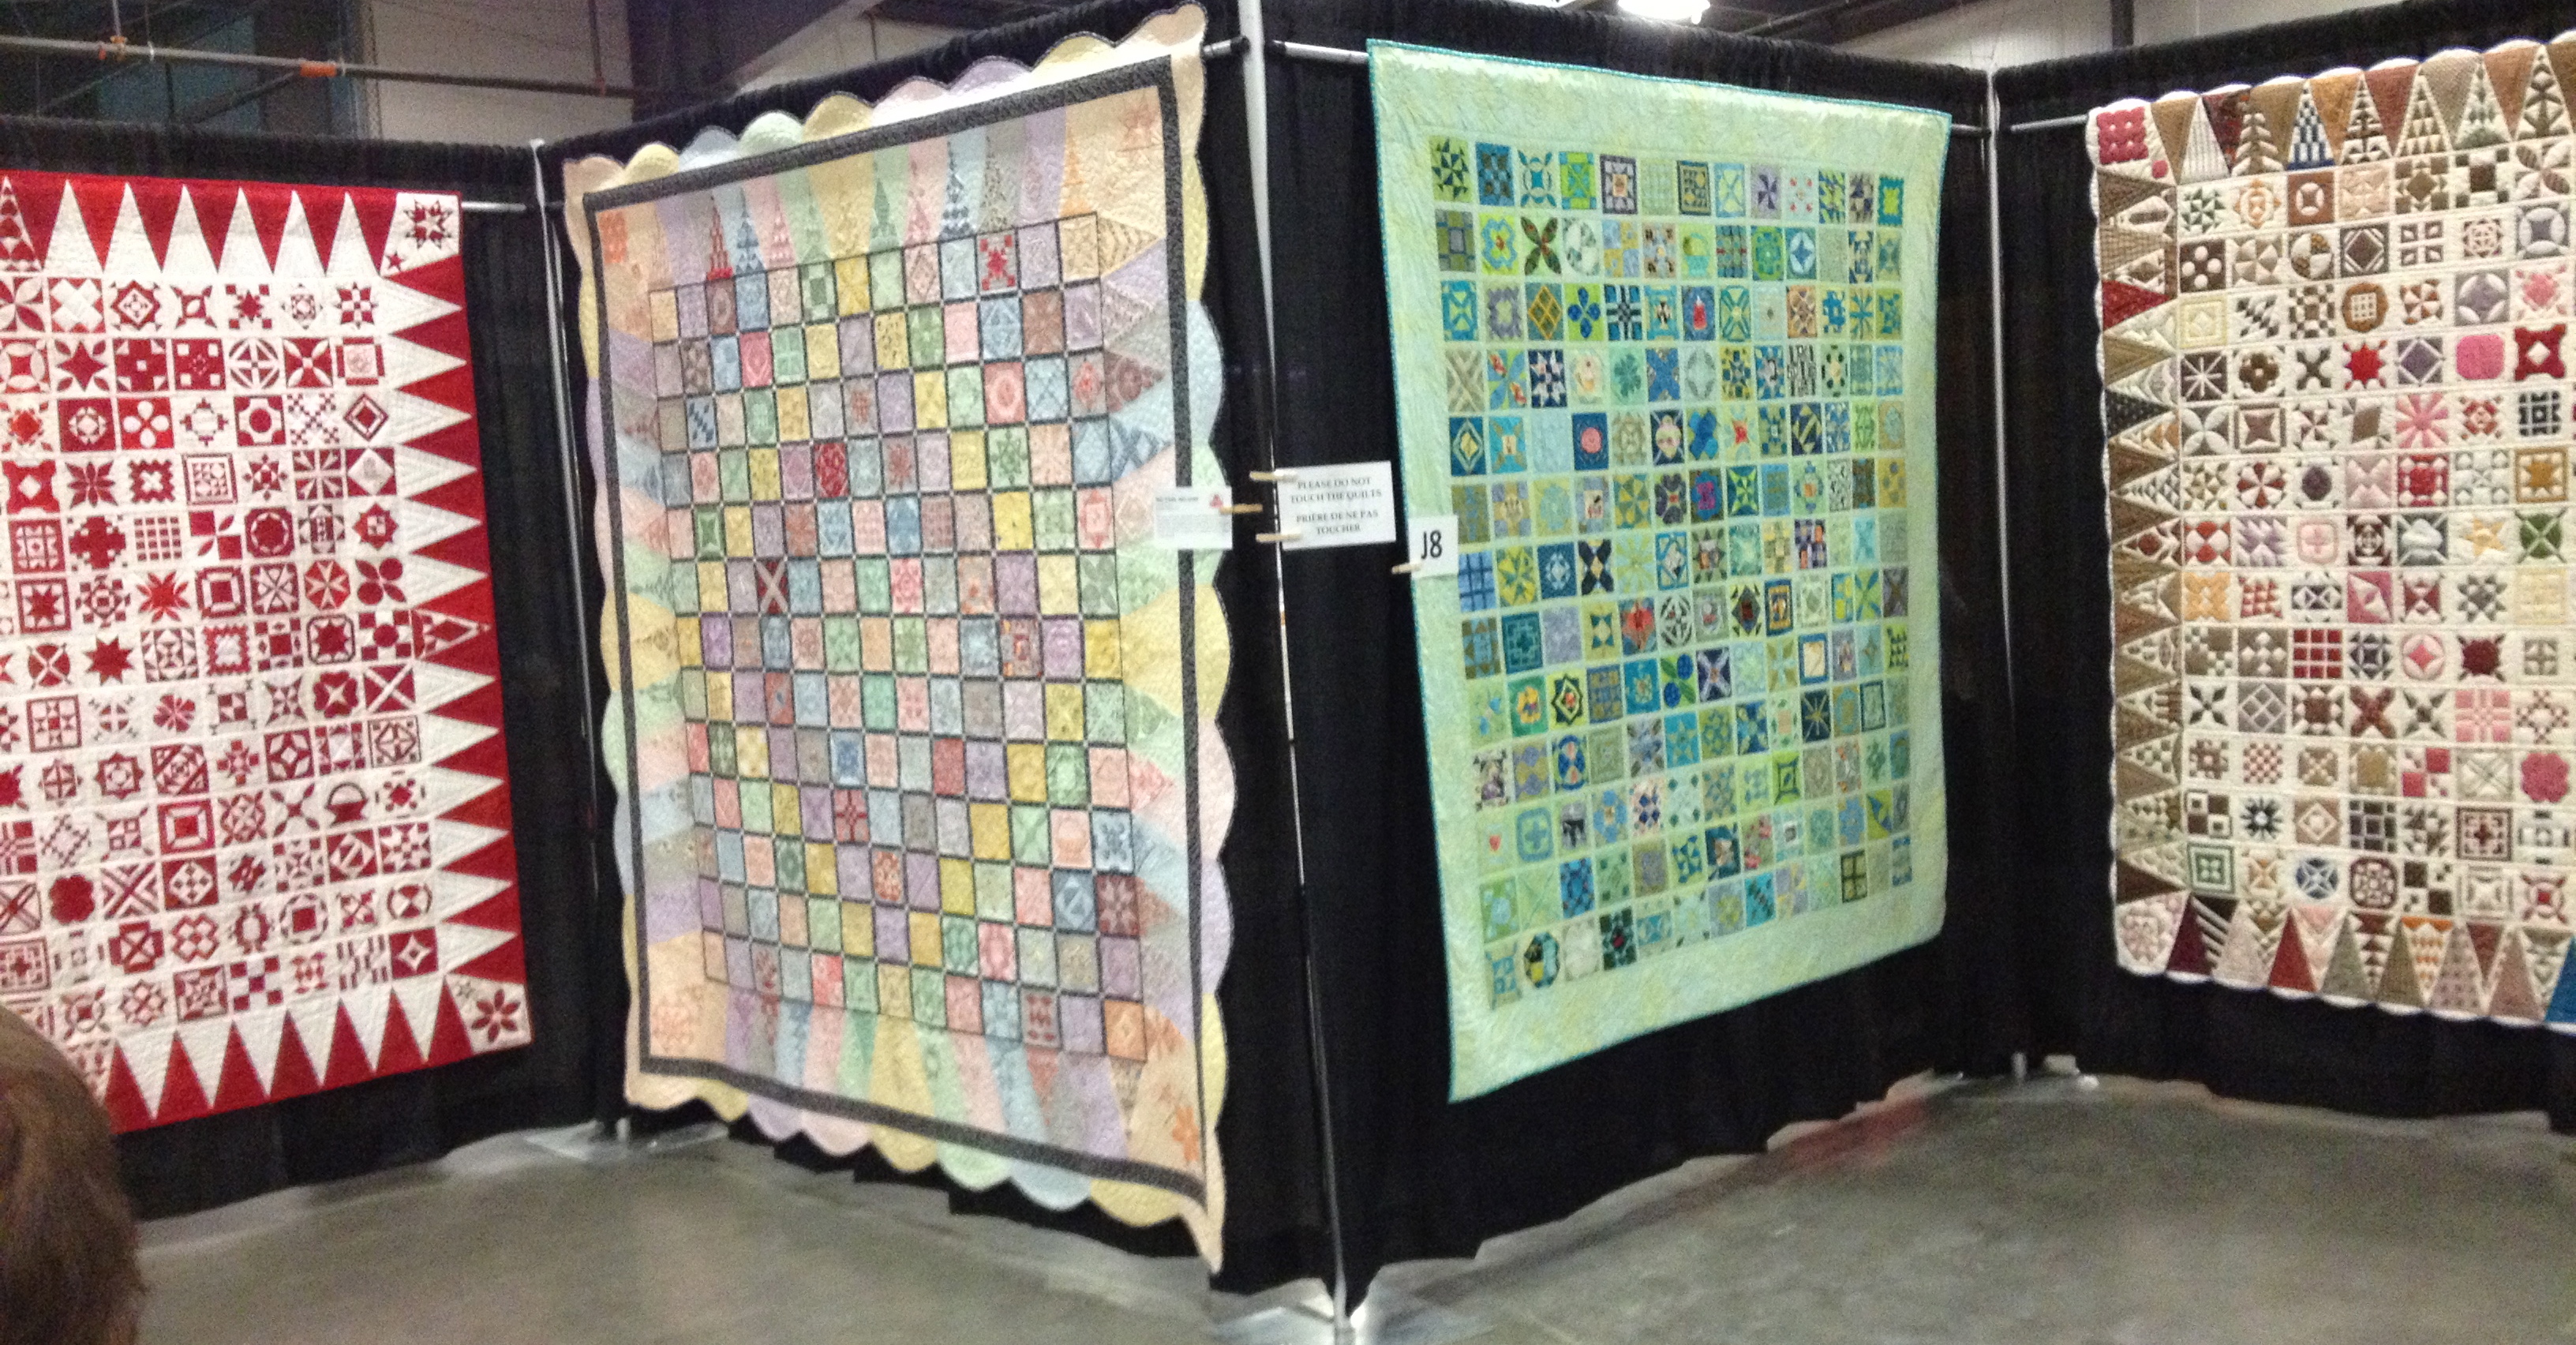
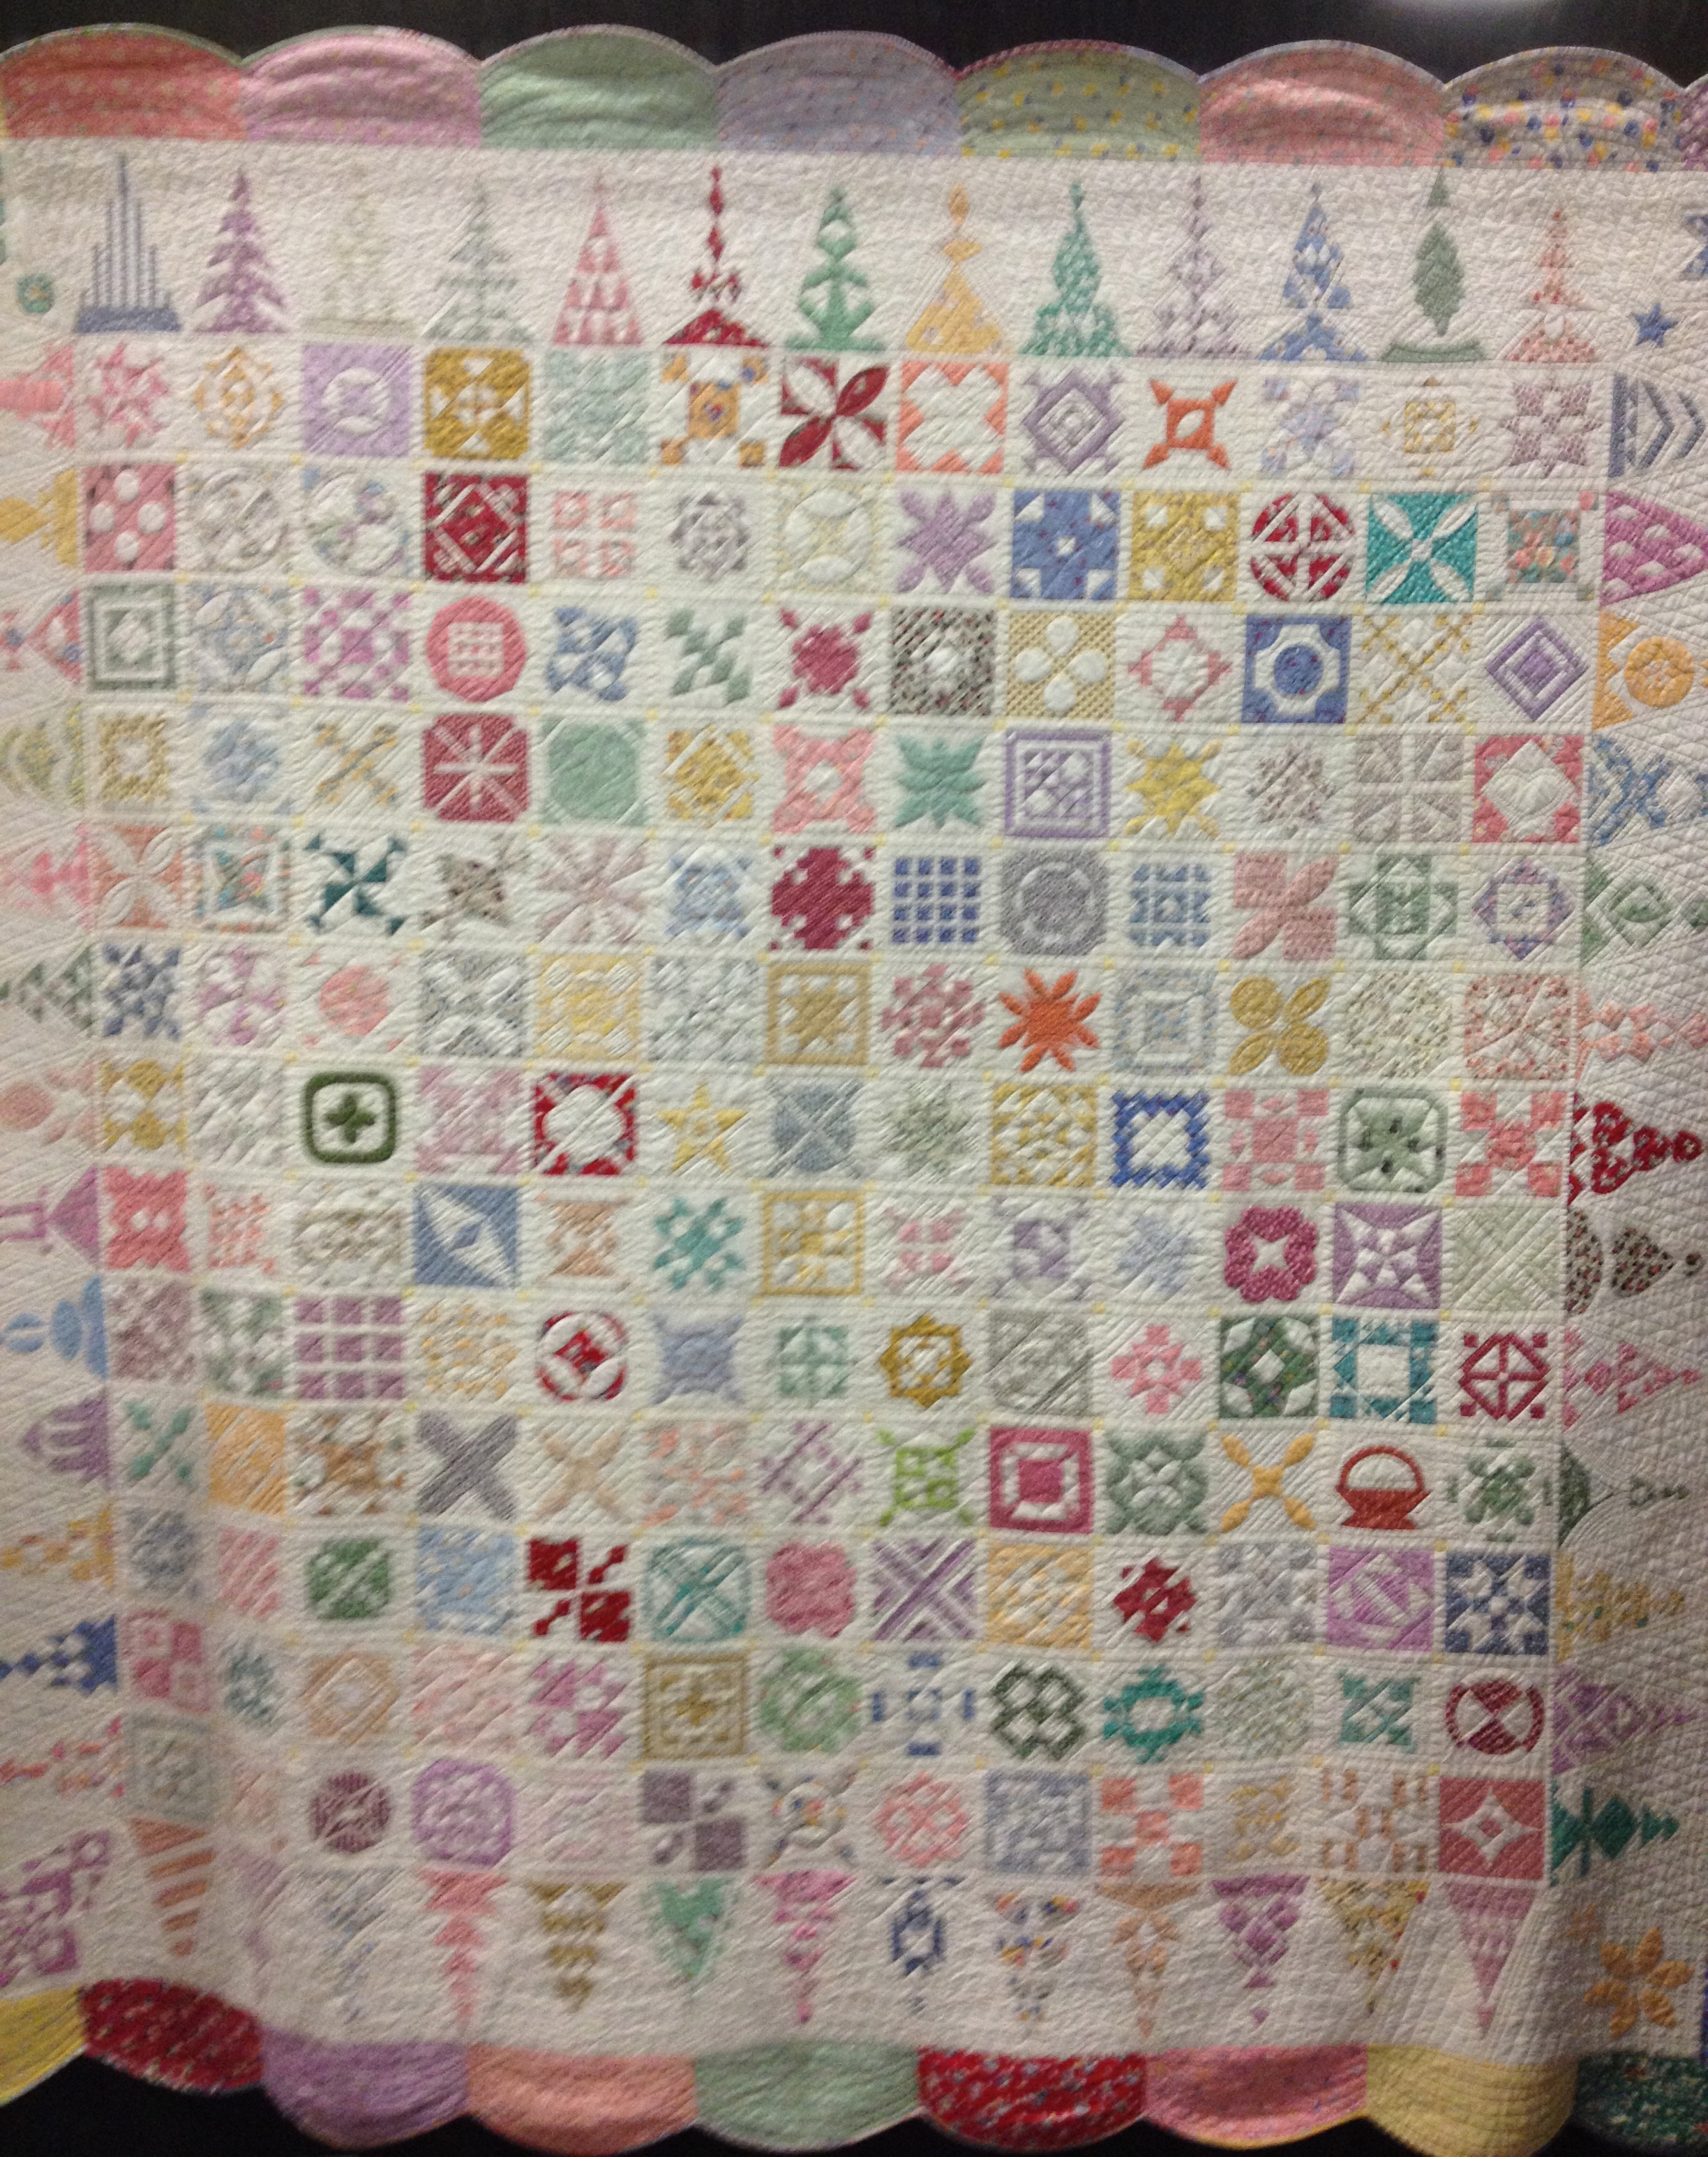
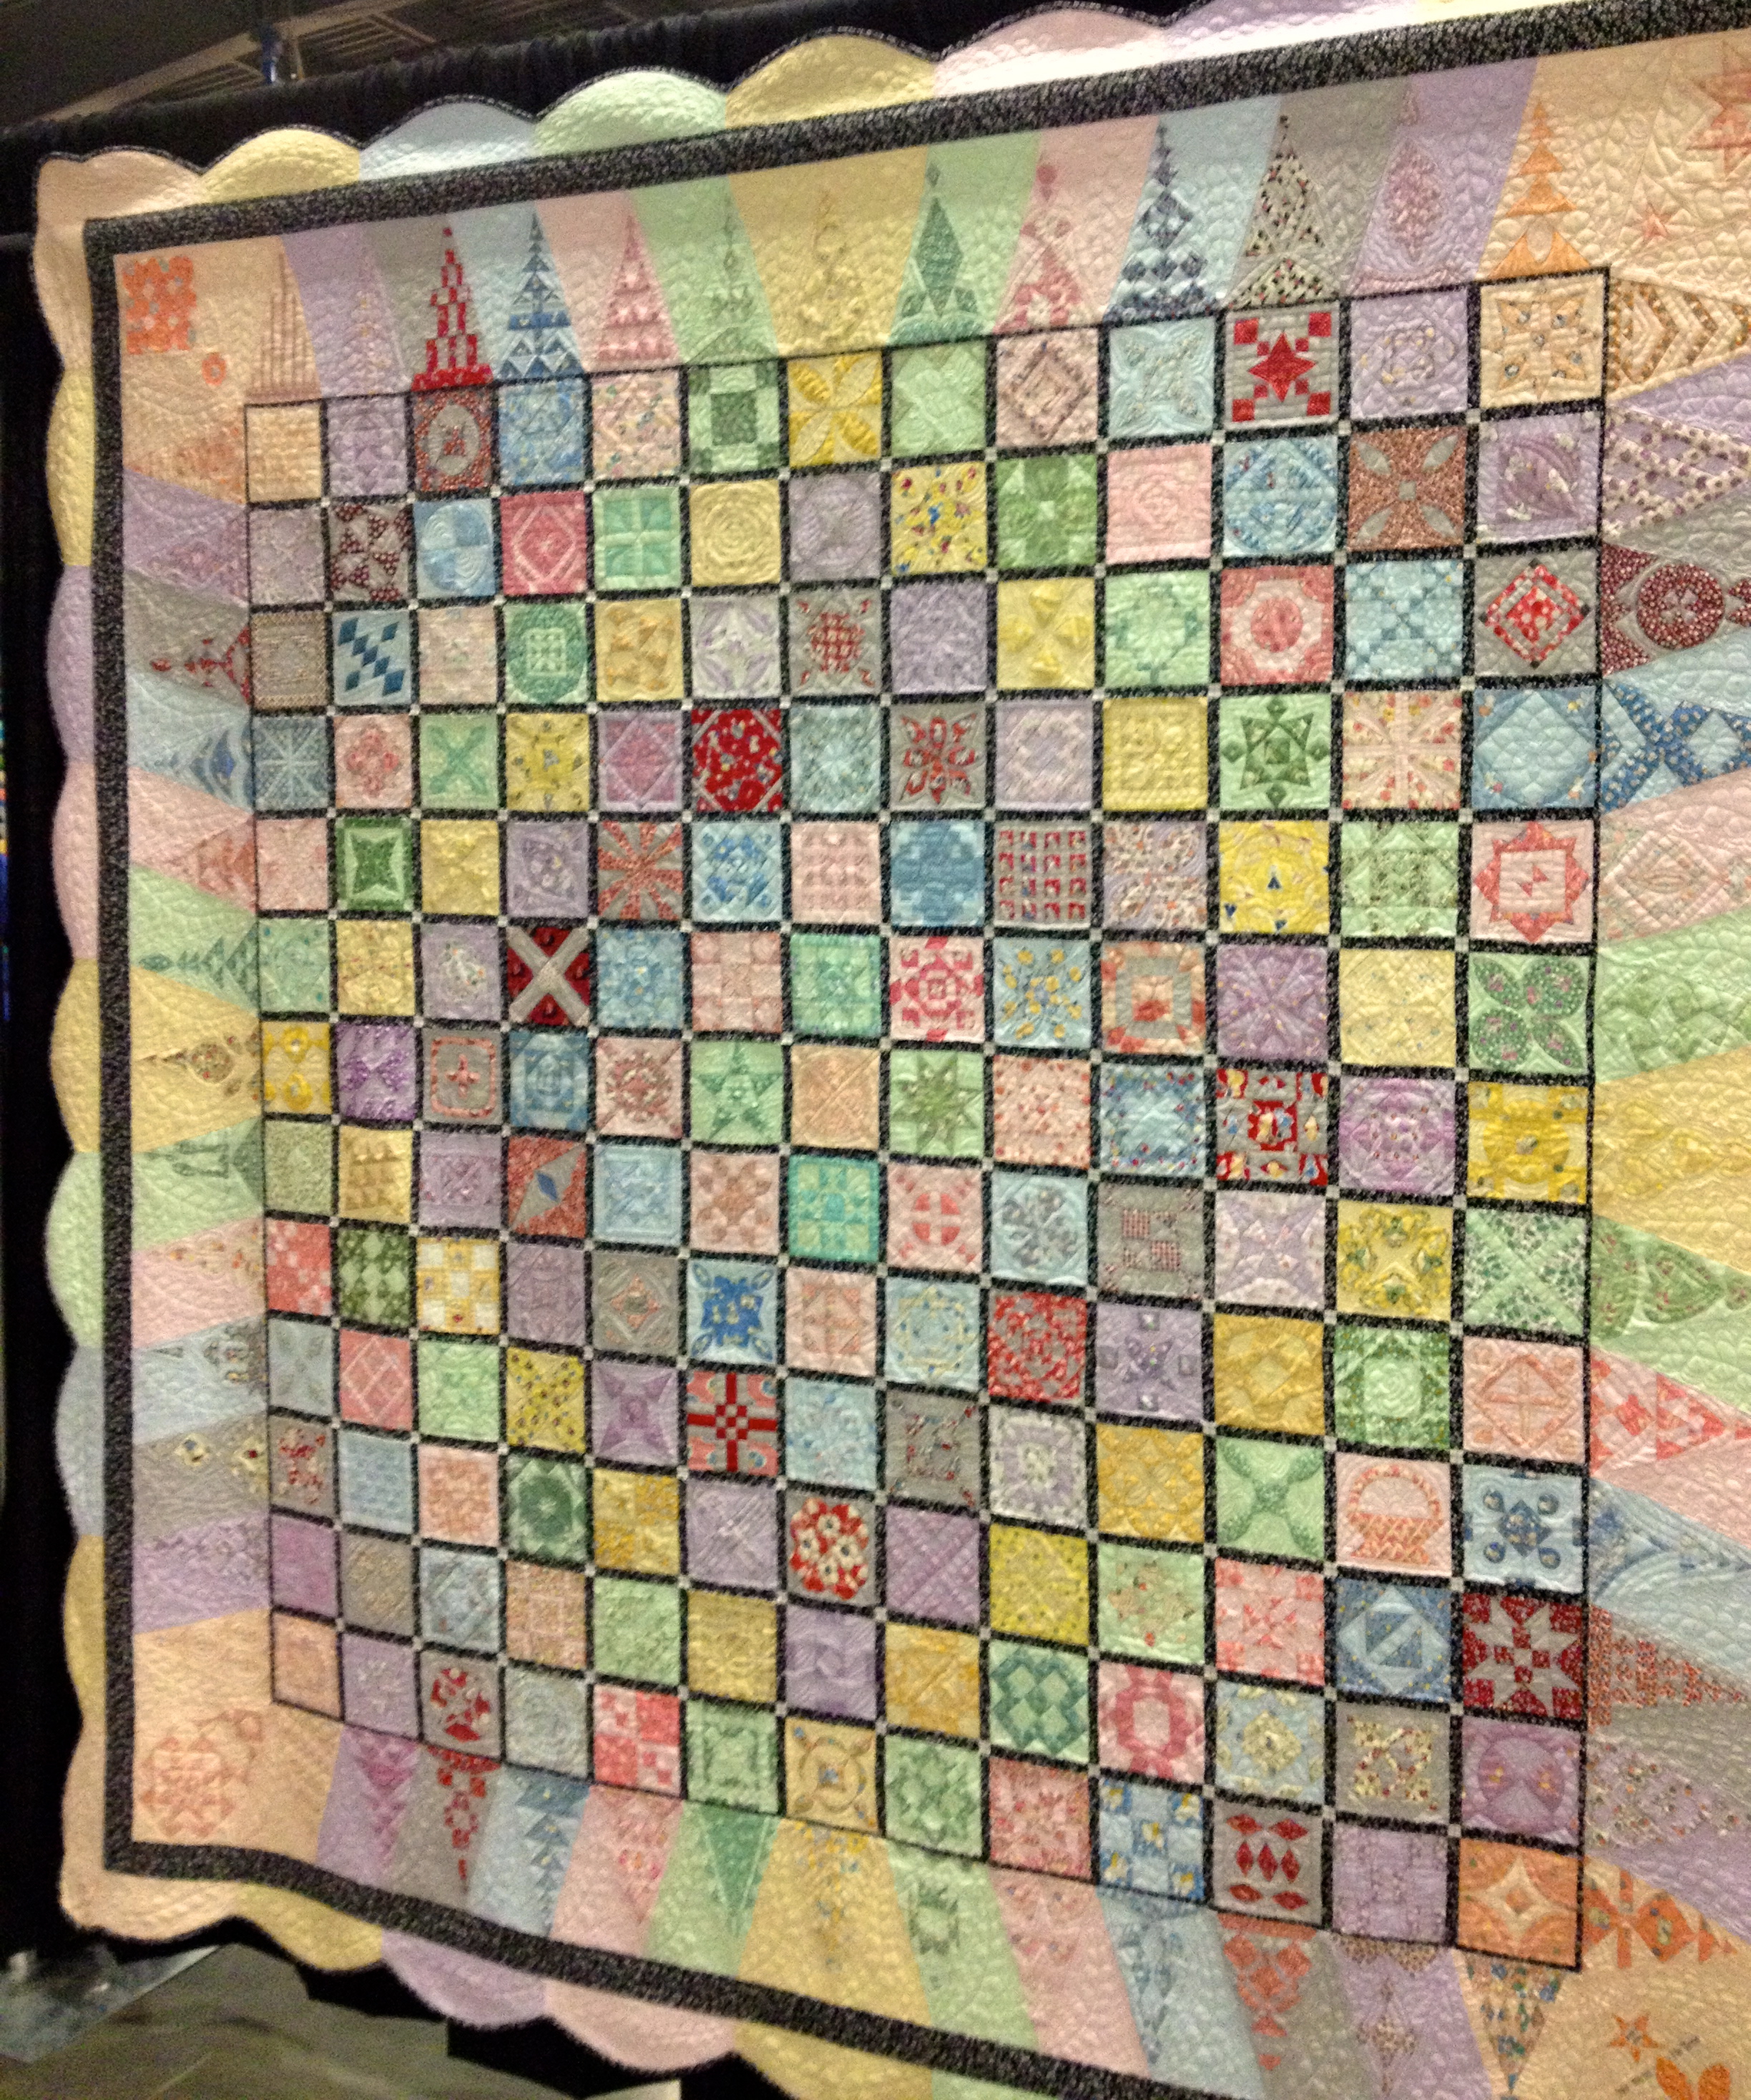
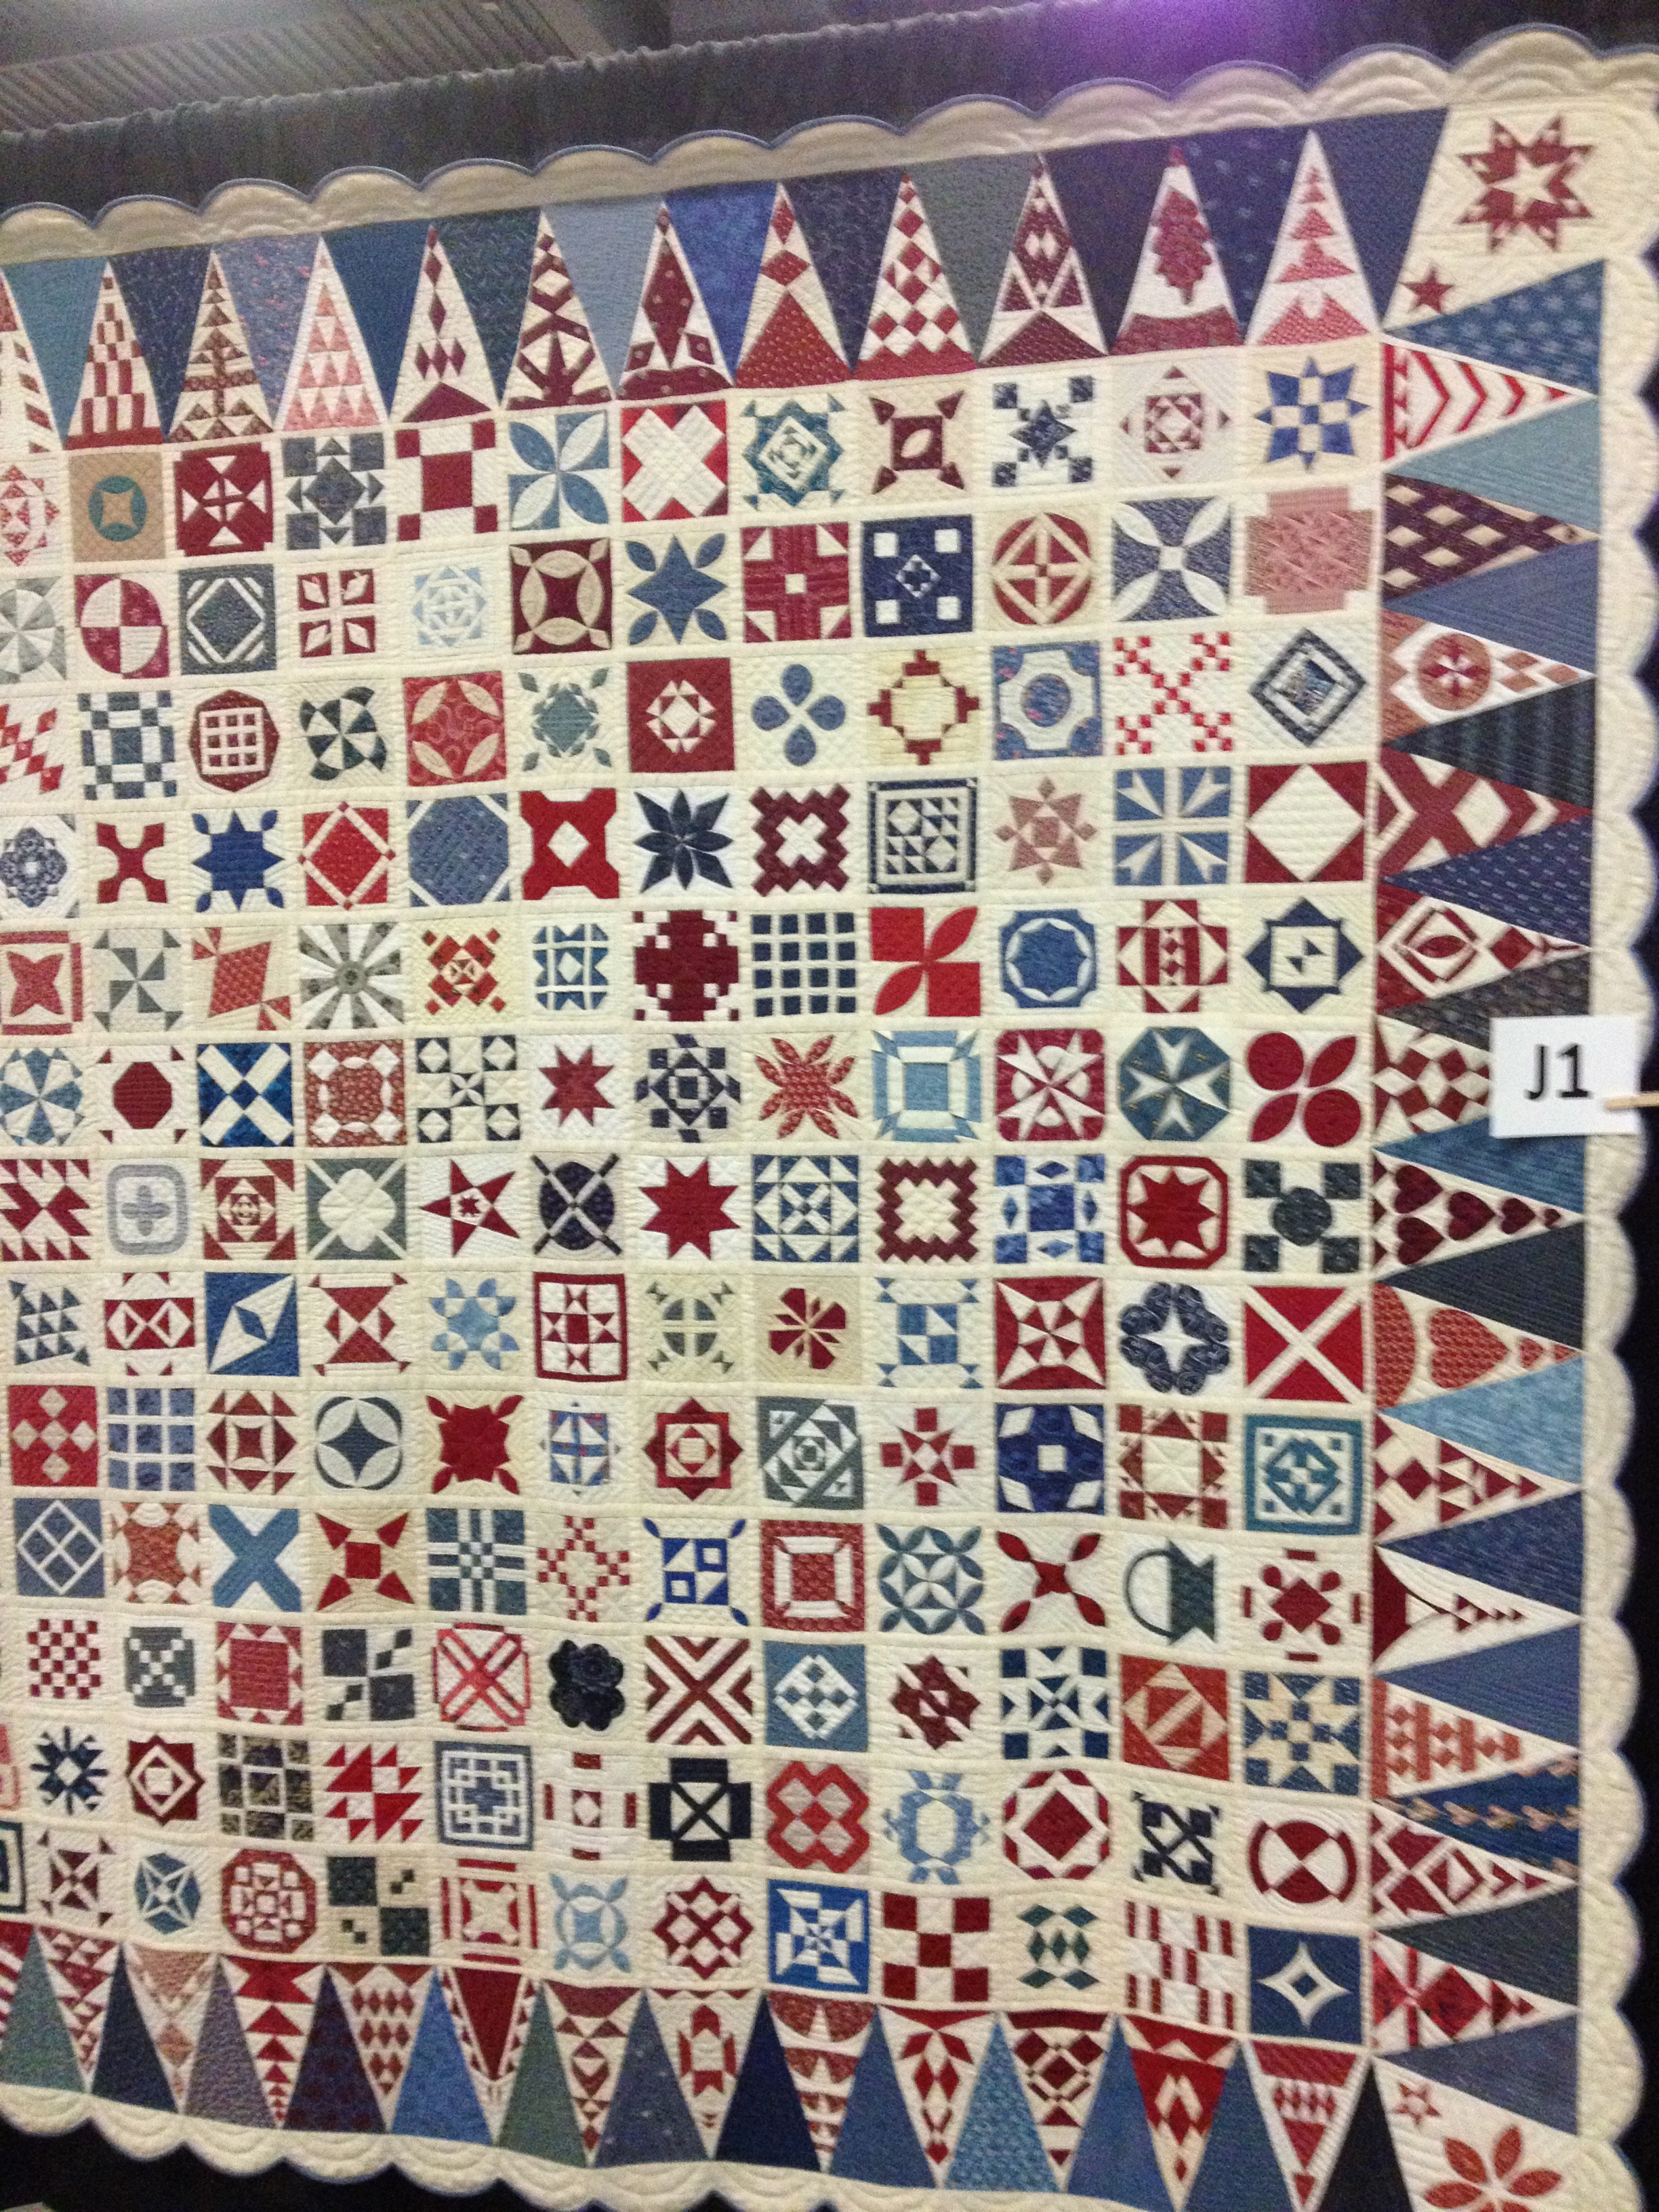
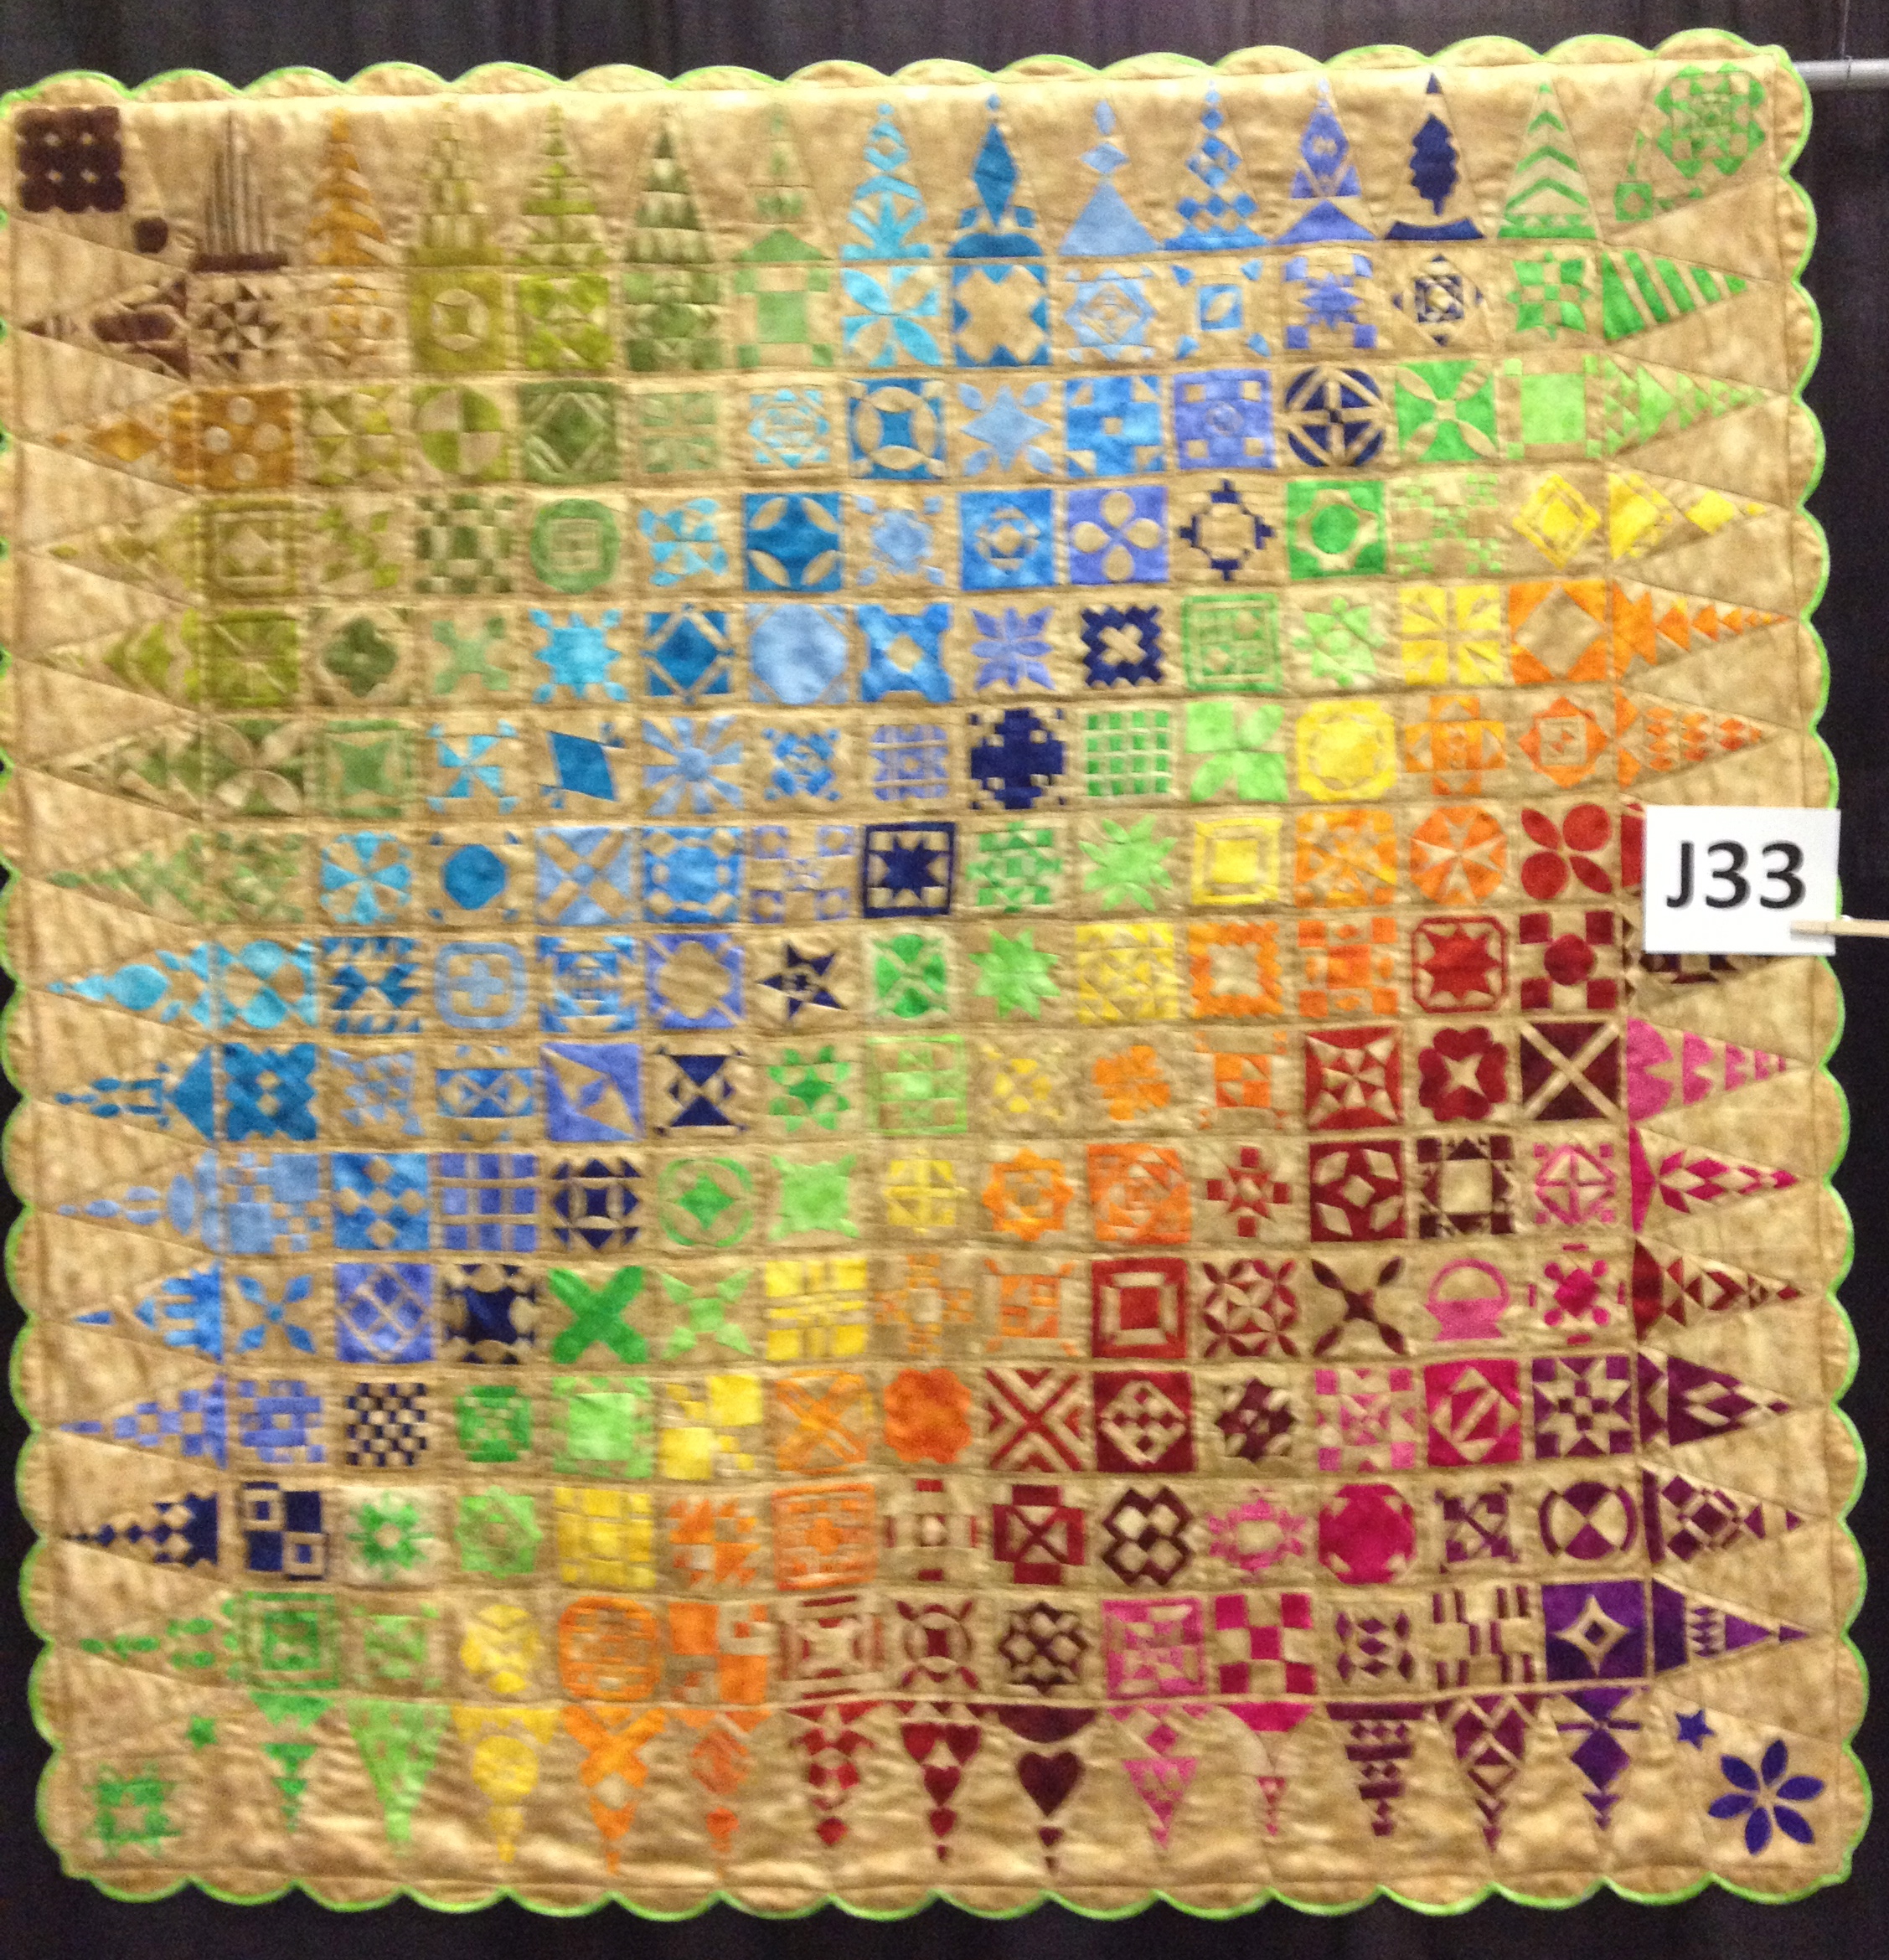
4 of the Dear Jane quilts at the Vermont Quilt Festival
Last week was my birthday and also the Vermont Quilt Festival. I live in Washington DC but we were traveling to see family in the New England area for the 4th of July holiday. When I learned that the quilt festival was taking place while we were going to be nearby, I asked my husband, Jim, if we could travel there and visit it “for my birthday”. Now really, what could he say?

My husband, (Dear) Jim.
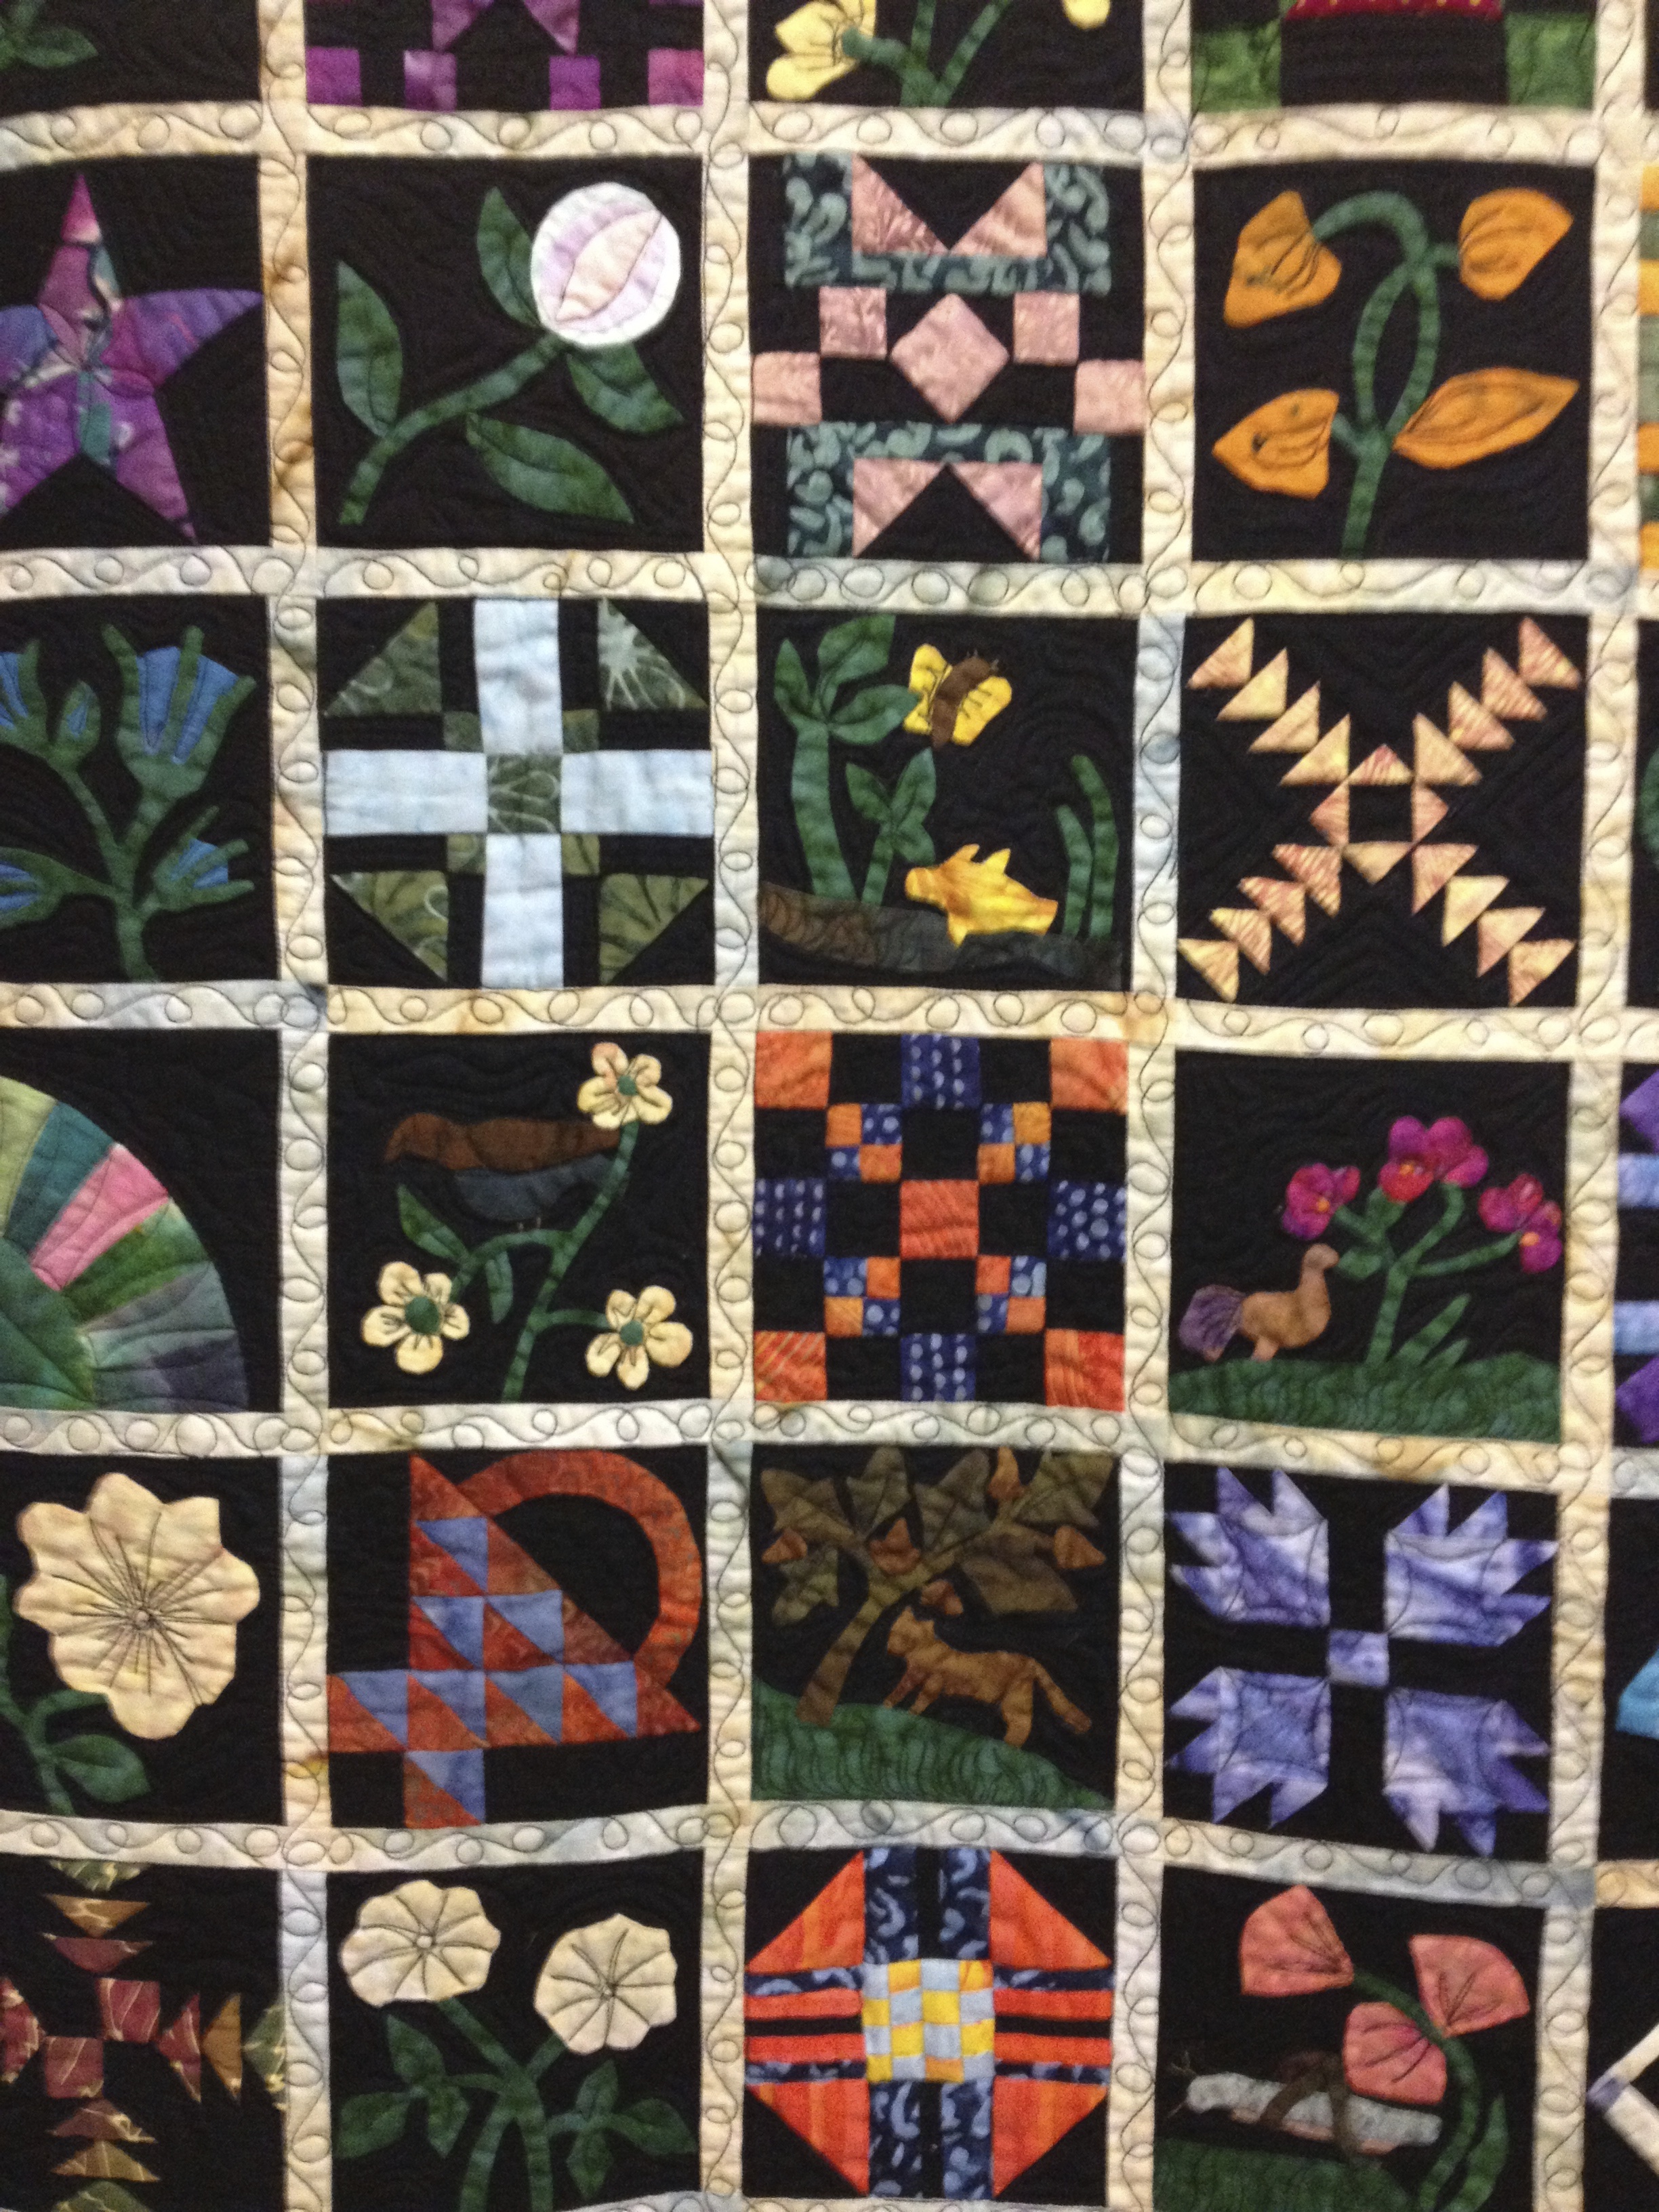
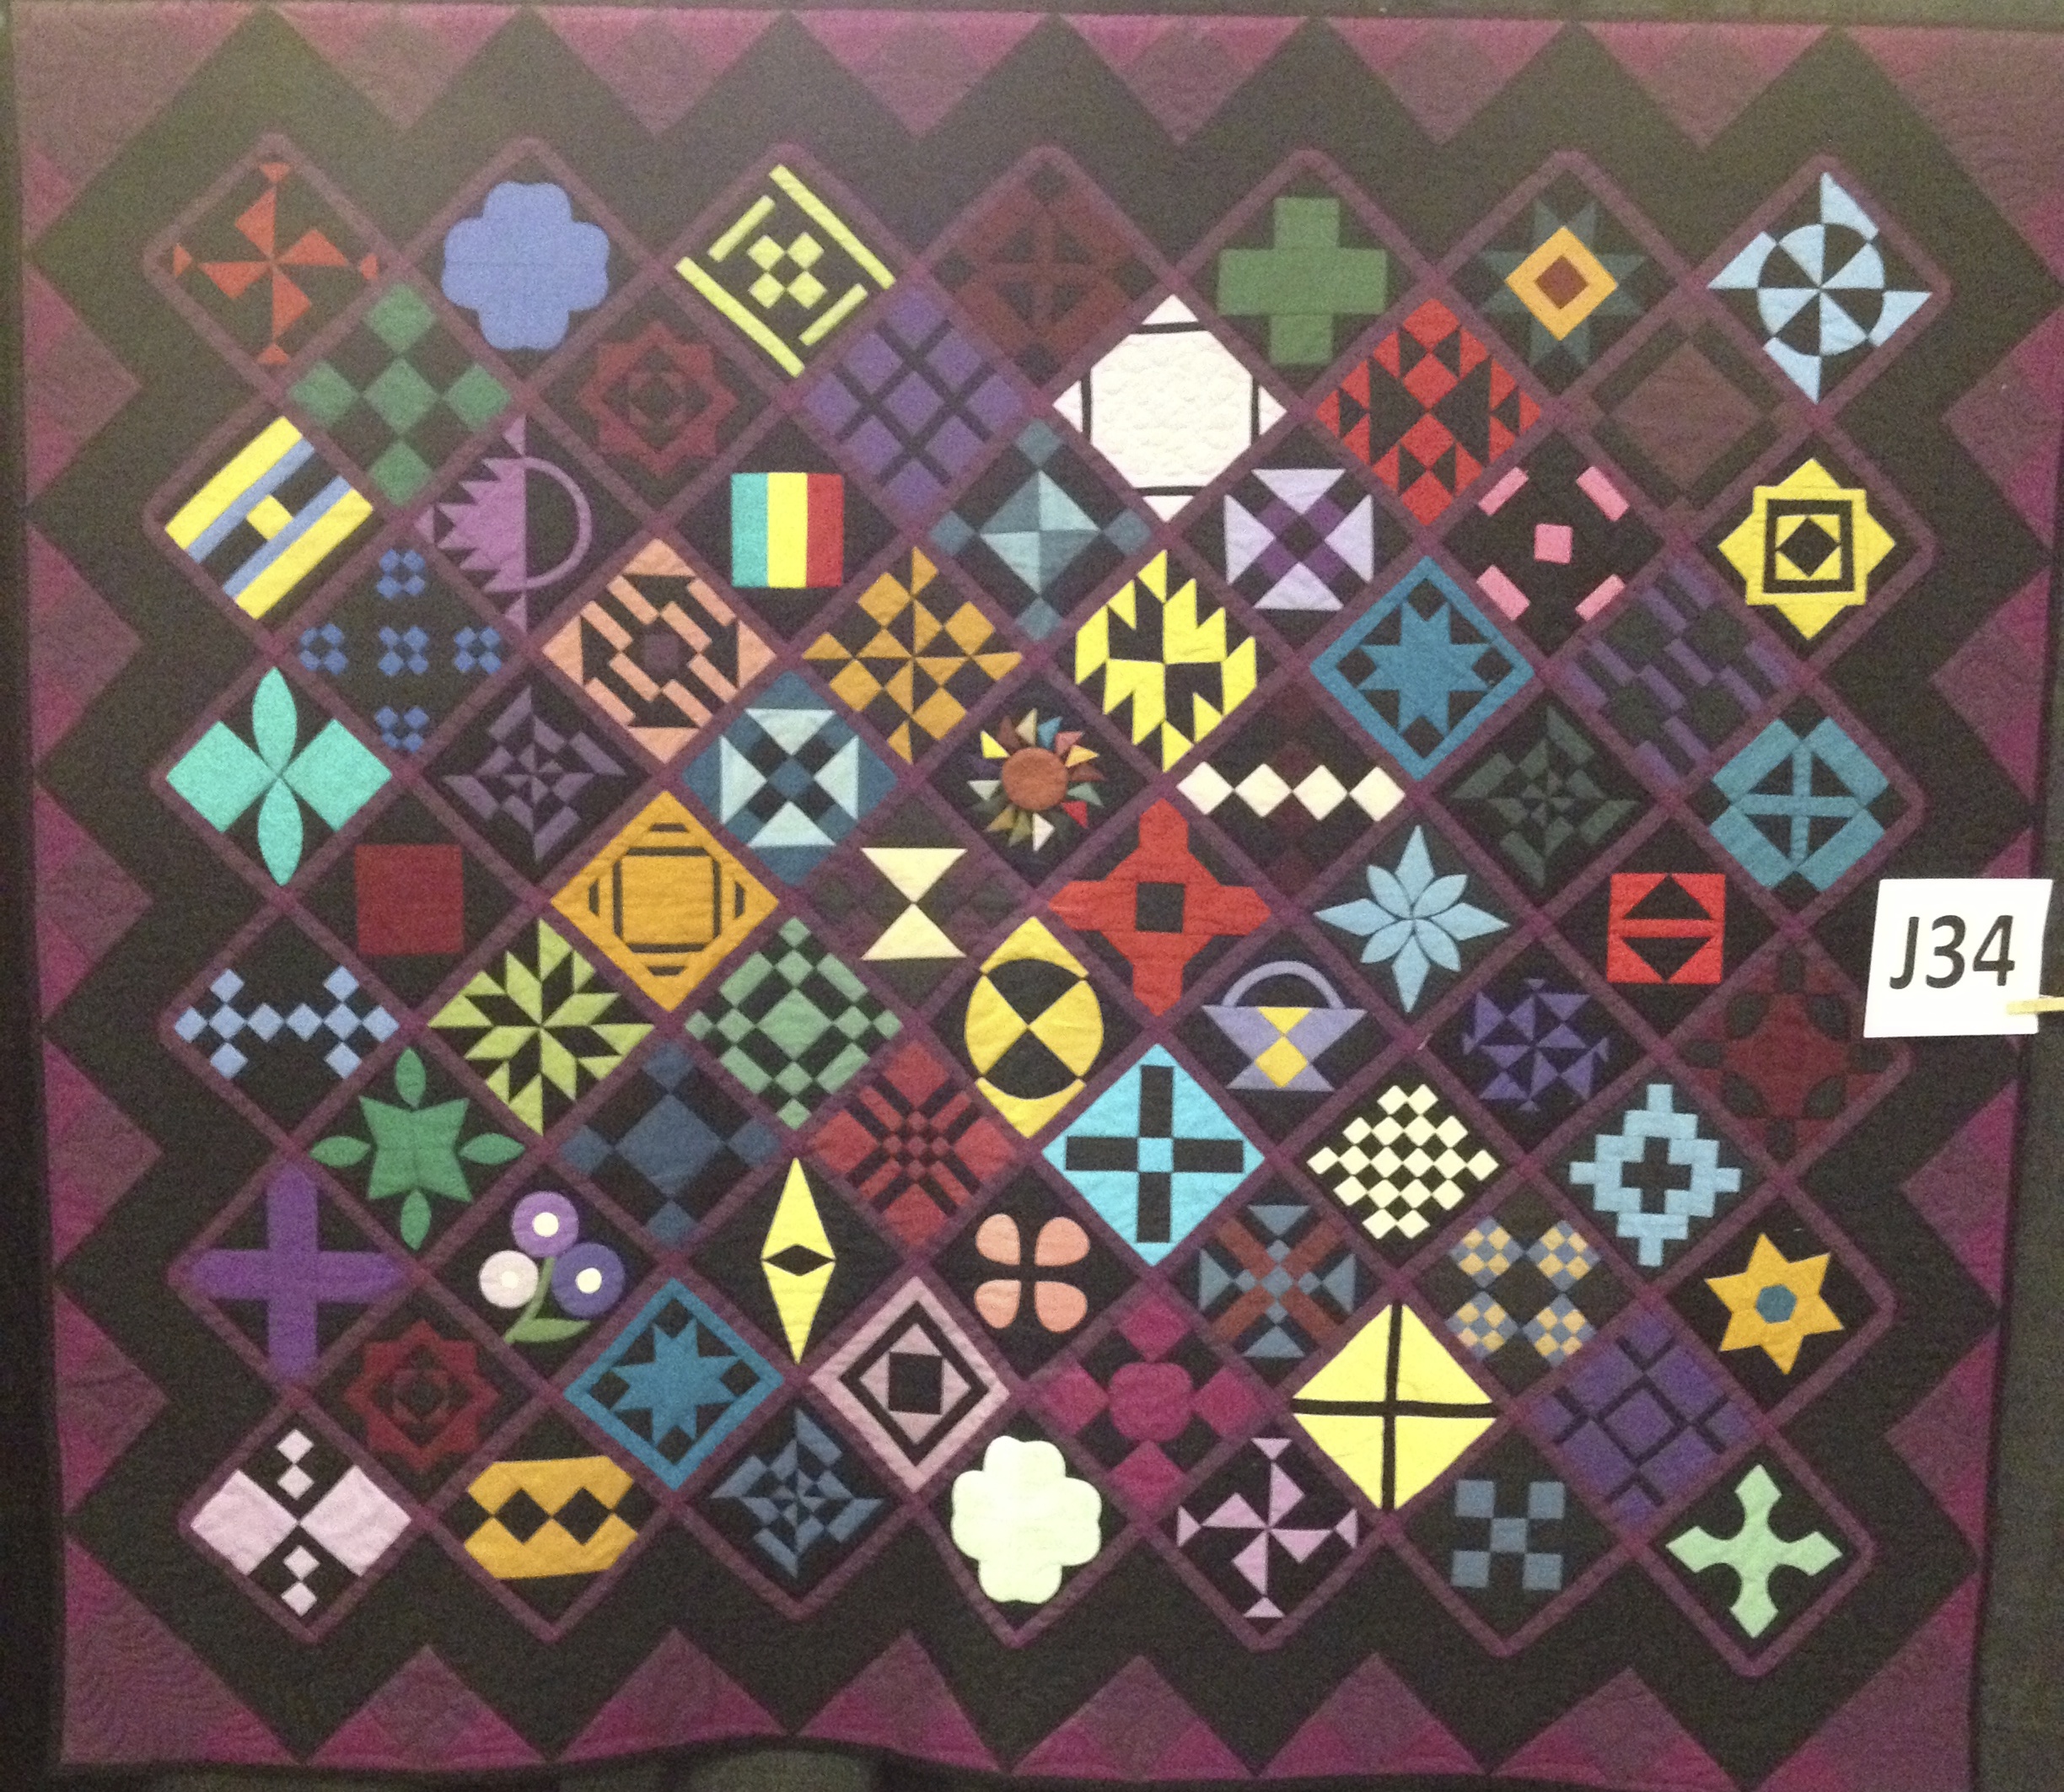
This quilt was made by Goldie Morrow of Rumney NH.
I had no idea before I looked through the festival booklet that there was going to be an exhibit of Dear Jane quilts. For those of you who don’t know what a Dear Jane quilt is, here is a very brief history. Jane A. Stickle from Shaftsbury, VT made the quilt below which is dated 1863. It is part of the Collection of the Bennington Museum in Vermont.

Quilt by Jane A. Stickle. From the Collection of the Bennington Museum in VT. Photo from the book Dear Jane

Label from Jane’s quilt.
In War Time.
1868.
Pieces 5602
Jane A. Stickle
In 1992 Brenda Papadakis saw a picture of this quilt and was fascinated with it. She spent the next 4 years drafting the 225 patterns and researching Jane’s life. She published her book Dear Jane in 1996 and quilters from all over the world have been making versions of it ever since.

Book by Brenda Papadakis
I first became familiar with Dear Jane quilts by this quilt that hangs in my friend’s kitchen area. I love this quilt!
Brenda Papadakis curated the Dear Jane exhibit at this year’s Vermont Quilt festival where approximately 33 quilts hung. Click here for more information about all things “Dear Jane”.
The following are photos I took of the quilts at the exhibit. I did not photograph them all but tried to get a variety of what was shown.

Quilt by Carol Archuleta of San Ramon, CA
The quilt below was started in 1999 as a class sample at The City Quilter in NYC. 14 years later their classes are still going strong. They titled their quilt “In Our Time (aka Technicolor Jane).

Made by Judy Doenias and Diane Rode Schneck of NY, NY.

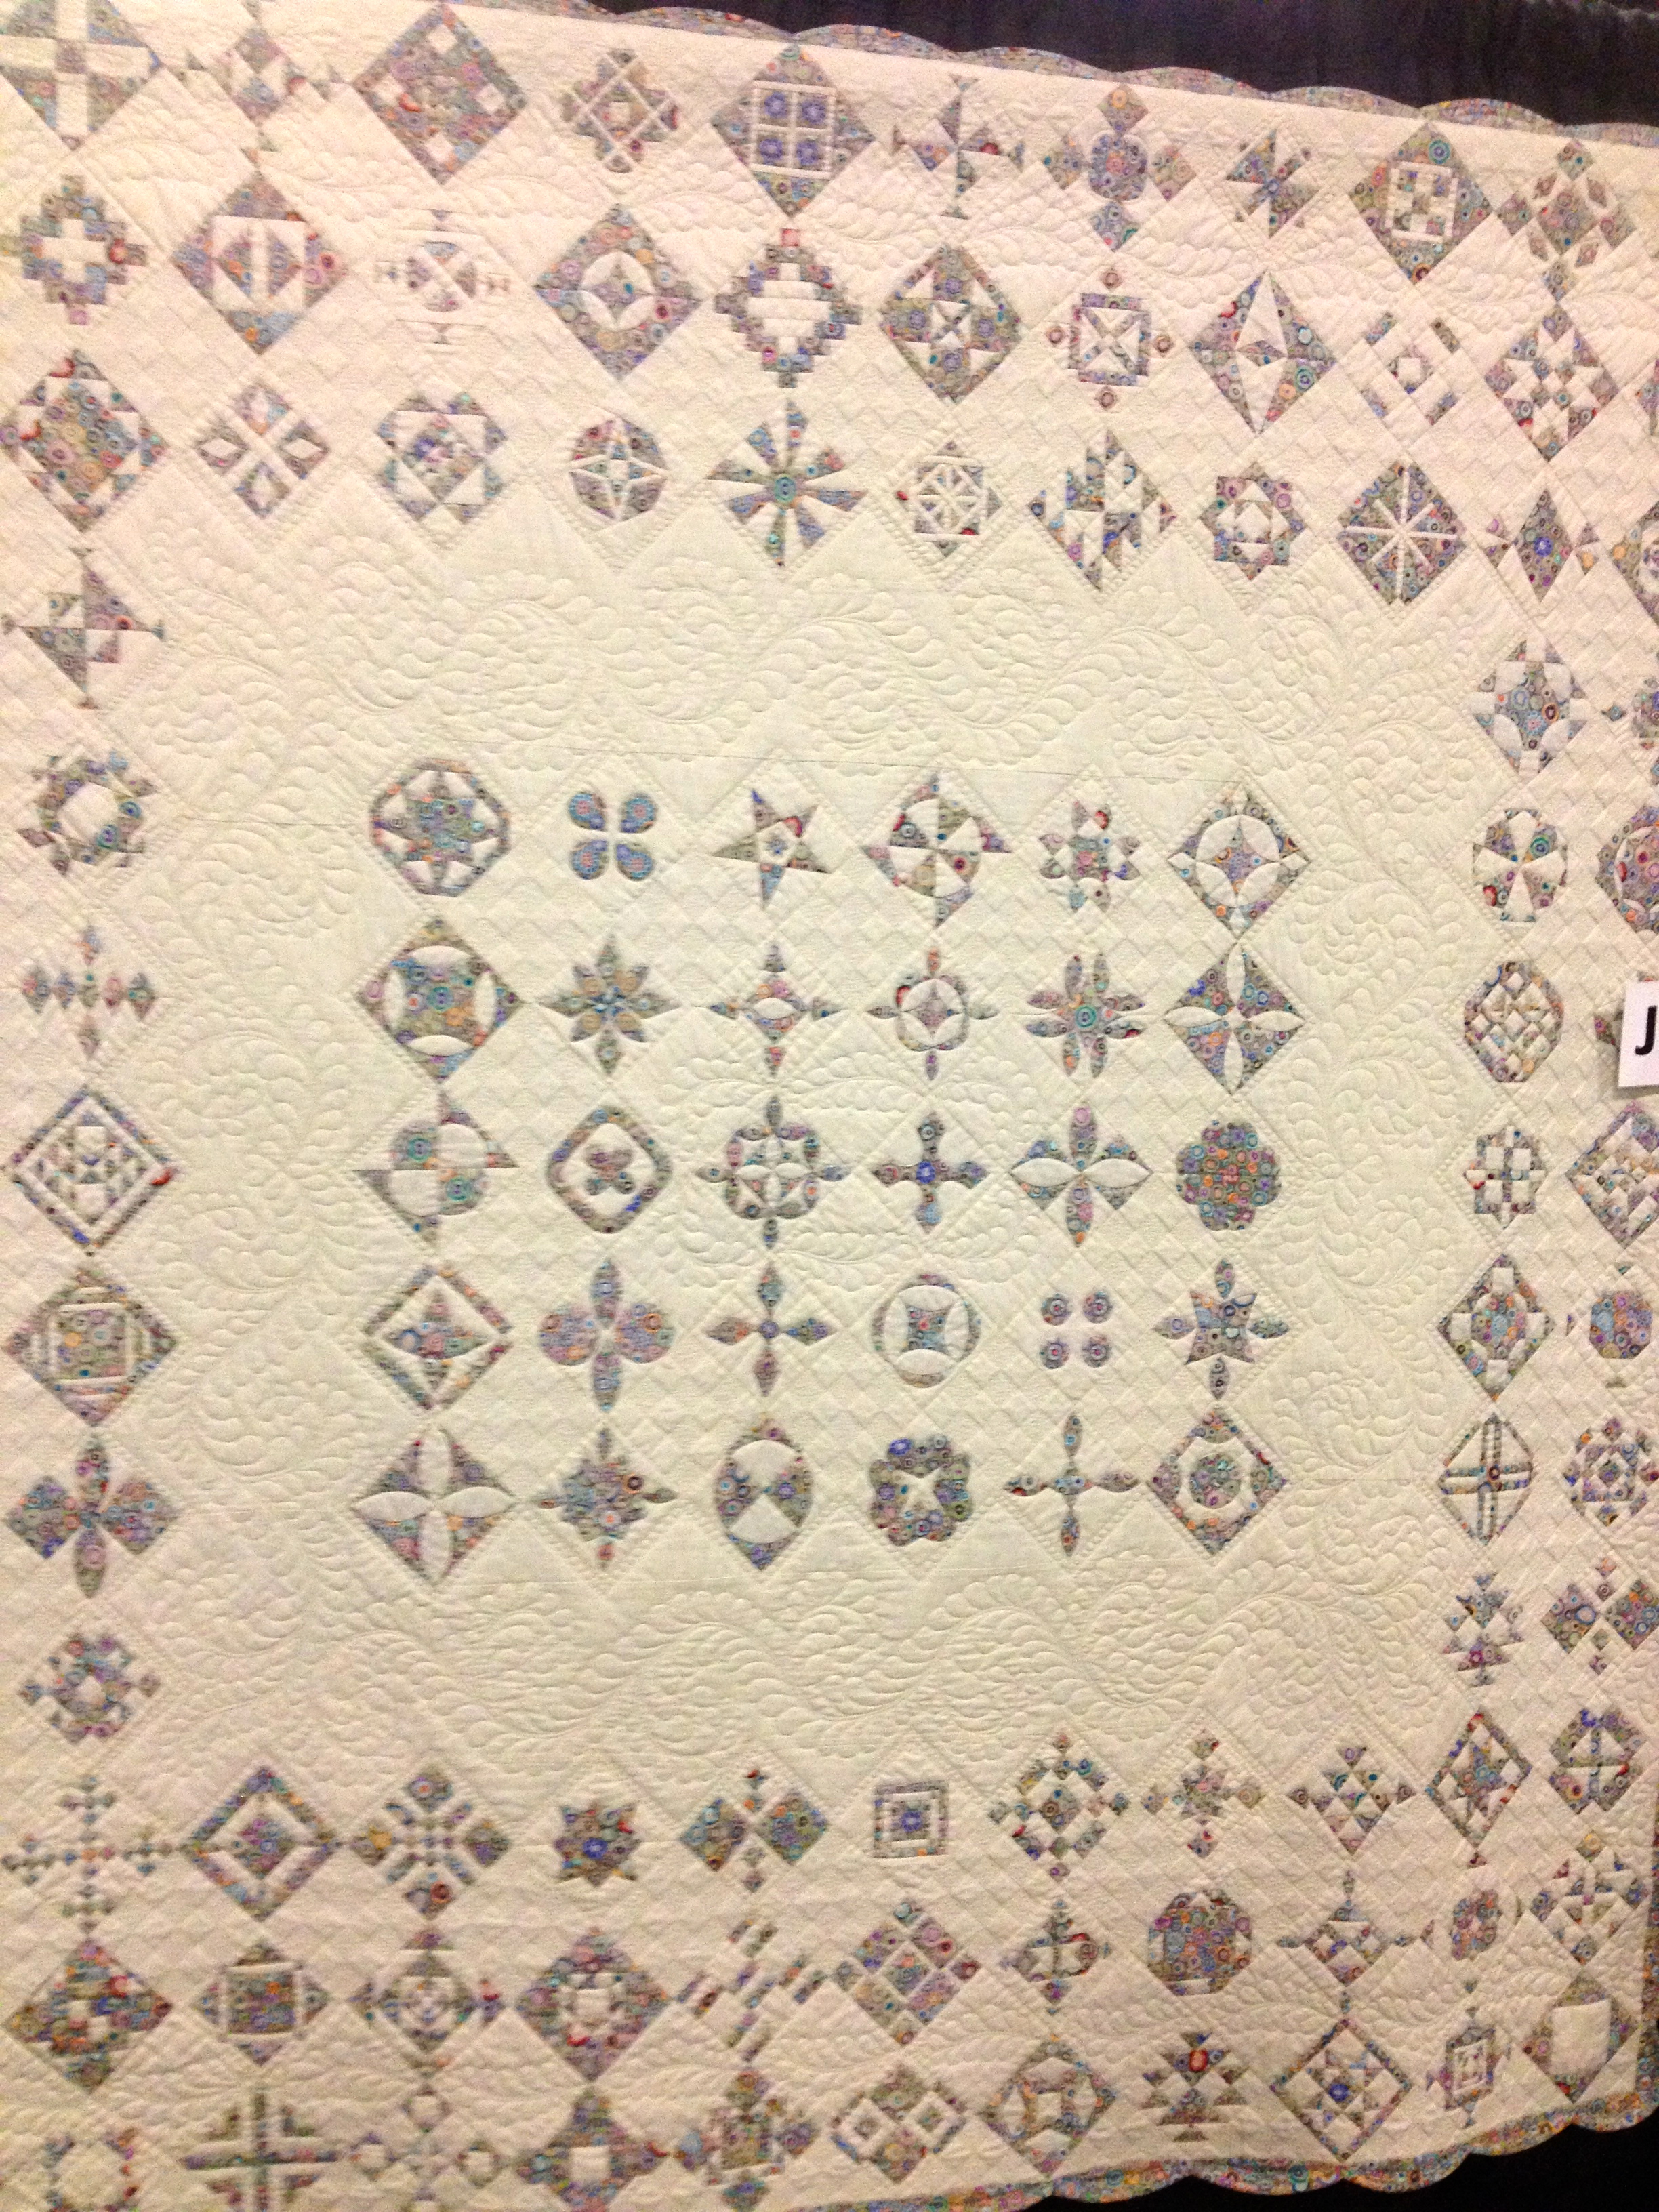
“Sunny Jane” made by Linda Pederson of Marysville, WA.
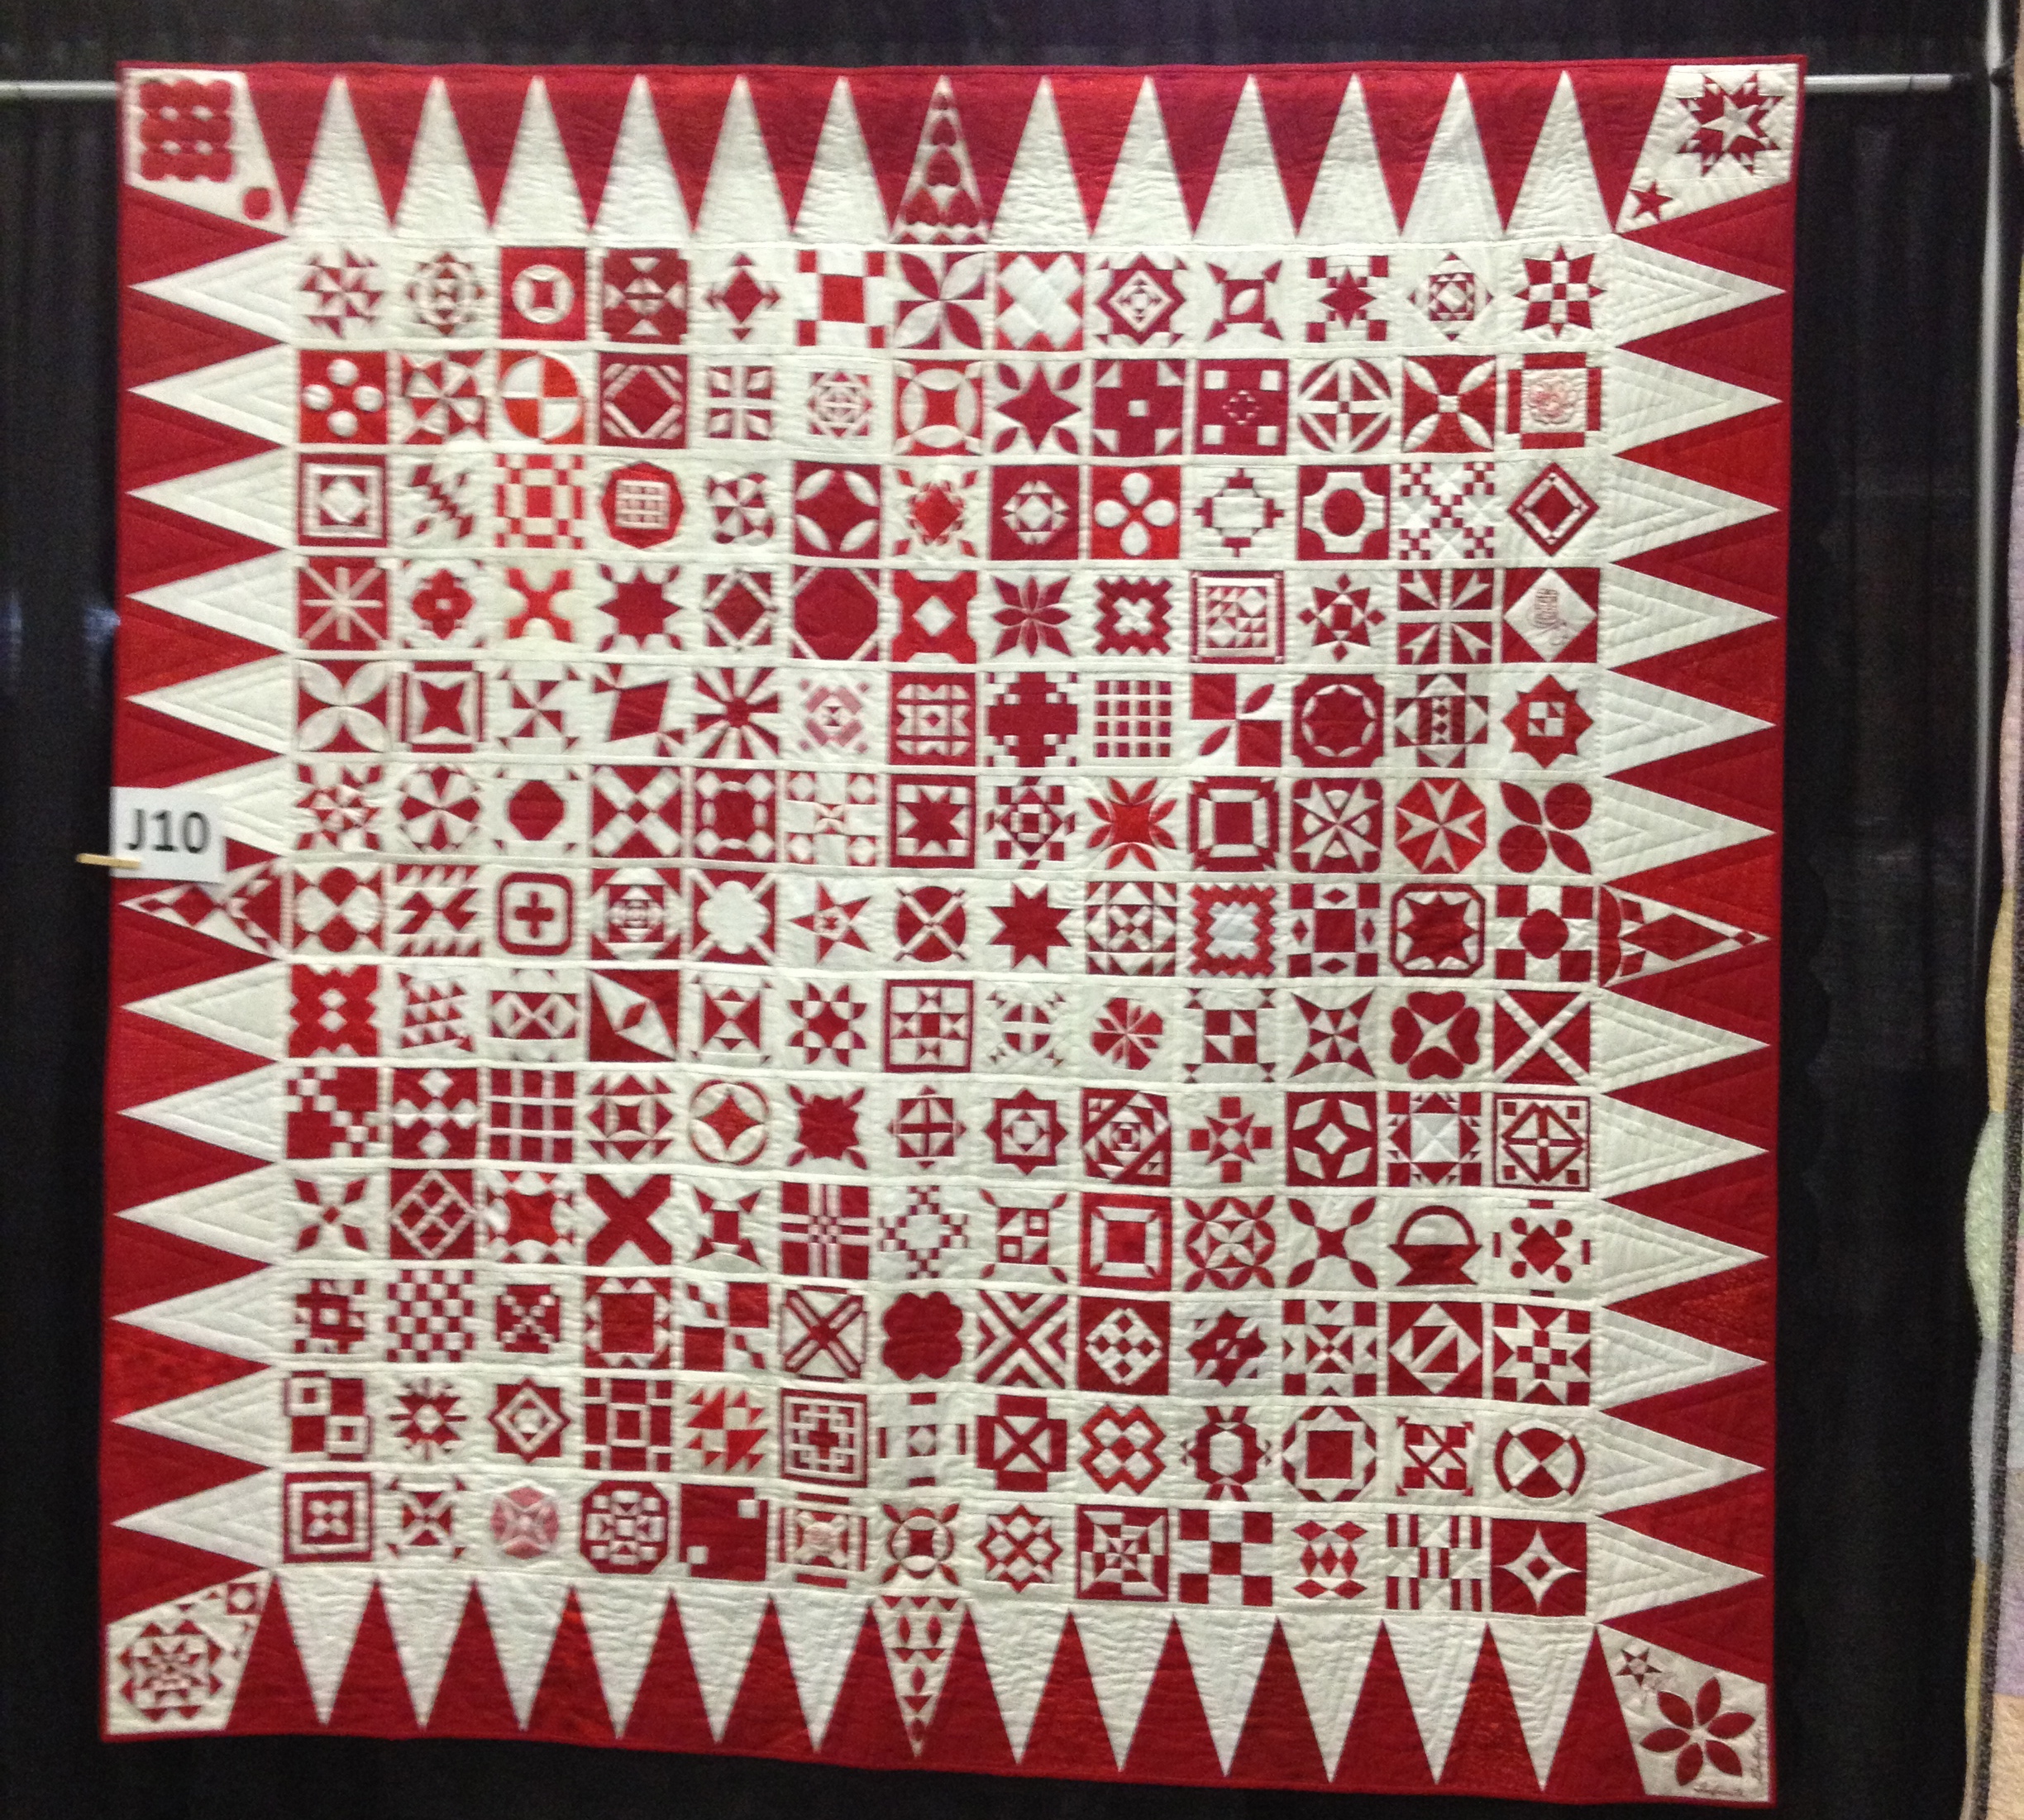
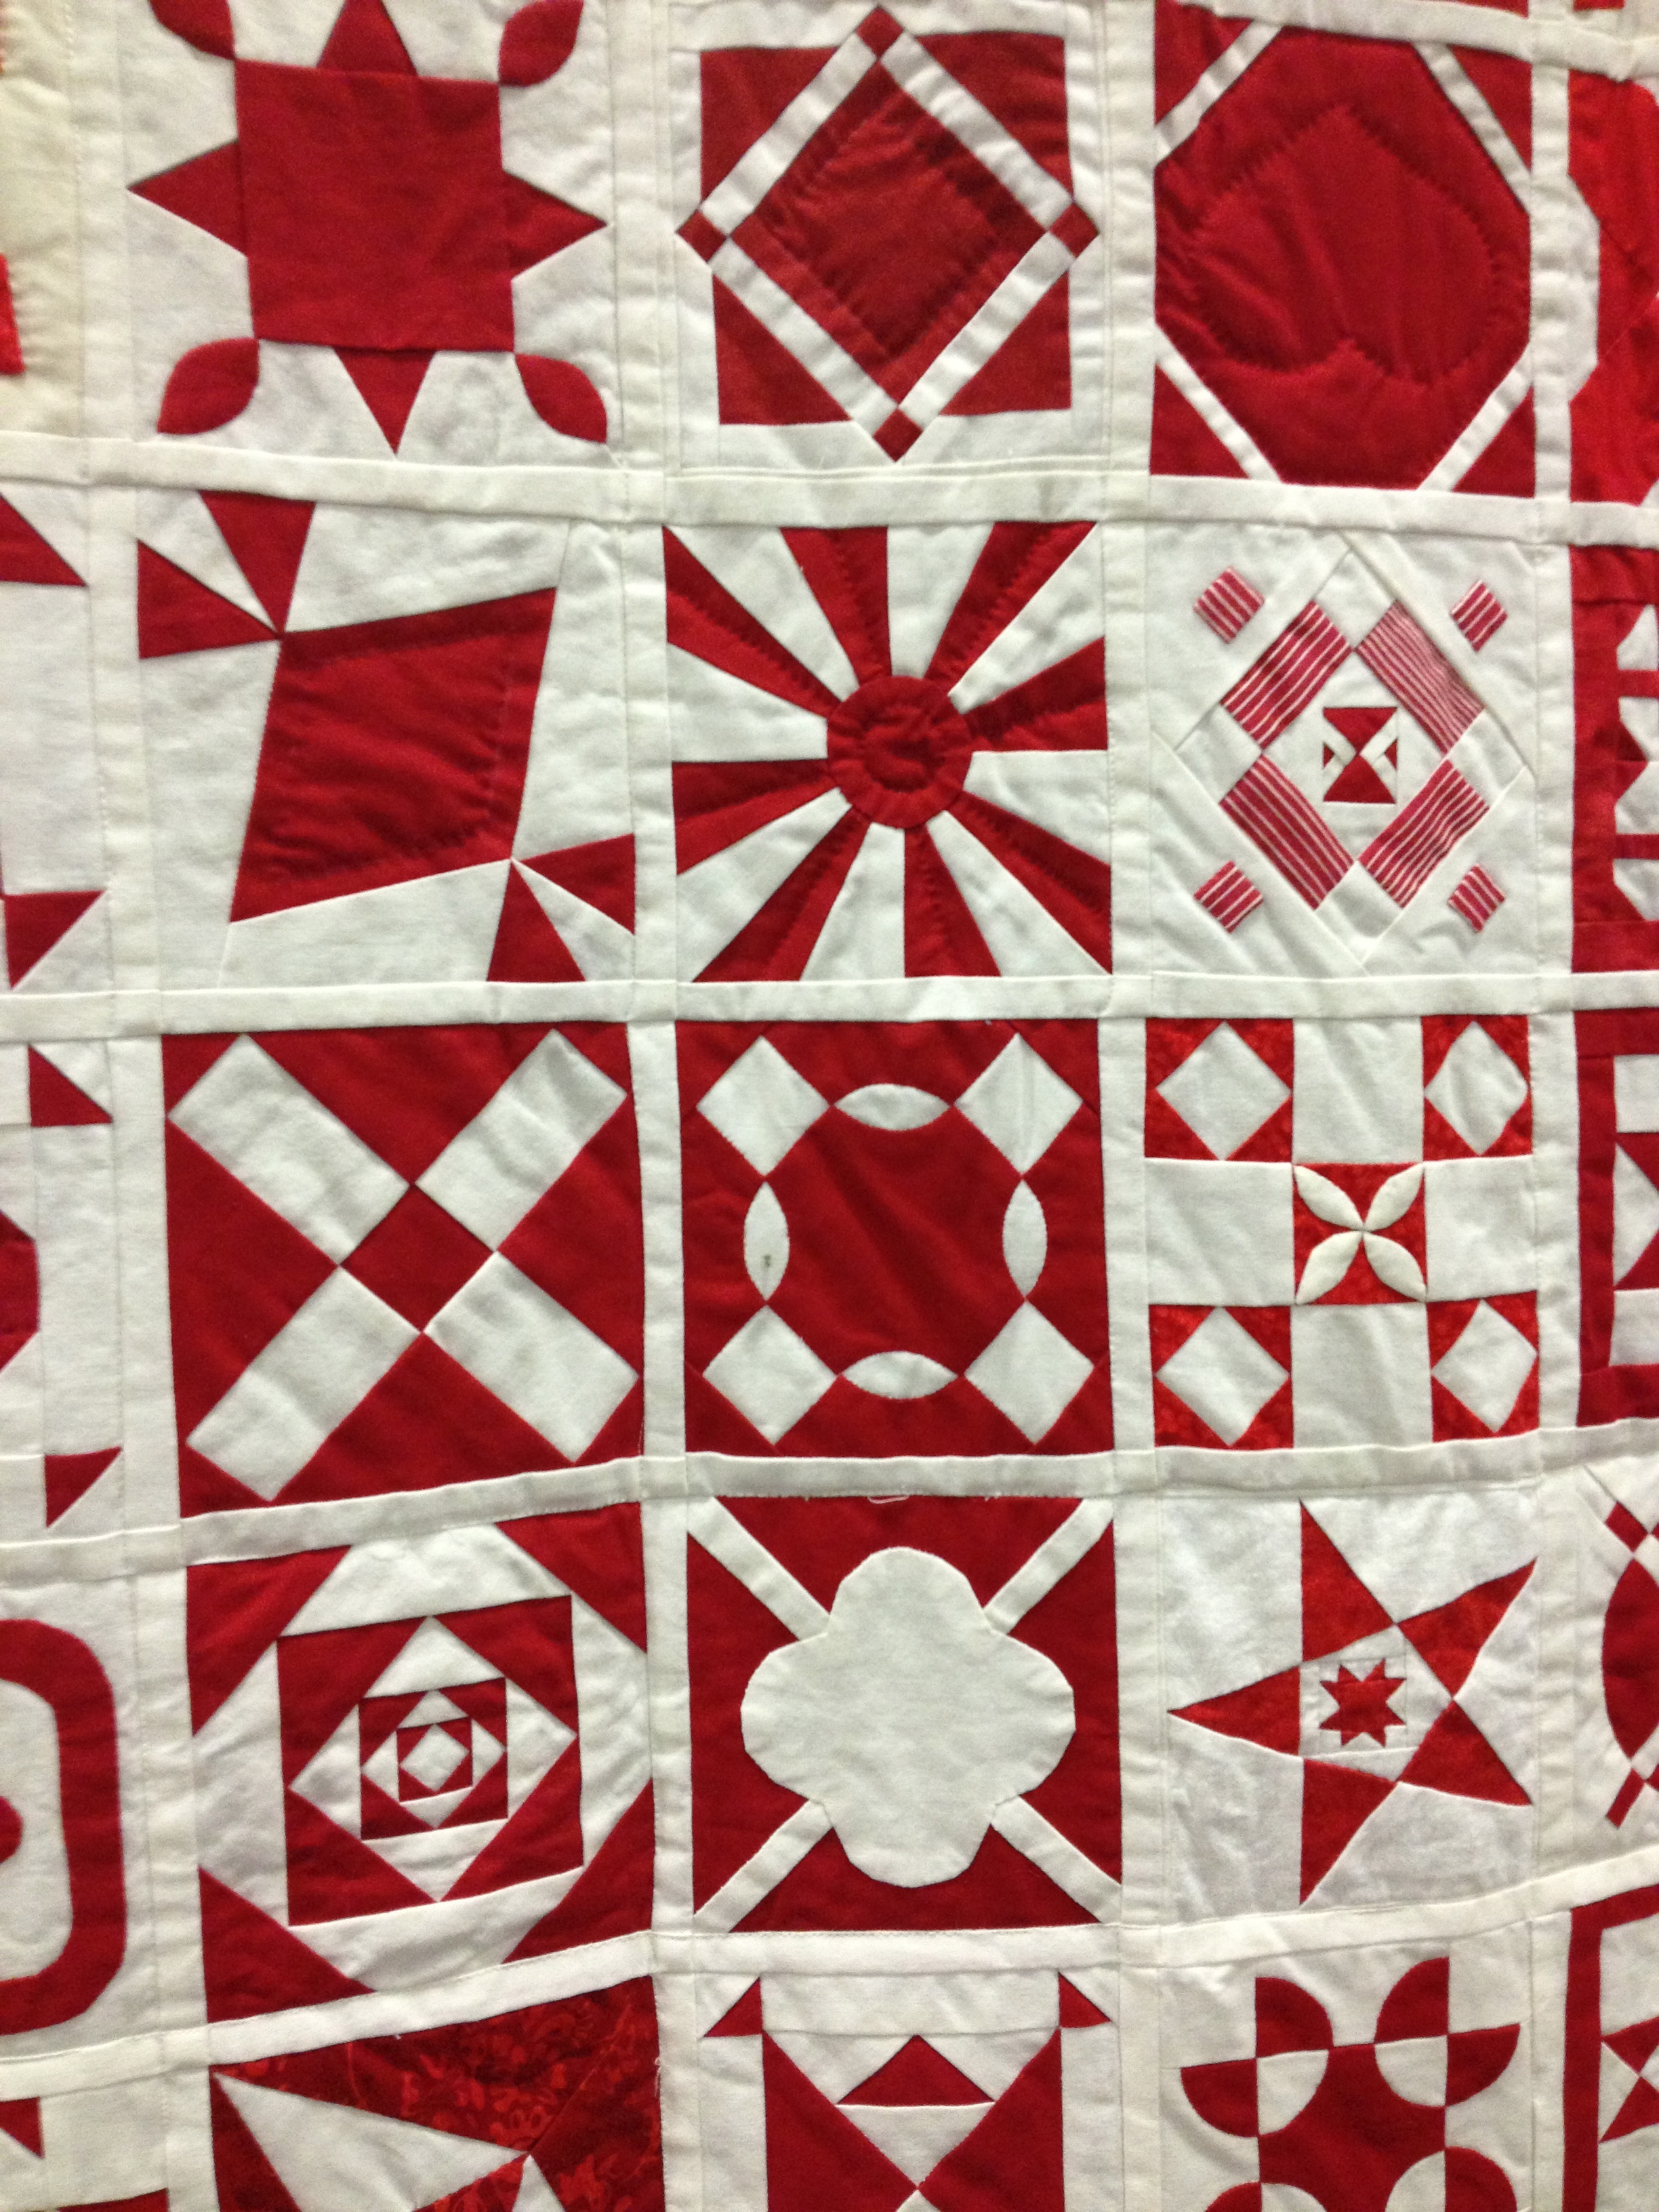
From the show program about the red and white quilt below – “This quilt was made in 2011 for Joanna Semel Rose in thanks for her exhibition, Infinite Variety: Three Centuries of Red and White Quilts. Thirty-six quilters worked together for nine months, in time for her 81st birthday. We knew this was one quilt design she did not have in her vast collection!”

Infinite Gratitude by Deborah Semel Bingham, NY, NY

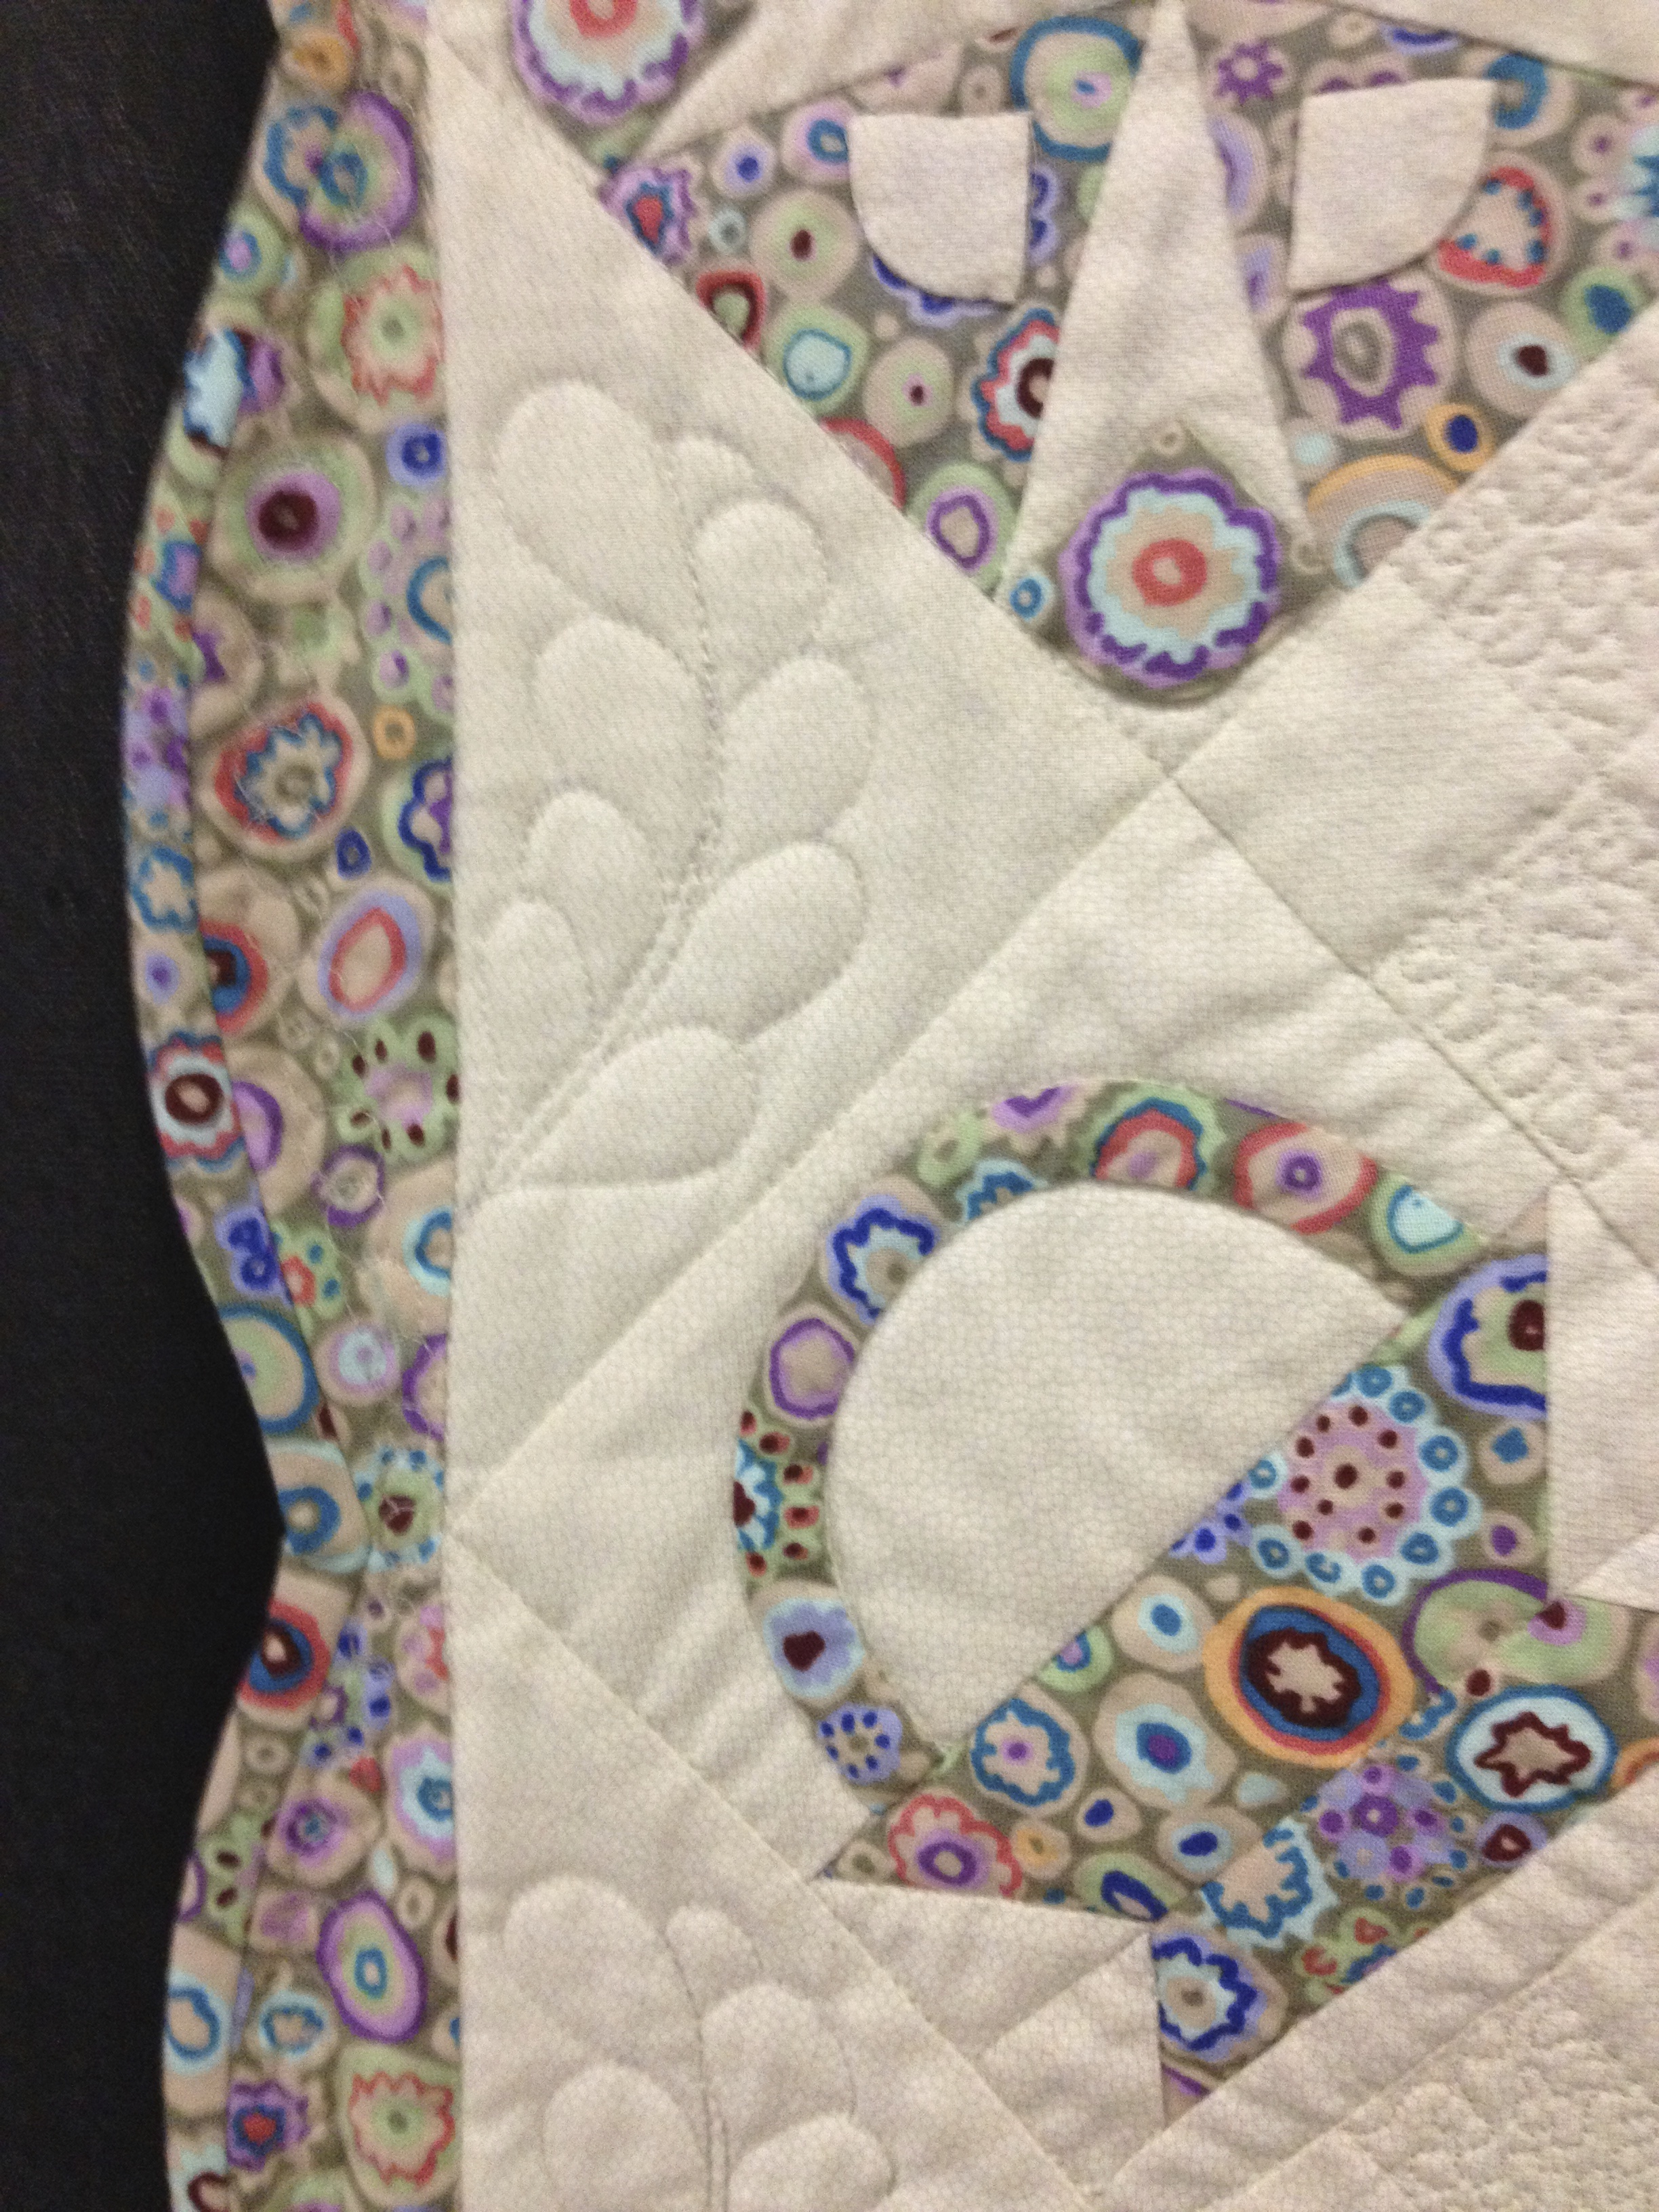
Detail of quilt above.
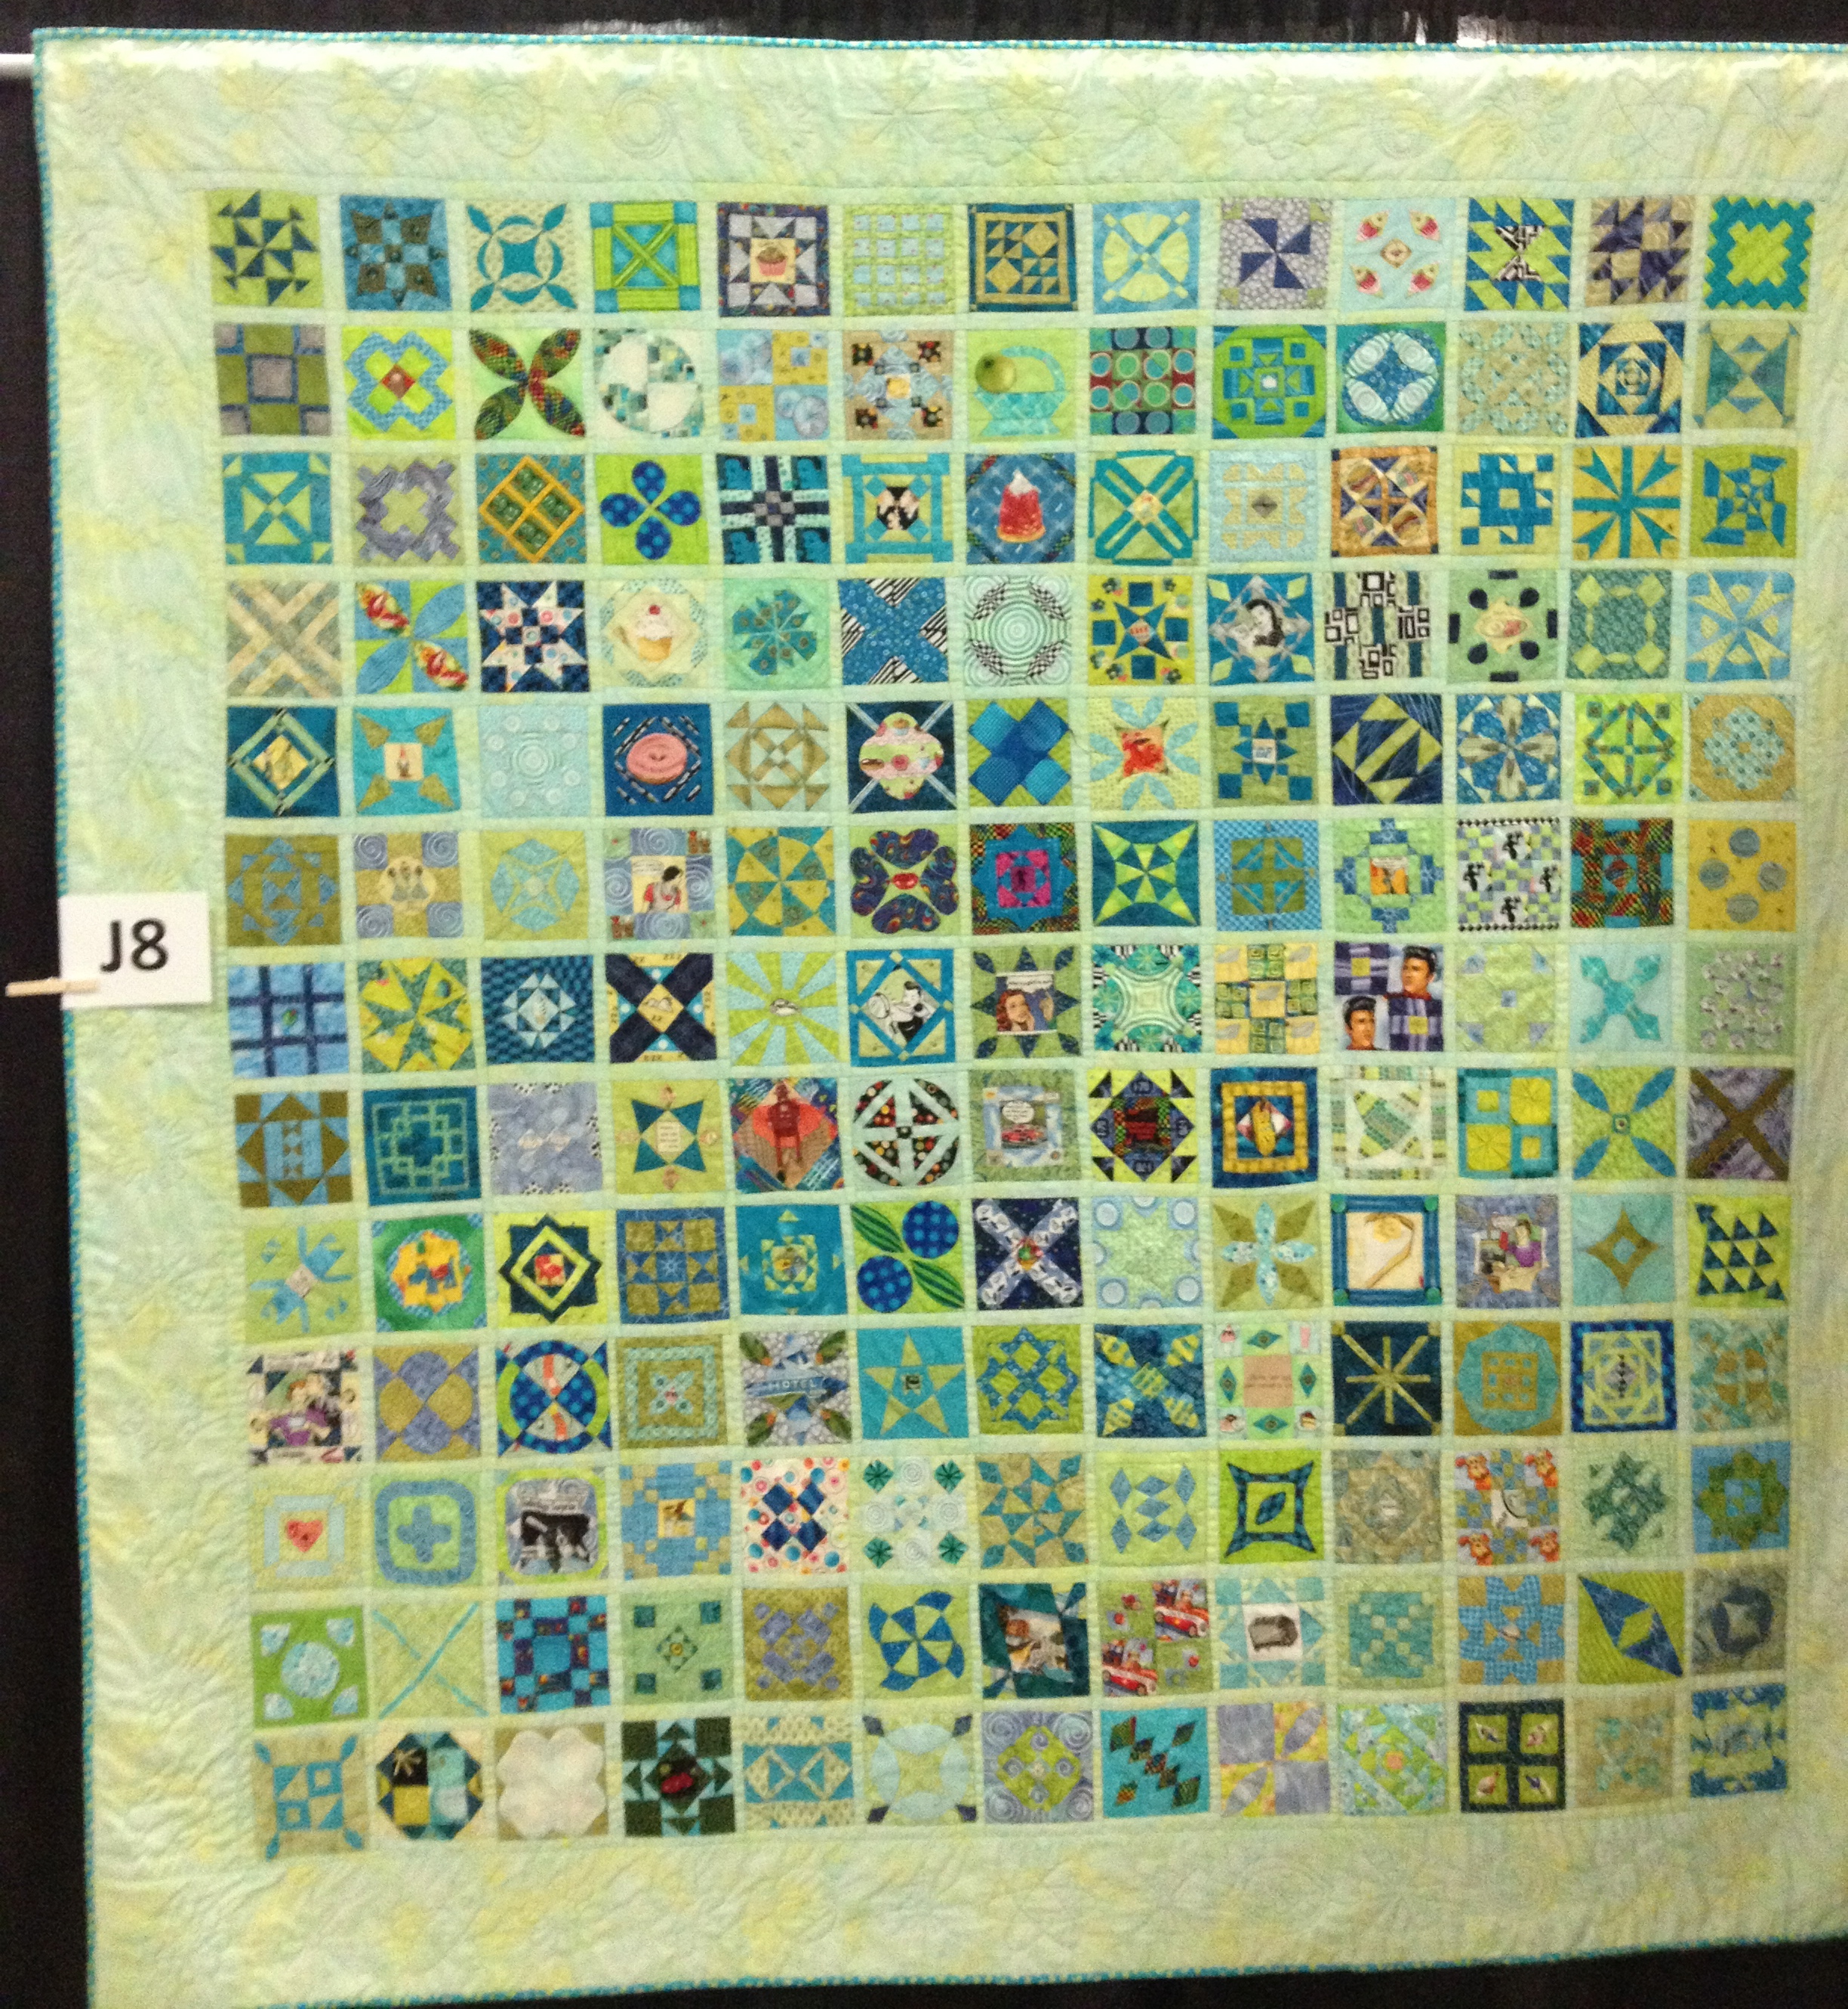
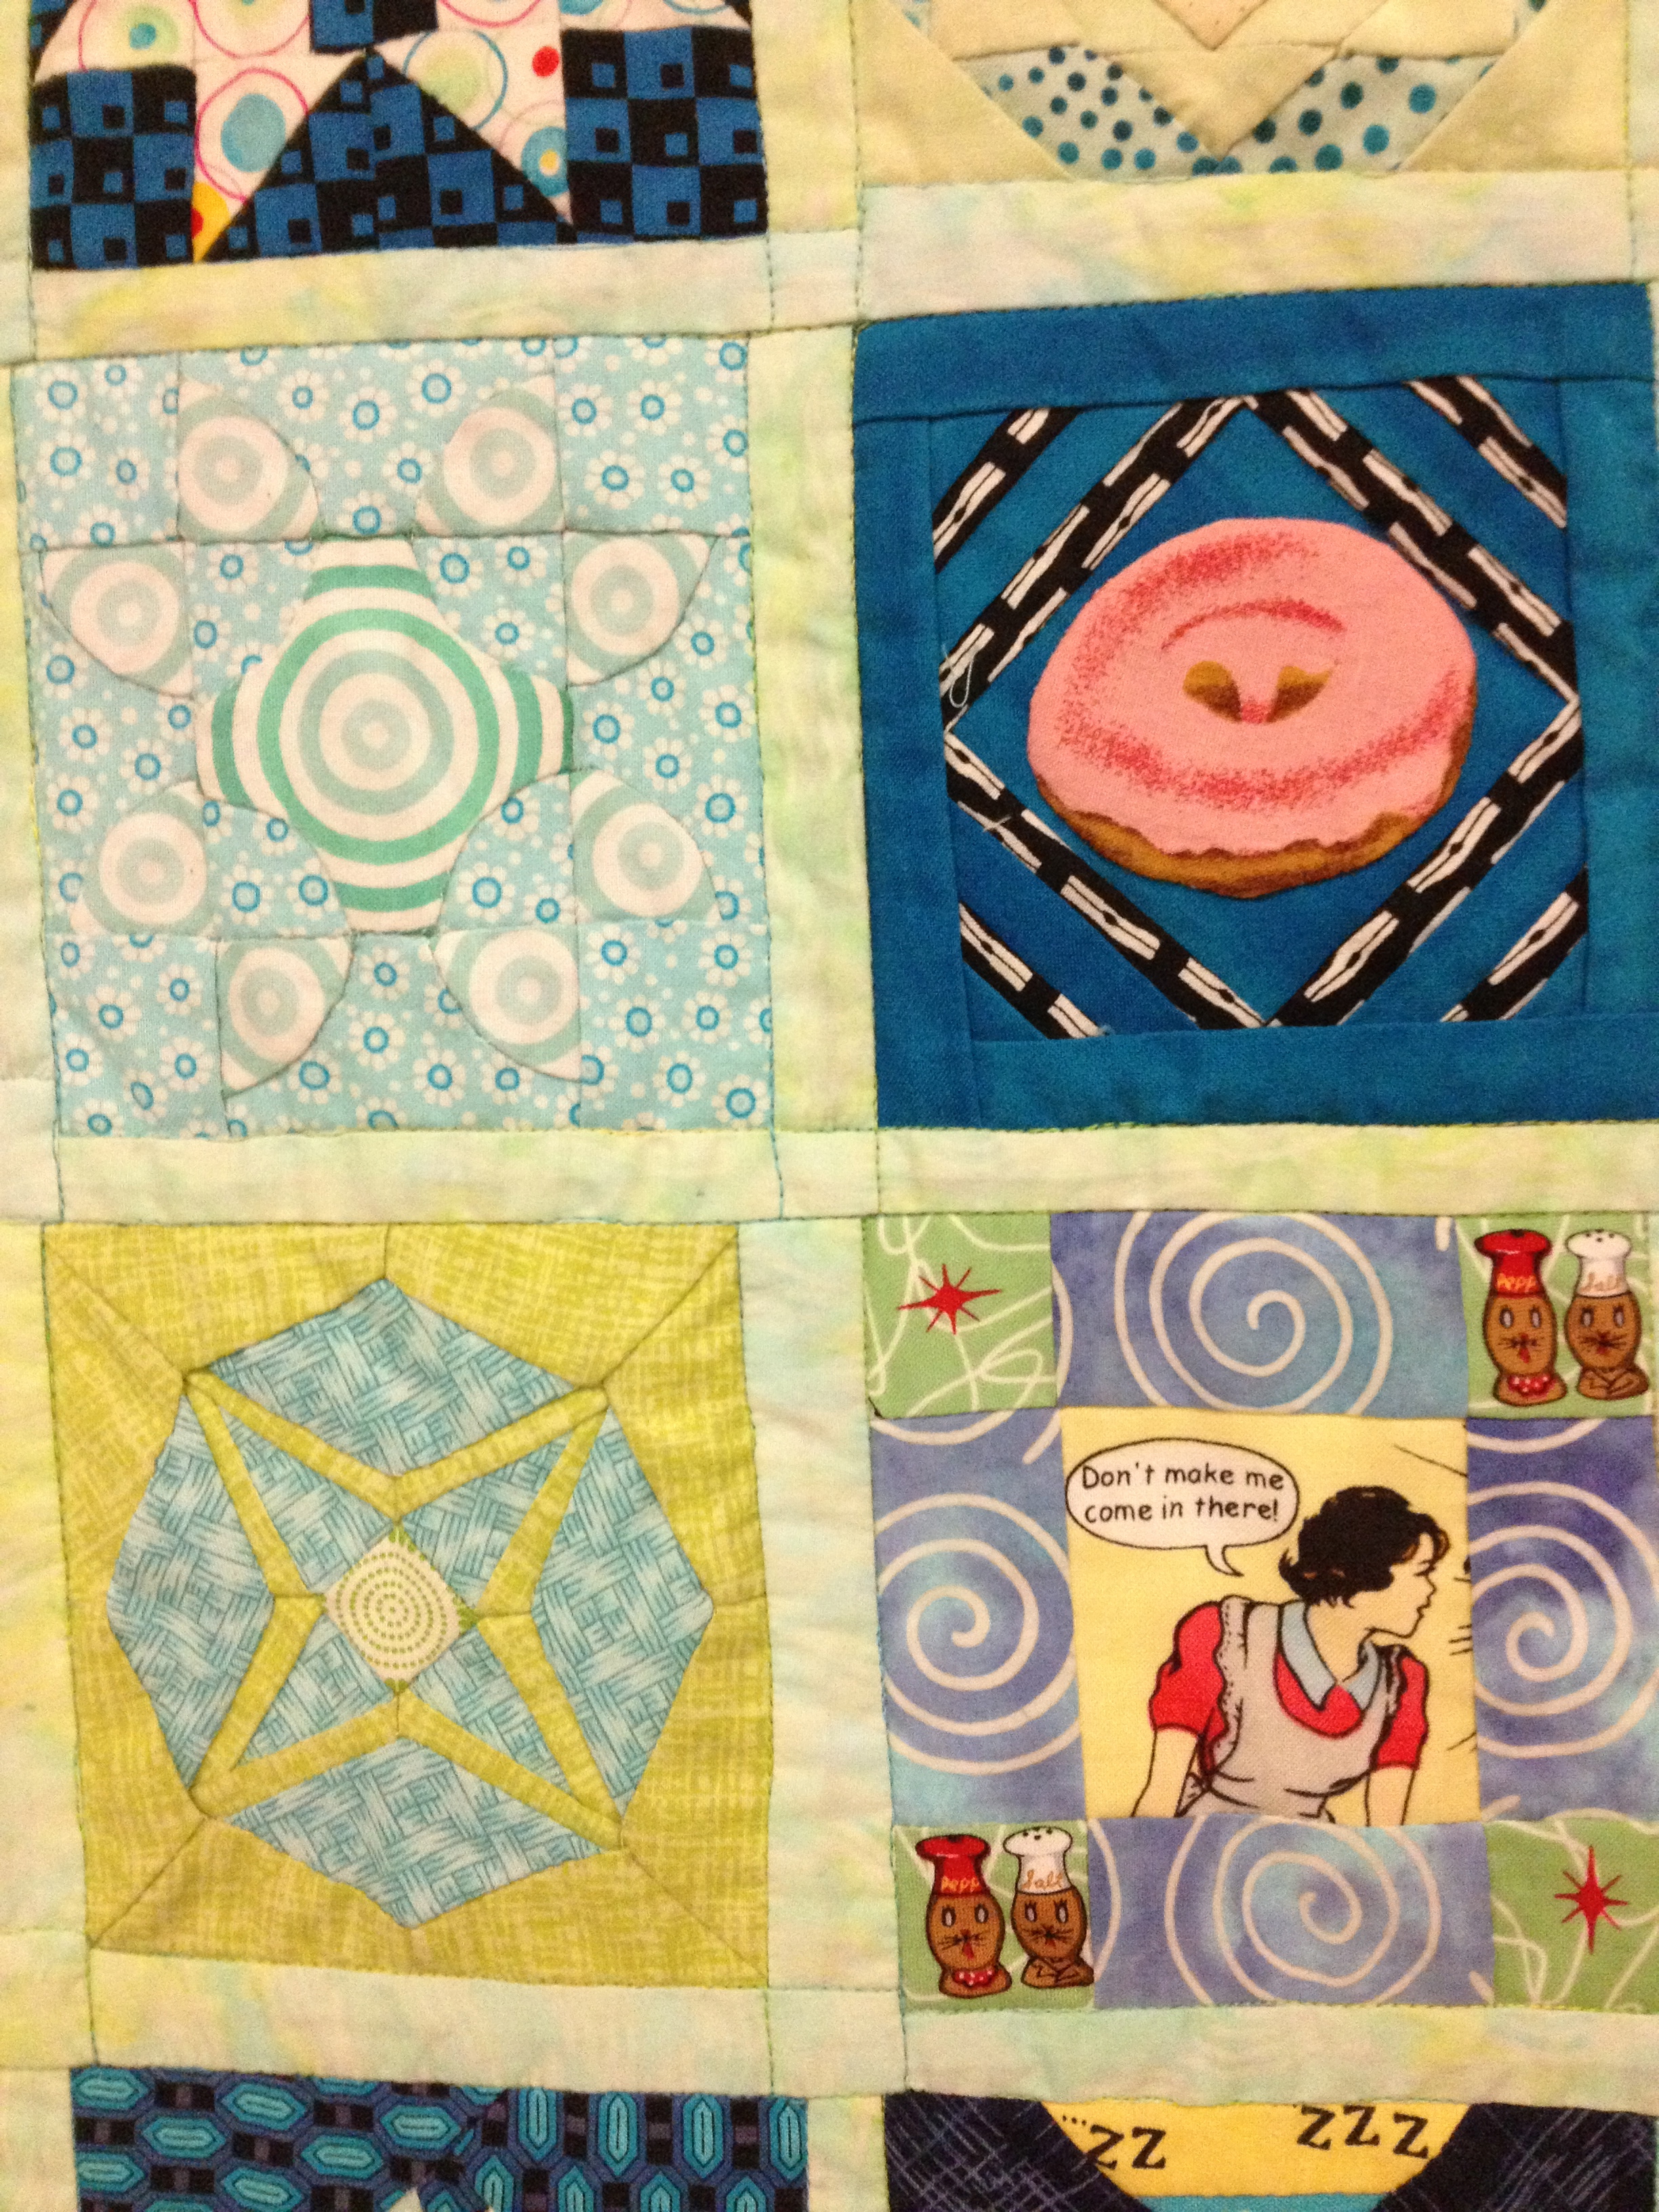
The quilt below is titled “Kitschin Jane” as the maker wanted elements of humor, surprise and “kitsch” in her version.

Quilt by Amy Ronis of NY, NY.

Detail of quilt above.
This next quilt is the cover quilt for Brenda Papadakis’ book Dear Hannah – in the Style of Jane Stickle.

Made by Edith Shanholt of Elkhart, IN. Quilted by Cathy Franks.

Detail of above quilt.

Dear Hannah book from Amazon website
I did not manage to get the number on the next 3 quilts in my photographs and can not give credit to who made them. Please contact me if you know so I can edit this post. However, I did not want to leave these beautiful quilts out!
The first one has blocks that are set on point and has beautiful quilting throughout the “empty” space.

Very traditional looking version from a distance.

Close-up shows a bright Kaffe Fassett print and lovely scalloped border.
Edited later: The quilt above is Never Say Never by Laura Fraga of San Ramon, CA

Interesting sashing and corner blocks.
Edited later: The quilt above is Birthday Jane by Kerry Marksbury of San Diego, CA. Quilting friends gave her 25 blocks for her 50th birthday.

A very pretty pastel version with scalloped border.
Edited later: The quilt above is Remember Me by Val Champ of Ontario, Canada. It is a tribute to all the people she lost during it’s constructions.
The next quilter says it took 15 years to finish her quilt which she has titled “Forever Jane”. It also has a beautiful scalloped border.

Forever Jane by Gay Bomers of Grand Rapids, MI.
“Newfangled Jane” was made with the bright, saturated colors and large prints of Kaffe Fassett.

Newfangled Jane! by Gwen Nishida of Irvine, CA.
Quilted by Judi Madsen.
This next quilt was made by 225 members of the Dear Jane internet group and presented to Brenda Papadakis at the first Dear Jane Gathering at the 2000 Vermont Quilt Festival.

The Spirit of Jane Stickle.
Group quilt.

Marbelous Jane by Claire Baker of Middlebury, IN.
The maker of the Marbelous Jane quilt used Kaufman’s Marbelous fabrics. This is her 5th completed Dear Jane quilt and she downsized the blocks to 3″.

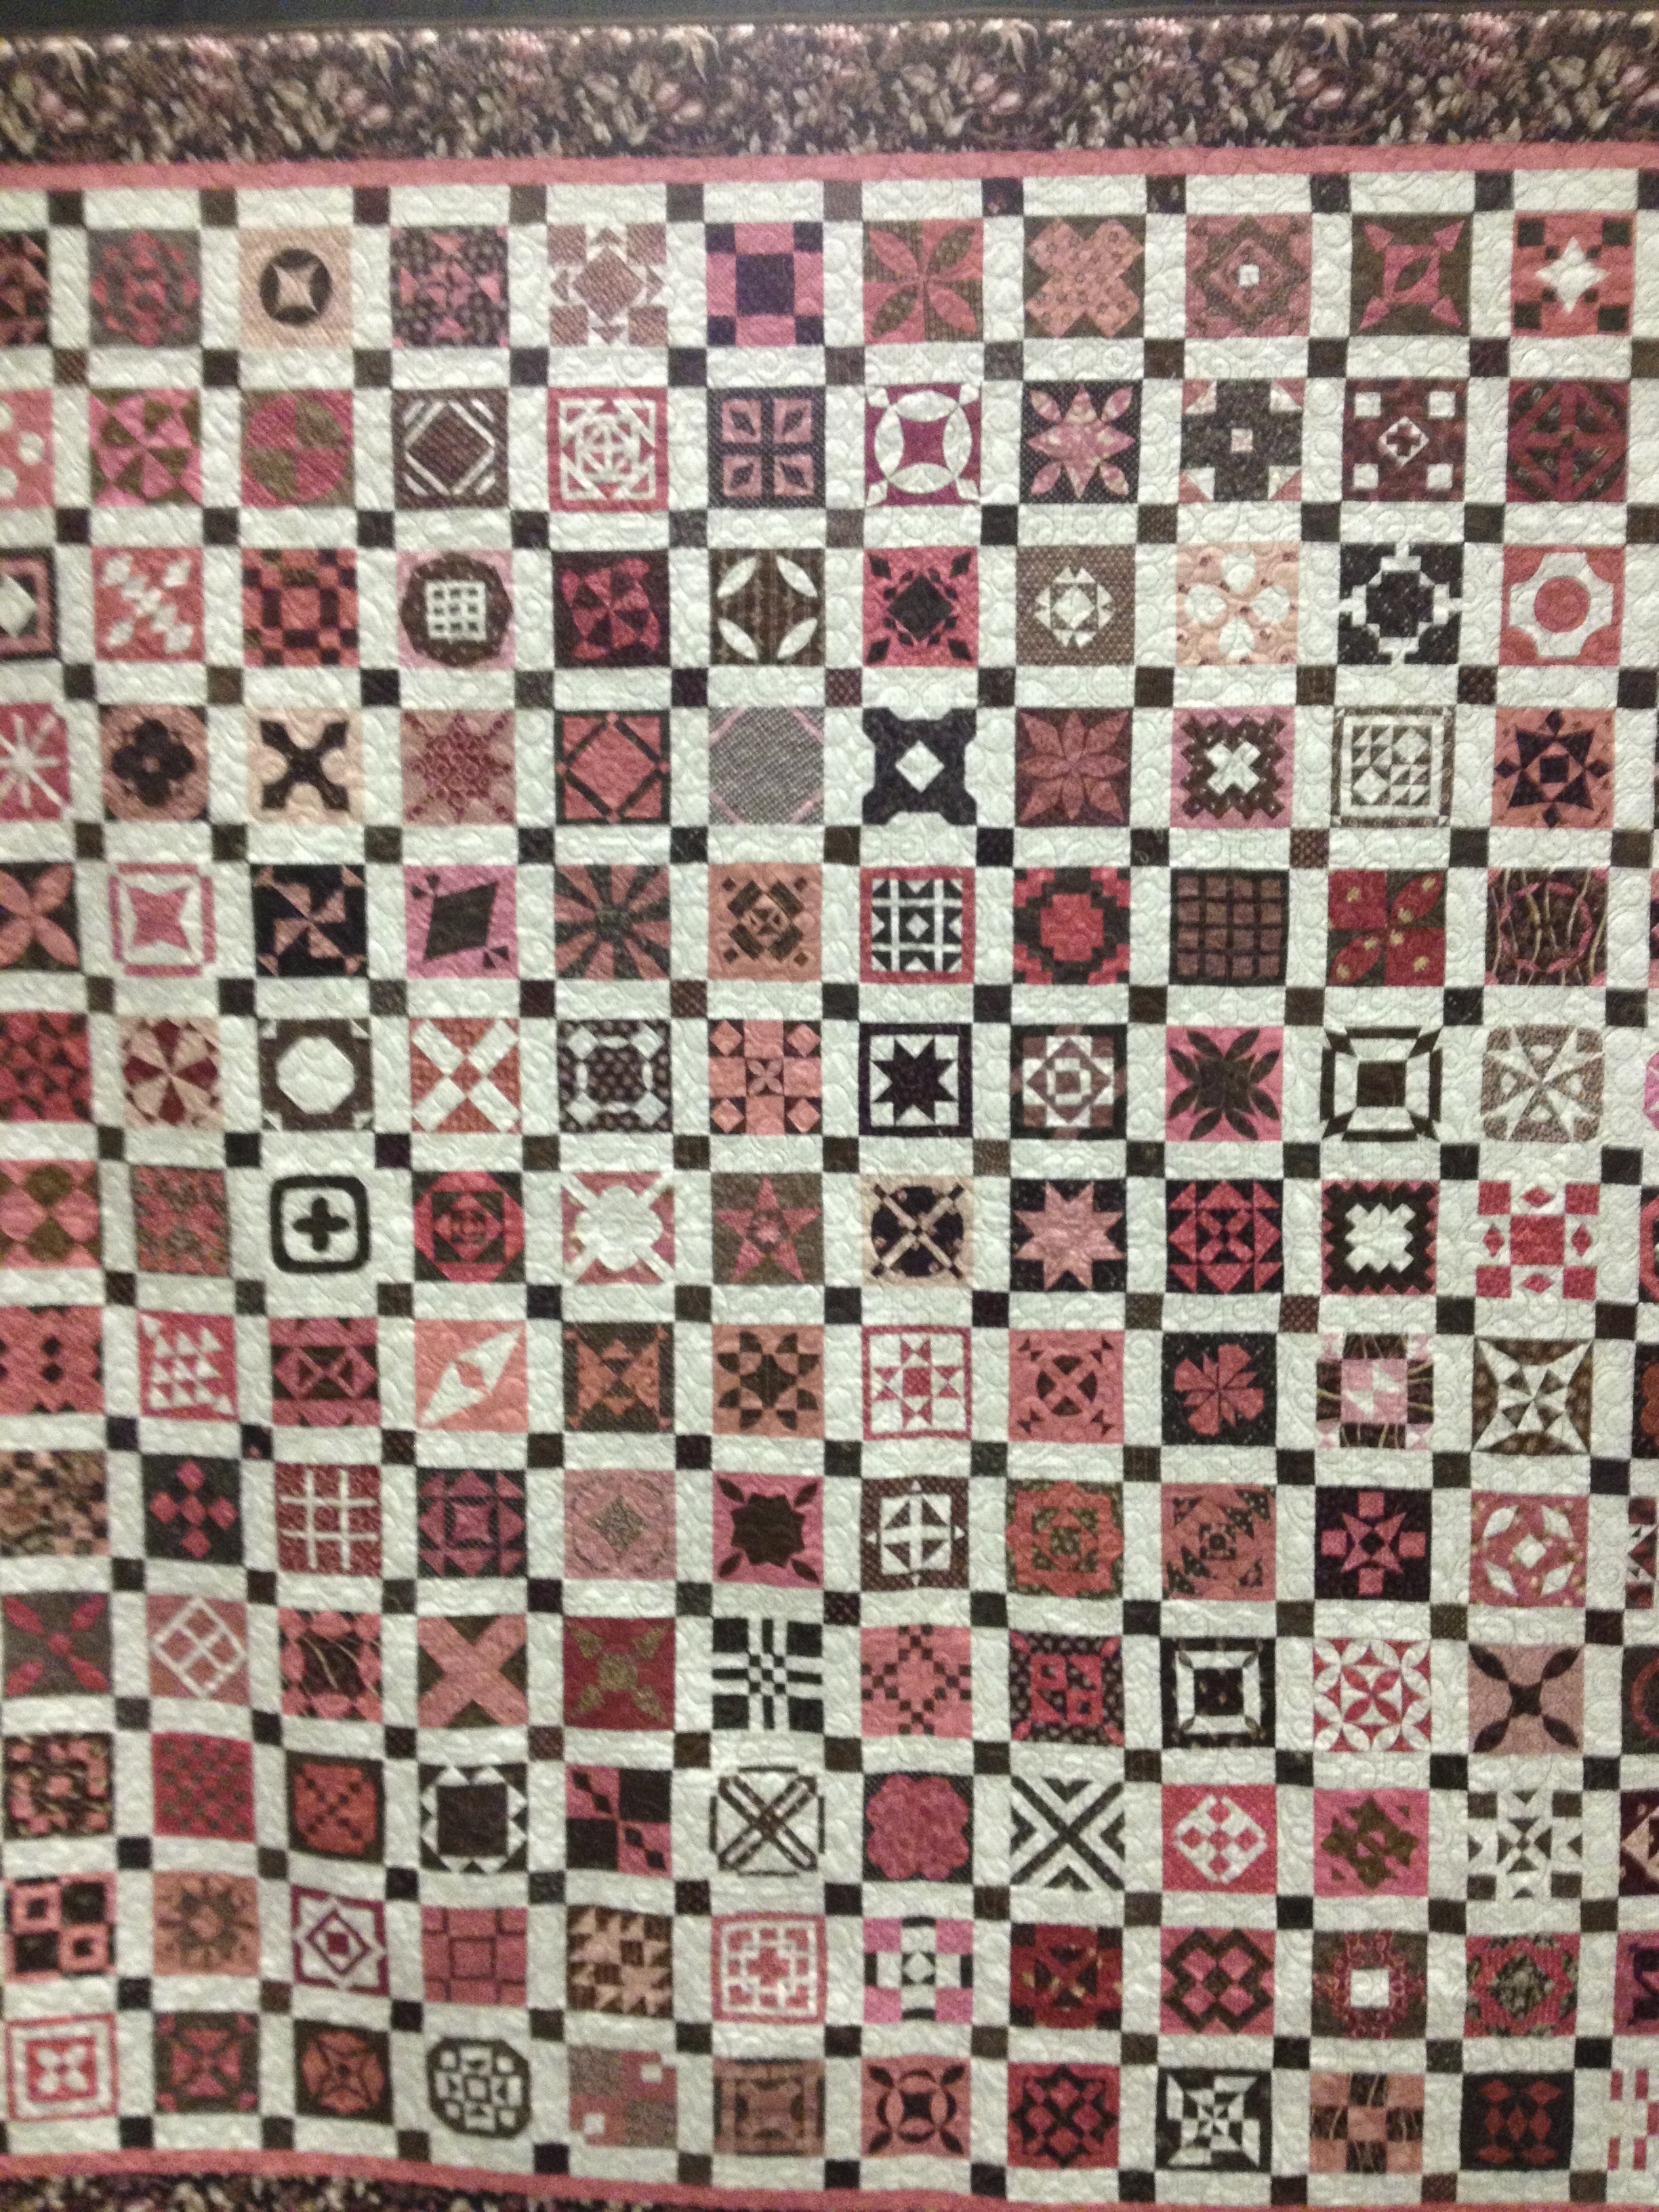
Black Jane by Linda Starkey of Denver, CO.
Dear Jane retreats are held in Shipshewana, IN two times a year. In the Spring of 2005, 35 participants exchanged blocks made in Amish solid colors.

Shipshewana Friends
Deb Kloss of Minneapolis, MN
The last quilt I have to show is a miniature Dear Jane quilt. The maker made 2″ blocks instead of the standard 4-1/2″.

Mini Jane by Barbara Larson of Chaska, MN

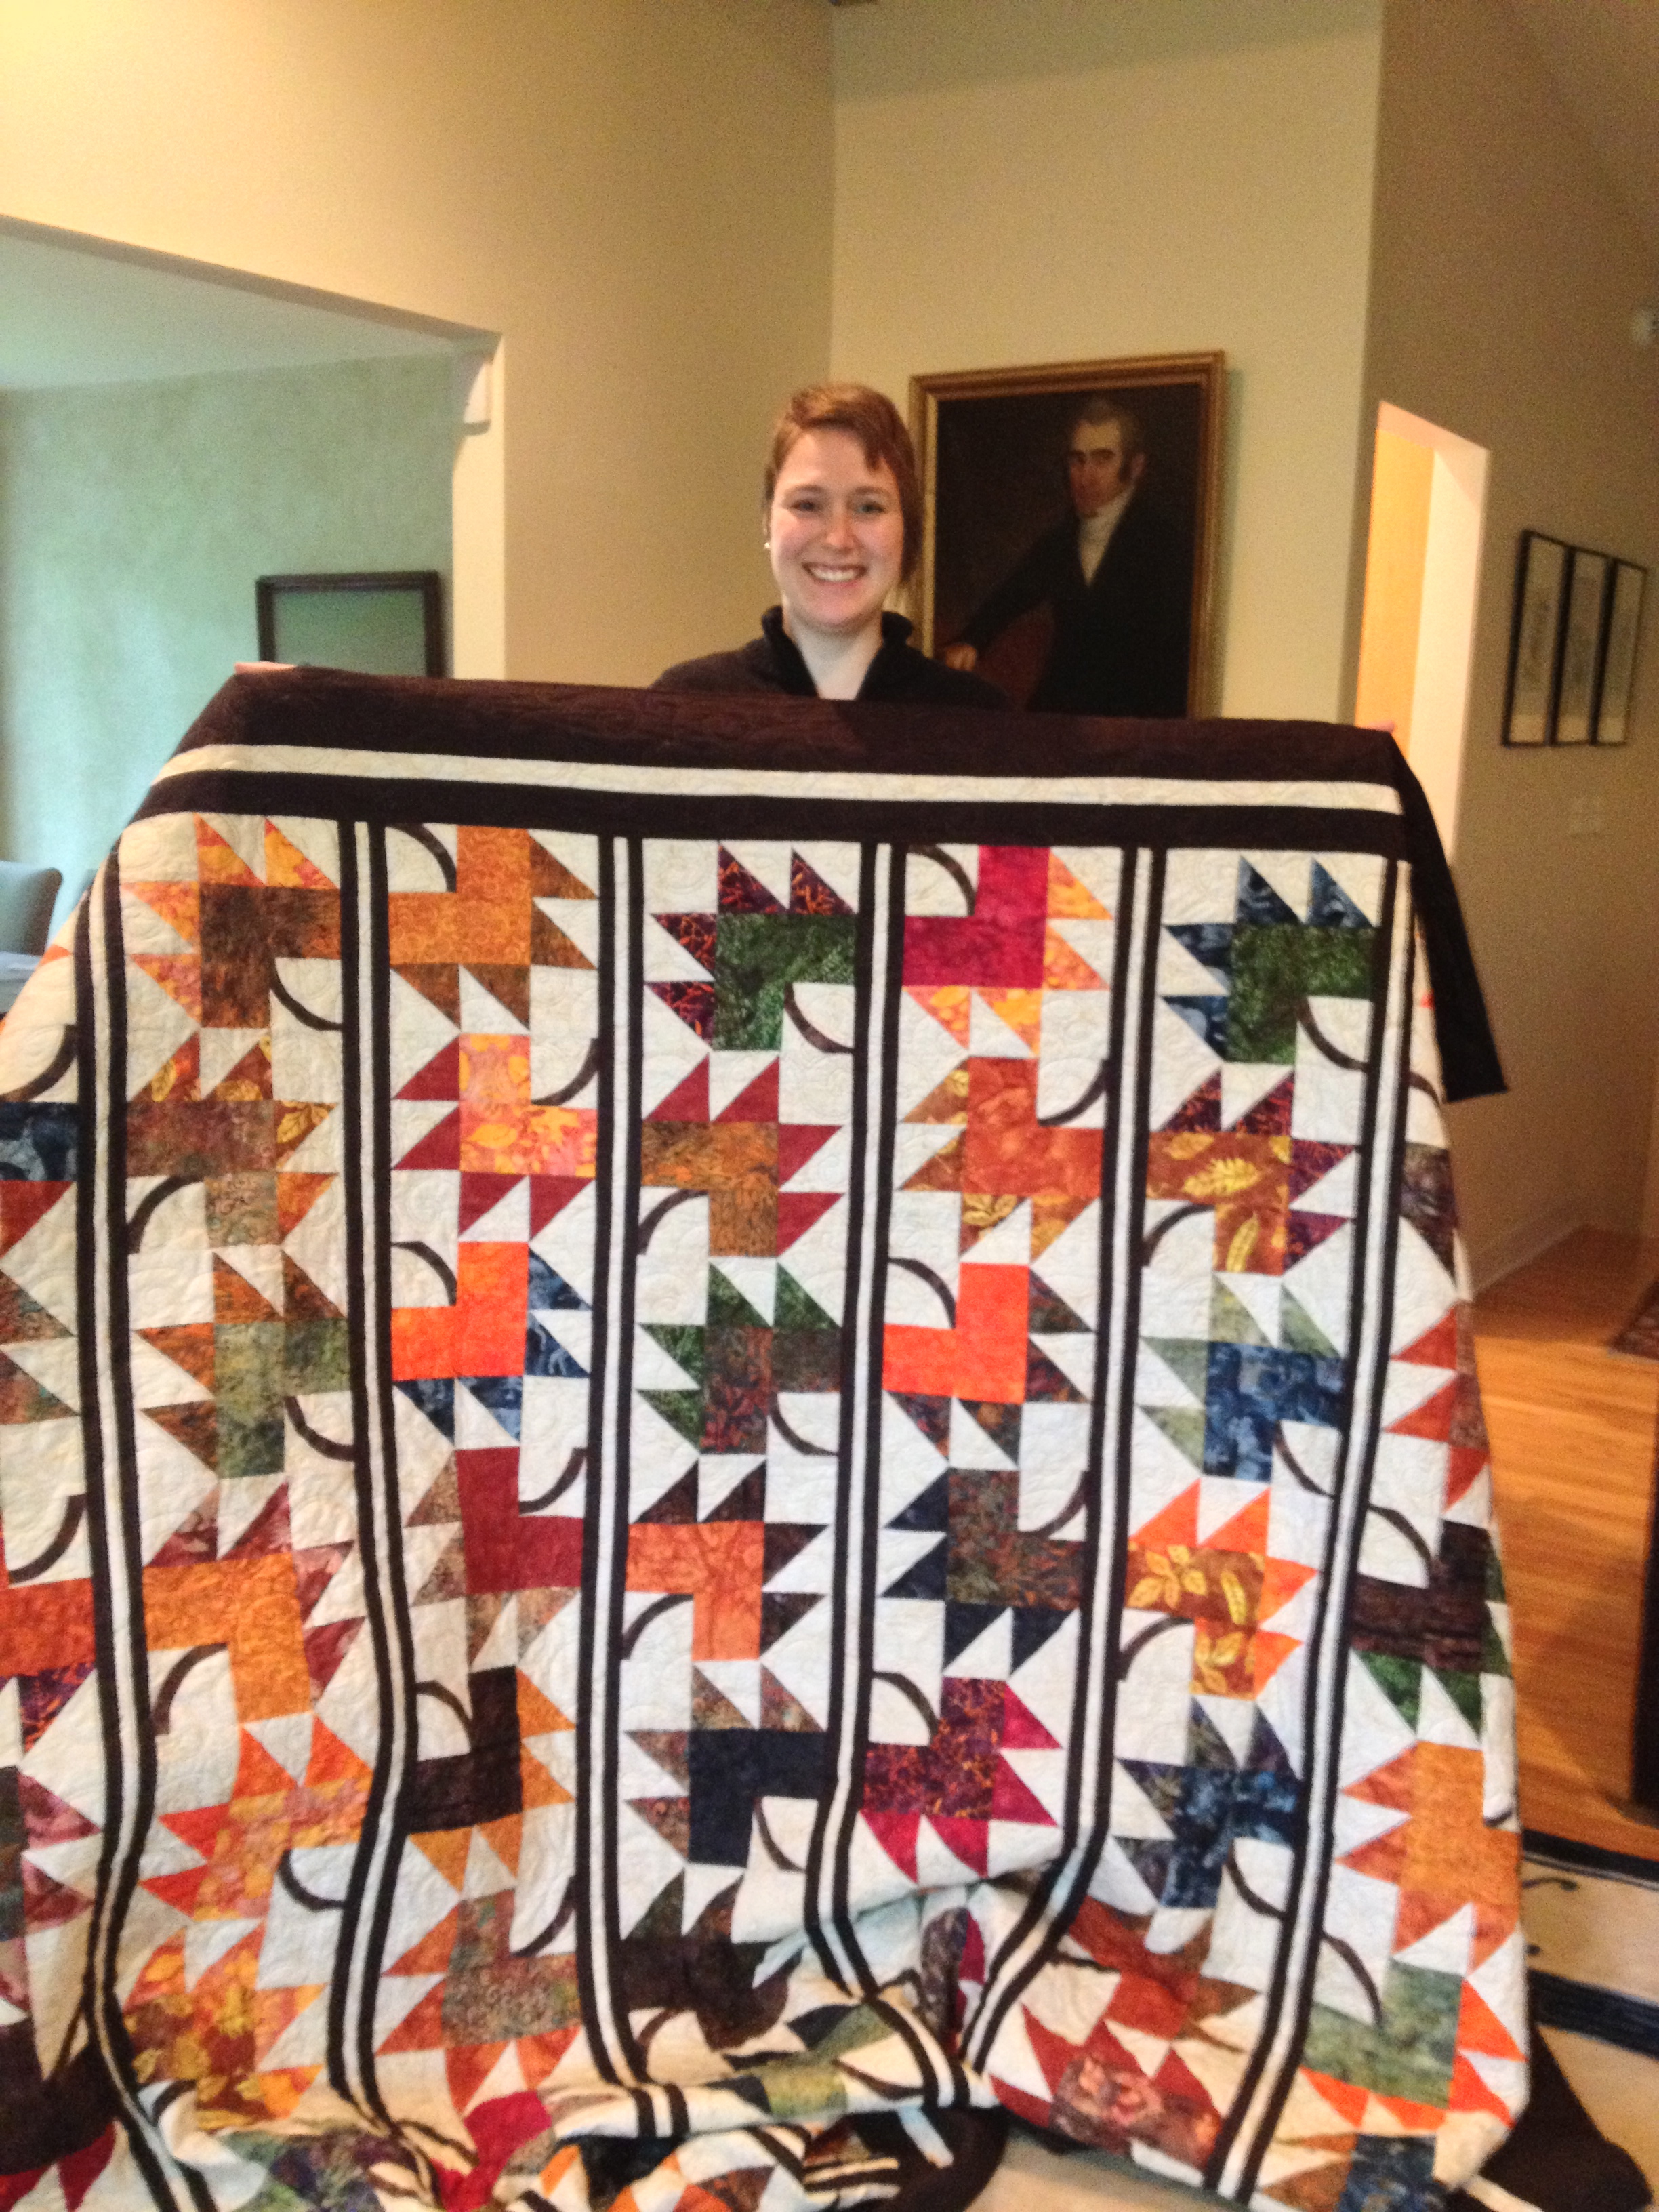
Jim shows how small this quilt is.
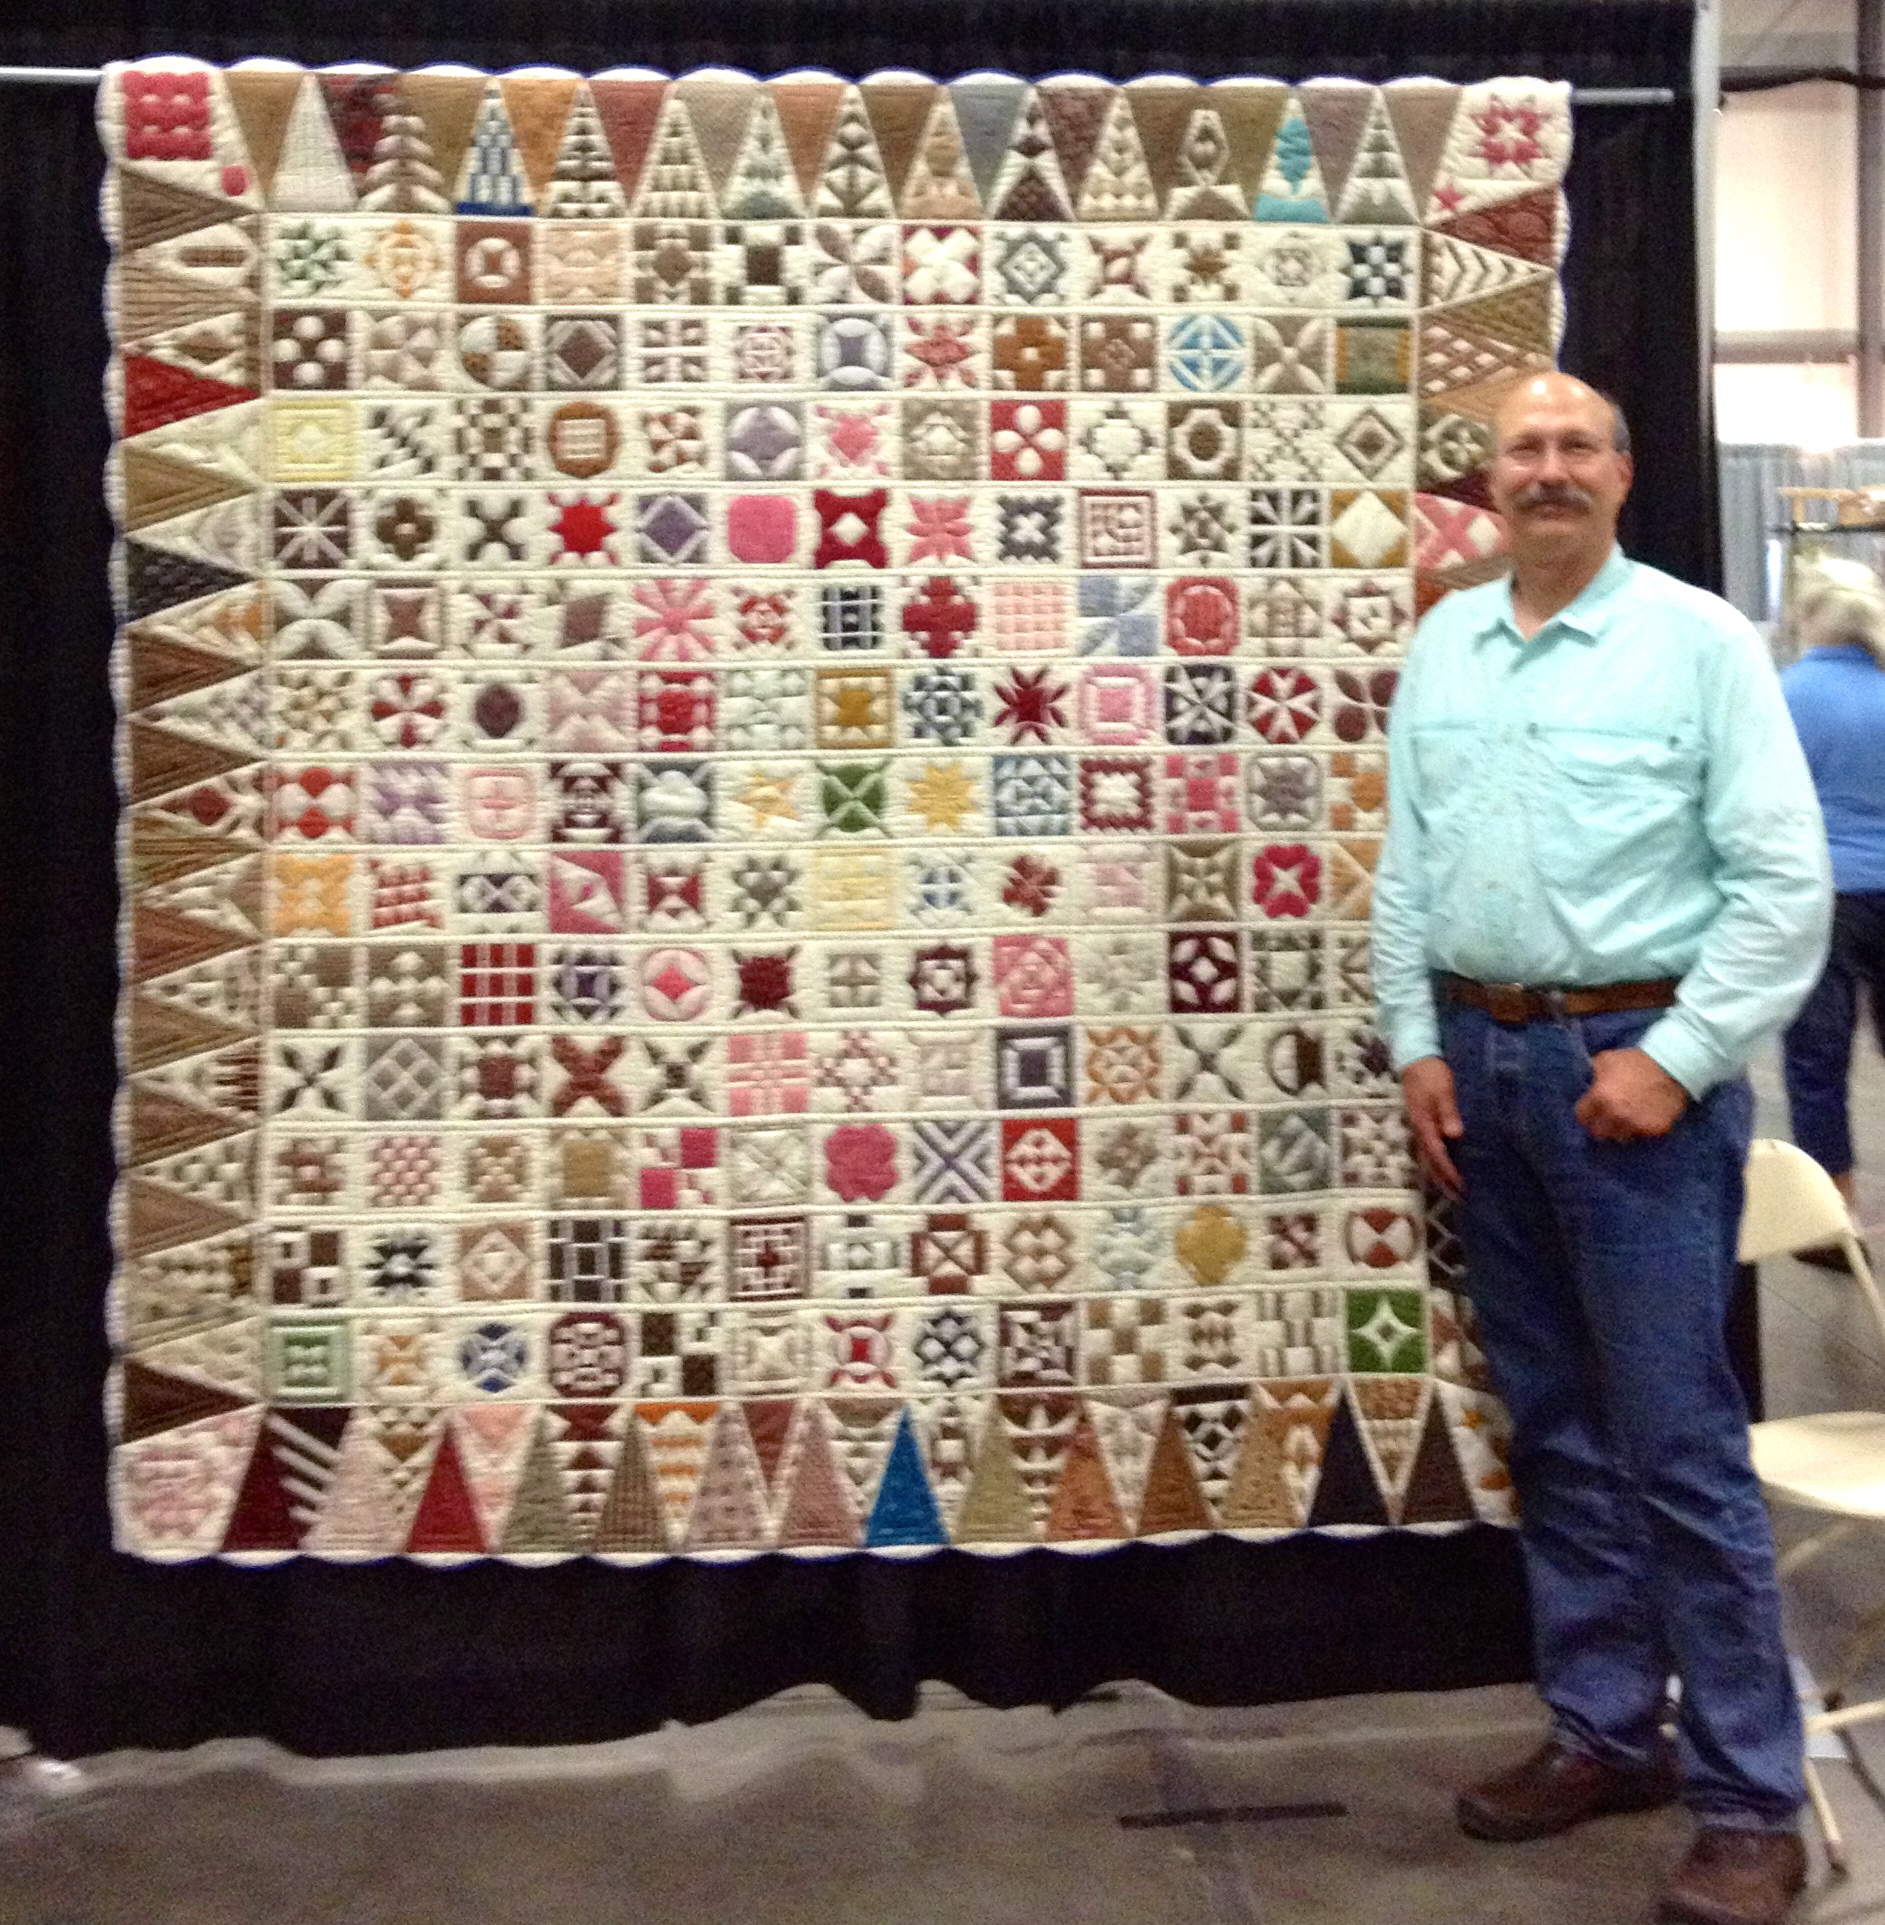
For perspective, here he is with the quilt at the top of the page again.
Jim with the quilt made by Goldie Morrow.
Jim really was “dear” to spend the day with me at the Vermont Quilt Festival. Thank you Dear!
Other blog posts about these quilts (with more pictures) can be found here and here.