

Finished and quilted block
I wanted to make a zippered pouch with Hillary Clinton’s “I’m with her” logo on it. My friend, Dana, had made and posted some she made on Instagram (danaandthread).
 Aren’t they great? I love these! She made hers using the block instructions from Maritza Soto (sotosewn on IG) who has a free pattern on Craftsy. The directions are for a 15 x 18″ block and reducing it didn’t seem to be a simple matter (for me) and so I decided to try to paper piece it in a smaller size.

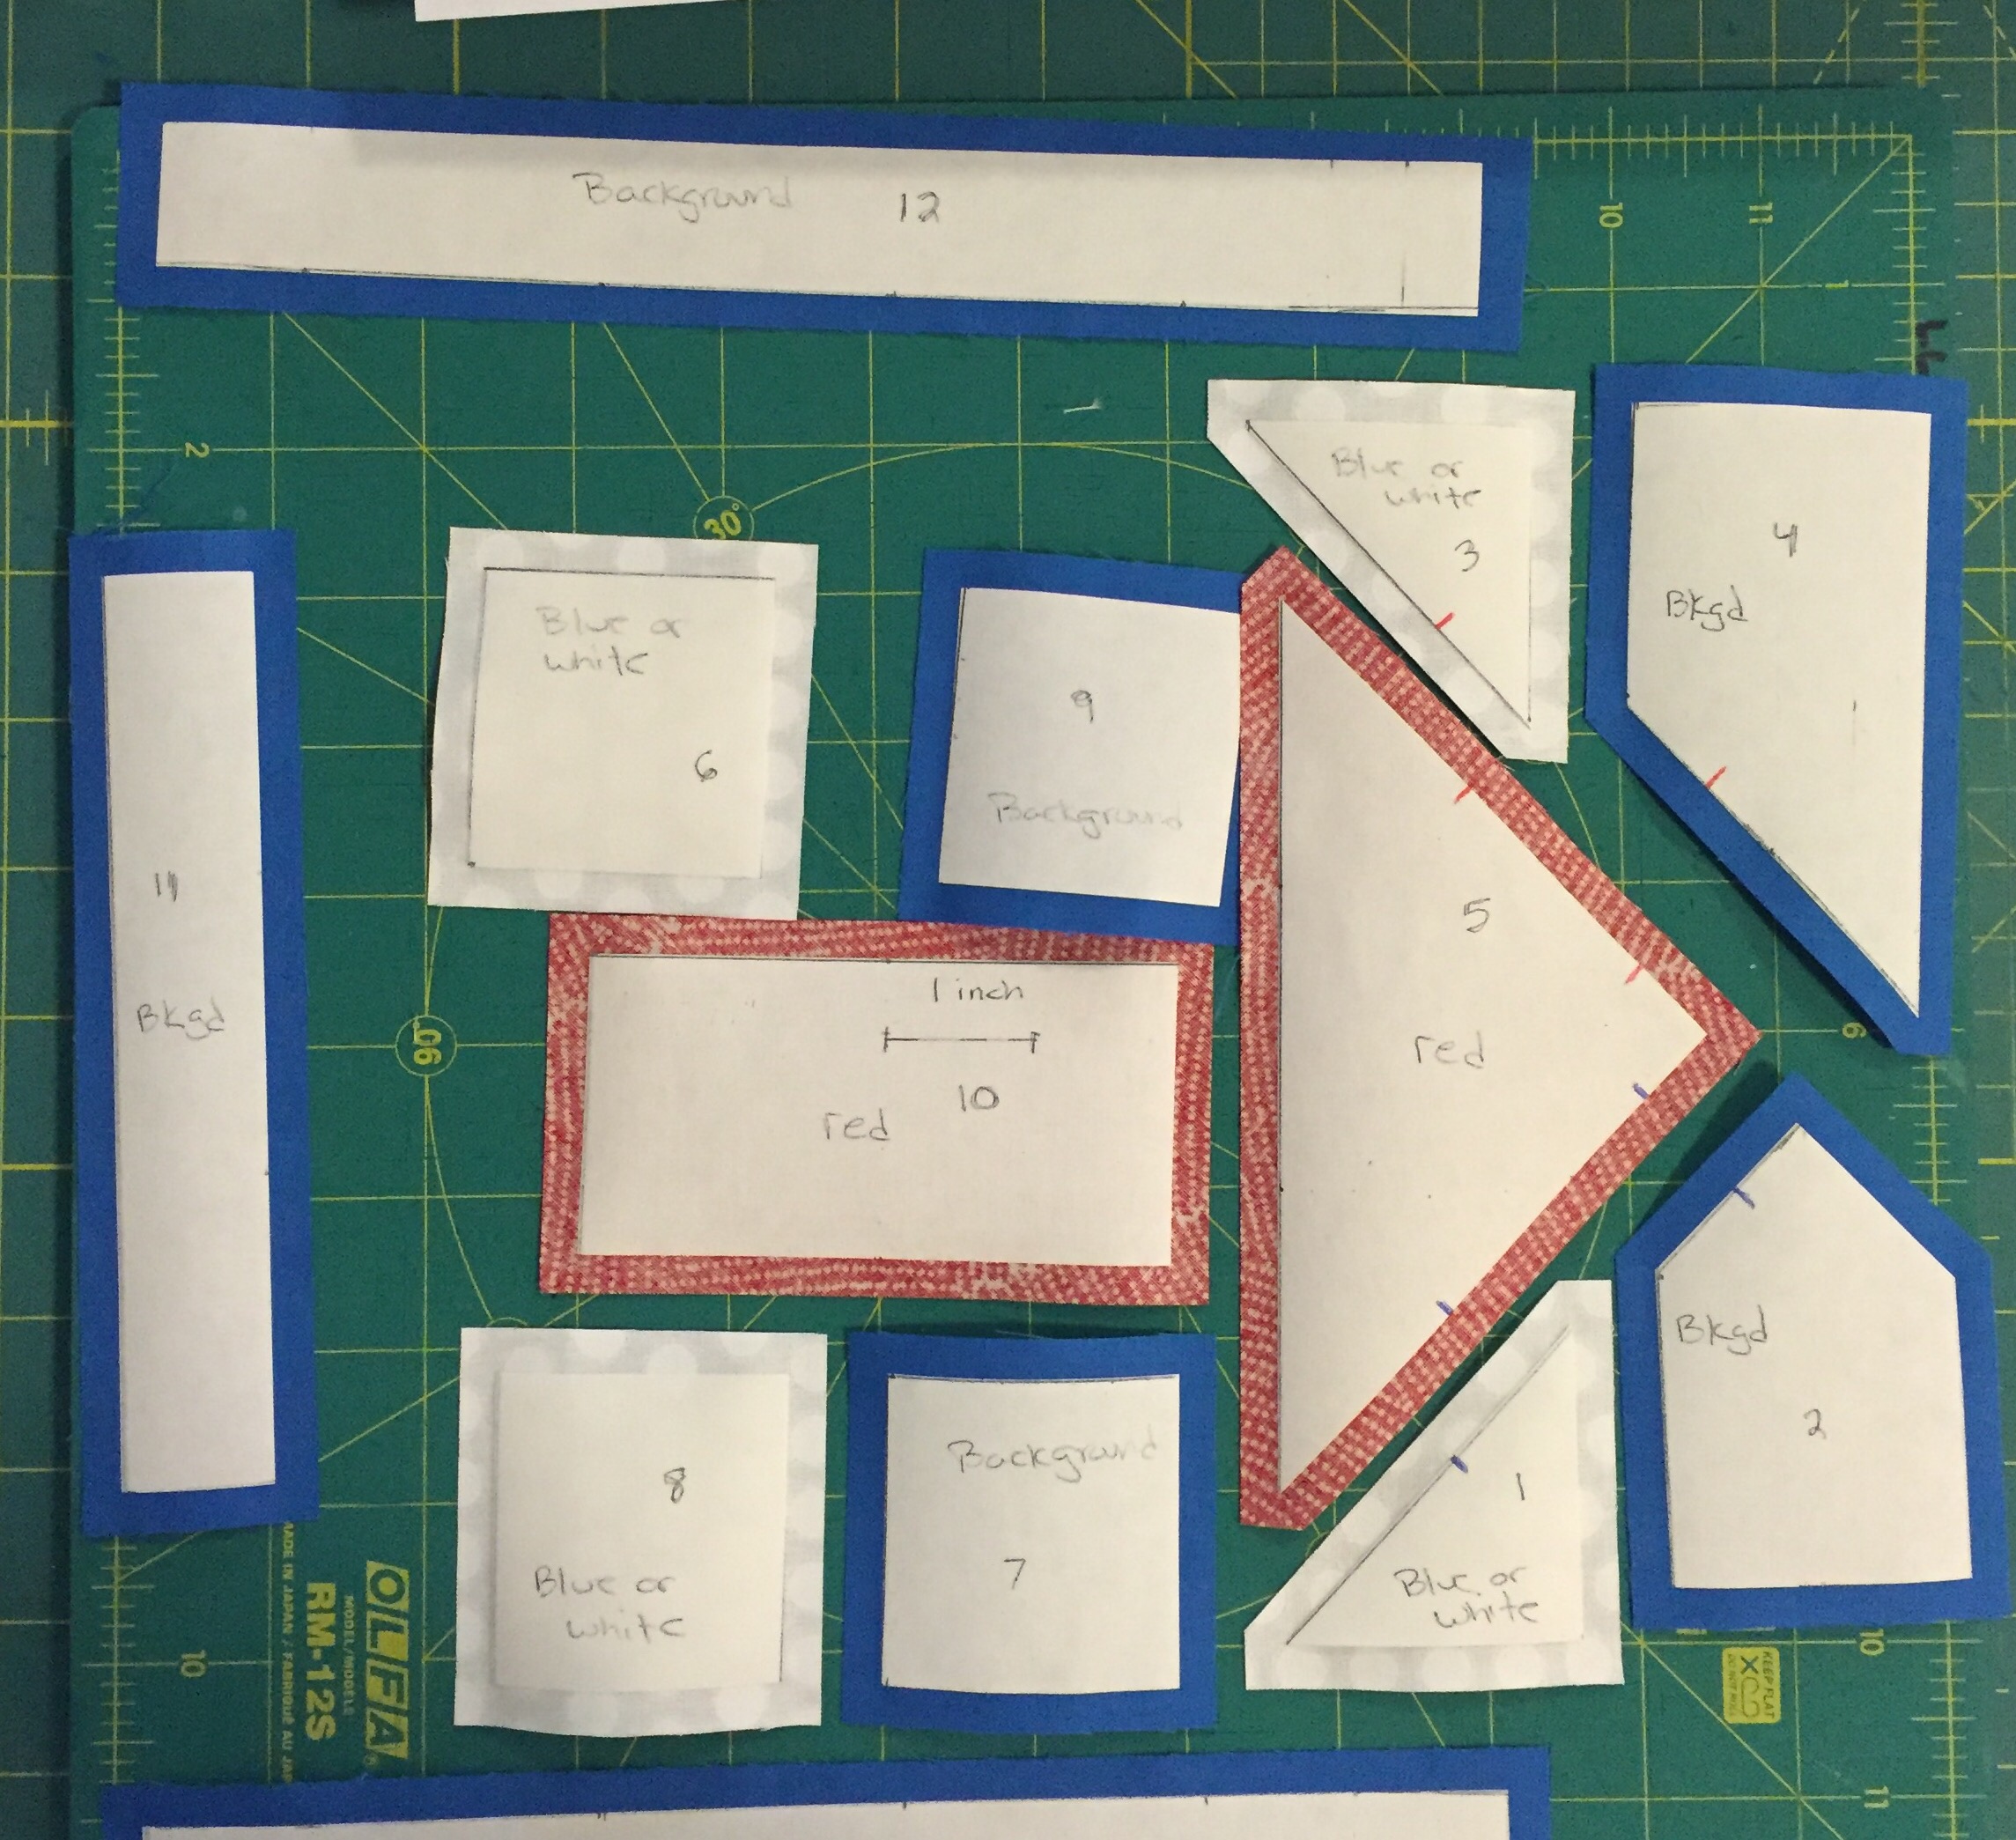
Template for 8.5 x 9.5″ block. Obviously the finished size could be altered by the width of the outside pieces (#2, 4, 11, 12, 13).
You can download this template by clicking here: I’m with her. I made mine using freezer paper piecing. I printed the template on freezer paper and cut it apart. (Note that there is a 1″ mark in the center of piece #10 to be sure it printed to scale.)
Templates ironed onto the wrong side of my fabrics
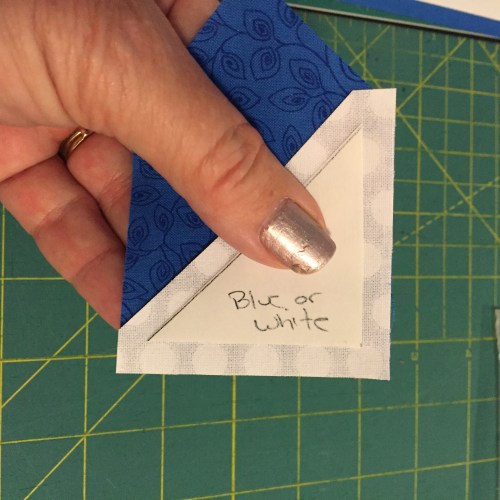
Templates held right sides together, ready to be sewn right along the paper template.

Sewn and pressed toward the darker fabric.

Pieces #1 – 5 were the only “tricky” pieces to align.
I used registration marks on the paper to help line them up for sewing (note the red and blue marks). Although I did piece this one entire block using the paper templates for the purposes of this tutorial, pieces 6 thru 13 could be cut & sewn in a conventional manner. Pieces 6 -9 are 2″ square finished or 2.5″ square unfinished, etc.

Above is a flipagram showing how the block went together. This was a fun and easy way to make this block.


Finished pouches

Do you have an even easier way to make up this block? Let me know in the comments.


So cool! I love the concentric star quilting. Very clever.
Thanks Sharon. I got the idea from Lindsey who quilted a flag quilt this way. It was much easier to do it on this small piece!
>
I love it! Since i don’t have any freezer paper here, I may try piecing it into 2 rectangles ( one will be easy, the other with partial seams), or I may just go out and get freezer paper! Would also make a great barn quilt!
Donna – it is possible to cut a 8.5” x 11” piece of the kitchen freezer paper roll and send that through a printer. Of course, you may not have that either!
>
Thanks so much! I downloaded both patterns and they were the same. I thought one was the freezer paper template. Anyway, I love the idea and can’t wait to make some for friends and me.
Mary – I did link the wrong file to the post when I first published it. If you go back into http://www.ifinallyhavetime and click on the paper template link, you will find that it is there now. Sorry for the confusion!
Thanks for letting me know of the change. I came back and printed the freezer paper copy. I really do want to make these! Once I do I’ll send you a photo. I appreciated the email as I wouldn’t have come back to check for a comment from you.
Great job, Linda!
Neat! Such a busy bee! You have seriously mastered that technique.
Love the quilting.
Love it. You are so clever
I’m working on one now. For my first one, I’m using a combination of paper piecing (sew and flip) and traditional patchwork. You machine pieced yours?
I did a combination of regular piecing and the paper piecing. Good luck with your blocks! I love the graphic nature of this.
Thanks – sorry that I did not see this before my second post.
Thanks for this. I am about to finish one using a combination of paper piecing (not English paper piecing – the sew and flip kind) and traditional patchwork, all on machine. It looks like yours are sewn on machine but using the freezer paper templates. I’ll try that.
It would be fun to do completely by hand too.
Thank you! I’m not a quilter, but I found piecing this remarkably easy. I just cut out the pieces of the template, copied them onto graph paper using 1/4″ margins for seam allowance, and stitched them together in the order you recommended using my 1/4″ foot. All told, with printing, tracing, cutting, and sewing, it took me about 2 hours.
As I said, I’m not a quilter, so I’m going to back my square with interfacing and applique it to a tote bag that I will use to carry campaign literature when I canvass in a neighboring swing state (mine is reliably blue). What a handy and fun accessory!
Pingback: QuiltCon 2017: The Quilts, Part 2 | resliced by Jordan