Category Archives: DC Modern Quilt Guild

Lazy Daisy Block

img_2615

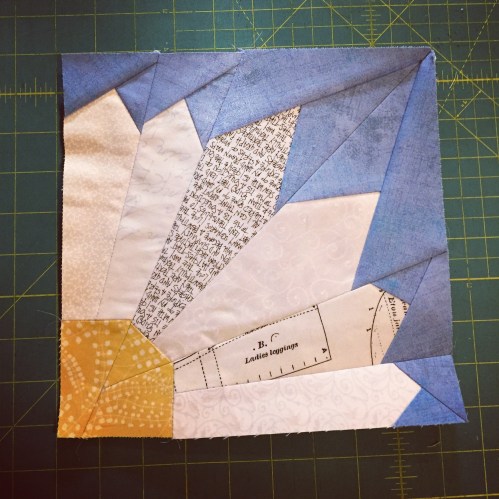
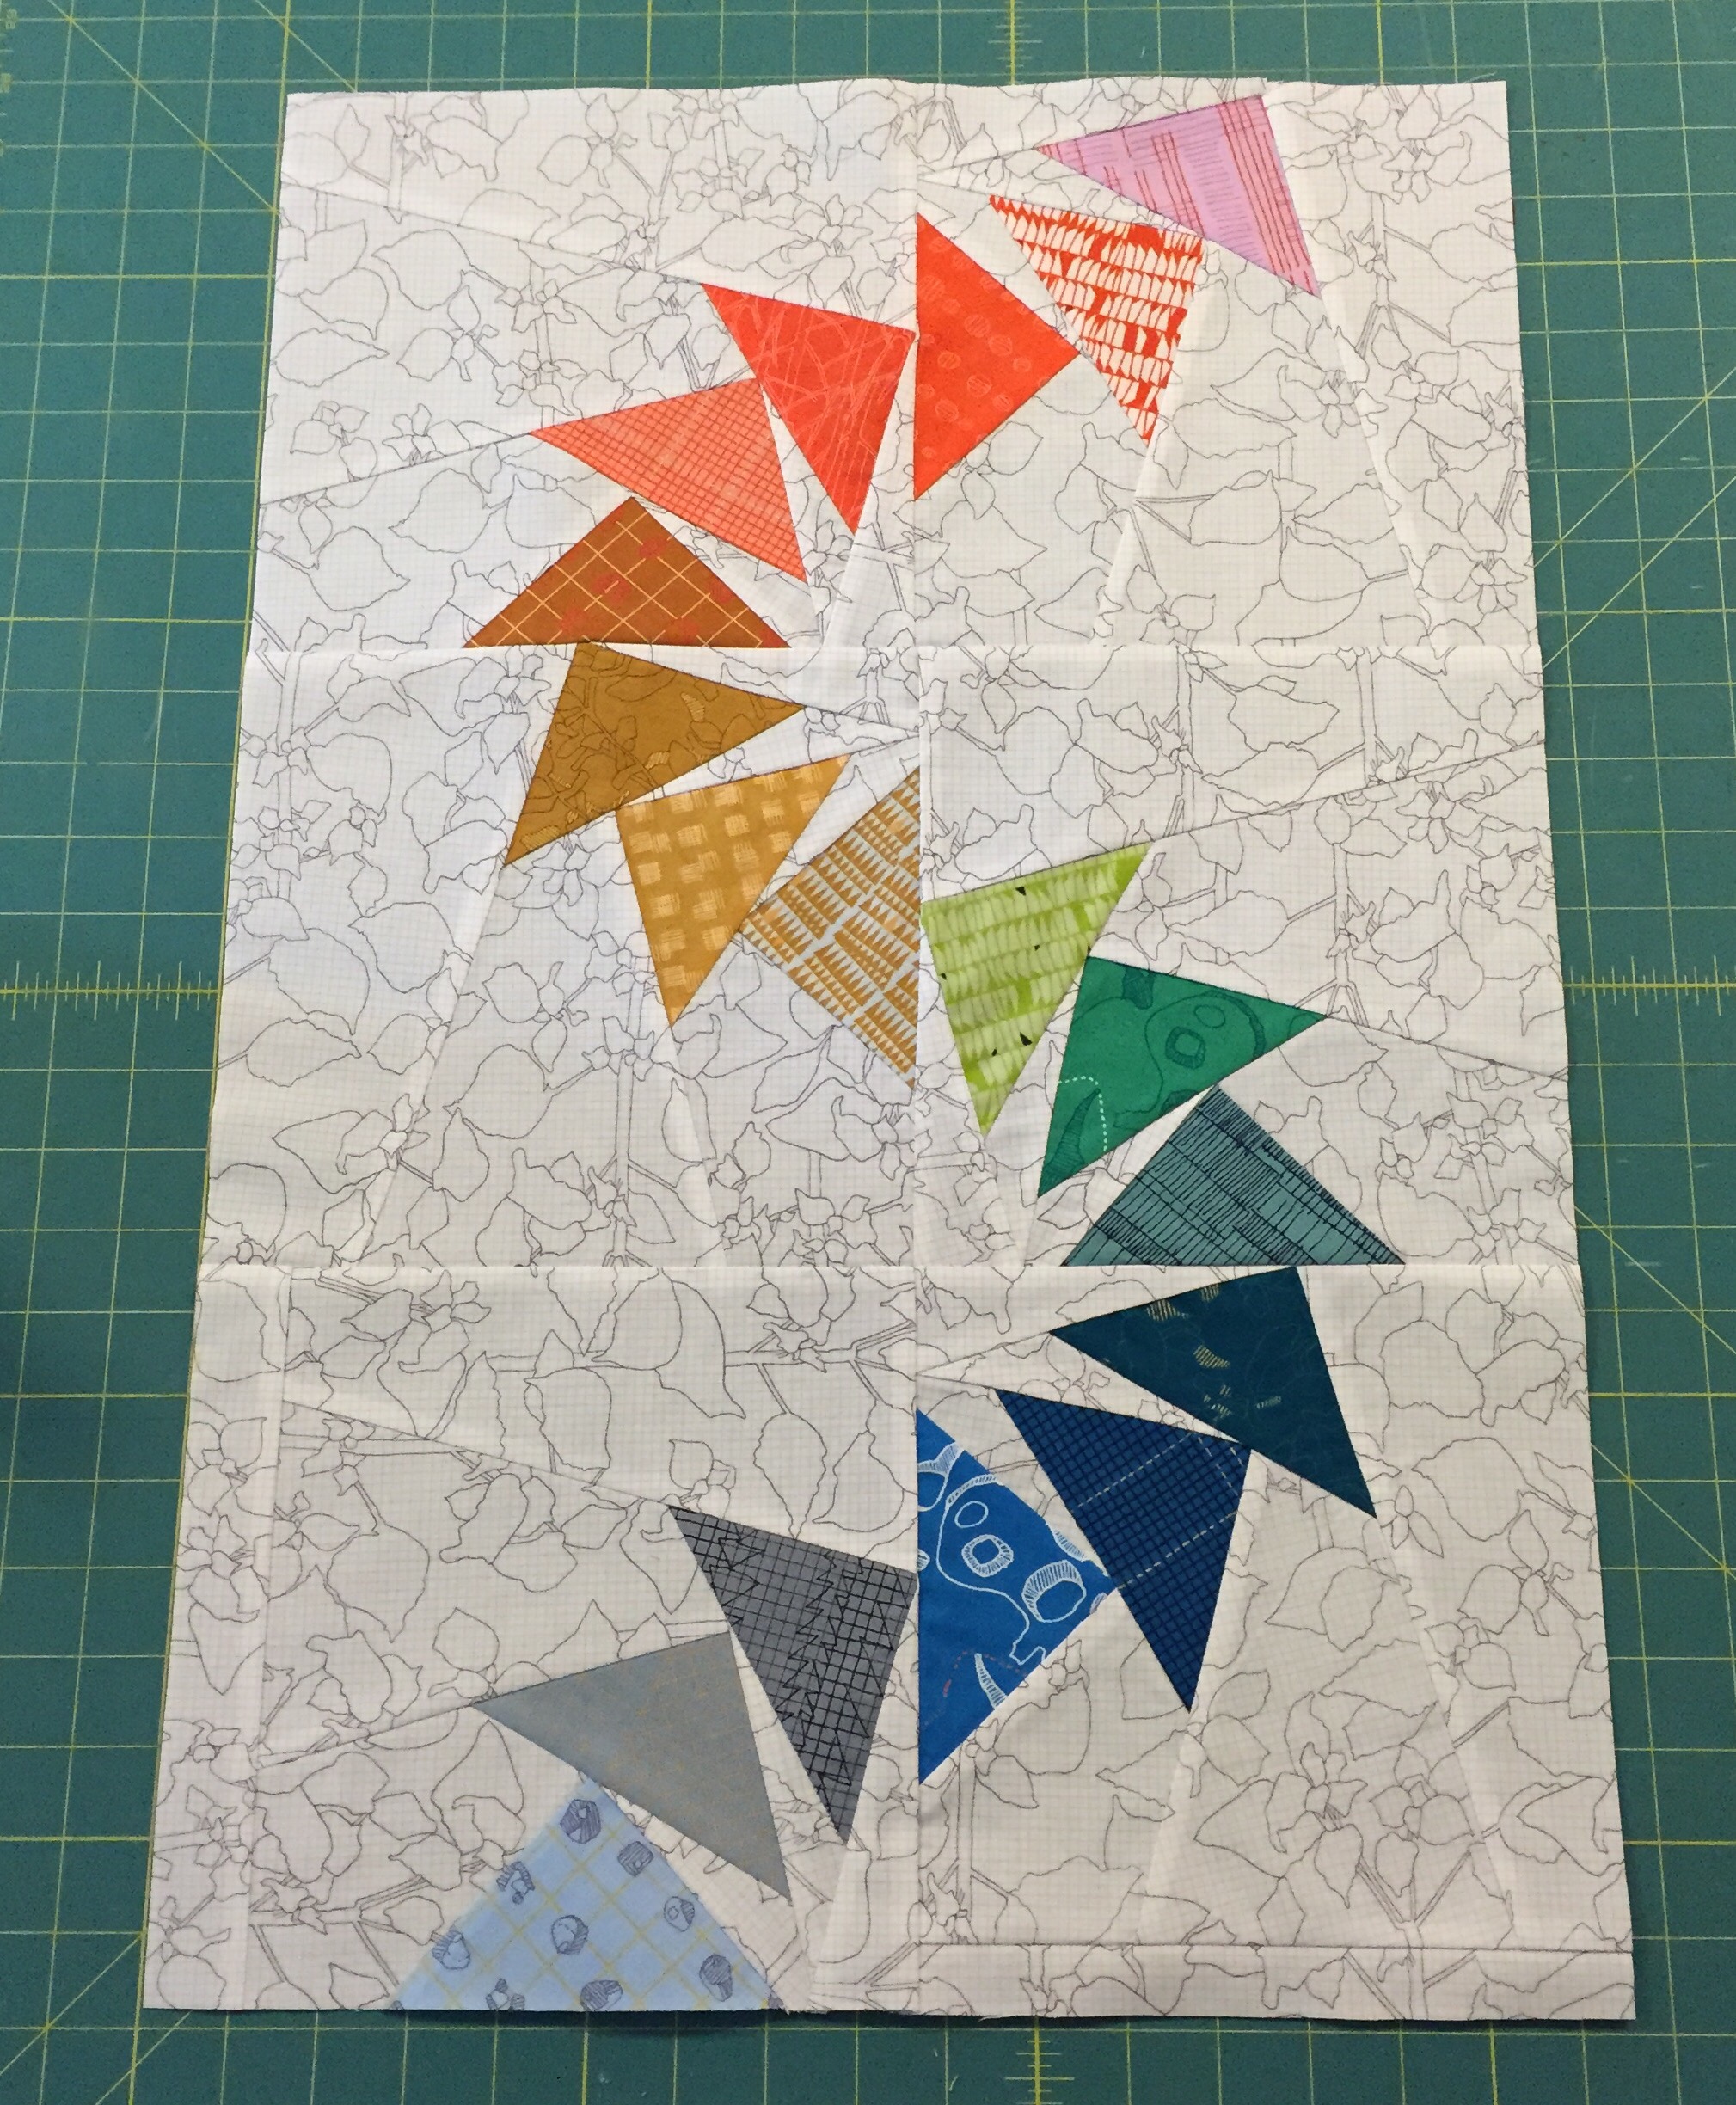
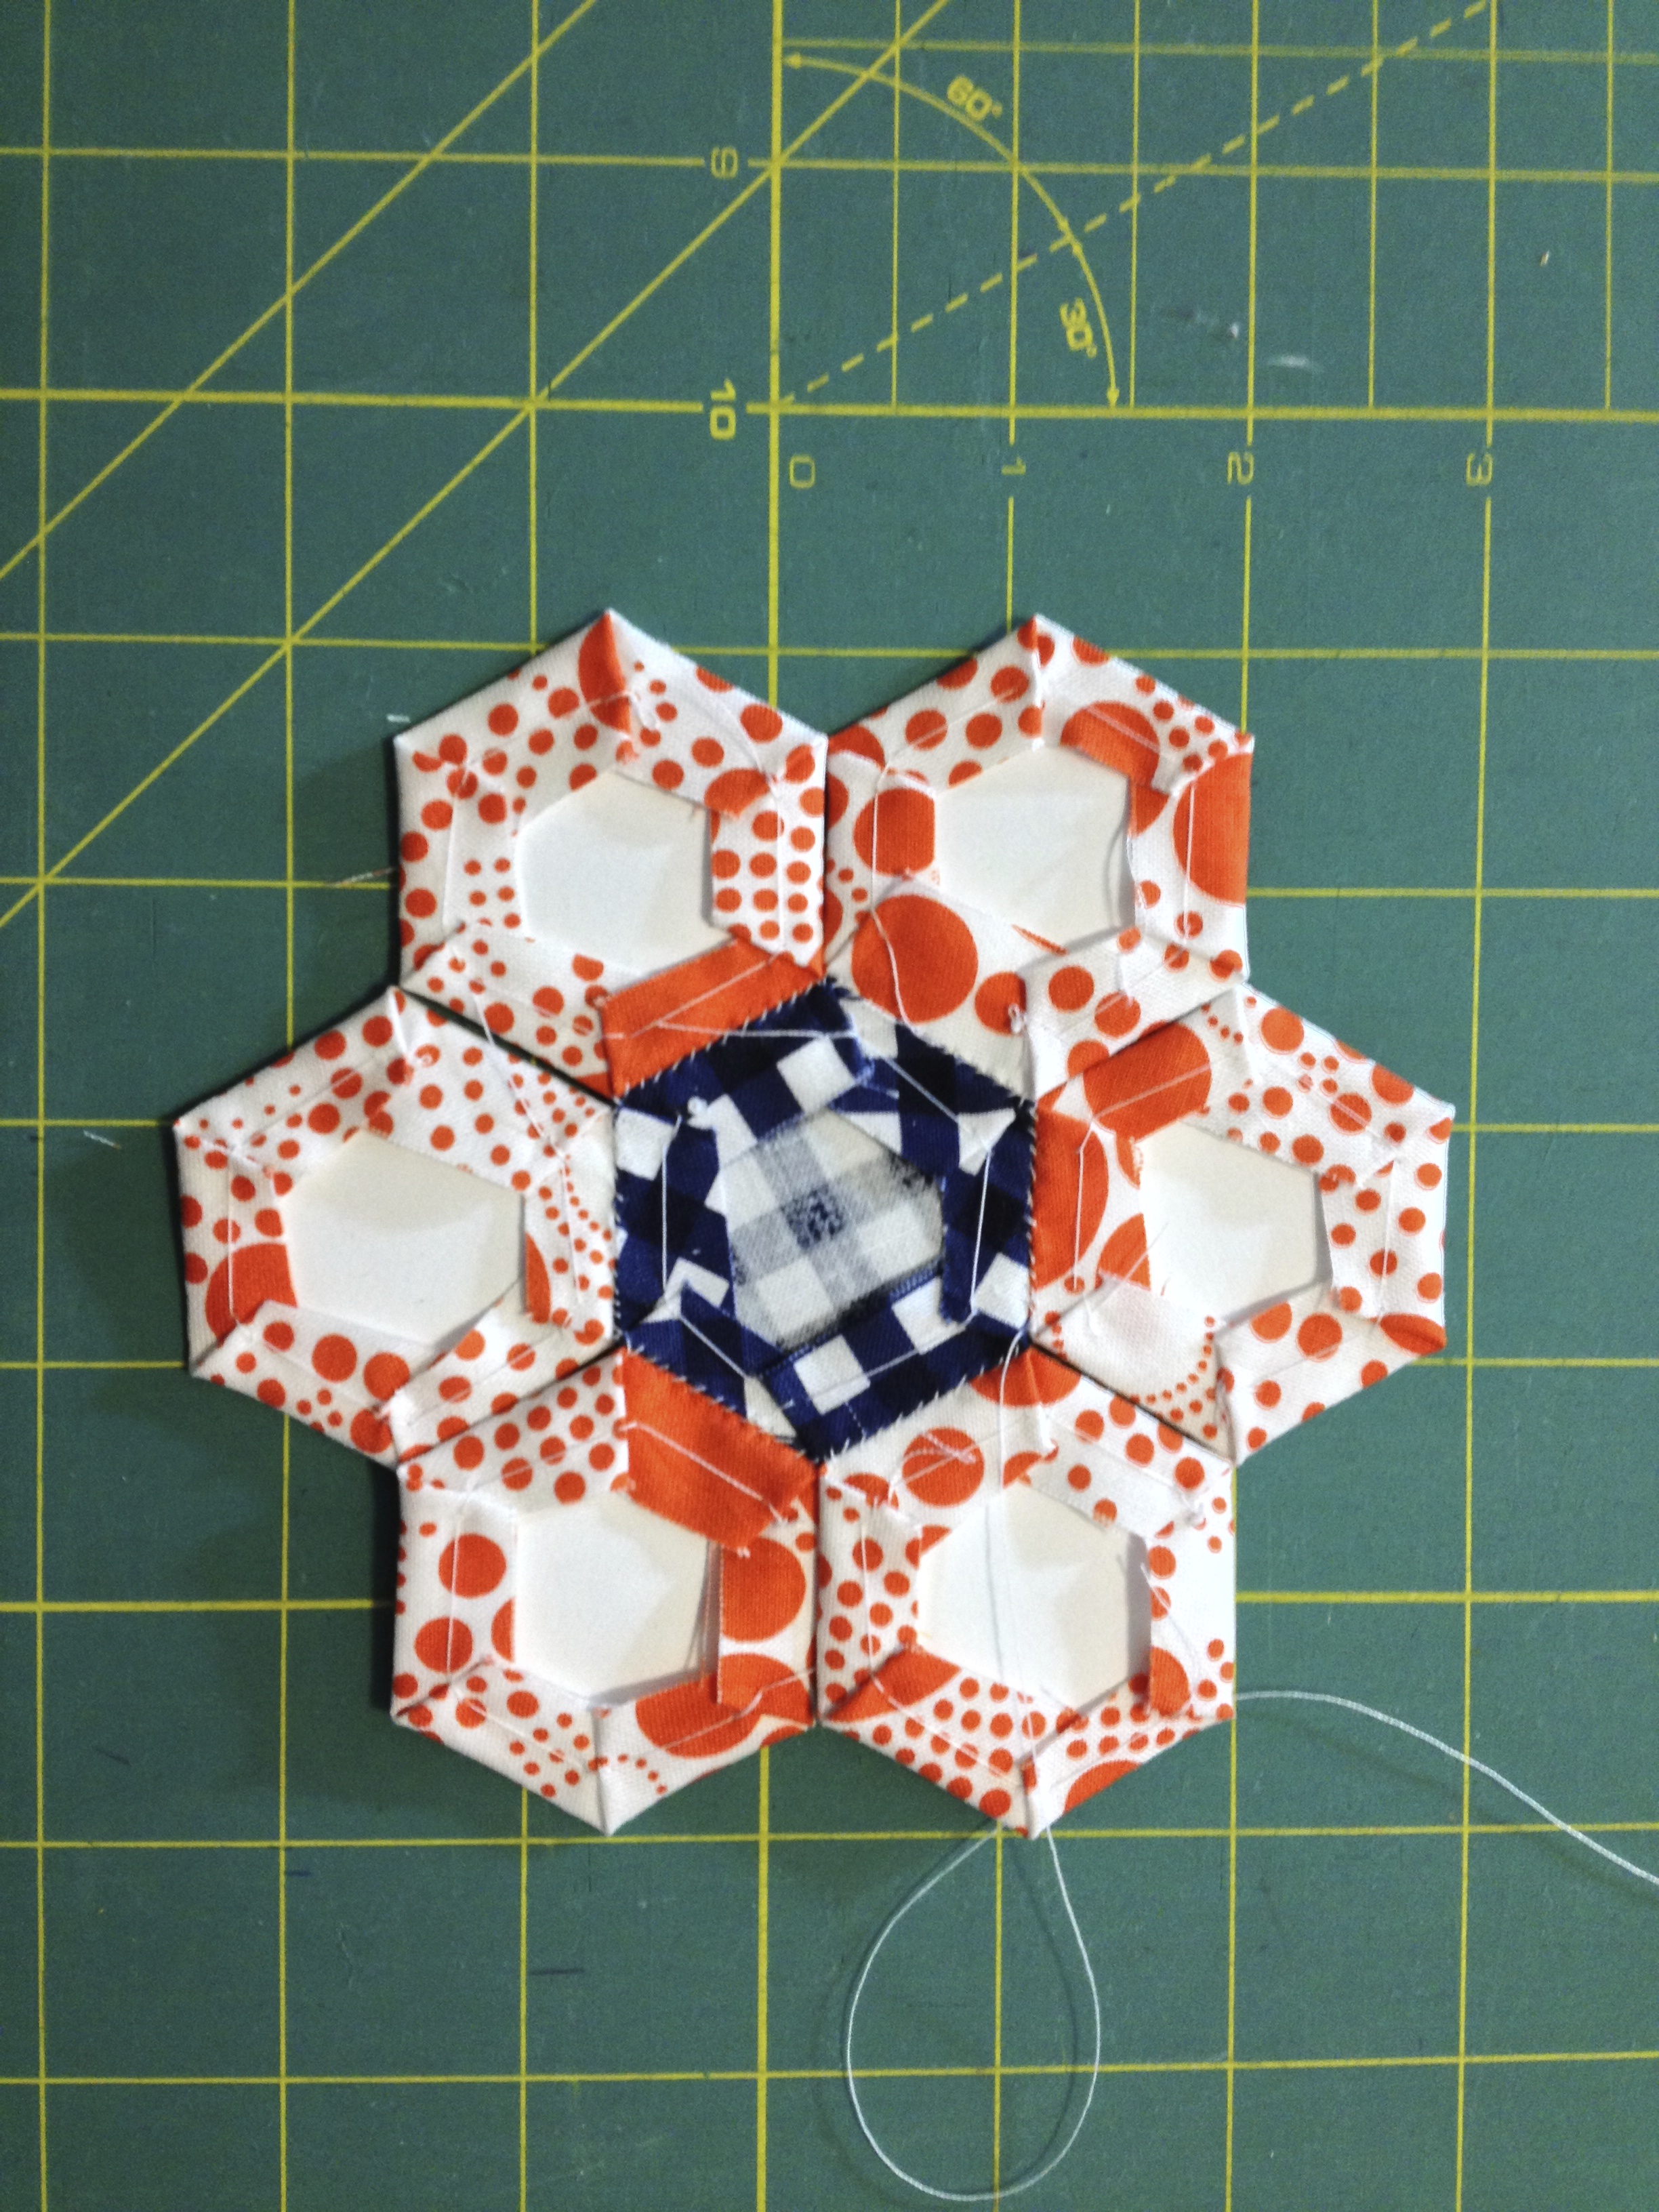
This is the Lazy Daisy block designed by Amy Gay of Butterfly Angels Quilts. It is a free foundation pieced pattern that I thought would make a great block for a Sewing Bee that I am currently involved in with the DC Modern Quilt Guild. This is the first time that I’ve joined a Sewing Bee. 5 of us have been grouped together and each month one of us asks the other 4 to sew up a few blocks using the pattern and fabric selection of our choice. We can provide fabric or ask for the others to sew from their stash.  My hive will be sewing for me in February.

If you are making a block for me, either because you’re in my hive, or just because you’re my friend and know I would love to have a block from you, please read through this entire post before starting. I’d like to make sewing this block as simple as possible and I hope the info and photos here will save you some time. Thank you in advance!!

fullsizeoutput_2237

My fabric selection

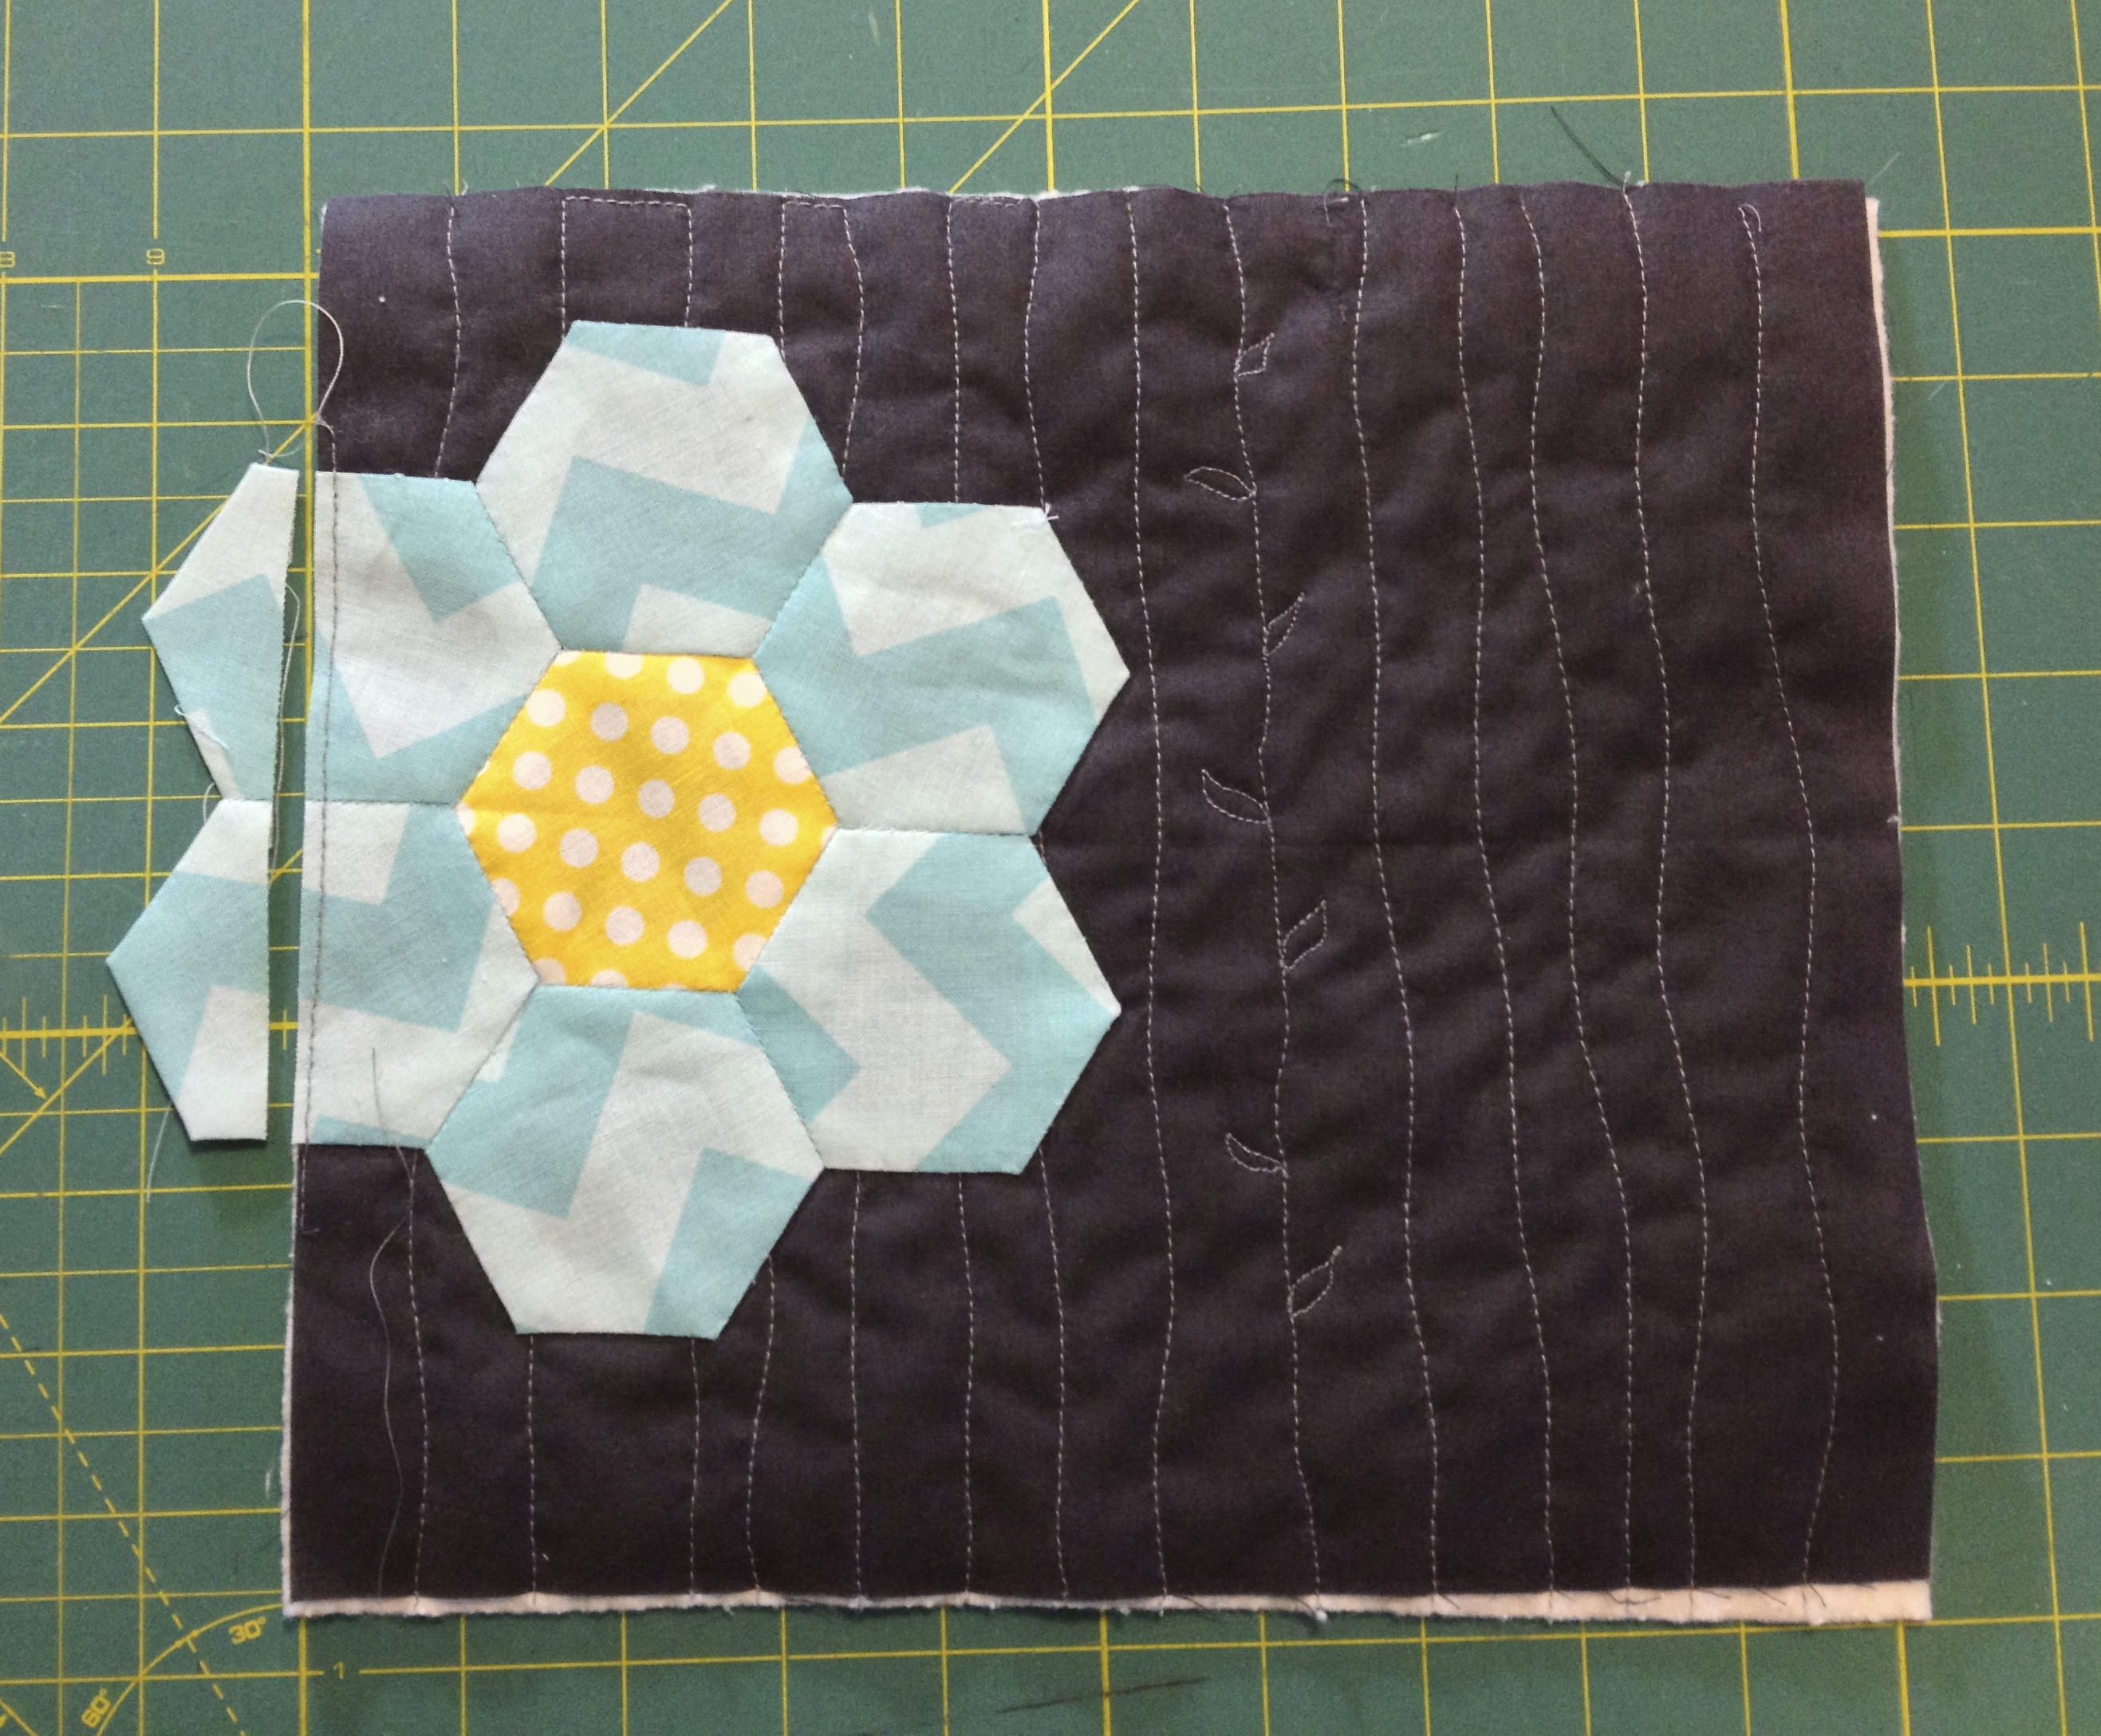
I am going to ask for white or light cream solids or low volume prints for the daisy petals. I would like blue sky colored fabric for the background and prefer solids, or like-solids, although I can see how some prints might work well too – I just don’t seem to have them in my own stash. I would like these to be any value of a blue you could imagine in the sky. True blues, even navy but not aqua or turquoise. Finally, I would like the centers to be yellow and/or gold.

fullsizeoutput_2236
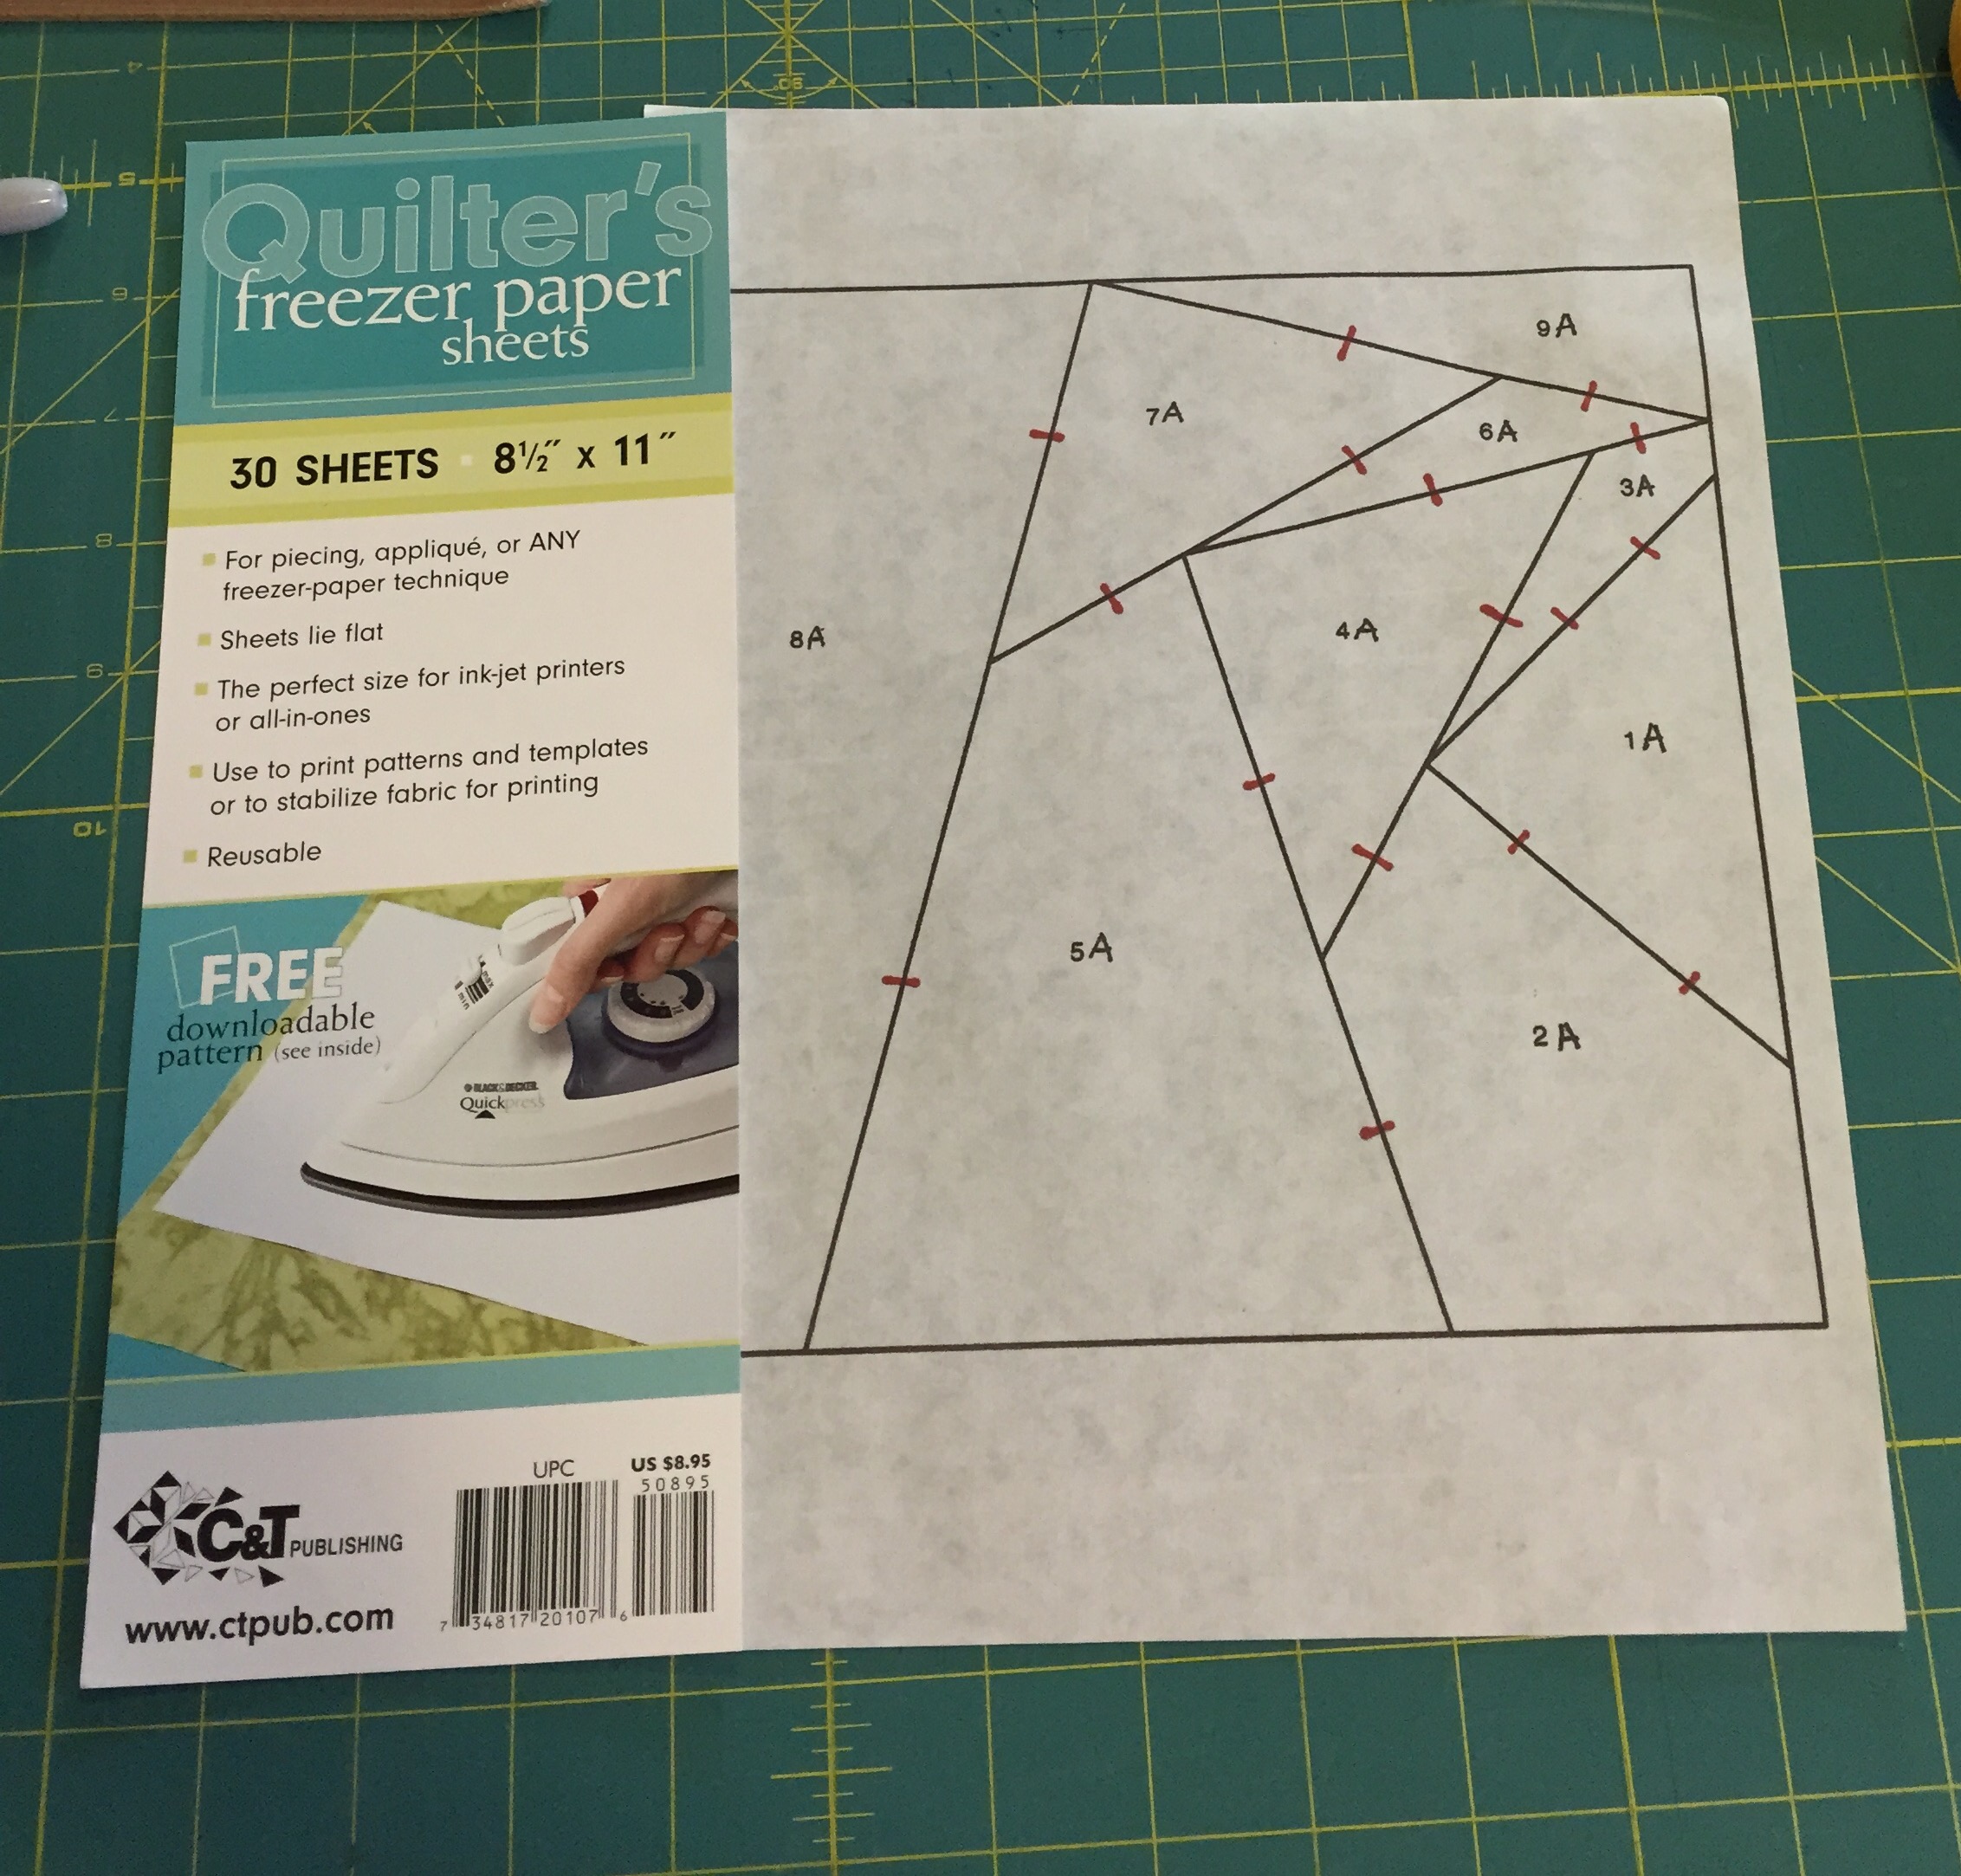
A word about paper: I like to use Carol Doak’s Foundation Paper. It is a thin paper that you can somewhat see through that tears away easily when you are done.

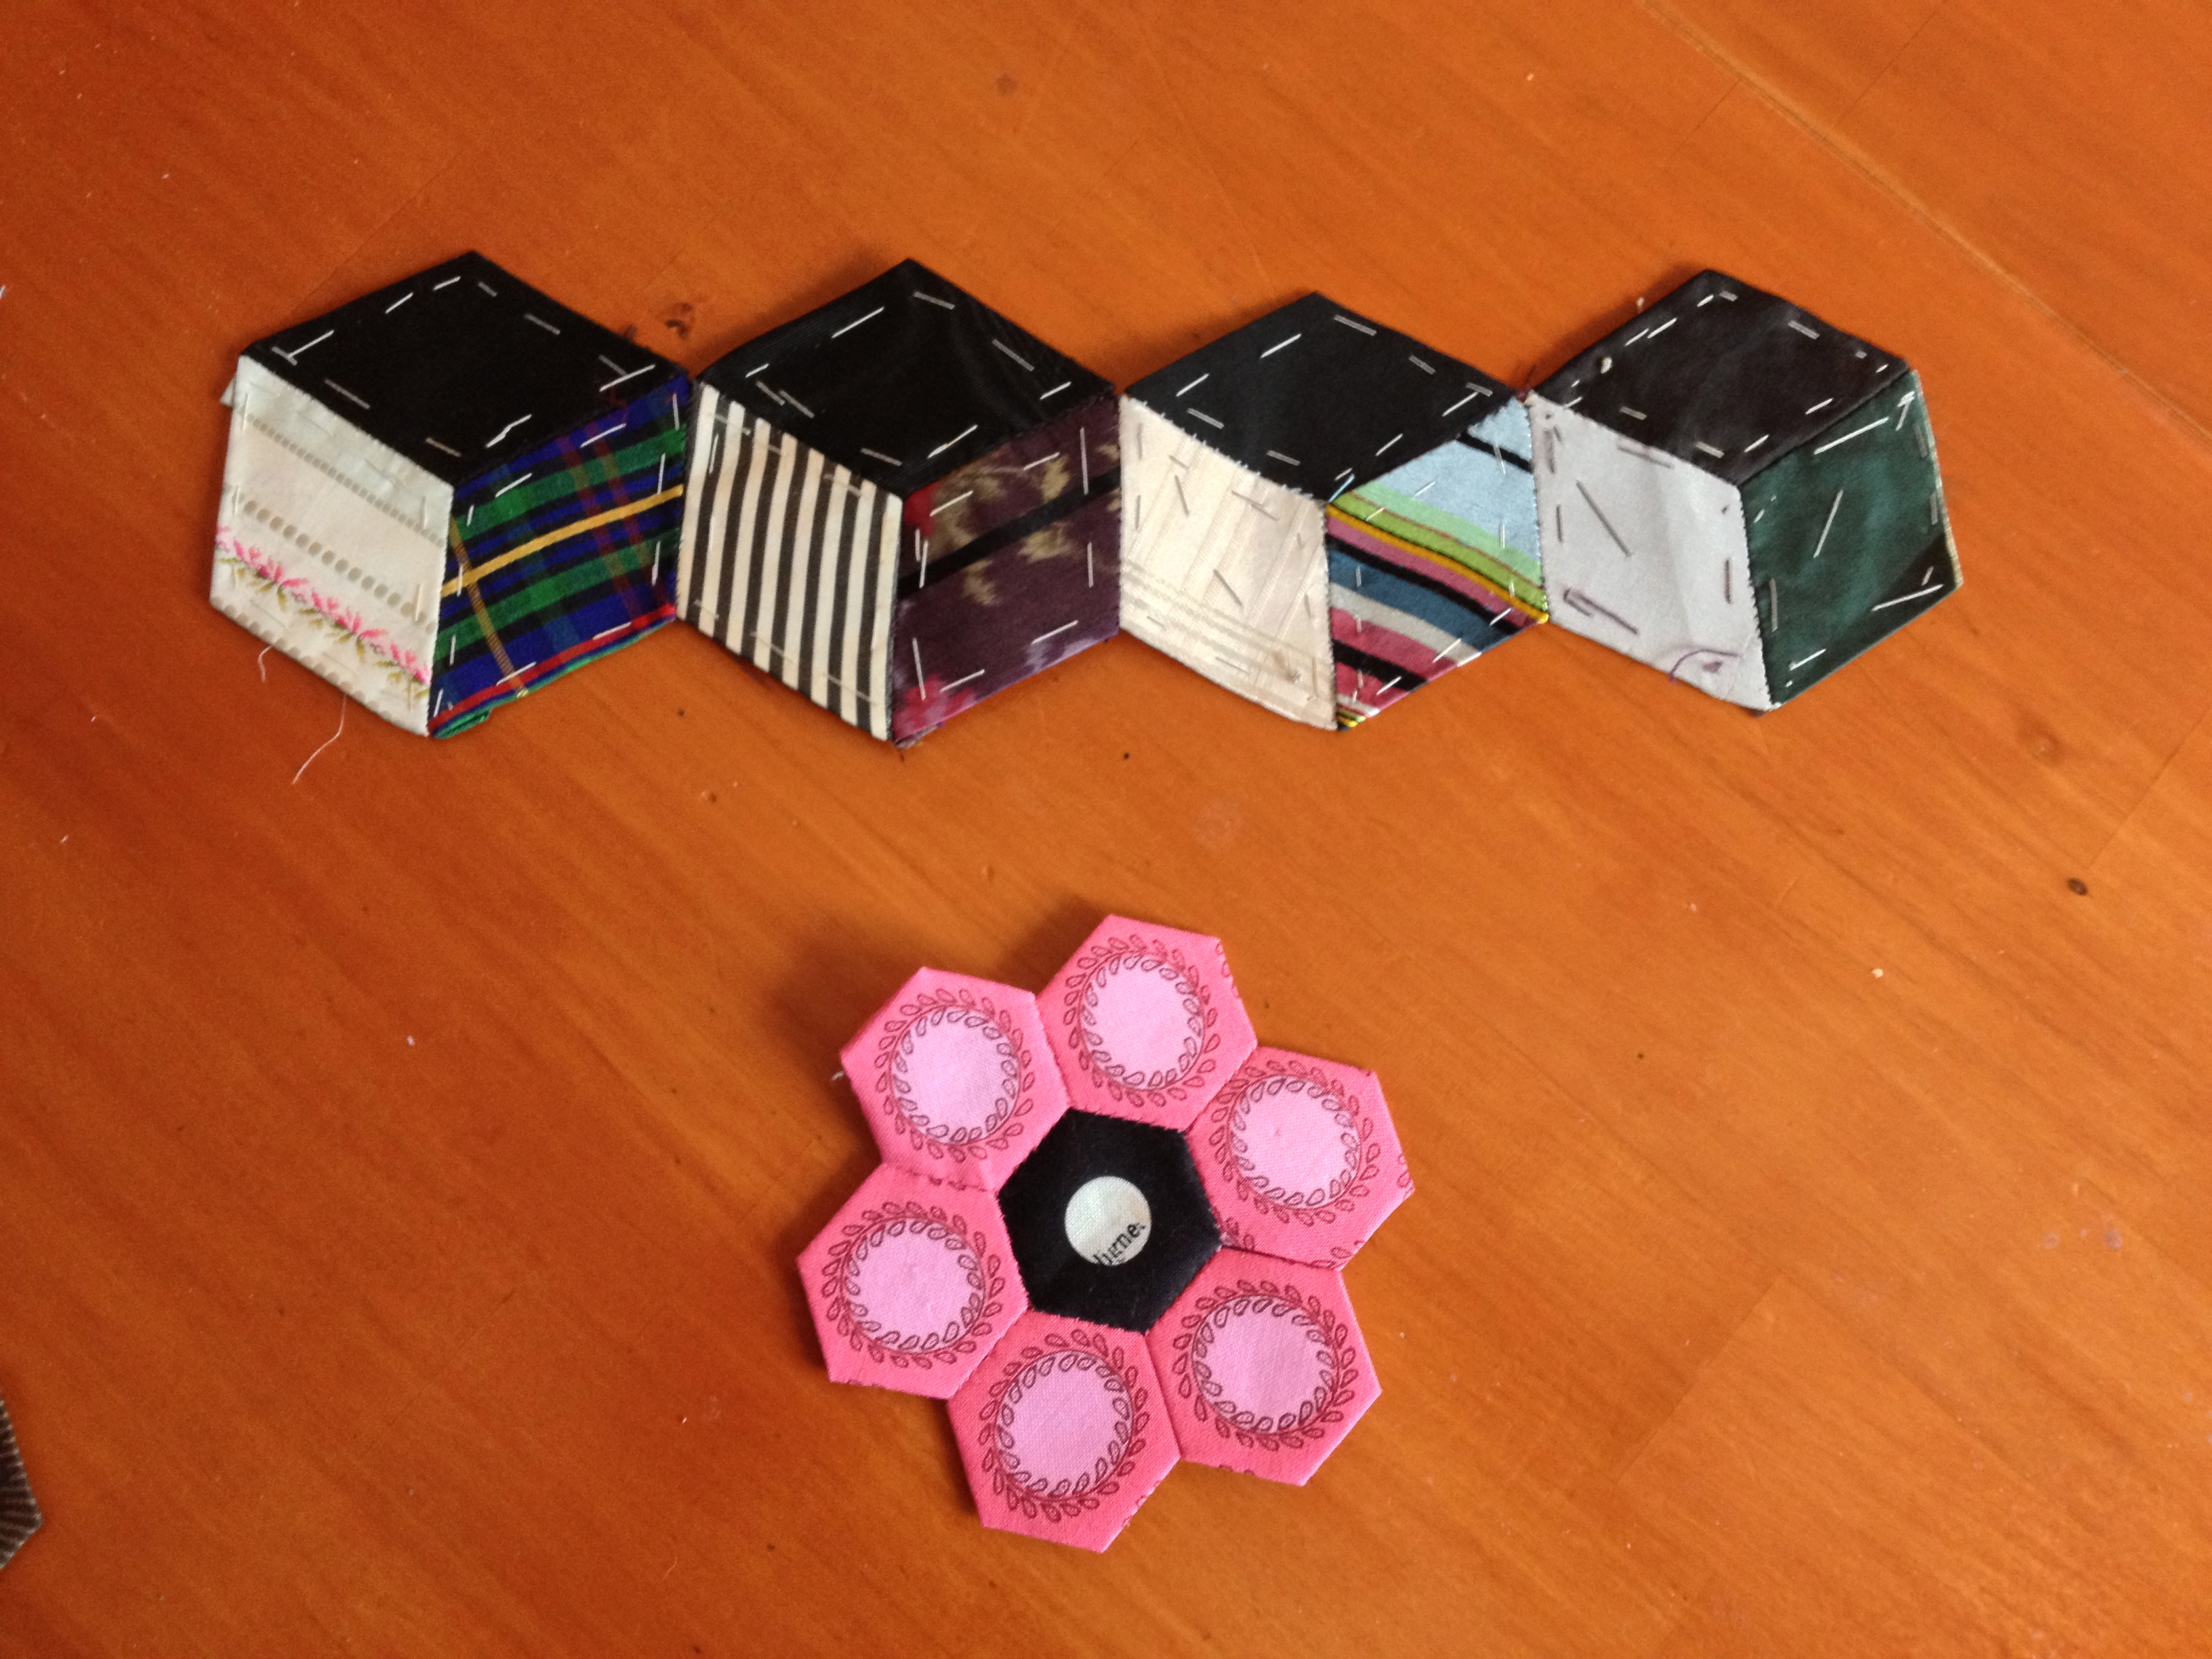
This pattern consists of 1 title page and 4 pattern pages. The only directions are what is printed on the title page as the “sewing order”. After making up the block myself, I thought it would be helpful to my bee-mates to have more instruction. I found the block easy to sew once I figured out a few logistics. The petals are each pieced separately and then joined together.fullsizeoutput_2238

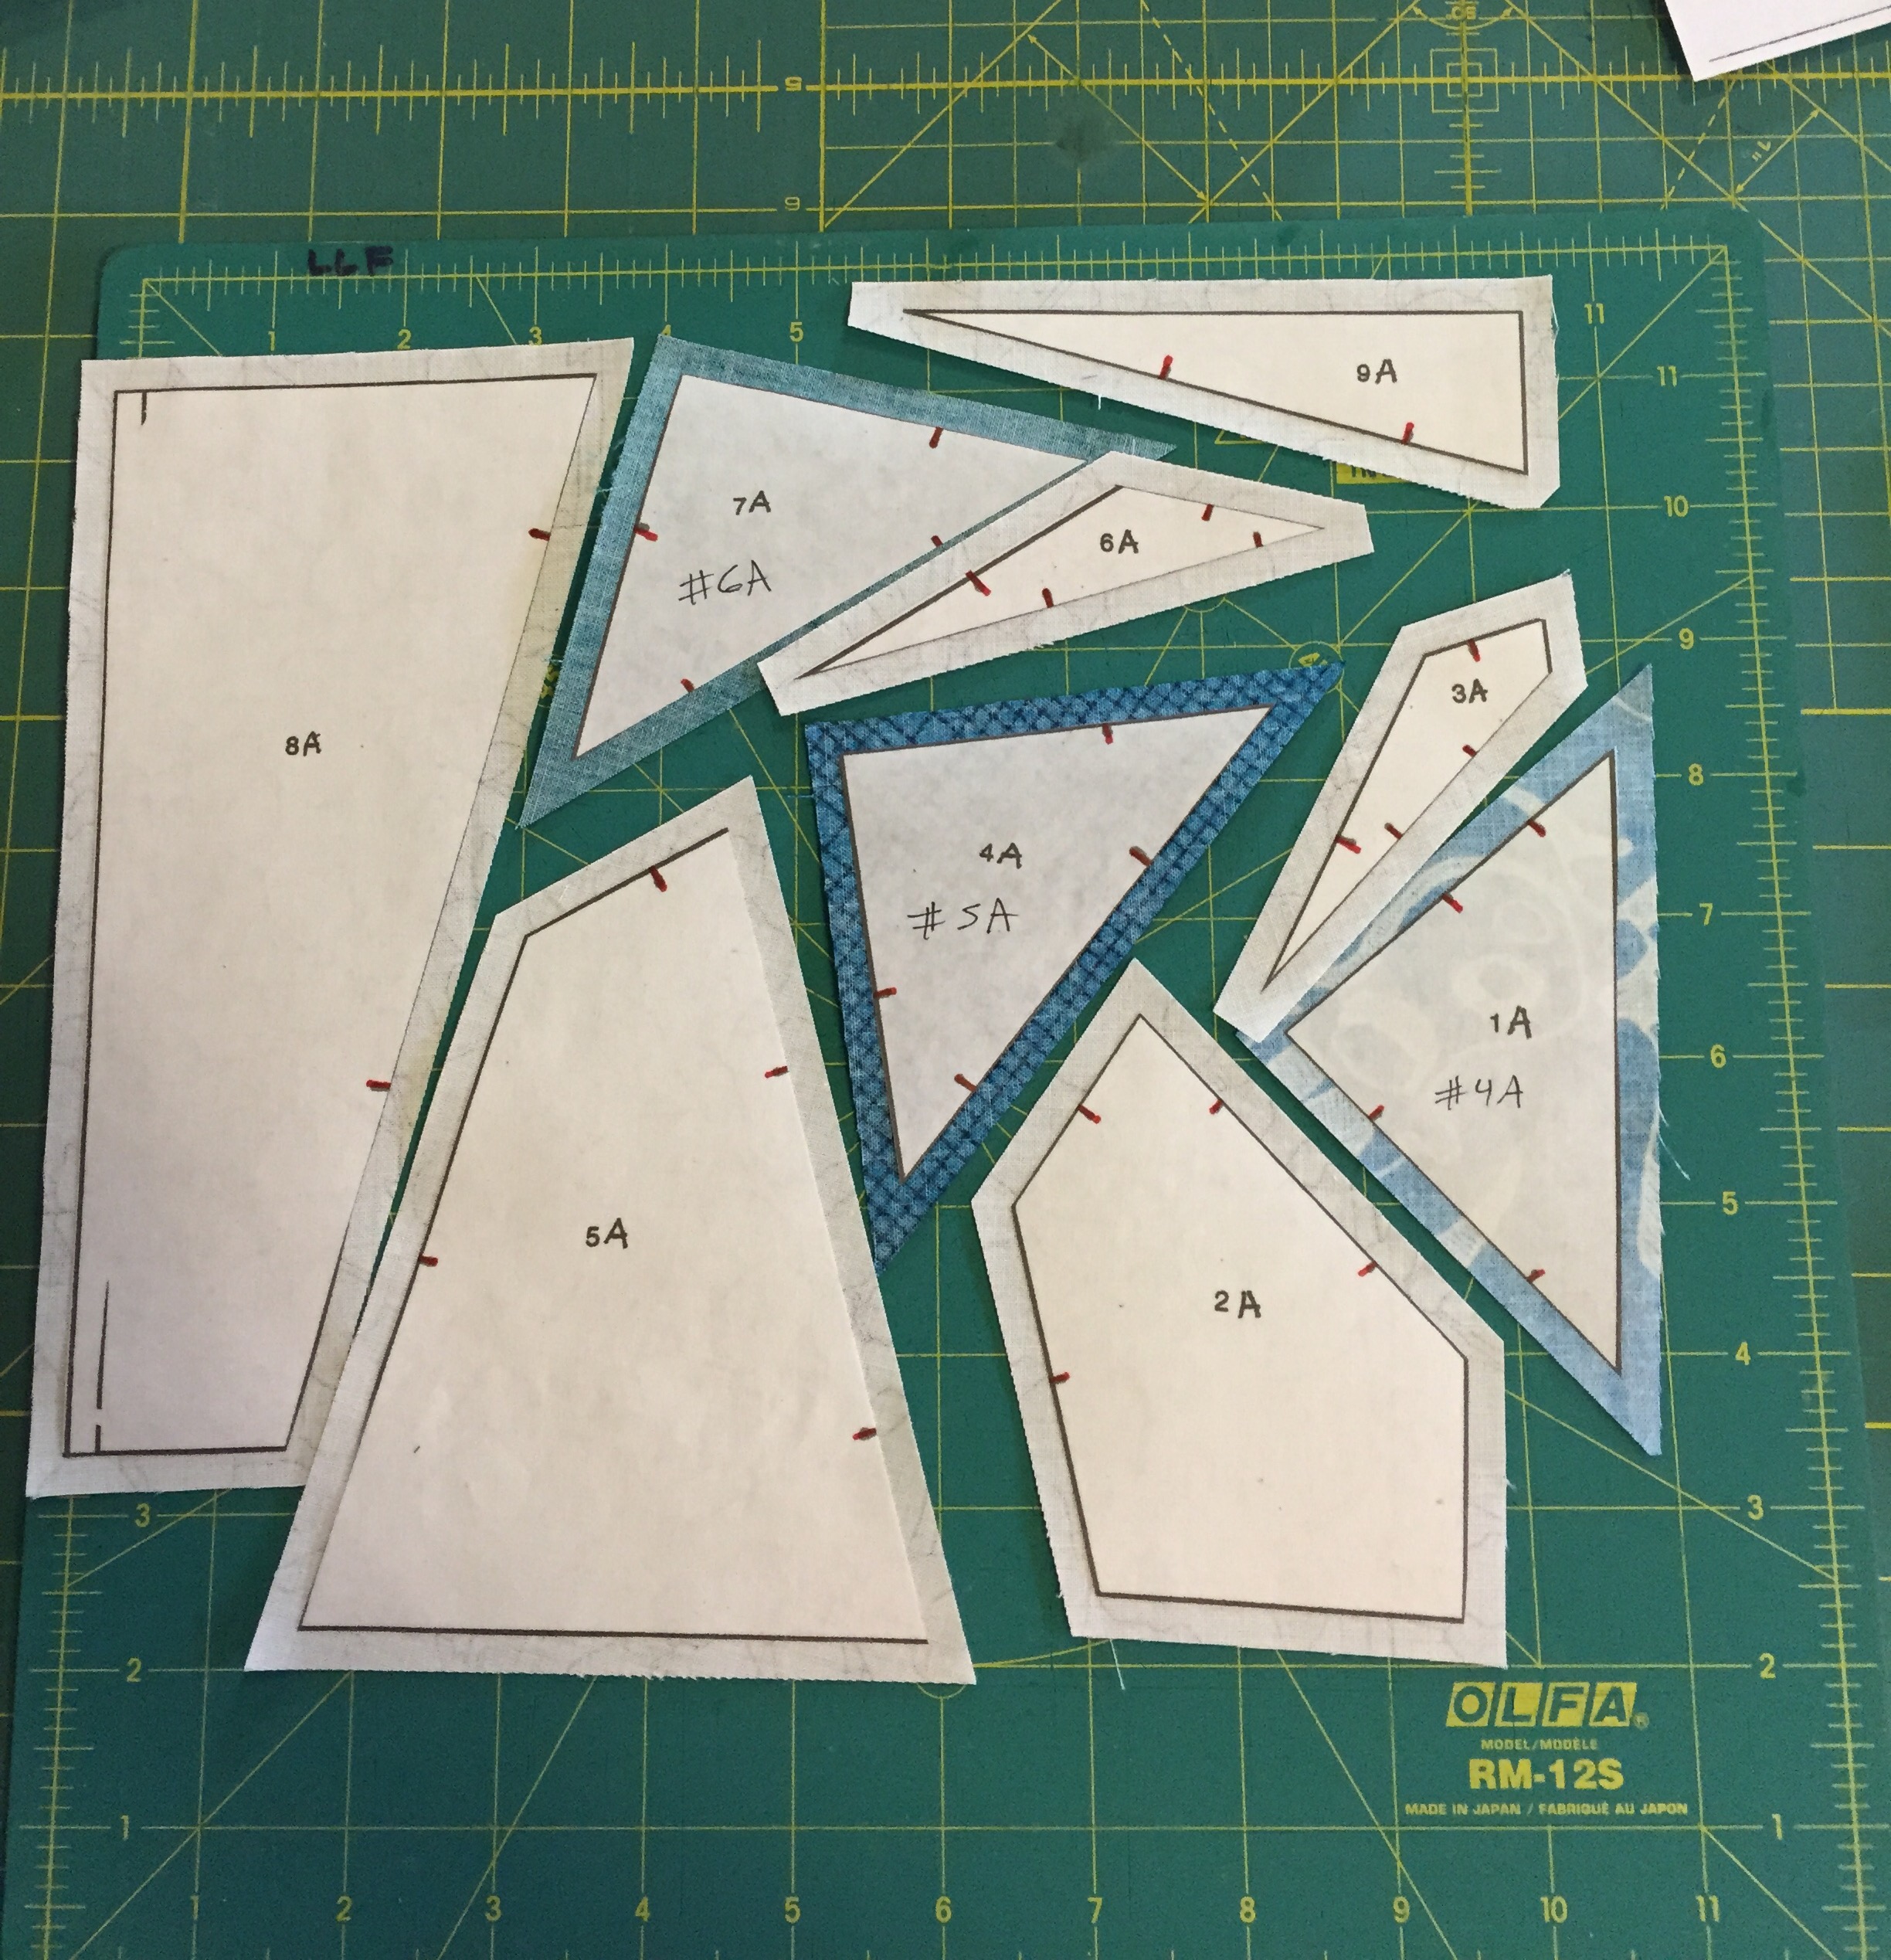
The first step was to rough cut around each of the paper pieces. Petal D has to be taped together. I went ahead and precut my fabric into the following size pieces:

White:  (4 pieces) 3 x 8″ and (2) 4 x 8″

Blue background: (2) 3″ squares cut diagonally,   (2) 4″ squares cut diagonally, (4) 3 x 8″, (2) 4 x 6″   To be honest – I didn’t cut enough blue at first and had to cut more.

Yellow/gold: (3) 3″ squares

Each petal piece (A thru H) starts with a white fabric strip glued onto the back side of the paper. The wrong side of the fabric is glued to the wrong side of the paper. I used an Elmer’s purple washable glue stick which worked like a dream. It goes on purple but dries clear. It holds the fabric to the paper through all the sewing and trimming but peels right off at the end.

fullsizeoutput_2239

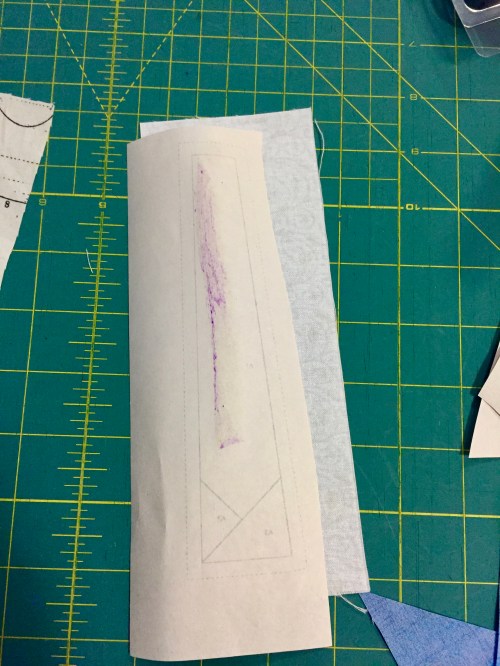
Put a good amount of glue onto the back of the paper where the white fabric strip will be placed and then . . .

fullsizeoutput_223a

. . . glue the wrong side of the white fabric piece to it. Cover the whole A1 area.

fullsizeoutput_2228

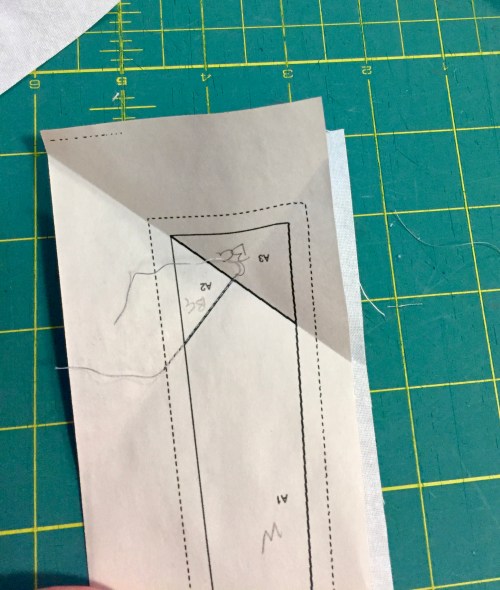
I like to make a crease where the sewing line is going to be. (Between A1 and A2 in this example)

fullsizeoutput_2227

Place a blue fabric piece (right sides together) over that crease such that when sewn and ironed in place, it will cover A2 on the paper.

fullsizeoutput_2226

I shortened my sewing stitch to 2.0 and sewed as shown. I sewed through the marked seam allowance and I did sew just one stitch into A3.

fullsizeoutput_223b

Leaving the fabric exactly as sewn, fold the paper only back along the stitching line and trim to a 1/4″ seam allowance. Now you can iron the blue fabric into place.

fullsizeoutput_223c

Crease along the next sewing line

fullsizeoutput_223d

Place the next blue piece

fullsizeoutput_223e

Sew the line between A2 and A3

fullsizeoutput_223f

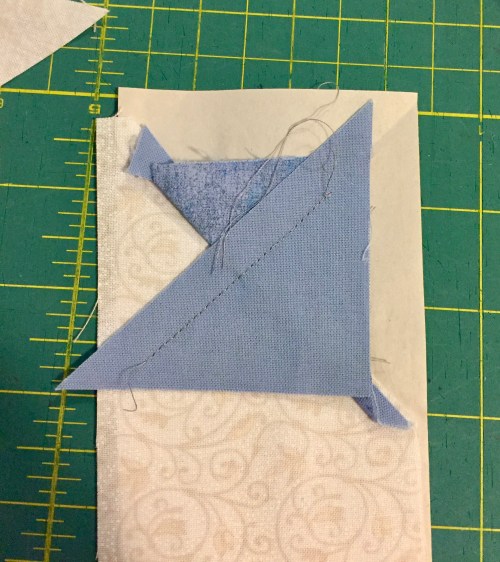
This shows what the right side looks like after sewing

fullsizeoutput_2240

Again, leaving the fabric as sewn, fold back the paper only along the stitching line and time leaving 1/4″ seam allowance.

fullsizeoutput_2241

Press the blue piece back into place

fullsizeoutput_2243

Now trim along all of the dotted lines on the paper

fullsizeoutput_2242

Right side of trimmed piece

fullsizeoutput_2245

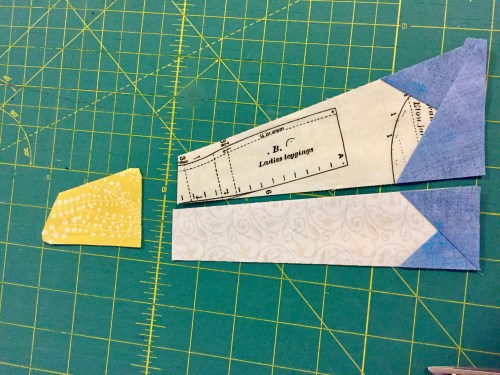
Once the A & B petals have been pieced and trimmed, they can be sewn together. Glue the yellow fabric to the paper piece C1, trim it and then sew this onto the AB piece.

fullsizeoutput_2244


I like to line up each of 2 pieces that are going to be sewn together by placing them right sides together and then inserting a pin through the ends of the seam lines to make sure they are exactly lined up correctly. I did not get a photo of this.

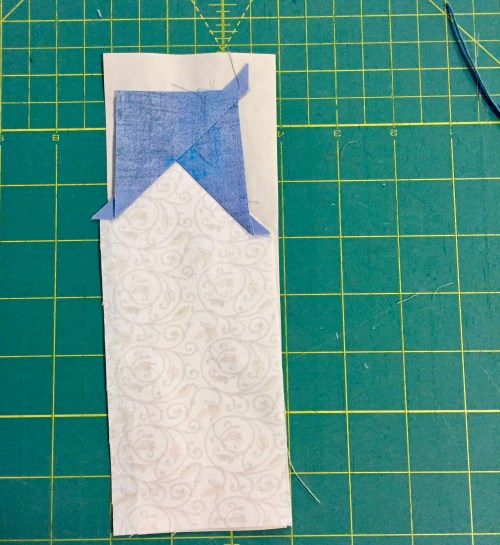
Also – you do have to make sure you are joining the pieces along the correct seam line. The photo above shows the correct orientation of these 3 pieces. A is on the bottom when looking at this from the right side. B is on top in this photo.

fullsizeoutput_2246

Repeat the process with D-E-F and G-H-I and then join them together. (see note below about removing paper from seam allowances after sewing)fullsizeoutput_2247

fullsizeoutput_2248

I did remove the paper from the narrow seam allowances after sewing and pressed those seam allowances open to help the block lay flatter. I removed the paper from the seam allowance of A & B before sewing C to it, etc.

fullsizerender

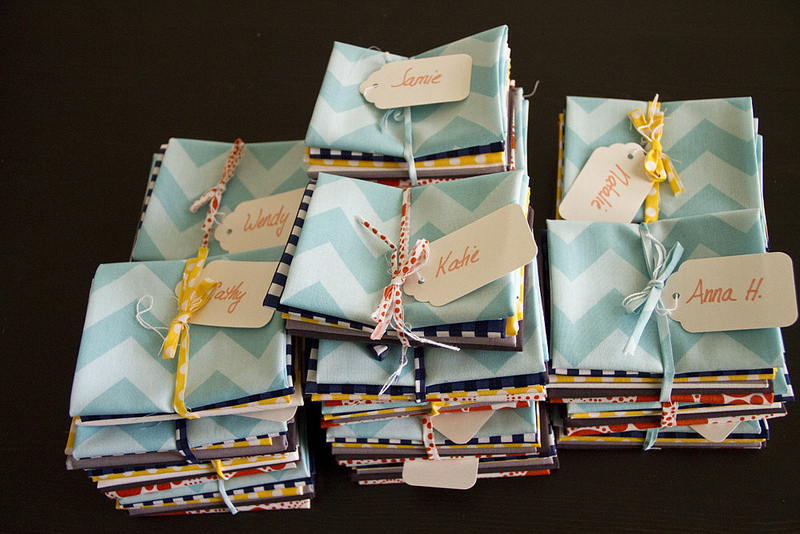
If you are in my hive, I would like to supply you with the printed papers for 2 blocks and a glue stick. If I do not see you at an upcoming meeting, I will mail these to you. Please leave the paper in place when you return the blocks to me. I will remove it when I sew the quilt together.

If you are not in my bee but are willing to make a block for my quilt, I would be absolutely overjoyed to have more blocks! I can also provide you with the papers and glue if you ask me or you can use your own.

Thank you!


4 Comments

Filed under DC Modern Quilt Guild, Uncategorized

Foundation piecing with Freezer Paper

DC Modern Quilt Guild has a skill building Quilt Along going on right now. Anna from Life Sew Crafty has challenged us with a weekly quilt block. Anyone can join in this fun challenge! Go to Anna’s blog or join this Facebook group.

Blocks 1 thru 5 are pretty straight forward. Block 6, however, is one of several “theme” blocks the quilt will contain. I chose a “flying geese” theme and found this trail of geese block from Daniel of Piece and Press. It is a foundation pieced block and he says in his post that he used a freezer paper technique to sew it.

I had some freezer paper sheets that are sized for printing. After resizing the block to fit the size I needed for the QAL quilt, I printed it onto the freezer paper sheets and made two red registration marks between each piece. This block only has 9 pieces which I think made it especially suitable for this technique. *The complete trail of geese block contains 6 of these individual blocks – 3 of which are mirror image.

Each template piece was cut out and ironed onto the wrong side of it’s corresponding fabric and then the fabric was cut 1/4″ larger than the template.  In this block six of the pieces are background and three are the geese. I numbered the geese (and my fabric) 1 thru 18 in order to have the geese end up in the color order I wanted.

They were arranged back into their block positions and then sewn together in order –  the registration marks made it very easy! I placed right sides together and sewed along the paper edge – not through it.

Once done, the paper was simply and easily peeled away. This is so much easier than removing paper from stitching. I’m not sure this technique would work for a more complicated foundation pieced block, but it sure was great for this one!
There is a great round-up of foundation piecing tutorials by VeryKerryBerry here.

This was a fun block to sew and I look forward to the upcoming theme blocks during this Quilt Along.

7 Comments

Filed under DC Modern Quilt Guild, Uncategorized

Angela Walters is amazing!

Angela showing one of her quilts.

Angela showing one of her quilts.

I had the extreme good fortune this past week of hosting Angela Walters in my home while she was in the DC area giving lectures and a workshop to the two quilt guilds that I belong to. She is a long arm quilter who’s work is so exquisite that many of the modern fabric and pattern designers (Tula Pink, Jacquie Gering, Cherri House to name a few) ask her to quilt the quilts they are going to display at market to sell their designs. See her quilting portfolio here.

Angela quilted this quilt that is on the cover of Tula Pink's book (and all of the quilts inside).

Angela quilted this quilt that is on the cover of Tula Pink’s book (and all of the quilts inside).

My traditional guild, The Needlechasers of Chevy Chase, brought Angela to the DC area to give a lecture and a workshop. DC Modern Quilt Guild got to take advantage of her being in town and scheduled a lecture as well. When I asked Angela which type of guild she normally speaks to, she said that she enjoys to speak to both traditional and modern guilds and considers herself “bilingual”. She also has a theory that the two groups are getting closer together and that as the younger modern quilters gain more sewing experience, there will be less and less difference between them. I found this to be very interesting and hope that I am not misspeaking what she said about this.

xx

This quilt highlights Angela’s fabric line “Drift”.

I think that the take away message that Angela gives when she teaches is to not let free motion quilting intimidate you. Have fun with it! She learned to quilt on a long arm machine without any preconceptions of what the quilting should look like. She had hand quilted before she got her first long arm machine. She didn’t know at the time that it was possible to quilt on a conventional sewing machine. (Lucky her!)

xx

There is no doubt that she loves to quilt and she wants everyone else to love it too! Her website is www.quiltingismytherapy.com. There are links there to her blog, to video tutorials, to free quilt patterns, to her shop and to where she’ll be teaching next. If you are not lucky enough to catch her in person, she currently has four Craftsy classes on free motion quilting which surely must be the next best thing – or even better because you can pause it and play it over and over while you’re practicing.

"Impracticality" Pieced and quilted by Angela Walters. Featured on the June/July 2013 issue of Quilter's newsletter. Click on photo to be taken to free pattern.

“Impracticality” Pieced and quilted by Angela Walters. Featured on the June/July 2013 issue of Quilter’s newsletter. Click on photo for free pattern.

Angela has written several books and has YouTube video tutorials. She has recently announced another book which will be available in April 2015 that she wrote with her 9 year old daughter about quilting with kids.

xx

I am so excited about free motion quilting now and hope to practice on some smaller projects like tote bags or pouches. The smaller size will help me feel more comfortable when I go to quilt something larger – I think! I hope!

I have always defaulted to using my walking foot but I am encouraged to try something new. As I’m working I’m going to hear Angela telling me that echoing is my friend and that there are no mistakes that can’t be made to look better with more quilting. I’ve also found that using a coordinating thread color can make even a multitude of flaws look pretty darn good.

Angela and myself.

Angela and myself.

Thank you, Angela, for being such an inspiration and for sharing your love of free motion quilting with us!


4 Comments

Filed under DC Modern Quilt Guild, NeedleChasers of Chevy Chase, Uncategorized

Fabric Postcard

Fabric postcard

Fabric postcard – Size is 5 x 8 inches.

Nicole at the Finch Sewing Studio is celebrating the 1 year anniversary of her shop being housed in an old building in the historic business district of Leesburg, VA. I met Nicole through the DC Modern Quilt Guild and I have been an avid supporter of her business.

Photo from July 2014.

Photo from July 2014.

It hasn’t been hard to support her. I have had so much fun taking classes with my sister, my daughter, and my friend Anne at her shop. She always has an interesting and varied selection of modern fabric. She has inspired me to try my hand at sewing clothing that actually fits me.

Last night, knowing that I would see her today (to shop her Anniversary sale!), I made a little fabric card to give her.

xx

How did I do?

I didn’t take any “progress” photos. Basically, I new that I wanted to replicate the front and side of her building. I wanted the front of the building, but also the Finch sign and pretty bay window on the side. I searched on the Finch Facebook page, Instagram, and Google Maps for photos of the shop.

I wanted the card to fit in an envelope that is 5-1/2″ by 8-1/2″ which is a regular sized piece of paper folded in half. I sketched out the design in pencil.

Pencil sketch

Pencil sketch

I realized at this point that the overall design had to be a little smaller than this to fit in the card and for me to do a satin stitch around the edges. I simply reduced this drawing to 85% on my copier and cut out the pieces for the front of house, side of house and roof to use as templates.

Everything sort of fell in place after that. A piece of Pellon Peltex (really stiff interfacing) forms the core of the card. I used Wonder Under to fuse the pieces to the card. I also had to interface the white building pieces to avoid having the blue of the sky or the red of the brick walk show through. Sewing themed fabric was incorporated just for fun. I debated about free motion stitching the “Happy Anniversary” at the top. I knew it would look messy. In the end, though, I decided to go ahead and do it. It is a hand-made card after all!

Happy Anniversary Finch Sewing Studio!


14 Comments

Filed under DC Modern Quilt Guild, Quilt Shops

Mid Atlantic Mod – sewing retreat

I am just back from a 4 day sewing retreat held in Lancaster, Pennsylvania. Mid-Atlantic Mod was arranged as a gathering of three area modern quilt guilds – DC, Philadelphia and Central New Jersey (although there were a few members of other MQGs there as well).

DC Modern Quilt Guild members

DC Modern Quilt Guild members

What a weekend! It is such an absolute pleasure to get away and be with this group of quilters. For a “first time” event, it was extremely well planned by Katie, Jessica, and Andrew. The retreat started on Thursday and didn’t end until Sunday at 6 PM. Participants brought their own projects to sew but throughout the weekend, there were various optional activities that you could chose to do – or not.

There was a tote bag swap. We were given a yard of Robert Kaufman Essex Linen a few months ago to incorporate into a tote bag. On the night of the swap everyone who brought a finished tote bag, got one that someone else had made.

Tote bag swap!

Tote bag swap!

Tote bag that I made.

Tote bag that I made.

Tote bag that I received.

Tote bag that I received  – I love it!

There were 60 minute long workshops on Saturday and Sunday. I taught a workshop on English Paper Piecing. I love that modern quilters are interested in this age old technique. I believe that the reason for this is that it is such a portable project and doesn’t require any special or expensive equipment. Very intricate designs can be sewn together with just a simple hand stitch. Thank you to Paper Pieces.com and the Colonial Needle Company for donating supplies for my EPP workshop.

EPP hexagon "kit" donated by www.paperpieces.com

EPP hexagon “kits” donated by http://www.paperpieces.com

Needles and thread donated by the Colonial Needle Company

Needles and thread donated by the Colonial Needle Company

EPP - Old and new.

EPP – Old and new.

Click on Mid Atlantic Mod – English Paper Piecing to download a copy of the EPP handout that I made up for my workshop. I encourage anyone and everyone to give it a try!

There were 3 progressive quilt tops that were sewn during the retreat. Those participants that wished to work on one or more of these came prepared with a quilt block that met certain specifications and then those blocks were used to create a top as one person after another worked with them. Here are the final quilts:

Low volume with pops of color

Low volume with pops of color

Triangles

Triangles

Stripes and solids

Stripes and solids

These progressive quilts were not something that I wanted to work on, but it was VERY interesting to watch them change and grow over the course of 4 days. One lucky participant got to keep each one at the end of the retreat – I think that there was a random drawing of those who worked on one to decide who “won” it.

On Friday night there was a “mixer” and we were served hors d’oeuvres and cocktails made just for our group (with names like “seam ripper”) and persuaded to mix with each other by constant give aways being given to those who changed seats.

On Saturday night we had a pajama party and sewed in our PJs. The group made pillowcases for ConKerr Cancer.

Pillowcases made for ConKer Cancer.

Pillowcases made for ConKerr Cancer.

I traveled to the retreat with my friend Anne. While we were there one of the participants was selling a Featherweight sewing machine and Anne tried it out and ended up buying it.

Anne and her "new" sewing machine.

Anne and her “new” sewing machine.

We did so much sewing and had so much fun. Thank you so much to the organizers and sponsors. Let’s do it again next year!


5 Comments

Filed under DC Modern Quilt Guild, Purses and Bags

Schoolhouse Tunic and Arts Center Exhibition

A few weeks ago the Anacostia Arts Center in Washington DC opened an exhibit of quilts by local quilters.  DC Modern Quilt Guild members have a variety of quilts hanging there including one of mine.

xx

Stitched DC

My husband and I helped to hang the quilts on the day before the opening. The quilt below was made by a member of the Daughters of Dorcas quilt organization.

My husband hanging the largest quilt in the exhibit.

My husband hanging the largest quilt in the exhibit. Photo courtesy the Anacostia Arts Center.

I wanted to make something new to wear to the opening reception. I had some Nani Iro double gauze fabric just waiting for this purpose and chose to make a pattern by Sew Liberated called the Schoolhouse Tunic.

Linda Fasules with "Zakka Style Quilt"

Linda Fasules with “Zakka Style Quilt”

The pattern comes in two lengths and I chose to make the longer version.

Carla Voorhees with "HST Journey"

Carla Voorhees with “HST Journey” (and me!)

I love how it turned out and it is beyond comfortable. Because the fabric was so precious, I did make a muslin first, but ended up not having to make any changes. This is a very quick and easy pattern to make.

Other quilts in the exhibit with their DC Modern sewists –

Susan Fuller with "Pinocchio"

Susan Fuller with “Pinocchio”

Dana Seltzer with DC Metro Map

Dana Seltzer with DC Metro Map

Anne Brill with "Four Flowerpots"

Anne Brill with “Four Flowerpots”

Natalie Hardin with "Little Star"

Natalie Hardin with “Little Star”

Meli Mathis with "Simply Styled Color"

Meli Mathis with “Simply Styled Color”

Frederick Nunley (on the right) with his partner Keith and Shoofly Orange Slice. Photo courtesy Anacostia Arts Center

Frederick Nunley (on the right) with his partner Keith and Shoofly Orange Slice. Photo courtesy Anacostia Arts Center

Elle Sutherland Irby (and Miles) with "Smooth Sailing"

Elle Sutherland Irby (and Miles) with “Smooth Sailing”

Lynne Mackay-Atha with Katte's Paintbox (back)

Lynne Mackay-Atha with Kaffe’s Paintbox (which is the back of this beautiful quilt)

xx

The front of the quilt above. Read her post  about the Arts Center choosing to show the back.

There are many more quilts to see and the exhibit is running through March 29, 2014. If you are in the DC area, make plans to go see it. There is a wonderful cafe in the center that is well worth visiting as well.

On Saturday, March 8th there will be quilting lectures and pop up shops at the Anacostia Arts Center.

March 8 event

March 8 event

Katie Blakesley and Laura Gunn will be speaking from 1 to 3 PM. You do need tickets to attend the lecture. More information and a link to buy them can be found here.

Finch Sewing Studio and Del Ray Fabrics will be selling from 3 to 5 PM.

See you there!

5 Comments

Filed under DC Modern Quilt Guild, Garment sewing, Pattern review, Uncategorized

Hexagon Zippered Pouch

I made up a little pouch yesterday.

Hexagon pouch made with Riley Blake Fabric

Hexagon pouch made with Riley Blake Fabric

The Modern Quilt Guild provided 6 fat eighths of this Riley Blake Fabric and challenged its members all around the world to make something from them and post a picture by Feb. 17th.

DCMQG's group of fabric for the Riley Blake fabric challenge

DCMQG’s group of fabric for the Riley Blake fabric challenge

The rules are simple – you can make anything that is quilted using these fabrics or any Riley Blake fabric and you can also add in any solids that you wish to.

Back of pouch

Back of pouch

I just wanted to make something up with the bundle we were given. I used the whole piece of the solid grey for the outside and a white and grey stripe for the inside. I simply cut the grey piece in half and quilted both halves.

Quilted wavy lines and added some leaves to one line just for fun.

Quilted wavy lines and added some leaves to one line just for fun.

I then made English Paper Pieced hexagons out of the other 4 fabrics into 2 flowers and appliquéd them onto the outside. 

EPP hexagon flower

EPP hexagon flower in progress

I wanted this flower to be flowing off the edge.

I wanted this flower to be flowing off the edge.

I inserted the zipper using my favorite technique of using little fabric tabs on both sides of the cut zipper to make the final product all neat and tidy. How this works is that there doesn’t end up being any zipper parts caught in the sewn side seam. In fact, I try to make it such that the fabric tabs aren’t caught there either.

Zipper inserted. You can't see it here, but the lining is also attached at this point.

Zipper inserted. You can’t see it here, but the lining is also attached at this point.

I had intended to make a flat bag, but right at the very end of sewing it up, I decided to box the bottom corners so that the bag would stand up.

xx

Boxed corners on the bottom

This kind of messed with my hexagon flower placement, but I do think it makes the bag more useful.

IMG_4053

10 Comments

Filed under DC Modern Quilt Guild, Gifts, Purses and Bags

Mary’s Quilt Shop and Victoria Findlay Wolfe

Mary's Quilt Shop in Bedford, PA

Mary’s Quilt Shop in Bedford, PA

Last weekend I had the pleasure of traveling from DC to Bedford, PA with 4 other members of the DC Modern Quilt Guild to spend 2 nights in the retreat center of Mary Koval’s Quilt Shop. Mary is an expert on antique quilts and fabrics.

Mary's Quilt Shop

Mary’s Quilt Shop – Photo by Anjeanette Klinder

She works with Windham fabrics to reproduce 18th and 19th century fabrics and that is primarily what she sells in her shop. She is a gracious hostess and made us feel right at home in her fabulous retreat space. We had a room on the ground floor to do our sewing.

Sewing space

Sewing space

A living room and kitchen on the first floor.

Kitchen and dining area

Kitchen and dining area – Photo from Mary’s website

And bedrooms complete with antique quilts on the beds on the second floor.

Bedroom in the retreat space.

Bedroom in the retreat space. Photo by Anjeanette Klinder.

We spent two days working on our own projects. For dinner on both nights we went to a restaurant down the street called the Birds Nest. I’m sure there are other nice restaurants in Bedford, but we were so impressed with the dinner the first night, we decided to go back instead of trying another place.

DCMQG members at the Bird's Nest

DCMQG members at the Bird’s Nest

Sunday afternoon, Mary hosted a lecture and trunk show by Victoria Findlay Wolfe. Victoria is the author of the book 15 Minutes of Play and one of her quilts won the best in show at the Modern Quilt Guild’s first show – Quilt Con.

She did not have that quilt with her for the trunk show as it is currently hanging in Houston, but she did show us some process pictures of making it and this youtube video shows her telling about it.

She did have many, many beautiful quilts to show us. It was a pleasure to see them and to get to know her a little bit.

xx

xx

xx

xx

xx

xx

Mary Koval, Victoria Findlay Wolfe and DCMQG members

Mary Koval, Victoria Findlay Wolfe and DCMQG members

Bedford, Pennsylvania is a quaint little town and Mary’s Quilt Shop and Retreat is a wonderful place for a nice little get away. I highly recommend it if you live in the area or near the area. It was about a two and a half hour drive from where I live in Washington, DC.

13 Comments

Filed under DC Modern Quilt Guild, Quilt Shops

Happy Fourth of July!

Flag quilt top

My flag quilt top

The Fourth of July is a fun holiday for me. I spend it in NH on Lake Winnisquam with my brother and sister and as many of our kids as can come. My brother has 3 grandsons that live nearby and they definitely add to the fun and excitement. This year about 2 weeks prior to traveling I was on a road trip (by bus) with the Needlechasers of Chevy Chase to a quilt shop called Patches in Mt. Airy, MD.

Patches - quilt shop in Mt. Airy, MD

Patches – quilt shop in Mt. Airy, MD (Picture from their website)

There was a quilt laying near the cutting table that was essentially a flag. I really loved how it was pieced together in different shades of red and white and had a star fabric for the blue canton. I immediately wanted to make one and figured, as I often do, how easy it would be to make up fast! So despite the fact that the store staff was busy cutting fabric for our 40 or so members on the trip, I was able to ask if they had the star fabric, and luckily they did.

Needlechasers shopping at Patches

Needlechasers shopping at Patches

Patches flag quilt.

Patches flag quilt.

I took this picture of their quilt because I liked the easy wavy quilting that was done on it. (Are you catching on to what was important to me?) I chose fat quarters and took them home, washed them and cut them into 3″ squares.

On the following weekend, the DC Modern Quilt Guild had a sewing retreat for 3 days. I had a serger there for a different project and decided it might be quicker to use that to sew all these squares together. Since completing it, I’m really not sure that it made ANY difference at all in the time it took, but I did love how tidy the back was when I was done.

Serged back to the quilt

Serged back to the quilt

I got the quilt top done at the retreat but didn’t have any backing fabric so the final backing, quilting and binding was done at home.

xx

Working on the wavy quilting.

Quilting this way with a walking foot was very easy. I used matching thread and did a wavy line on each of the red and white stripes. I did a diagonal straight line through the star fabric.

Diagonal quilting

Diagonal quilting

Finished quilt is 60 x 32.5"

Finished quilt is 60 x 32.5″

I originally thought that this quilt would be a table topper but the size may be a little awkward for that. I think that we will display it off the deck as though it were a flag. Surely no one will get close enough to count the stars. Although the size of the stars look about right for the size of the flag, there are actually 70 stars!

Added later:

I gave the flag quilt to my brother and sister-in-law while cruising Lake Winnisquam in a pontoon (party!) boat from Winnisquam Marine which my brother owns and operates.  It turns out that it’s actually a pretty good quilt for keeping warm.

Sunset on Lake Winnisquam

Sunset on Lake Winnisquam

9 Comments

Filed under DC Modern Quilt Guild, Family, Gifts, NeedleChasers of Chevy Chase, Quilt Shops