Category Archives: Pattern review

Diaper bag

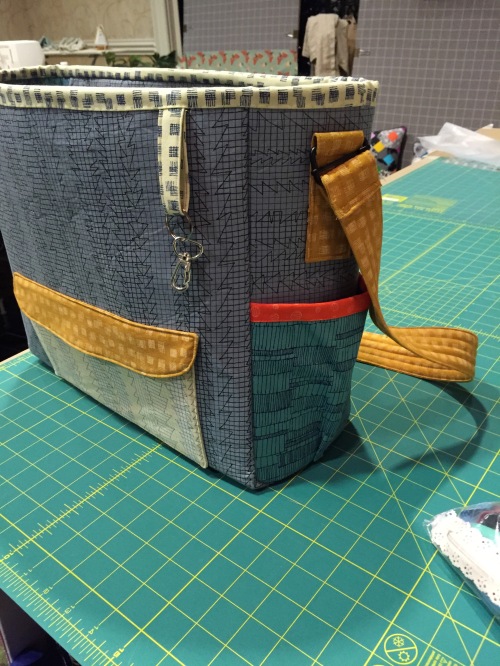
Diaper bag version of the Multi-Tasker Bag. Size is 12″ high, 14″ wide, 5″ deep.

xx

Trying out the length of the strap.

My daughter is due to have a baby soon and a friend asked if I was interesting in making a diaper bag as she wanted to make one for a friend of hers. I knew my daughter hadn’t bought or received one yet and I always love to do a project with a friend, so I agreed it would be a fun idea. We used a pattern from the book “Sew Serendipity BAGS” by Kay Whitt. This is the diaper bag version of the “Multi Tasker Bag” in the book.

Sew Serendipity BAGS by Kay Whitt

Sew Serendipity BAGS by Kay Whitt

This bag is not for the lighthearted! The pattern directions fill up 15 pages of the book and references several others. It was fun to make and to see come together, but it took 2 sessions together with my friend, a sewing retreat and several hours back at home to complete this bag.

Closed

Bag front with zippered  changing area zipped closed.

Unzipped

Unzipped. Pockets for diapers and wipes exposed.

Changing pad folded out. Velcro attaches it to the bag flap.

Changing pad folded out. Velcro attaches it to the bag flap.

The dark blue fabric here is PUL (polyurethane laminate) which is soft, breathable and waterproof. The changing mat detaches and can be used separately or really washed clean. I used Carolyn Friedlander’s fabric line called “Doe”. My daughter and her husband are engineer and architect and I thought this would appeal to them. They are having a son and I hope this fabric is “manly” enough for the father to not mind using for his son.

xx

Reverse side of the bag

The pocket on the back has a small piece of velcro as a closure on the envelope style flap. This is called a “media pocket” in the pattern directions. I think it is supposed to fit a phone or iPod type device but it is really not sized for today’s phones. I sewed a dividing stitch down the middle of this pocket but I am now thinking that if that is removed, a phone would fit sideways in this pocket – or in one of the side pockets!

Diaper bag

Carabiner on outside loop can hold keys, pacifier, rattle, etc.

A fabric loop is sewn into the outside binding to hold anything you really want to keep handy. I found this black carabiner and it is a bit large. The parents can change it out if they want something smaller.
xx

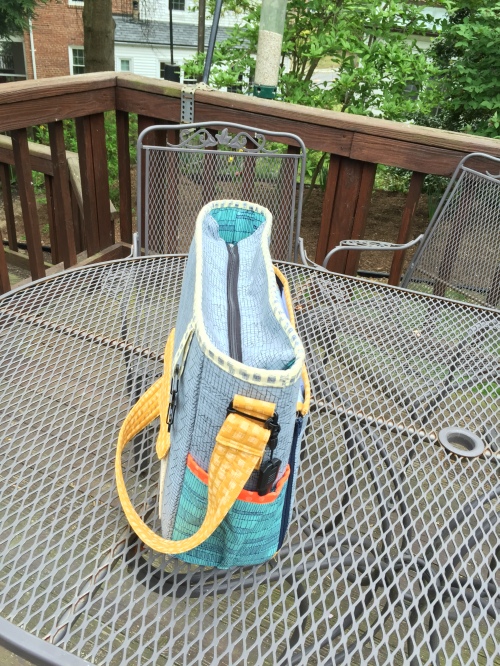
The bag top zips closed. When unzipped the top falls into the bag. Straps are attached with hardware to the sides of the bag which allows them to lay nicely out of the way.

The top has a separating zipper which falls into the bag when unzipped. The directions called for sewing the side edges of the top to the sides of the bag. This would allow the top to hold a boxier shape but I didn’t do it because I felt it would make it much more difficult to access the inside.

xx

The inside has an elasticized pocket on one side that is divided into 3 sections.

There is quite a bit of room on the inside and one long pocket.

I think this bag will be very useful. There are plenty of pockets for bottles, diapers and wipes, extra clothing and the parent’s phone, keys and wallet. Am I forgetting anything?

Pattern details and changes

1. This bag has a HUGE number of pieces to cut out – including fabric, fleece and interfacing. The only actual pattern piece in the book is the media pocket flap. Every other piece is given as height by width measurements. The book does not include a separate list of all the pieces together in one spot. It gives the measurements throughout the 15 pages of instructions as you come to that particular piece. I went through the pages of directions and made a cutting list and here it is:  Diaper bag cutting measurements.  You’re welcome! Thank you to Kay Whitt for her generous permission to include this is my post.

2. As mentioned above, I did not sew the zipper to the sides of the bag. If I made this again, I would use a longer zipper which would not separate at the end, but rather extend well beyond the end of the top flap so that the top would still fall into the bag when unzipped but you wouldn’t need to use both hands to get the zipper in place to start zipping it. (I hope that makes sense).

3. The bag’s stability is obtained by using Peltex for the body. It would be interesting to try something like “by Annie’s Soft and Stable” instead. The shape may not be as defined but it would be easier to sew and lighter weight when done. A piece of Peltex could still be used as an insert for the bottom of the bag. (If you use a softer stabilizer you can ignore my next 2 comments.)

4. Sewing the bottom of the bag to the sides is tough (again because of the stiff Peltex). On page 118 Step 4, the directions say that sewing this is “awkward” but “they will sew together with good result”. Good news! This is true!

5. Sewing the binding around the top of the bag through the Peltex is tough. I ended up sewing it by machine to the inside of the bag and then hand sewing it down on the outside. This worked well. It’s not that the Peltex is hard to sew through, it’s dealing with it in the round as you’re sewing that is difficult.

I hope my notes will help you if you make this bag. Have patience and persevere. It will be worth it!

6 Comments

Filed under Pattern review, Purses and Bags, Uncategorized

One Hour Top by Fancy Tiger Crafts

Free pattern download

Free pattern download

I just finished sewing this One Hour Top by Fancy Tiger Crafts. I used a knit fabric that I bought in December from Girl Charlee as part of that months’ “KnitFix“. I received 6 two yard cuts of knit fabric and didn’t know what they looked like until they arrived at my doorstep. I’ve seen some amazing things made out of the different knits. I thought this easy top pattern would be a good choice to make a quick top.

Easy top

Easy top

The pattern is a free download and is only two pieces – the front and the back. The two pieces are identical except for the front neckline dipping down lower. I made some ridiculous mistakes making this top and the first one was that I cut out two fronts instead of a front and a back. I had to cut them separately to line up the stripes and I guess I was thinking I would cut 2 backs and then cut out the scoop of the front neck, but suddenly I realized I had cut 2 fronts and had to decide what to do. I could just make it up using 2 fronts and the back would dip down too. However, in the end I decided I would just sew an extra piece of fabric to the back neck area (with careful matching of the fabric design) and no one would be the wiser (except for those of you reading this!)

Back neck - fabric added

See the lower line of white stitching? That’s where I matched and added fabric.

Knit fabric which doesn’t fray and this very busy print enabled me to get away with this.

The “One Hour” pattern gives instructions for folding over all of the raw edges to finish the top. It does not give directions for sewing on knit bands as I did at the neck and the sleeves. I really didn’t think that folding under the curved neckline and topstitching it down would look good. I was afraid of the stretching that might occur or losing the stretchiness of the fabric where I topstitched. I did not have any problem hemming the shirt this way however.

xx

I found a wonderful suggestion for how to make knit bands that can be found in the directions here of another easy top that is a free download called the Hemlock Tee by Grainline. Making the bands can be tricky because the knit tends to roll at the edges and you have to fold these bands in half and keep the two edges flat and together while you sew them onto the top. This tutorial suggests that you cut the bands wider than needed and then mark a guide to the left of your serger needles/blade to run the folded edge along. By doing this you are cutting off the edges that may be curling and sewing the flat area together.

I used a strip of washi tape as a guide here.

I used a strip of washi tape as a guide here. The left edge of the band is the fold and I am serving  two layers of fabric together on the right. 

This creates a nice even band. It helps to make it longer than you want too so that you can cut it to exact size afterwards as sometimes the fabric stretches as you start or finish the piece. If you are sewing this band on your garment in the “round”, you do have to unpick some stitches on either end in order to join the piece together.

Flat piece with unpicked stitches on both ends.

Flat piece with unpicked stitches on both ends.

Now joined to make the cuff that will be sewn onto the sleeve.

Now joined to make the cuff that will be sewn onto the sleeve.

I could have serged that “unpicked” area on this cuff, but I found that the fabric didn’t shift enough to bother with doing that and just sewed it on to the sleeve this way.

So what were the other ridiculous mistakes I made? Two things. 1) I paid attention to matching the stripes but I didn’t realize I should have been paying attention to centering the motifs on the fabric vertically too. At first glance you might not notice this, but if you really look, it is obvious that the design is not centered. 2) I obviously have a “front” and “back” problem because I sewed the seamline in the the neckband to the middle front of the top instead of the back!

Some of my followers wanted to see the other fabrics I received as part of the Girl Charlee KnitFix.  Here they are!

Girl Charlee KnitFix fabrics from December

Girl Charlee KnitFix fabrics from December

What in the world am I going to do with all of these? I like the One Hour Top but not enough to make it again. It is quick but so completely shapeless that I need to try something else.

7 Comments

Filed under Garment sewing, Pattern review

The Moneta dress by Colette and sewing with plaid

xx

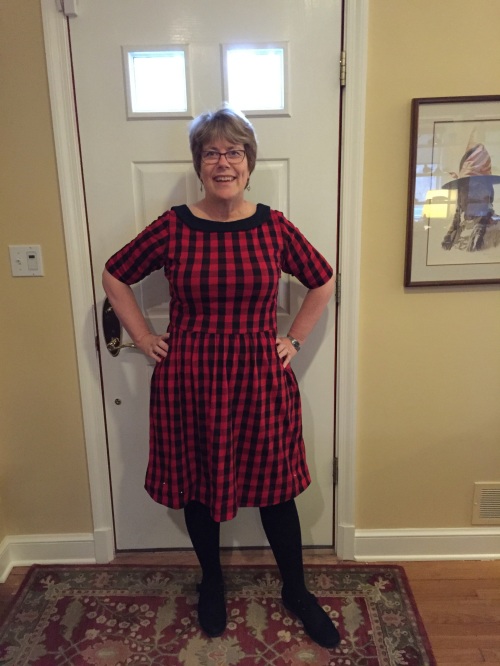
Moneta Dress

I bought this red plaid knit fabric from the online shop Girl Charlee. I know that it looks like flannel and it kind of feels like flannel. However, it is a nice soft knit. I bought it in December along with their “KnitFix” which is a group of six 2 yard cuts of different knit fabrics. When you order a KnitFix, you don’t know exactly what the fabrics you get are going to look like but they promise they will all be high quality and “on trend”.

The collar has a little center piece that hangs down in the back.

The collar has a little center piece that hangs down in the back.

I seem to be enamored with “mysteries” lately as I also signed up for the Amitie Mystery Block of the Month in December. I haven’t cut into the other knits yet but will soon. There is a Facebook group for those who are sewing with these knits and there has been a lot of sharing of favorite patterns and tips for sewing with knits.

Unable to "cut on the fold".

Unable to “cut on the fold”.

Cutting out this plaid dress was quite a bit of trouble. There is no way you can fold this knit fabric in half and have it line up exactly right. In order to be absolutely sure that the 2 halves were identical, I had to cut it out without folding. I cut one side and then turned the pattern over to lay it on the other side.

Bodice

Bodice

For the bodice I actually marked some of the darker black parts of the plaid on the pattern in order to get it just right. This was very fussy but definitely worth it.

Pockets!

Pockets!

The Moneta pattern has pockets and the collar and sleeves are optional. The pattern says that it’s skill level is “beginner”. I would hate to see a true beginner try to make this dress. There are a number of tricky parts – but I will say that it has very good directions – including a link to a video that shows a lining technique for the sleeveless version. There are also good directions for inserting clear elastic into the waistline which is done to keep that area from stretching out over time.

Knit Moneta dress by Colette

Megan’s sleeveless version

My daughter made the sleeveless version last May. Isn’t she adorable?

The Moneta pattern has quite a bit of “negative ease”. This means that the garment measurements of the bust and waist are less than your own measurements. The bodice is meant to s-t-r-e-t-c-h and be very form fitting. I think this is more appealing to a younger sewist like my daughter than it is for me. I made a size larger than my measurements called for and it is still very close fitting. Because of the knit fabric, though, it is very comfortable. I am looking forward to sewing with my KnitFix fabrics next!

Notes to myself about making up this pattern –  Size XL. Added 1 inch to center of sleeve. Added 1 inch to length of bodice and graded bodice out to make waist about 1/2 inch larger on each side. Lined the bodice with the same fabric I made the collar out of. Lengthened the hemline by 1.5 inches which is about the size of the hem I turned under. Used ballpoint needles in both my sewing machine and serger. Used a double needle with regular thread in the needles and wooly nylon in the bobbin to hem the skirt and the sleeves. Also used my black latch bobbin case in order to loosen the tension on the bobbin when using the double needle. Used 3/8″ plastic elastic from JoAnns for the waistline but would have preferred 1/4″ if I could have gotten it. Sewed the waistline with a zig zag stitch on my sewing machine rather than using the serger. I would love to make this dress again but would rather not have to match a plaid or stripe!


5 Comments

Filed under Garment sewing, Pattern review

Wide Open Pouch

The Wide Open Pouch is a free pattern by Anna Graham, aka Noodlehead. I liked the idea of having a bag that is easy to get into and it looked like it might be a quick sew. Instructions for cutting a 2 color bag are here. First I made one:

First Wide Open Pouch

First Wide Open Pouch (both sides)

Then I made four more. It was just so much fun to pull different fabrics to sew these. These are all the Medium size pouch and are roughly 11″ wide x 6″ tall x 4″ deep.

I altered the directions for my bags by using fusible batting and quilting them. This gives a much sturdier bag than if they are just interfaced – and the quilting also adds another design element. If you decide to quilt one of these, you will quilt it with just the exterior fabric and the batting. Do not make a “sandwich” with the lining. The lining is added separately later.

xx

The original pouch and four more

With Anna’s permission, I am donating these to my traditional quilt guild, Needlechasers of Chevy Chase, to be sold at their upcoming Quilt Show in October to support the guild. I posted this photo on Facebook and several friends and family wanted one. I decided to go ahead and “pre-sell” the ones that I was asked about. However, then I felt as though I should make some more.

I attended a DC Modern Quilt Guild meeting that was held at the Finch Sewing Studio this past weekend. While there I bought some of the new fabric from Cotton + Steel. Perfect to use for more pouches! (I may have bought most of the fabrics that were primarily turquoise.)

xx

Pouches made out of Cotton + Steel fabric. Exterior fabric.

I love those horses! I couldn’t resist these different combinations. More fun fabrics on the inside too.

Inside of pouches.

Inside of pouches.

One of my daughters told me she wants a new make up bag and so I had to make a pouch for her – but these are way too colorful – she doesn’t like bright colors. So I made her what I think is a very classy bag that is grey and black and she does like polka dots – who doesn’t? (She can let me know if this is acceptable or not after I post this).

xx

Pouch # 9

I made the original bag with a friend who then urged me to try the Zippy Strippy pouch pattern by Atkinson Designs. Today I made up the medium size of that pattern which costs $8. I used a mini charm pack that I’ve had for awhile to make the fabric for the outside of the pouch.

xx

This bag is a little smaller than the Wide Open Pouch.

xx

The Atkinson bag is a little smaller.

xx

Different finishes inside.

Pouch comparison:

The Noodlehead pattern is free, the top does open wide and so it is easy to find what you’re looking for inside, and it is fully lined. Due to the way it is constructed, you can top stitch around the entire top of the pouch after it is made which makes everything lie nicely around the zipper.

The Atkinson bag is a paper pattern (not a download) that is for sale, the top has a pretty finish using a fabric tab at the ends of the zipper but the inside has exposed seams which have to all be finished with a zig-zag stitch to prevent raveling.

I’ve made 10 pouches at this point and can’t wait to make some more – but maybe not right away. This may be my “go-to gift” for the holidays this year.

9 Comments

Filed under Pattern review, Purses and Bags

Bucket Brigade by Atkinson Designs

Largest "bucket" is 12" high and 12"wide

Largest “bucket” is 12″ high and 12″wide

I spent the past week at my oldest daughter’s home doing some sewing and other projects with her. One of things that she asked me to make was this fabric bucket. The fabric on the outside is a decor weight cotton and the inside is a pretty batik. The pattern is Bucket Brigade by Atkinson Designs.

Filled with knitting.

Filled with knitting.

This was the largest of the 4 sizes that the pattern includes. Isn’t it pretty? I love the fabrics that she picked. We debated about what to use for the stiff interfacing that the pattern calls for. We ended up using Peltex by Pellon which gives a very stiff finish which is what Lindsey wanted. When I sewed the rectangular outer piece into a tube I was afraid that the seam would stick out and not be smooth.

Here is what it looked like after ironing.

Here is what it looked like after ironing.

I decided to iron on a strip of fusible interfacing over the seam which secured it very neatly.

Interfacing fused over the seam to hold it in place.

Interfacing fused over the seam to hold it in place.

Two buckets are created (outer and inner) and when finished, the top is folded over to the outside to give about a 2 inch contrast band to the top. I didn’t want to fold over the Peltex (yikes, how could you?) and so I cut the Peltex shorter. You can see this in the photos above.

Handles on both sides.

Handles on both sides.

If I make one of these for myself, I think I will consider using something softer than Peltex. The pattern suggests Stiff Stuff by Lazy Girl Designs but I am not familiar with this product and don’t think I have a local place to buy it.

I love the way the bucket turned out and I’m sure it will be great for any number of uses! I can’t wait to make another for myself.

3 Comments

Filed under Pattern review

Carol’s Convertible Purse

Purse!

Purse!

Backpack!

Backpack!

This project started with a fellow NeedleChaser guild member who showed her purse during “show and tell”. I thought it would be very handy to have a bag this summer that could also be worn hands free on my back. I bought the pattern and recruited a few friends to make it with me. This seems to be the best way for me to get something done these days.

Carol's Convertible Purse

Pattern and labels!

Boy, did I need those friends to get this done! The pattern is 12 pages long. There are a few variations you can chose which affect how and what you cut out. There are a lot of pieces and the very BEST thing about the pattern is the premade label sheet that you can see above. Most of the pieces are given as simple dimensions rather than pattern pieces and these labels made the chore of cutting everything properly much less daunting.

All of the pieces.

All of the pieces.

Of course, the reason there are a lot of pieces is the reason we like the bag – lots of pockets and a chance to use a couple (or more) coordinated fabrics for the outside.

xx

My fabric: Anna Maria Horner Pretty Potent

I used this pretty AMH fabric for the outside but found that Tula Pink’s fabric went well with it for the inside.

Mix of fabrics

Mix of fabrics

The four of us met one morning at 10 AM with our pieces all cut out and ready to sew. At 5 PM we had them almost done.

xx

Nearly complete

Who would have guessed it would take that long? I ALWAYS underestimate how long it is going to take for me to sew something. Do you?

We had to each finish up individually and a week later, we have all done it!

I love my bag!

I love my bag!

I think that I will use this bag a lot this summer.

Out and about

Out and about

Notes:

1. To begin, I found it helpful to highlight the cutting diagrams I was going to use, once I decided on the options given.

2. When the outside and the lining are both made, the directions tell you to iron in a 1/4″ fold and then  topstitch the two together. Lynne chose to leave an opening in her lining and sew the two parts together inside out which seemed to give a much cleaner finish. It still needed to be topstitched, but the bags are already sewn together when you do this.


4 Comments

Filed under Pattern review, Purses and Bags, Uncategorized

Flirting the Issue Skirt Sew-along

I heard Rachel Hauser of Stitched in Color on Pat Sloan’s radio podcast recently talking about hosting a sew along for a free skirt pattern by Anna Maria Horner. The name of the pattern is called Flirting the Issue Skirt and you can download it here.

xx

Cotton voile fabric by Amy Butler

The skirt is very light and airy. The suggested fabric for making it is cotton voile which is definitely one of the nicest feeling fabrics you can wear! Sometimes voile is difficult to find and pricey compared to quilting weight cotton but Rachel gave a link to Pink Chalk Fabrics who has a great selection at a great price. Irresistible!

xx

Voile is lightweight enough that it would not make a suitable skirt in one layer. This pattern uses 2 fabric layers (an outside fabric and a lining) which are sewn together at the top of the skirt. Channels for elastic are then sewn in which create the waistband. It is very easy to sew this skirt, but threading all of that elastic and making the gathers even is daunting!

4 rows of elastic.

4 rows of elastic inserted between the outside fabric and the lining.

I suggested to my friend Anne that we get together and each make up a skirt. I seem to get much more done if I plan a date to do it with a friend. Do you do this?

Anne's skirt.

Anne’s skirt using Anna Maria Horner’s voile fabric


I have linked up at Stitched in Color where you can see the other skirts that were made during this sew along and see Rachel’s post comparing her two skirts – one made out of voile and the other made of quilting weight cotton.

Rachel's skirts from Stitched in Color. Voile on the left. Quilting cotton on the right.

Rachel’s skirts from Stitched in Color. Voile on the left. Quilting cotton on the right.

This was a fun project. The skirt is very comfortable to wear. Perfect for the warm weather ahead.

xx

I cut the front and back such that I could match those circles at the sides. It is very difficult to see the side seam which looks nice – but took extra time!

Other info for this garment (in case I decide to make another).

I used 1.5 yards of an Amy Butler voile for the outer skirt and 1.5 yards of cotton batiste for the lining. These 2 fabrics were perfect for this skirt. Unfortunately the only local source for batiste had very few colors options which is how I ended up with yellow.

The elastic I used was 1/4″ and was called “knit” elastic. The other option at Joann’s was “braided” elastic. The only difference I could see from descriptions on the packaging was that the braided variety narrows when stretched and the knit does not. I’m not sure the relevance of that to this project, but I decided to chose the one that did not narrow when stretched.

The 4 rows of elastic is very comfortable at the waist. I cut each piece of elastic the measurement of my waist, inserted it into the skirt, pulled and twisted and tried to get the gathers evenly distributed, tried it on and then cut off probably at least 3 inches from each end before joining them together. The finished waist is, in fact, about 6″ less than my waist measurement, but this elastic is so stretchy that it does not feel at all tight.

Who doesn’t LOVE a hem (or two) that can be finished by machine? Very quick and easy finish as the skirt pieces are exact rectangles and everything, including the hem, is right on grain. I did use the suggested pattern advice of making both the front and back the circumference of my waist. It appears as though some of the other sewists participating in the sew along thought their skirt may have benefitted by less width if they used a heavier fabric.

Anne and I both chose fabrics with a semi-large motif that we thought would look better matched at the side seams. An all over print would have eliminated having to fuss with that.


10 Comments

Filed under Garment sewing, Pattern review

Schoolhouse Tunic and Arts Center Exhibition

A few weeks ago the Anacostia Arts Center in Washington DC opened an exhibit of quilts by local quilters.  DC Modern Quilt Guild members have a variety of quilts hanging there including one of mine.

xx

Stitched DC

My husband and I helped to hang the quilts on the day before the opening. The quilt below was made by a member of the Daughters of Dorcas quilt organization.

My husband hanging the largest quilt in the exhibit.

My husband hanging the largest quilt in the exhibit. Photo courtesy the Anacostia Arts Center.

I wanted to make something new to wear to the opening reception. I had some Nani Iro double gauze fabric just waiting for this purpose and chose to make a pattern by Sew Liberated called the Schoolhouse Tunic.

Linda Fasules with "Zakka Style Quilt"

Linda Fasules with “Zakka Style Quilt”

The pattern comes in two lengths and I chose to make the longer version.

Carla Voorhees with "HST Journey"

Carla Voorhees with “HST Journey” (and me!)

I love how it turned out and it is beyond comfortable. Because the fabric was so precious, I did make a muslin first, but ended up not having to make any changes. This is a very quick and easy pattern to make.

Other quilts in the exhibit with their DC Modern sewists –

Susan Fuller with "Pinocchio"

Susan Fuller with “Pinocchio”

Dana Seltzer with DC Metro Map

Dana Seltzer with DC Metro Map

Anne Brill with "Four Flowerpots"

Anne Brill with “Four Flowerpots”

Natalie Hardin with "Little Star"

Natalie Hardin with “Little Star”

Meli Mathis with "Simply Styled Color"

Meli Mathis with “Simply Styled Color”

Frederick Nunley (on the right) with his partner Keith and Shoofly Orange Slice. Photo courtesy Anacostia Arts Center

Frederick Nunley (on the right) with his partner Keith and Shoofly Orange Slice. Photo courtesy Anacostia Arts Center

Elle Sutherland Irby (and Miles) with "Smooth Sailing"

Elle Sutherland Irby (and Miles) with “Smooth Sailing”

Lynne Mackay-Atha with Katte's Paintbox (back)

Lynne Mackay-Atha with Kaffe’s Paintbox (which is the back of this beautiful quilt)

xx

The front of the quilt above. Read her post  about the Arts Center choosing to show the back.

There are many more quilts to see and the exhibit is running through March 29, 2014. If you are in the DC area, make plans to go see it. There is a wonderful cafe in the center that is well worth visiting as well.

On Saturday, March 8th there will be quilting lectures and pop up shops at the Anacostia Arts Center.

March 8 event

March 8 event

Katie Blakesley and Laura Gunn will be speaking from 1 to 3 PM. You do need tickets to attend the lecture. More information and a link to buy them can be found here.

Finch Sewing Studio and Del Ray Fabrics will be selling from 3 to 5 PM.

See you there!

5 Comments

Filed under DC Modern Quilt Guild, Garment sewing, Pattern review, Uncategorized

Winter Tweed Boston Bag

xx

I made this wool bag for one of my daughters for Christmas this year. It is from the book “Carry Me – 20 Boutique Bags to Sew” by Yuka Koshizen. I bought the book after seeing the bag from the cover made up at a quilt shop in Hawaii. However, after buying the book I fell in love with this Boston Bag and knew my daughter who works in Boston would love it.

xx

This bag was quite an accomplishment. Just gathering the materials needed to make it was somewhat of a challenge.  I bought the tweed wool and then the lining fabric. That was the easy (and fun!) part.

Inside of bag.

Yellow for the inside!

Then I bought the 12″ Tubular Frame (Item 912) from Ghee’s online.  I thought I was ready to go. As I got started I saw that the pattern called for purse feet on the bottom. That seemed like a good idea but I couldn’t find any locally so back online I went.

Antique brass purse feet

Antique brass purse feet

I ended up ordering from BuckleGuy.com. I had to decide what color metal hardware to order. The internal frame doesn’t show except for the hinges which are brass. I didn’t want shiny brass feet or handle hardware and so I chose antique brass. These small antique brass feet (B1615) require a back post to attach them.

Close up. Aren't they pretty?

Close up. Aren’t they pretty?

The back post (B1414) comes in different lengths and so I had to guess what thickness the bottom of the bag would be. They only cost about 8 cents each so I ordered a couple different sizes. I ended up using the 3/8″ size which worked well. My bag bottom had 2 layers of interfaced fabric (wool and lining), a layer of foam stabilizer which gives this bag it’s structure, and 2 layers of stiff Peltex that was cut just the size of the bag bottom.

xx

After all of that, I couldn’t find leather handles locally. I could find some synthetic leather handles that looked pretty nice, but after spending all of this money on all of the other materials, was I really going to settle for less than leather? And believe me, this daughter would notice – immediately! I needed dark brown leather, 20″ long with antique brass hardware and the ability to attach to the bag. I bought these from Pursesuppliers on Etsy. I did like that they sewed on rather than having to use a single rivet. I just feel as though they can handle the weight of whatever gets put into the bag better this way. And believe me, a LOT can fit in this bag!

xx

Pockets on both sides.

Once I had the fabric cut and all of the supplies gathered, it was summer! I kept everything together and put it all away for months.

xx

The directions for this bag are very minimal. You have to read and look at small diagrams and I don’t think they are very clear. I would not want a beginner sewist or someone who hasn’t put several handbags together before to make an attempt at anything in this book. I had to make my best guess at much that I did. Having said that, though, the whole bag is one piece of fabric, and so it is very cleverly put together. It’s all about that internal frame.

xx

I am so glad to finally have completed this bag! I think my daughter is going to love it – I really hope so.

11 Comments

Filed under Gifts, Pattern review, Purses and Bags, Uncategorized

Barbados Bag

I just finished making the Barbados Bag by Pink Sand Beach Designs

Barbados Bag

Barbados Bag

The finished size is approximately 10″ wide by 11″ tall which makes it a pretty good size for an everyday bag. I’ve had the pattern for awhile but was a bit overwhelmed after looking at the directions and hadn’t taken the plunge to give it a try. Thankfully while shopping last week with a friend, she saw the bag made up, liked it, and we decided to try it together. The woman in the shop gave us great advice – trust the directions and follow them step by step without double guessing or looking ahead.

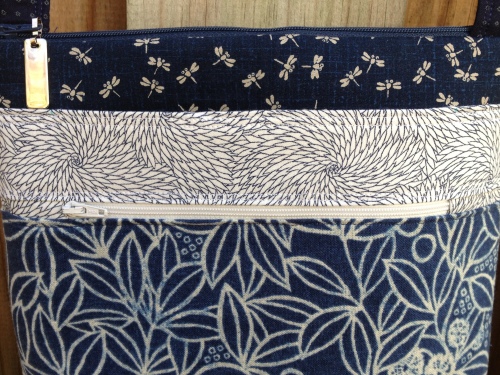
The outside front has a zippered pocket and a non-zippered pocket.

The outside front has a zippered pocket and a non-zippered pocket.

Following this advice did work and the bag does go together very nicely! The only thing that we didn’t think was crystal clear, was where each piece of fabric we cut would end up in the final bag. So let me spell this out for you if you are considering sewing this bag. The “Bag Front and Back” end up being that dark blue fabric on the top of my bag. It does not show on the outside very much but does form the body of the bag.

Two pockets!

Two pockets!

The “Front Pocket” and “Back Pocket” are the blue floral fabric that is the dominant fabric of my bag. Finally, the “Pocket Accent” is the lighter fabric in the middle of the other two fabrics only on the front.

The outside back has a divided pocket.

The outside back has a divided pocket.

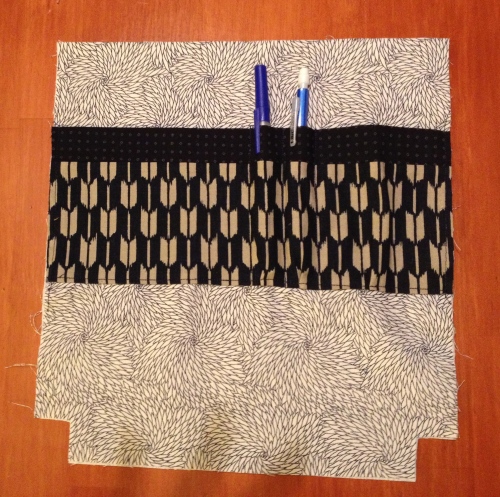
The inside of the bag has a divided pocket on one side. The directions were to divide it in two but I decided to add a couple places for pens also.  I should have dropped the pocket a bit lower in the bag than the directions called for since the pens are so close to the top of the bag, they almost don’t fit under the zippered top.

Inside pocket.

Inside pocket.

The directions tell you how to shorten and make tabs for each end of the two zippers which gives an extremely professional looking finish. It also removes any metal parts that your needle might hit during the sewing and removes the bulk of the zipper from any seams. These are all “win” situations for dealing with zippers! I will use them again in other projects.

Wonderful zipper insertion directions!

Wonderful zipper insertion directions!

As far as I'm concerned, a zipper at the top of a bag doesn't get any better than this!

As far as I’m concerned, a zipper at the top of a bag doesn’t get any better than this!

I used by Annie Soft and Stable instead of fusible fleece for the front and back of the bag and a heavy weight interfacing I had on hand in the places that called for Decorbond. Typically I like a stiffer bag that doesn’t show every lump and bump of what is inside of it. If you like a softer bag, you should use the fusible fleece.

xx

I love this bag!

.

22 Comments

Filed under Pattern review, Purses and Bags