Category Archives: Tutorials

Decorative Zipper Band on the Back of a Pillow

xx

Front and back of the same pillows

I love to make pillows and give them as gifts. It’s nice if the cover is removable so that it can be washed or changed out. I like to put in a zipper and to cover it with a contrast fabric band. It makes the back look as pretty as the front!

xx

Front

xx

Back

For an 18″ pillow start with:

  1. Pillow Front – this can be a single piece of beautiful fabric or an orphan quilt block or something you sew together specifically for who you are making the pillow for. This pillow front can be quilted or not. If you quilt it, you will want to add batting. If you don’t quilt it, depending on the weight fabric you use, you may want to interface it. For this example the front was cut 18″ x 18″ after quilting.
  2. Pillow Back – I cut the back the same width as the front (18″) and 1 inch longer than the front (19″).  18 wide x 19″ long. I fuse on the same size piece of interfacing (again based on fabric used),  and then make a horizontal cut where I want to add the contrast band that will hide the zipper.
  3. Contrast Band – One piece cut 4″ x the width of the pillow. For this pillow: 18″ wide x 4″ long.  I also interface this piece if it is quilting cotton weight. (I often use the same fabric that I will edge the pillow with.)
  4. Fabric for edging – 2 strips cut the whole width of the fabric. If I bind the edges of the pillow I cut these strips 2 1/4″ wide. If I am going to insert cording into the edge, I base the width on the size of the cord. Lately I’ve been using 6/32″ cotton filler cord and I cut the strips 1.5″ wide cut on the bias. I sew these 2 strips together using a diagonal join which gives me a single strip that is about 80″ long.
  5. Zipper – A plastic teeth (tooth?) zipper that is longer than the width of the pillow. In this case 20″ or longer.
  6. Pillow form – 18″ pillow form. This will be a little larger than the pillow cover which will make a nicely stuffed pillow.
xx

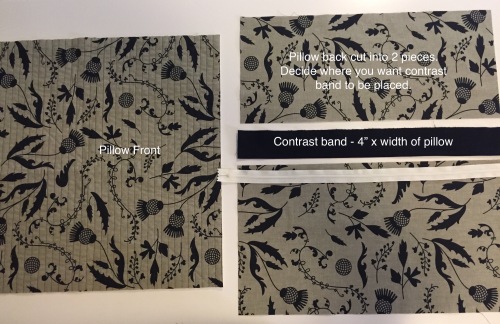
Project pieces as listed above – Front, back (divided into 2 pieces), band, zipper.


Fold the contrast band in half lengthwise with wrong sides together. This folded band is now 2″ x 18″.

xx

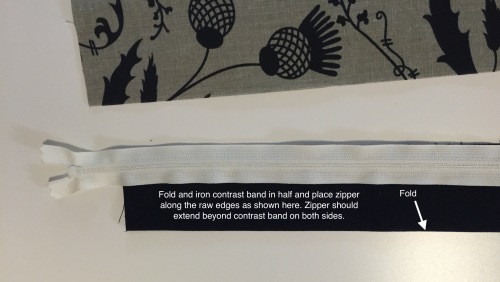
Zipper placed correctly on band. Zipper face down and extending beyond edges on both sides.


Place the zipper wrong side down along the raw edges of the folded contrast band. The extra length of the zipper should be sticking out on both ends. Baste in place

xx

Now attach the zipper and band to the pillow back top.


xx

Top of pillow back now looks like this.


Add this basted unit to the top piece of the pillow back, align the edges and pin in place. If you pin the way I have in the photo below, it will allow you to then open the zipper to sew this side of the zipper in place.

xx

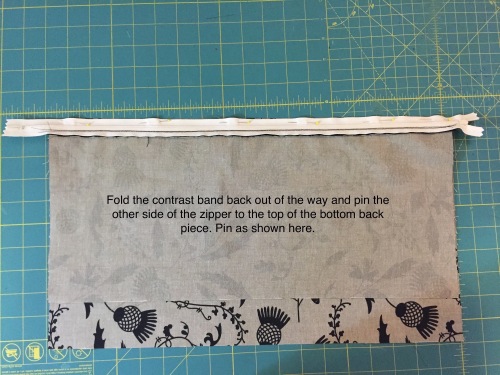
Place other side of zipper to bottom bottom and pin as shown above.


Sew the bottom of the pillow back to the other side of the zipper. There is no need to baste this side first. The right side of the zipper is sewn to the right side of the pillow back.

xx

Open zipper to make sewing easier.


xx

Zipper back almost done!


xx

This photo shows the zipper hiding under the contrast band.


xx

Move the zipper stop to the middle of the pillow and stitch along both sides.


xx

Trim zipper.

The back is now done. It should be trimmed to the same dimension as the front (18 x 18″). If you are going to bind the edges, the front and back are placed wrong sides together and basted around the edges. The binding is now applied to the edges to finish the raw edges.

xx

Binding on edges

If you are going to insert cording into the edges, cover the cording with bias cut fabric which allows the cording to go around the corners easily. This is sewn onto the right side of the pillow front and then the front and back are sewn together right sides together.

xx

Another pillow – front and back. Corded edges.

Happy Sewing!


5 Comments

Filed under Gifts, Pillows, Tutorials, Uncategorized

2016 Calendar Tea Towels

Linen/cotton fat quarters from Spoonflower

Linen/cotton fat quarters from Spoonflower

This is an easy project to welcome in the New Year. I bought these tea towels online from Spoonflower. They aren’t actually towels yet in this photo because the fabric edges are raw and fraying. If you click on this Spoonflower link you will see that there are an amazing number of design options and they are all so colorful and fun.

IMG_8907

Untrimmed fabric

I made my fabrics into tea towels (described below), but my friend, Anne, made hers into adorable (and reversible) tote bags using this YouTube tutorial by Alanda Craft. The tutorial does not describe using a towel with a one way design such as these calendar towels. To have both sides of the bag facing “right side up”, you have to make a cut down the middle, reposition and sew back together.

Tote bags made from calendar fabric.

Tote bags made from calendar fabric.

All I had to do to make the towels was to trim the edges, iron 1/4″ towards the back once and then again, and then sew in place.

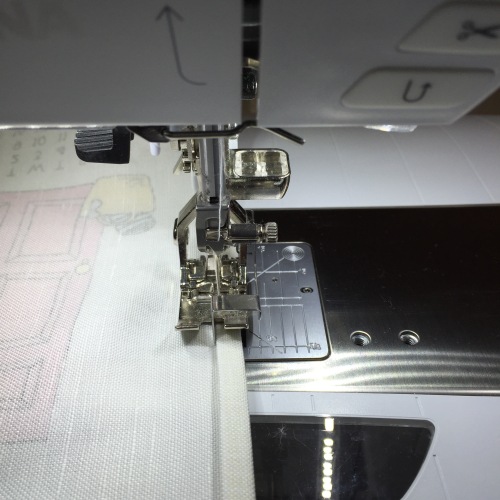
Edge stitch foot - Bernina foot #10

Edge stitch foot – Bernina foot #10

Sewing this edge was made easy with an edge stitch foot and my needle position changed slight to the right of center. As I sewed around all of the edges (from the back of the towel), I did add in a piece of twill tape to one corner to allow the towel to be hung over a hook if desired.

Twill tape in the corner

Twill tape in the corner makes the towel able to be hung on a hook or knob.

IMG_8917

Due to the bulk of the folded edge, I did have trouble getting my sewing machine to grasp and move the towel forward as I began sewing. This is what the Bernina height compensation tool is for.

Presser foot slanted up in the front causes feed dogs to not be able to advance the fabric.

Presser foot slanted up in the front causes feed dogs to not be able to advance the fabric.

In this next photo I have inserted the tool under the back of the foot (behind the start of the towel edge) which has leveled the presser foot and enabled the feed dogs to move the fabric.

Height compensation tool in place.

Height compensation tool in place – presser foot now level.

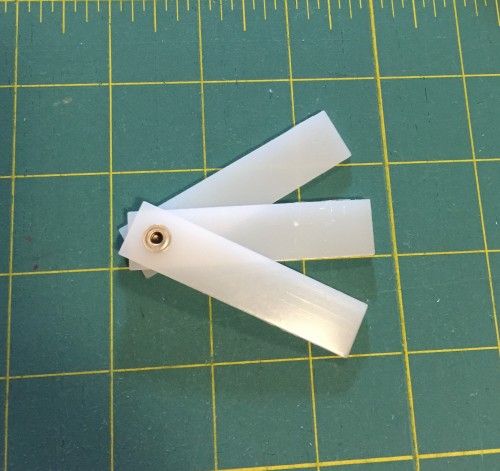
Height compensation tool.

Height compensation tool.


This tool has a swivel holding the 3 layers together which allows you to use 1, 2 or all 3 of the layers to get different thicknesses depending on what you’re sewing. I used 2 layers for these towels.

Finished towels

Finished towels


This was a fun project and makes a lovely gift. This cotton/linen fabric is fairly stiff when you receive it, but a quick wash turns it into a nice soft towel. I finished the edges before washing to prevent a lot of fraying that would have happened in the washer and dryer.

Happy New Year!


6 Comments

Filed under Gifts, Purses and Bags, Tutorials

Disappearing Nine Patch

Disappearing nine patch blocks

Disappearing nine patch blocks

I’m starting on a small quilt that I hope will have a lot of texture and decided to make “disappearing nine patch” blocks. This is an easy way to sew a block that looks rather complicated but isn’t that difficult to sew.

Sew a nine patch block together

Sew a nine patch block together

I randomly chose to use 3 inch square blocks to make my nine patches. I cut up as many gray or black and gray fabrics that I had and of course I had to purchase some more in order to have a great variety. That silvery dotted fabric is one I bought in Hawaii on a trip.

Cut the block down the middle both vertically and horizontally.

Cut the block down the middle both vertically and horizontally.

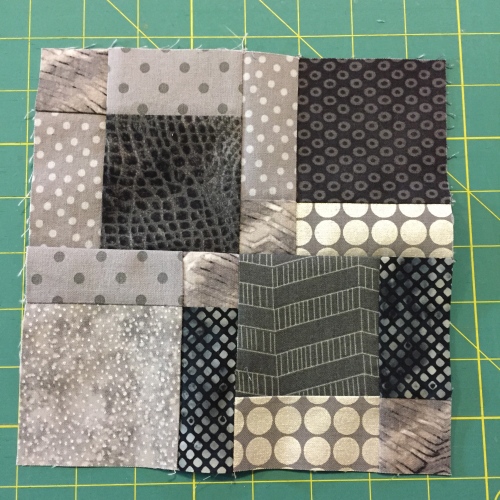
Once cut, I rotated the upper left and lower right pieces to put the small square at the outside corners.

I rotated 2 of the pieces.

I rotated two of the pieces.

You have other options at this point. You could orient these smaller blocks in any way you desire and you would get different looks.

Sewn together.

Sewn together.

The nice thing about the way I did these is that there is no fussing with lining up the seams to “nest” together except at the very center of the block. This may not seem like a big deal, but think about it. Every time two seams meet, it is desirable to have them ironed in different directions and this can get pretty complicated with this many seams.

Can you imagine sewing the block above by cutting out all of those pieces individually and piecing them together? It would take forever and be so inaccurate. At least if I did it, it would be.

xx

15 blocks on my design wall.

My finished blocks are 7 1/2″ square unfinished or will be 7″ square finished. I have 15 done and 33 left to go. If I lay them out with 6 blocks across and 8 blocks down, the finished quilt will be 42 X 56″ which I’m told is a good size for a baby. This is not what the finished quilt will look like however. There is going to be a big twist to make it special for the exceptionally special baby it is being made for. More to come!


13 Comments

Filed under Quilts, Tutorials

Dyeing Wool with Kool-Aid

xx

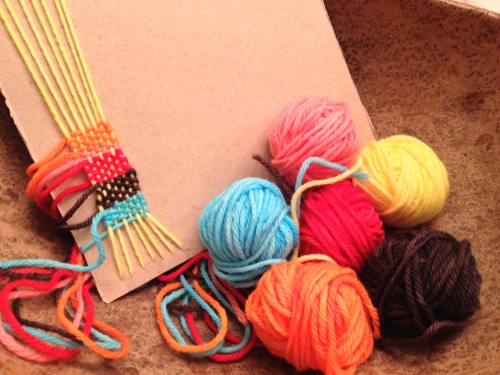
Flavors used: 1. Grape, 2. Cherry, 3. Orange, 4. Pink Lemonade, 5. Ice Blue Raspberry Lemonade and 6. Yellow Lemonade.

I recently took a beginning wool class at Serendipity Quilt Shop in Dagsboro, Delaware which I blogged about here. The instructor, Lenny Truitt, told us we could dye wool fabric in a microwave using Kool-Aid. It sounded so easy. The idea is that, by using Kool-Aid, you don’t need to use any toxic chemicals or delegate any kitchen equipment to be used only for dyeing and not for food.

Wool pincushion that I made in the beginning wool class.

Wool pincushion that I made in the beginning wool class.

Fast forward a month to Christmas and my oldest daughter gifting me a 3 month subscription to http://www.creativebug.com which is a collection of craft videos. I can view any or all of them for the next 3 months. One of the categories is “Kids Crafts” which I wanted to see because my (almost) 10 year old niece was going to be visiting for the New Year. One of the classes is called “Kool-Aid Dyed Yarn”. I combined techniques between this video class and the wool class to dye some beautiful yarn with my niece – completely fuss and mess free! Here is the lovely Maya to show you the process:

Measure 1 cup of tepid water and place in a ziplock bag. We used a gallon sized bag.

Measure 1 cup of tepid water and place in a ziplock bag. (We used a gallon sized bag).

Add 1 teaspoon of white vinegar.

Add 1 teaspoon of white vinegar (Maya did NOT like the smell) . . . .

and 1 packet of unsweetened Kool-Aid.

. . . . and 1 packet of unsweetened Kool-Aid.

The yarn that you dye must be an animal fiber. We used a white 100% wool yarn and I cut about a 5 yard length and tied it in a loop in several places (not tightly though or the dye won’t penetrate). This yarn should be soaked in warm water for about 30 minutes prior to being wrung out and dropped into the ziplock bag with the water, vinegar and Kool-Aid.

xx

Wet white yarn ready for the dye bath.

I put the ziplock bag in a small glass bowl with the bag slightly open to let steam escape and microwaved it for 2 minutes. My microwave is a low powered machine. I would guess that a regular microwave might only take 1 minute. The bag was pretty hot to the touch, but I doubt that the liquid had reached a boil. The glass bowl made it easy to take it out of the microwave without touching the hot bag.

xx

After microwaving, the yarn has absorbed most of the color.

We set the bag aside until it had cooled – several hours.

Maya showing cooled bag before removing the dyed yarn.

Maya showing cooled bag before removing the dyed yarn.

Cool bag

Cool bag – liquid is clear!

At this point the dye has all been absorbed by the wool yarn and the water in the bag is essentially clear. Some flavors left a cloudy liquid. We took the cool yarn out, rinsed it in cool water, wrung it out the best we could by hand, and hung it on a drying rack overnight.

Hung to dry overnight.

Hung to dry overnight.

The wool yarn is really beautiful and I have read that it is colorfast. It does still have a slight scent of the flavor Kool-Aid used (which Maya loved to smell) but which I’ve also read does disappear with time. There are many online resources for dyeing with Kool-Aid but most of them involve either dyeing in a pot on the stove-top or in a bowl in the microwave – not a bag.  The ziplock bag just seemed to make the whole process so much less of a mess risk – especially when doing this with a child. By putting the bag into a bowl we could also avoid touching anything that was very hot if we handled it correctly.

xx

Ready to be wound into a ball.

All ready for some fun! Knitting? Weaving? I can’t wait to see what Maya does with it!

xx

7 Comments

Filed under Tutorials

Leather iPad Case

xx

My daughter, Megan, asked me if I could make a protective case for her new iPad. She carries it in a large book bag and wanted something padded to put it in. This seemed like it could be a quick and easy project and I wanted to make it from materials on hand. After looking through some fabric of hers, my thoughts wandered to the leather that we recently used for a skirt yoke. Was there enough left? Yes!

iPad is 6.75" x 9.5" Leather cut 16" x 11" and 2 inch "flap" added to top of one side.

iPad is 6.75″ x 9.5″
Leather cut 16″ x 11″ and 2 inch “flap” added to top of one side.

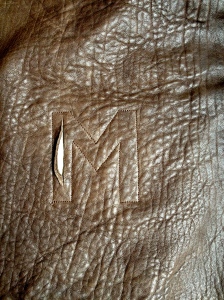
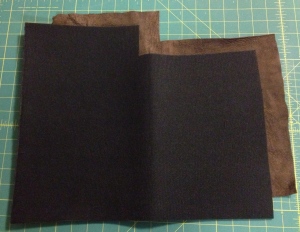
I wanted to personalize this case in some way and decided to put an “M” on it in reverse appliqué. I picked out a fabric that would show from underneath and ironed a heavy interfacing on the back. I taped it on to the back of the leather piece since pins would leave permanent pin holes.

Interfaced fabric put right side to wrong side of leather.

Interfaced fabric put right side to wrong side of leather.

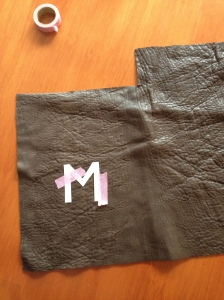
On the front, I taped the letter “M” and stitched around it. I just kept moving the tape as I sewed!

xx

Once the stitching was done. . .

xx

I made a slit with a small pair of embroidery scissors. . .

xx

and cut as close to the stitching as I could, revealing the fabric underneath.

xx

Next I cut a piece of Annie’s Soft and Stable (foam stabilizer) and a lining fabric to the same size as the leather piece.

xx

These were spray basted together and then stitched at the “fold” lines of the finished case.

xx

Leather sticks to the throat plate of the sewing machine, so I did this stitching with a piece of thin paper underneath which was easily torn away after the stitching was done.

Now what? I decided the best way to finish the edges was to bind them in the same lining fabric. I started with the top of the front of the case. This is double folded binding cut 2-1/4″ on the straight of grain.

Binding on top of front of case.

Binding on top of front of case.

Next I bound the flap. I rounded the corners and made bias binding (also 2-1/4″ wide) to do this part.

Binding across the flap.

Binding across the flap.

The final binding was cut 2-3/4″ wide on the straight of grain and was applied to the final 2 sides after folding the piece.

xx

Final binding complete.

I used a hair elastic and a button from my button jar for the closure.

xx

Now her new iPad should be nice and protected from scratches in her book bag.

Megan was very happy with it!

Megan was very happy with it!


6 Comments

Filed under Gifts, Tutorials, Uncategorized

Mesh Beach Bags

Ready for the beach!

Ready for the beach!

I made these 3 mesh beach bags recently for my nephew’s 3 little boys (ages 2 – 6). I thought they would be the perfect thing to carry their beach toys in. When they were done playing with them, they could throw the toys back in the bag and just give it a little shake to get rid of the sand.

I bought the colored mesh at a local quilt store.

Colored mesh comes in a roll that is 18" x 36" for about $5.25.

Colored mesh comes in a roll that is 18″ x 36″ for about $5.50.

Don’t you love the bug fabric? It was perfect to use with all 3 colors of the mesh.

This was a very simple project. I folded the mesh in half and sewed down the sides. Luckily my friend, Jan, had previously made a similar bag and suggested I sew the side seam with a french seam. This creates a smooth edge to the inside seam instead of something jagged that would possibly hurt little hands or catch on the toys or towel that you’re trying to get into or out of the bag.

Inside french seam

Inside french seam

Next was to box the bottom corners. This had to be done as a regular seam.

Boxed bottom corners.

Boxed bottom corners.

I sewed across the bottom corners and then cut the excess mesh. I did do a zig zag stitch over the seam edge to give it some extra strength.

The bug fabric was cut into 2 inch strips x WOF. I sewed 2 strips together lengthwise and then ironed the opposite raw edges under about 1/2 inch. I laid this right over the top of the mesh, marked exactly where the fabric should be joined to form a circle the width of the bag and then removed it and sewed this seam in the fabric. I’m afraid I don’t have pictures of this step. I think I got so excited about finishing up the bags so quickly, that I forgot to take more pictures!

Top of bag

Top of bag

The fabric was placed back on the top of the bag so that the mesh is right up against the top of it. I edge stitched around both the top and the bottom of the fabric strip.

Black webbing was used for the handles and secured onto the inside of the bag with both a square and an X in machine stitching.

Finished bags

Finished bags

That’s it!

The boys loved them!

The boys loved them!

Heading to the beach.

Heading to the beach.

6 Comments

Filed under Family, Gifts, Purses and Bags, Tutorials

Shower Caddy

I made this shower caddy for my daughter, Lindsey, for Christmas.

Shower caddy

It is made with laminated cotton fabric. I ordered this fabric from lu summers on etsy. I love the fabric and at the time I ordered it months ago, I wasn’t in a rush, so I didn’t mind ordering it to be sent from England and paying the postage. Laminated fabric is fairly heavy and this added to the postage fees. I was going to make this pattern by Terry Atkinson which I blogged about here

However, there are so many pieces with fussing and cutting, zippers and binding that I decided this was not the pattern to use laminated fabric for. I did an online search for “shower organizer sewing tutorials” and came up with this:

This pattern is a free tutorial by Alida Rad who blogs about DYI projects at http://www.Radcrafter.com. She has many other fun tutorials for all sorts of things on her site. Her organizer finished is about 9″ long, 6 inches wide and 7 1/2″ inches tall. I used her pattern pieces but I cut 2″ off of the height. This pattern has only a few pattern pieces – 2 sides, bottom and handles. I added the pockets to the inside by simply cutting an 8″ wide strip which I folded in half lengthwise to create 4″ deep pockets (less seam allowance) on the inside.

These fabrics are all laminated

I had to do some research on sewing with laminated fabrics. If you use pins, they leave holes so you have to either use them in the seam allowance where the holes won’t show or use something else like binder clips or paperclips to hold pieces together. Another problem is that the laminated side of the fabric wants to stick to the presser foot and to the throat plate. I happen to have a teflon presser foot but I found that using my walking foot worked better. I used painters tape on the throat plate to keep the fabric from sticking there.

Walking foot and painters tape to keep the laminated fabric moving!

I added the pocket pieces to the sides with small pleats in the bottom to create room to insert things like makeup brushes or hair brushes.

Pockets sewn onto side piece

The next step is to sew the bottom to both sides.

Sides are sewn together.

Sew the bottom to the side next.

Held together with binder clips.

Lining finished.

The outside of the bag is sewn together in the same way except that there are no pockets involved.

Outside of bag.

Lining sitting inside of outer bag.

If I followed the traditional directions for this bag, I would sew the handles onto the sides and then place the lining and outer bag together right sides together and sew around the top. I would have to have an opening somewhere in order to turn it right side out. I did not want to do this.

The laminated fabric will not fray and at this point in my sewing shown above, with the lining looking taller than the outer bag, it seemed to be a brilliant idea to just fold the lining over the top and sew it in place. I had to decide what to do about the handles.  I thought I might just add them under the “binding” as I had in the original caddy.

Possible handle placement

However, this makes the handles somewhat awkward to use. I decided to simply make a “slit” at the top where each handle would fit.

Slits made for handles

Before I sewed the handles in and topstitched around the top edge, I decided to stiffen the sides and bottom with pel-tex. I cut pieces to size for the bottom and all 4 sides and inserted them in between the lining and the outer bag. The Pet-tex that I used was fusible so I did try to fuse the sides together by touching a hot iron to them with a press cloth in place. I’m not sure this fusing will hold indefinitely but I figured if it held it in place while I sewed the top edge, that would be enough to keep the inside pieces in place.

Inserting the Pel-tex to make the organizer more sturdy.

Finished shower caddy

The finished bag is a great size, about 9″ x 6″ x 5 1/2″.  It has inside pockets on all 4 sides and can be easily wiped off, inside and out if it get’s wet or dirty. How great is that? I can’t wait to try another project with laminated fabric.

2 Comments

Filed under Family, Gifts, Pattern review, Tutorials

Traveling hexagons

If you have followed my last couple of blog posts, you know that I’ve been traveling. I brought the ultimate traveling sewing project with me – English paper pieced hexagons!

A group of hexagons sewn together.

Before I left home, I grabbed this great set of fat quarters that my dear niece had given me.

Fun group of fat quarters

I had already purchased a package of 100 one-inch hexagon precut paper shapes.

Package of precut paper hexagons

I found these at a quilt shop in Illinois but you can also buy them online here. They come in all kinds of shapes and sizes. A 1″  hexagon means that each side of the hexagon measures one inch. These are made out of light card stock which is perfect. I also cut a couple hexagons out of some card stock I had that were 1/4 inch larger all the way around.  I used these as a rough template to cut my fabric with. I simply cut the fabrics into strips, stacked about 4 strips, and then used a rotary cutter to cut around the hexagon template.  Some of the fabrics had patterns on them that I felt would look better if they were not randomly cut.  In order to “fussy cut” these fabrics, I cut the 1 ” shape out of the middle of my template, placed it where I wanted on the fabric and cut each one out individually.

Using template to see what final hexagon will look like.

Using template to “fussy cut” hexagon

This gave me a wonderful collection of fabric hexagons which are the right size to use with my 1″ papers.

Fabric hexagons and paper pieces.

There are a lot of different instructions for english paper piecing. Some have you actually baste the fabric to the paper which I do not like to do. I hold the paper against the wrong side of the fabric, fold over one side, then another and baste the fold where they intersect. Keep doing this around the shape until all sides are basted down.

Back of basted hexagon.

After basting many of these, they can be whip-stitched together by putting right sides together and sewing one side at a time. It is an extremely accurate way of piecing geometric shapes together and is all done by hand.  This is what makes English paper piecing so great to travel with!  Small pieces, needle and thread.  So little to carry with you!

Front side

Reverse side.

Here is the little case I carry this project in which I bought at the Container Store.

Hexagon tool box

Everything I need!

I’m not sure what I’m going to do with my hexagons.  I’m thinking of making a tote bag or pillow. I guess it will depend on how many I get put together.

6 Comments

Filed under Tutorials, Uncategorized

Zakka Style project #13 – Patchwork Pot Holder

Finished front

Finished Back

This week’s project from the Zakka Style sew along is a patchwork potholder. Kim from Retro Mama designed these potholders for the book. She has also updated the instructions for putting on the binding which can be found here. This was a pretty quick and easy project to put together. The great thing about these is that they are large and thick enough to make a nice trivet for the table as well as protecting your hands from a hot dish.

I started the project by making a strip set. I had some strips that were already sewn together. Adding a strip of linen to those gave the potholder the look I wanted. After all, linen is the fun element of the Zakka Style projects!

Strips sewn, layered with Insul-Brite, batting, and backing and then trimmed into an 8 ” circle.

I layered 10″ squares of the strip set, a piece of Insul-Brite, a piece of cotton batting and then a piece of linen for the backing. A walking foot made quilting these together very easy. Once they were together I cut an 8 inch circle.

Bound edge of partial circles

2 partial circles were cut out of linen and 2 out of a cotton print (which ended up unseen on the inside). The flat edge was bound and then these were placed onto the back of the round piece and basted around the edge. Now it was ready for the binding.  I have avoided binding in linen on other Zakka projects due to the fraying of the fabric. However, since this binding HAD to be cut on the bias, fraying would not be a problem so I went ahead and used it.

Binding turned to the back. Ready for hand stitching.

Unfortunately, I didn’t read the updated binding instructions and just overlapped and sewed the edge of the binding which did not give as clean a finish as doing it the other way would have. I look forward to trying it again and perfecting the binding.

I’m happy with how this turned out and will be making some more for gifts.  Any sort of quilted design could be put on the front and it would be fun to try some different things to make a useful and pretty gift.

2 Comments

Filed under Gifts, Tutorials, Zakka Style sew along

Zakka Style Project 5: Patchwork Pencil Case

Zakka Pencil Case finished

This was a fun and easy project.  Thankfully, many of you have already posted about it so I was forewarned about following the directions exactly. The best suggestion that I have to add is that the directions want you to “turn” the project through a 1 1/2 inch opening.  I thought it was easier to leave the whole 3 inch end open to turn through (see pictures below).  There were not many pictures or diagrams for this project so I tried to take pictures of each step.  I hope this helps!

Pieces all cut and patchwork sewn together.

Sew the small linen piece to the top of the patchwork strip and the longer linen piece to the bottom of it. Baste the closing band 1" from the top of the small linen piece.

After fusing interfacing onto the wrong side of the lining piece, sew lining to linen piece across top with right sides together. Fold lining back at top and topstitch along the fold.

With lining side up, fold the lining right sides together by folding 5 1/2" from the topstitched edge.

Turn the piece over and fold the linen exterior in the same way - aligning raw and folded edges.

Sew along raw edges on both long sides. I left the 3rd raw edge open to give more room for turning right side out. Folded edge is not sewn.

Turn right side out.

Fold raw edges in.

Topstitch opening closed and it's done!

As others have posted, this case is smaller than it looks in the book or online.    It’s only about 2 1/2″ by 6″.  Here is how it compares to a pencil and a pen:

It has been suggested that it could be used for a small pair of eye glasses or to keep crochet hooks in.  I might use mine to keep my small rotary cutter in when I take it to a class.

Happy sewing everyone!

4 Comments

Filed under Tutorials, Zakka Style sew along