Category Archives: Garment sewing

Alabama Chanin style T shirt

I’m kicking off “Me Made May” with a bang. I have totally hand sewn a T-shirt! I bought this organic cotton fabric from Alabama Chanin and it is dreamy.

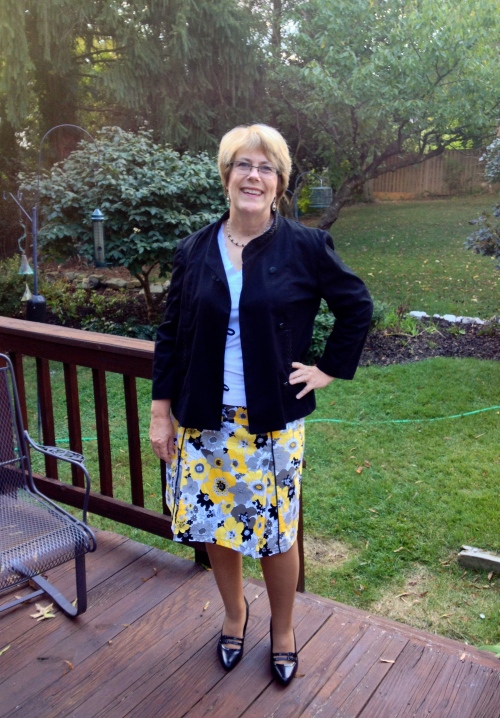
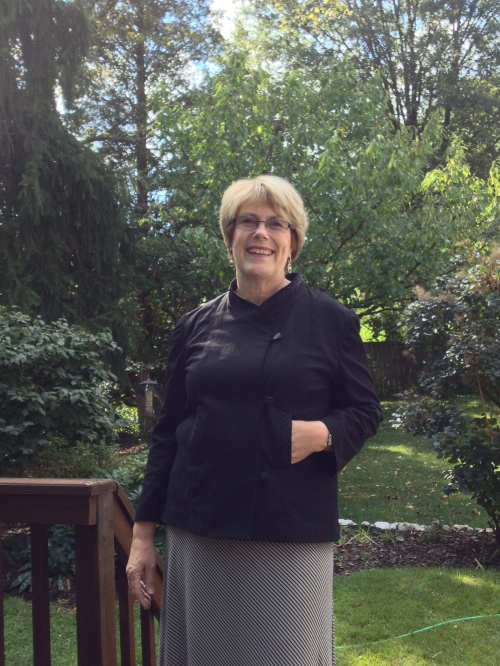
I’m wearing it here with a skirt I made years ago. The pattern is the Everyday Skirt from oliver & s. It is an easy sew and I love the pockets!


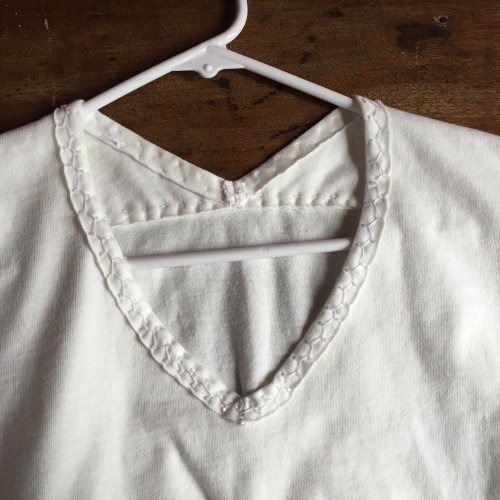
To make the top, I traced around a favorite T shirt that I owned. I used a folded knit band to finish the neckline and sewed it down with a decorative stitch incorporating small little chop beads as I went.

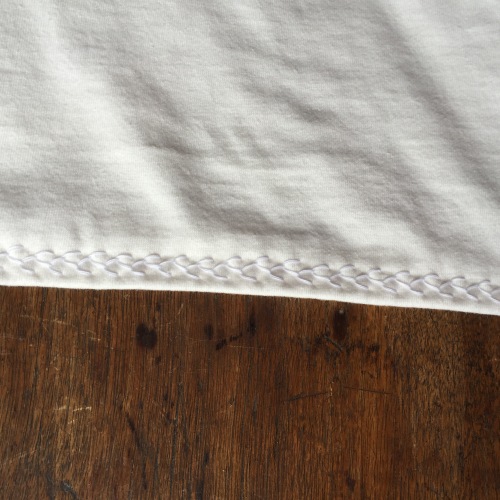
I hemmed the bottom of the shirt and the sleeves using another decorative stretch stitch found in the book Alabama Studio Sewing + Design.

All of the seams were hand sewn using a regular running stitch and then felled to one side also with a running stitch.

Practice samples

Fun beads and sequins from Alabama Chanin


I made this shirt specifically to wear with the Alabama Chanin skirt I am currently sewing. I guess I had better get going on that!

IMG_9463

1 of 4 skirt panels. This is a double layer of knit that has been stenciled and then “quilted” together and the top cut away to expose the underneath layer.

Notes to self (or anyone else who’s interested):

  1. I used 2 layers of cotton knit on the front of this shirt and only one layer for the back and sleeves. I thought I might do some reverse appliqué on the front but put the bottom layer of knit with the right side towards the inside of the shirt. I could probably still cut and expose the layer with the wrong side showing, but it would bother me. Next time put both right sides facing the same way as I did with the skirt.
  2. I found the directions for Creating Mitered Binding for a V-neck in the book Alabama Studio Sewing Patterns on page 22.
  3. Directions for garment construction and the stretch stitches are in all of the books.Alabama Studio Sewing + Design has them on pages 24 – 27.
  4. Same book (as#3) has a page of pretty circular stitches  – Pg. 81  These are used for a beautiful skirt on page 101 of the Alabama Studio Style book.


10 Comments

Filed under Garment sewing, Uncategorized

One Hour Top by Fancy Tiger Crafts

Free pattern download

Free pattern download

I just finished sewing this One Hour Top by Fancy Tiger Crafts. I used a knit fabric that I bought in December from Girl Charlee as part of that months’ “KnitFix“. I received 6 two yard cuts of knit fabric and didn’t know what they looked like until they arrived at my doorstep. I’ve seen some amazing things made out of the different knits. I thought this easy top pattern would be a good choice to make a quick top.

Easy top

Easy top

The pattern is a free download and is only two pieces – the front and the back. The two pieces are identical except for the front neckline dipping down lower. I made some ridiculous mistakes making this top and the first one was that I cut out two fronts instead of a front and a back. I had to cut them separately to line up the stripes and I guess I was thinking I would cut 2 backs and then cut out the scoop of the front neck, but suddenly I realized I had cut 2 fronts and had to decide what to do. I could just make it up using 2 fronts and the back would dip down too. However, in the end I decided I would just sew an extra piece of fabric to the back neck area (with careful matching of the fabric design) and no one would be the wiser (except for those of you reading this!)

Back neck - fabric added

See the lower line of white stitching? That’s where I matched and added fabric.

Knit fabric which doesn’t fray and this very busy print enabled me to get away with this.

The “One Hour” pattern gives instructions for folding over all of the raw edges to finish the top. It does not give directions for sewing on knit bands as I did at the neck and the sleeves. I really didn’t think that folding under the curved neckline and topstitching it down would look good. I was afraid of the stretching that might occur or losing the stretchiness of the fabric where I topstitched. I did not have any problem hemming the shirt this way however.

xx

I found a wonderful suggestion for how to make knit bands that can be found in the directions here of another easy top that is a free download called the Hemlock Tee by Grainline. Making the bands can be tricky because the knit tends to roll at the edges and you have to fold these bands in half and keep the two edges flat and together while you sew them onto the top. This tutorial suggests that you cut the bands wider than needed and then mark a guide to the left of your serger needles/blade to run the folded edge along. By doing this you are cutting off the edges that may be curling and sewing the flat area together.

I used a strip of washi tape as a guide here.

I used a strip of washi tape as a guide here. The left edge of the band is the fold and I am serving  two layers of fabric together on the right. 

This creates a nice even band. It helps to make it longer than you want too so that you can cut it to exact size afterwards as sometimes the fabric stretches as you start or finish the piece. If you are sewing this band on your garment in the “round”, you do have to unpick some stitches on either end in order to join the piece together.

Flat piece with unpicked stitches on both ends.

Flat piece with unpicked stitches on both ends.

Now joined to make the cuff that will be sewn onto the sleeve.

Now joined to make the cuff that will be sewn onto the sleeve.

I could have serged that “unpicked” area on this cuff, but I found that the fabric didn’t shift enough to bother with doing that and just sewed it on to the sleeve this way.

So what were the other ridiculous mistakes I made? Two things. 1) I paid attention to matching the stripes but I didn’t realize I should have been paying attention to centering the motifs on the fabric vertically too. At first glance you might not notice this, but if you really look, it is obvious that the design is not centered. 2) I obviously have a “front” and “back” problem because I sewed the seamline in the the neckband to the middle front of the top instead of the back!

Some of my followers wanted to see the other fabrics I received as part of the Girl Charlee KnitFix.  Here they are!

Girl Charlee KnitFix fabrics from December

Girl Charlee KnitFix fabrics from December

What in the world am I going to do with all of these? I like the One Hour Top but not enough to make it again. It is quick but so completely shapeless that I need to try something else.

7 Comments

Filed under Garment sewing, Pattern review

The Moneta dress by Colette and sewing with plaid

xx

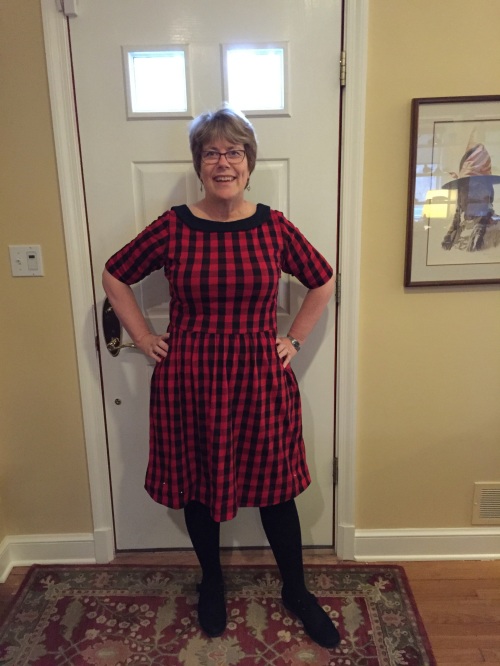
Moneta Dress

I bought this red plaid knit fabric from the online shop Girl Charlee. I know that it looks like flannel and it kind of feels like flannel. However, it is a nice soft knit. I bought it in December along with their “KnitFix” which is a group of six 2 yard cuts of different knit fabrics. When you order a KnitFix, you don’t know exactly what the fabrics you get are going to look like but they promise they will all be high quality and “on trend”.

The collar has a little center piece that hangs down in the back.

The collar has a little center piece that hangs down in the back.

I seem to be enamored with “mysteries” lately as I also signed up for the Amitie Mystery Block of the Month in December. I haven’t cut into the other knits yet but will soon. There is a Facebook group for those who are sewing with these knits and there has been a lot of sharing of favorite patterns and tips for sewing with knits.

Unable to "cut on the fold".

Unable to “cut on the fold”.

Cutting out this plaid dress was quite a bit of trouble. There is no way you can fold this knit fabric in half and have it line up exactly right. In order to be absolutely sure that the 2 halves were identical, I had to cut it out without folding. I cut one side and then turned the pattern over to lay it on the other side.

Bodice

Bodice

For the bodice I actually marked some of the darker black parts of the plaid on the pattern in order to get it just right. This was very fussy but definitely worth it.

Pockets!

Pockets!

The Moneta pattern has pockets and the collar and sleeves are optional. The pattern says that it’s skill level is “beginner”. I would hate to see a true beginner try to make this dress. There are a number of tricky parts – but I will say that it has very good directions – including a link to a video that shows a lining technique for the sleeveless version. There are also good directions for inserting clear elastic into the waistline which is done to keep that area from stretching out over time.

Knit Moneta dress by Colette

Megan’s sleeveless version

My daughter made the sleeveless version last May. Isn’t she adorable?

The Moneta pattern has quite a bit of “negative ease”. This means that the garment measurements of the bust and waist are less than your own measurements. The bodice is meant to s-t-r-e-t-c-h and be very form fitting. I think this is more appealing to a younger sewist like my daughter than it is for me. I made a size larger than my measurements called for and it is still very close fitting. Because of the knit fabric, though, it is very comfortable. I am looking forward to sewing with my KnitFix fabrics next!

Notes to myself about making up this pattern –  Size XL. Added 1 inch to center of sleeve. Added 1 inch to length of bodice and graded bodice out to make waist about 1/2 inch larger on each side. Lined the bodice with the same fabric I made the collar out of. Lengthened the hemline by 1.5 inches which is about the size of the hem I turned under. Used ballpoint needles in both my sewing machine and serger. Used a double needle with regular thread in the needles and wooly nylon in the bobbin to hem the skirt and the sleeves. Also used my black latch bobbin case in order to loosen the tension on the bobbin when using the double needle. Used 3/8″ plastic elastic from JoAnns for the waistline but would have preferred 1/4″ if I could have gotten it. Sewed the waistline with a zig zag stitch on my sewing machine rather than using the serger. I would love to make this dress again but would rather not have to match a plaid or stripe!


5 Comments

Filed under Garment sewing, Pattern review

Sewing with Daughters

I am a lucky woman – I have three daughters. I sewed a lot of things for them when they were little.  This included not only dresses or other clothing to wear, but also costumes – dress up clothes, Halloween costumes, dance costumes and school or church play costumes.

My three daughters wearing Easter dresses I made them.

My three daughters wearing Easter dresses I made them. Circa 1990.

They saw me sew a lot of things and now as adults they all have sewing machines and can sew themselves – when and if they have the time! Sometimes I feel silly that I named my blog “I Finally Have Time”, because I actually never feel as though I have that much time to spend on sewing. However, compared to my young professional daughters – I do have much more time. Nothing pleases me more than to actually sew with them.

My youngest daughter, Megan, asked for a sewing day with me for her birthday in May. She wanted to make the Moneta Dress by Colette. We made plans to spend the day at the Finch Sewing Studio in Leesburg, VA where we knew we could purchase the pattern, some great fabric and have lots of space to work without the interruptions that come up at home. We also knew that if we got into trouble with sewing the pattern, Nicole would be there to bail us out. We have already taken a variety of classes from Nicole, but this time we decided to just use her wonderful sewing studio space. Although she does have classes coming up for this dress pattern!

Knit Moneta dress by Colette

Knit Moneta dress by Colette

I didn’t take any process photos and Nicole took this one right before we left for the day. Don’t you LOVE this polka dot dress! And those pockets! Megan did a great job putting it together and there were some tricky parts. Actually, it is not a tricky pattern, but if you chose the sleeveless version, the bodice is lined and there is a magical way of sewing it in which requires extra attention to the directions. Colette also provides a video link to the process for people like me who would like to see it done instead of just reading the instructions. The waist has a narrow clear elastic sewn onto the seam allowance which will keep the knit from stretching out of shape there.

A week later I met my oldest daughter, Lindsey, in Montana and she had a knit maxi skirt that she had bought last summer and some fabric that she wanted to use to try to replicate it. Here is the original skirt on her.

Stripes horizontal on the front and back with Chevron on the sides.

Stripes horizontal on the front and back with Chevron on the sides.

We did not have enough fabric to do those chevrons and so decided to run the stripes vertically on the sides. This had an added benefit of not having to match the stripes. Here is the result:

New skirt

New skirt

The waistband of the purchased skirt looks like this on the inside:

xx

Inner waistband and elastic

There is a strip of clear elastic sewn into the seam allowance of the waist – just like with the dress above! Do you see the line of stitching about an inch below the top of the waistband? That is where a second strip of elastic is sewn inside the waistband. As nice as it is to have a knit waistband, my experience is that cotton knit fabric does stretch and it is nice to have the security of that extra elastic. We did not have access to clear elastic but where able to find 1/2″ white elastic to sew into the new skirt. It worked perfectly. The side seams of the waistband also had some elastic in them to cinch the sides which looked nice.

Cinched side seams.

Cinched side seams.

If only we had one more clothespin!

If only we had one more clothespin!

Lindsey happily left for home a few days later wearing this skirt.

I don’t know when I’ll have a chance to sew with my middle daughter, Sandy, but I hope it is soon. Most of the sewing she has done recently is to make pillows which she sells. She has a process to create a stencil using her computer and a Silhouette cutting machine. She can take words that are meaningful to someone and “paint” (actually ink) them onto fabric and then create a pillow. Below is one of three pillows she made for my brother and sister and me regarding our childhood summer home commonly referred to as “camp”.

Front

Front

Back (zipper hidden underneath)

Back (zipper hidden underneath)

My family will all be gathered at camp soon and can not wait to get there!


8 Comments

Filed under Family, Garment sewing, Pillows

Flirting the Issue Skirt Sew-along

I heard Rachel Hauser of Stitched in Color on Pat Sloan’s radio podcast recently talking about hosting a sew along for a free skirt pattern by Anna Maria Horner. The name of the pattern is called Flirting the Issue Skirt and you can download it here.

xx

Cotton voile fabric by Amy Butler

The skirt is very light and airy. The suggested fabric for making it is cotton voile which is definitely one of the nicest feeling fabrics you can wear! Sometimes voile is difficult to find and pricey compared to quilting weight cotton but Rachel gave a link to Pink Chalk Fabrics who has a great selection at a great price. Irresistible!

xx

Voile is lightweight enough that it would not make a suitable skirt in one layer. This pattern uses 2 fabric layers (an outside fabric and a lining) which are sewn together at the top of the skirt. Channels for elastic are then sewn in which create the waistband. It is very easy to sew this skirt, but threading all of that elastic and making the gathers even is daunting!

4 rows of elastic.

4 rows of elastic inserted between the outside fabric and the lining.

I suggested to my friend Anne that we get together and each make up a skirt. I seem to get much more done if I plan a date to do it with a friend. Do you do this?

Anne's skirt.

Anne’s skirt using Anna Maria Horner’s voile fabric


I have linked up at Stitched in Color where you can see the other skirts that were made during this sew along and see Rachel’s post comparing her two skirts – one made out of voile and the other made of quilting weight cotton.

Rachel's skirts from Stitched in Color. Voile on the left. Quilting cotton on the right.

Rachel’s skirts from Stitched in Color. Voile on the left. Quilting cotton on the right.

This was a fun project. The skirt is very comfortable to wear. Perfect for the warm weather ahead.

xx

I cut the front and back such that I could match those circles at the sides. It is very difficult to see the side seam which looks nice – but took extra time!

Other info for this garment (in case I decide to make another).

I used 1.5 yards of an Amy Butler voile for the outer skirt and 1.5 yards of cotton batiste for the lining. These 2 fabrics were perfect for this skirt. Unfortunately the only local source for batiste had very few colors options which is how I ended up with yellow.

The elastic I used was 1/4″ and was called “knit” elastic. The other option at Joann’s was “braided” elastic. The only difference I could see from descriptions on the packaging was that the braided variety narrows when stretched and the knit does not. I’m not sure the relevance of that to this project, but I decided to chose the one that did not narrow when stretched.

The 4 rows of elastic is very comfortable at the waist. I cut each piece of elastic the measurement of my waist, inserted it into the skirt, pulled and twisted and tried to get the gathers evenly distributed, tried it on and then cut off probably at least 3 inches from each end before joining them together. The finished waist is, in fact, about 6″ less than my waist measurement, but this elastic is so stretchy that it does not feel at all tight.

Who doesn’t LOVE a hem (or two) that can be finished by machine? Very quick and easy finish as the skirt pieces are exact rectangles and everything, including the hem, is right on grain. I did use the suggested pattern advice of making both the front and back the circumference of my waist. It appears as though some of the other sewists participating in the sew along thought their skirt may have benefitted by less width if they used a heavier fabric.

Anne and I both chose fabrics with a semi-large motif that we thought would look better matched at the side seams. An all over print would have eliminated having to fuss with that.


10 Comments

Filed under Garment sewing, Pattern review

Schoolhouse Tunic and Arts Center Exhibition

A few weeks ago the Anacostia Arts Center in Washington DC opened an exhibit of quilts by local quilters.  DC Modern Quilt Guild members have a variety of quilts hanging there including one of mine.

xx

Stitched DC

My husband and I helped to hang the quilts on the day before the opening. The quilt below was made by a member of the Daughters of Dorcas quilt organization.

My husband hanging the largest quilt in the exhibit.

My husband hanging the largest quilt in the exhibit. Photo courtesy the Anacostia Arts Center.

I wanted to make something new to wear to the opening reception. I had some Nani Iro double gauze fabric just waiting for this purpose and chose to make a pattern by Sew Liberated called the Schoolhouse Tunic.

Linda Fasules with "Zakka Style Quilt"

Linda Fasules with “Zakka Style Quilt”

The pattern comes in two lengths and I chose to make the longer version.

Carla Voorhees with "HST Journey"

Carla Voorhees with “HST Journey” (and me!)

I love how it turned out and it is beyond comfortable. Because the fabric was so precious, I did make a muslin first, but ended up not having to make any changes. This is a very quick and easy pattern to make.

Other quilts in the exhibit with their DC Modern sewists –

Susan Fuller with "Pinocchio"

Susan Fuller with “Pinocchio”

Dana Seltzer with DC Metro Map

Dana Seltzer with DC Metro Map

Anne Brill with "Four Flowerpots"

Anne Brill with “Four Flowerpots”

Natalie Hardin with "Little Star"

Natalie Hardin with “Little Star”

Meli Mathis with "Simply Styled Color"

Meli Mathis with “Simply Styled Color”

Frederick Nunley (on the right) with his partner Keith and Shoofly Orange Slice. Photo courtesy Anacostia Arts Center

Frederick Nunley (on the right) with his partner Keith and Shoofly Orange Slice. Photo courtesy Anacostia Arts Center

Elle Sutherland Irby (and Miles) with "Smooth Sailing"

Elle Sutherland Irby (and Miles) with “Smooth Sailing”

Lynne Mackay-Atha with Katte's Paintbox (back)

Lynne Mackay-Atha with Kaffe’s Paintbox (which is the back of this beautiful quilt)

xx

The front of the quilt above. Read her post  about the Arts Center choosing to show the back.

There are many more quilts to see and the exhibit is running through March 29, 2014. If you are in the DC area, make plans to go see it. There is a wonderful cafe in the center that is well worth visiting as well.

On Saturday, March 8th there will be quilting lectures and pop up shops at the Anacostia Arts Center.

March 8 event

March 8 event

Katie Blakesley and Laura Gunn will be speaking from 1 to 3 PM. You do need tickets to attend the lecture. More information and a link to buy them can be found here.

Finch Sewing Studio and Del Ray Fabrics will be selling from 3 to 5 PM.

See you there!

5 Comments

Filed under DC Modern Quilt Guild, Garment sewing, Pattern review, Uncategorized

Sewing Day with my Daughter

xx

Cutting the fabric. The lining was cut and sewn first to check the fit.

Monday was Columbus Day and Megan had the day off from both school and work and asked if we could have a “sewing day” and make a skirt that she had purchased wool fabric and a pattern for years ago. Luckily we knew where they were!

When I was at the fabric store for something else, I saw they had some leather pelts and one was just the color of the fabric for her skirt, so I bought it.

xx

Leather!

I’ve done a little bit of sewing with leather before, but I wasn’t completely confident. At least I had a leather needle for my sewing machine!

Here is the pattern she used. Notice the word “EASY!” Not even a dart and we cut the front on the fold of the fabric and so didn’t put a seam down the front either. Nothing to mess with the houndstooth pattern of the wool fabric.

Simplicity 9825 - No longer available

Simplicity 9825 – (No longer available)

Here is the mostly finished skirt. (Still needs to be hemmed)

xx

It came out great!

Since both the houndstooth wool and leather were precious, we ended up making two muslins to make absolutely sure we were going to be happy with the fit. The leather was not difficult to work with. This piece was pretty pliable. It wasn’t much different than working with the heavy wool. We were concerned about messing up the zipper but found this blog post that showed an amazing red leather skirt with an invisible zipper in it, so we went for it.

Invisible zipper

Invisible zipper

We even made the inside as pretty as the outside!

xx

Inside yoke and lining

All in all, we’re pretty proud of this skirt. Megan did almost all of the sewing but was pretty much hand fed all of the pieces by me as she went. You can not put pins into leather so we used clover binding clips instead. The only other comment I would make about sewing with leather, in case you’re tempted to try it, is that it does stretch and so you do have to be careful of that. I sewed a piece of twill tape to the upper edge to keep it from stretching as she wears it.

Now we just have to wait for the weather to get cold enough for Megan to wear it.

(Well, I guess someone’s got to hem it first too!)

12 Comments

Filed under Garment sewing, Uncategorized

Maxi Skirt Class at the Finch Sewing Studio

The Finch Sewing Studio is Leesburg, VA

The Finch Sewing Studio in Leesburg, VA

I took the Maxi Skirt Class  with my friend, Anne, and daughter, Megan, at the Finch Sewing Studio a few weeks ago. It was so much fun (as is any class offered there!) Nicole showed us how to draft a custom pattern for our skirts after taking our measurements.

In our new skirts after the class

In our new skirts after the class

We chose cotton knit fabrics from the beautiful selection she carries and got to work. I learned so much about sewing with knits. We used special needles and special pins and a walking foot. Being a quilter, I have not sewn with knits very much at all so it was well worth taking a class to learn all about this and to come away with a fun skirt.

xxx

Maxi skirt and my Passport Jacket

I’m going to be able to wear it into fall with my Passport Jacket. The fabric I chose is organic cotton and bamboo and has such a nice feel to it. Megan and Anne picked a lighter cotton fabric and Nicole showed them how to add a lining to theirs. We all learned a lot and had a fun morning together.

1 Comment

Filed under Garment sewing, Quilt Shops, Uncategorized

Passport Jacket by Lisette

Passport Jacket

Passport Jacket and my Proper Attire Skirt

I’ve been working on this jacket for the past 3 weeks. It didn’t take that long to put together, it was just a matter of making all of the decisions about what adjustments to make regarding fit, length, number of buttons, etc… This is a Simplicity pattern by the designer Liesl Gibson of Oliver & S fame. Oliver & S in an independent pattern company that has the absolutely most adorable children’s patterns.

xxx

Jacket & dress pattern

The jacket was part of the online garment sewing class I’ve been taking. Sadly the class ended this week and I have not started the 4th and last piece which is a dress. I am very pleased to have the jacket done, and just in time for cooler weather.

xx

I made the View C jacket which is unlined and has a straight collar. I added a little bit of embroidery to the collar and the pocket welts.

Embroidery to collar and pockets

Embroidery to collar and pockets

This was very simple to do on the individual pieces before they were attached to anything. I did interface them before doing the embroidery. I used a variegated thread in a black/gray color that doesn’t show up too strongly – taking this picture was a challenge. It was my intention to add this little detail but not have it be too “in your face”.

Embroidery on finished collar

Embroidery on finished collar

Alterations I made to the pattern:

I added 3″ to the length of the jacket and to the sleeves. This made my sleeves long instead of 3/4 length.

I put 3 buttons down the front instead of just the one at the top.

I made an adjustment to the center back to make it fit better on my shoulders.

What I like about the pattern:

It fits really nice and the black twill I chose to use is very soft and nice feeling.

It can be worn with a lot of different clothing.

The button loops are a lot easier to make than buttonholes!

What I don’t like about the pattern:

I’m not sure I love the asymmetry of the front closure or that the jacket is not lined. I’m pretty sure I will feel as though it has to be worn closed rather than open. What do you think?

Would I make this pattern again?

Maybe. If I did, I might try the ruffled collar, make it smaller and only put the top button loop on. I would also lower the pockets which are a bit high.

xxx

Pockets!

Pockets!

5 Comments

Filed under Garment sewing, Pattern review, Uncategorized

Proper Attire Skirt by Anna Maria Horner

zzz

My finished skirt

I made the Proper Attire Skirt this past week as part of the Fall Wardrobe e-course I’m taking from Deborah Moebes. It is a pattern by Anna Maria Horner and includes sizes XS to 4XL. The only measurements that the pattern envelope lists are finished dimensions and so you have to judge the size to make based on that.

Pattern envelope

Pattern envelope

I did make a muslin of the pattern to check for sizing. Luckily I did not have to make many adjustments to the size that I chose.

Muslin to check for fit.

Muslin to check for fit.

There was some fullness in the hips, just below the yoke, that I flattened out on the pattern pieces and I ended up adding 3 inches to the length.

Finished skirt and the Sorbetto top that I made last week.

Finished skirt and the Sorbetto top that I made last week.

The fabric I used was a bottom weight 100% cotton that was 60″ wide. It wasn’t quite as heavy as a twill, but was much heavier than a quilting weight cotton. I bought it at Hancock Fabrics where I never would have expected to find anything I liked. (I went there because their McCalls patterns were on sale and our last garment for this e-course is a McCall’s dress.) I have to admit that this fabric was a dream to sew with.

Knife pleat and piping detail

Knife pleat and piping detail

I used packaged piping and did not insert it in all of the areas that the pattern suggested. (Putting a stripe right across my belly did not seem very appealing to me). The skirt is completely lined and has an invisible zipper in the back.

Alterations I made to this pattern:

I took the curve out of the side seams below the yoke, lengthened the skirt by 3 inches and excluded the piping across the front yoke.

What I like about this pattern:

The finished skirt feels like a very well made and tailored garment.

What I don’t like:

The pleat does not hold it’s shape very well when the skirt is worn. A good friend who has done a lot of garment sewing suggested I edge stitch it. This has helped a great deal but it’s not perfect.

Would I make it again?

No. I think that I will wear this one quite a bit, but I don’t feel as though I like it enough to make another.


8 Comments

Filed under Garment sewing, Uncategorized