
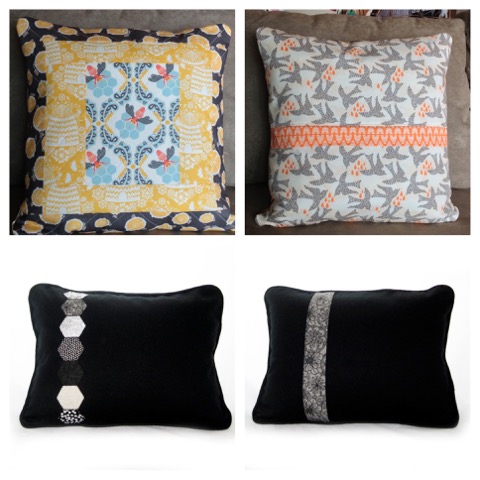
Front and back of the same pillows
I love to make pillows and give them as gifts. It’s nice if the cover is removable so that it can be washed or changed out. I like to put in a zipper and to cover it with a contrast fabric band. It makes the back look as pretty as the front!

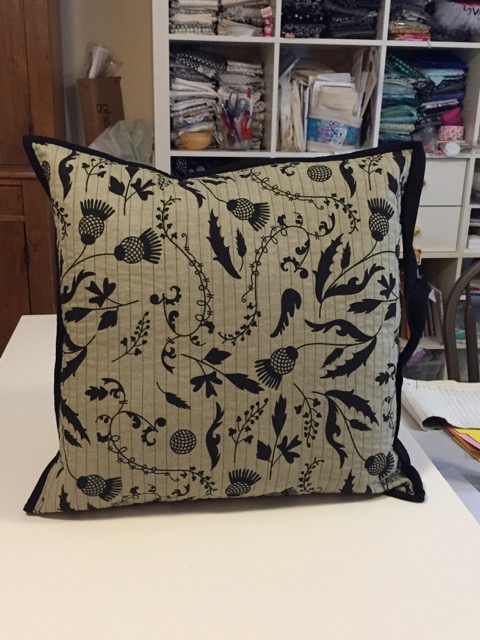
Front

Back
For an 18″ pillow start with:
- Pillow Front – this can be a single piece of beautiful fabric or an orphan quilt block or something you sew together specifically for who you are making the pillow for. This pillow front can be quilted or not. If you quilt it, you will want to add batting. If you don’t quilt it, depending on the weight fabric you use, you may want to interface it. For this example the front was cut 18″ x 18″ after quilting.
- Pillow Back – I cut the back the same width as the front (18″) and 1 inch longer than the front (19″). 18 wide x 19″ long. I fuse on the same size piece of interfacing (again based on fabric used), and then make a horizontal cut where I want to add the contrast band that will hide the zipper.
- Contrast Band – One piece cut 4″ x the width of the pillow. For this pillow: 18″ wide x 4″ long. I also interface this piece if it is quilting cotton weight. (I often use the same fabric that I will edge the pillow with.)
- Fabric for edging – 2 strips cut the whole width of the fabric. If I bind the edges of the pillow I cut these strips 2 1/4″ wide. If I am going to insert cording into the edge, I base the width on the size of the cord. Lately I’ve been using 6/32″ cotton filler cord and I cut the strips 1.5″ wide cut on the bias. I sew these 2 strips together using a diagonal join which gives me a single strip that is about 80″ long.
- Zipper – A plastic teeth (tooth?) zipper that is longer than the width of the pillow. In this case 20″ or longer.
- Pillow form – 18″ pillow form. This will be a little larger than the pillow cover which will make a nicely stuffed pillow.

Project pieces as listed above – Front, back (divided into 2 pieces), band, zipper.
Fold the contrast band in half lengthwise with wrong sides together. This folded band is now 2″ x 18″.

Zipper placed correctly on band. Zipper face down and extending beyond edges on both sides.

Place the zipper wrong side down along the raw edges of the folded contrast band. The extra length of the zipper should be sticking out on both ends. Baste in place

Now attach the zipper and band to the pillow back top.

Top of pillow back now looks like this.
Add this basted unit to the top piece of the pillow back, align the edges and pin in place. If you pin the way I have in the photo below, it will allow you to then open the zipper to sew this side of the zipper in place.

Place other side of zipper to bottom bottom and pin as shown above.
Sew the bottom of the pillow back to the other side of the zipper. There is no need to baste this side first. The right side of the zipper is sewn to the right side of the pillow back.

Open zipper to make sewing easier.

Zipper back almost done!

This photo shows the zipper hiding under the contrast band.

Move the zipper stop to the middle of the pillow and stitch along both sides.

Trim zipper.
The back is now done. It should be trimmed to the same dimension as the front (18 x 18″). If you are going to bind the edges, the front and back are placed wrong sides together and basted around the edges. The binding is now applied to the edges to finish the raw edges.
Binding on edges
If you are going to insert cording into the edges, cover the cording with bias cut fabric which allows the cording to go around the corners easily. This is sewn onto the right side of the pillow front and then the front and back are sewn together right sides together.

Another pillow – front and back. Corded edges.
Happy Sewing!


Linda, Those are some gorgeous pillows!!! Love the fabric choices.
Fabulous directions. I love the two that I made and can’t wait to make more. Beautiful pillows.
Linda, what lovely pillows! A very good tutorial that I am going to be following in the near future.
Thanks for checking out my tutorial. Good luck with your pillow sewing!
Nicely done! Thanks.