

Disappearing nine patch blocks
I’m starting on a small quilt that I hope will have a lot of texture and decided to make “disappearing nine patch” blocks. This is an easy way to sew a block that looks rather complicated but isn’t that difficult to sew.

Sew a nine patch block together
I randomly chose to use 3 inch square blocks to make my nine patches. I cut up as many gray or black and gray fabrics that I had and of course I had to purchase some more in order to have a great variety. That silvery dotted fabric is one I bought in Hawaii on a trip.
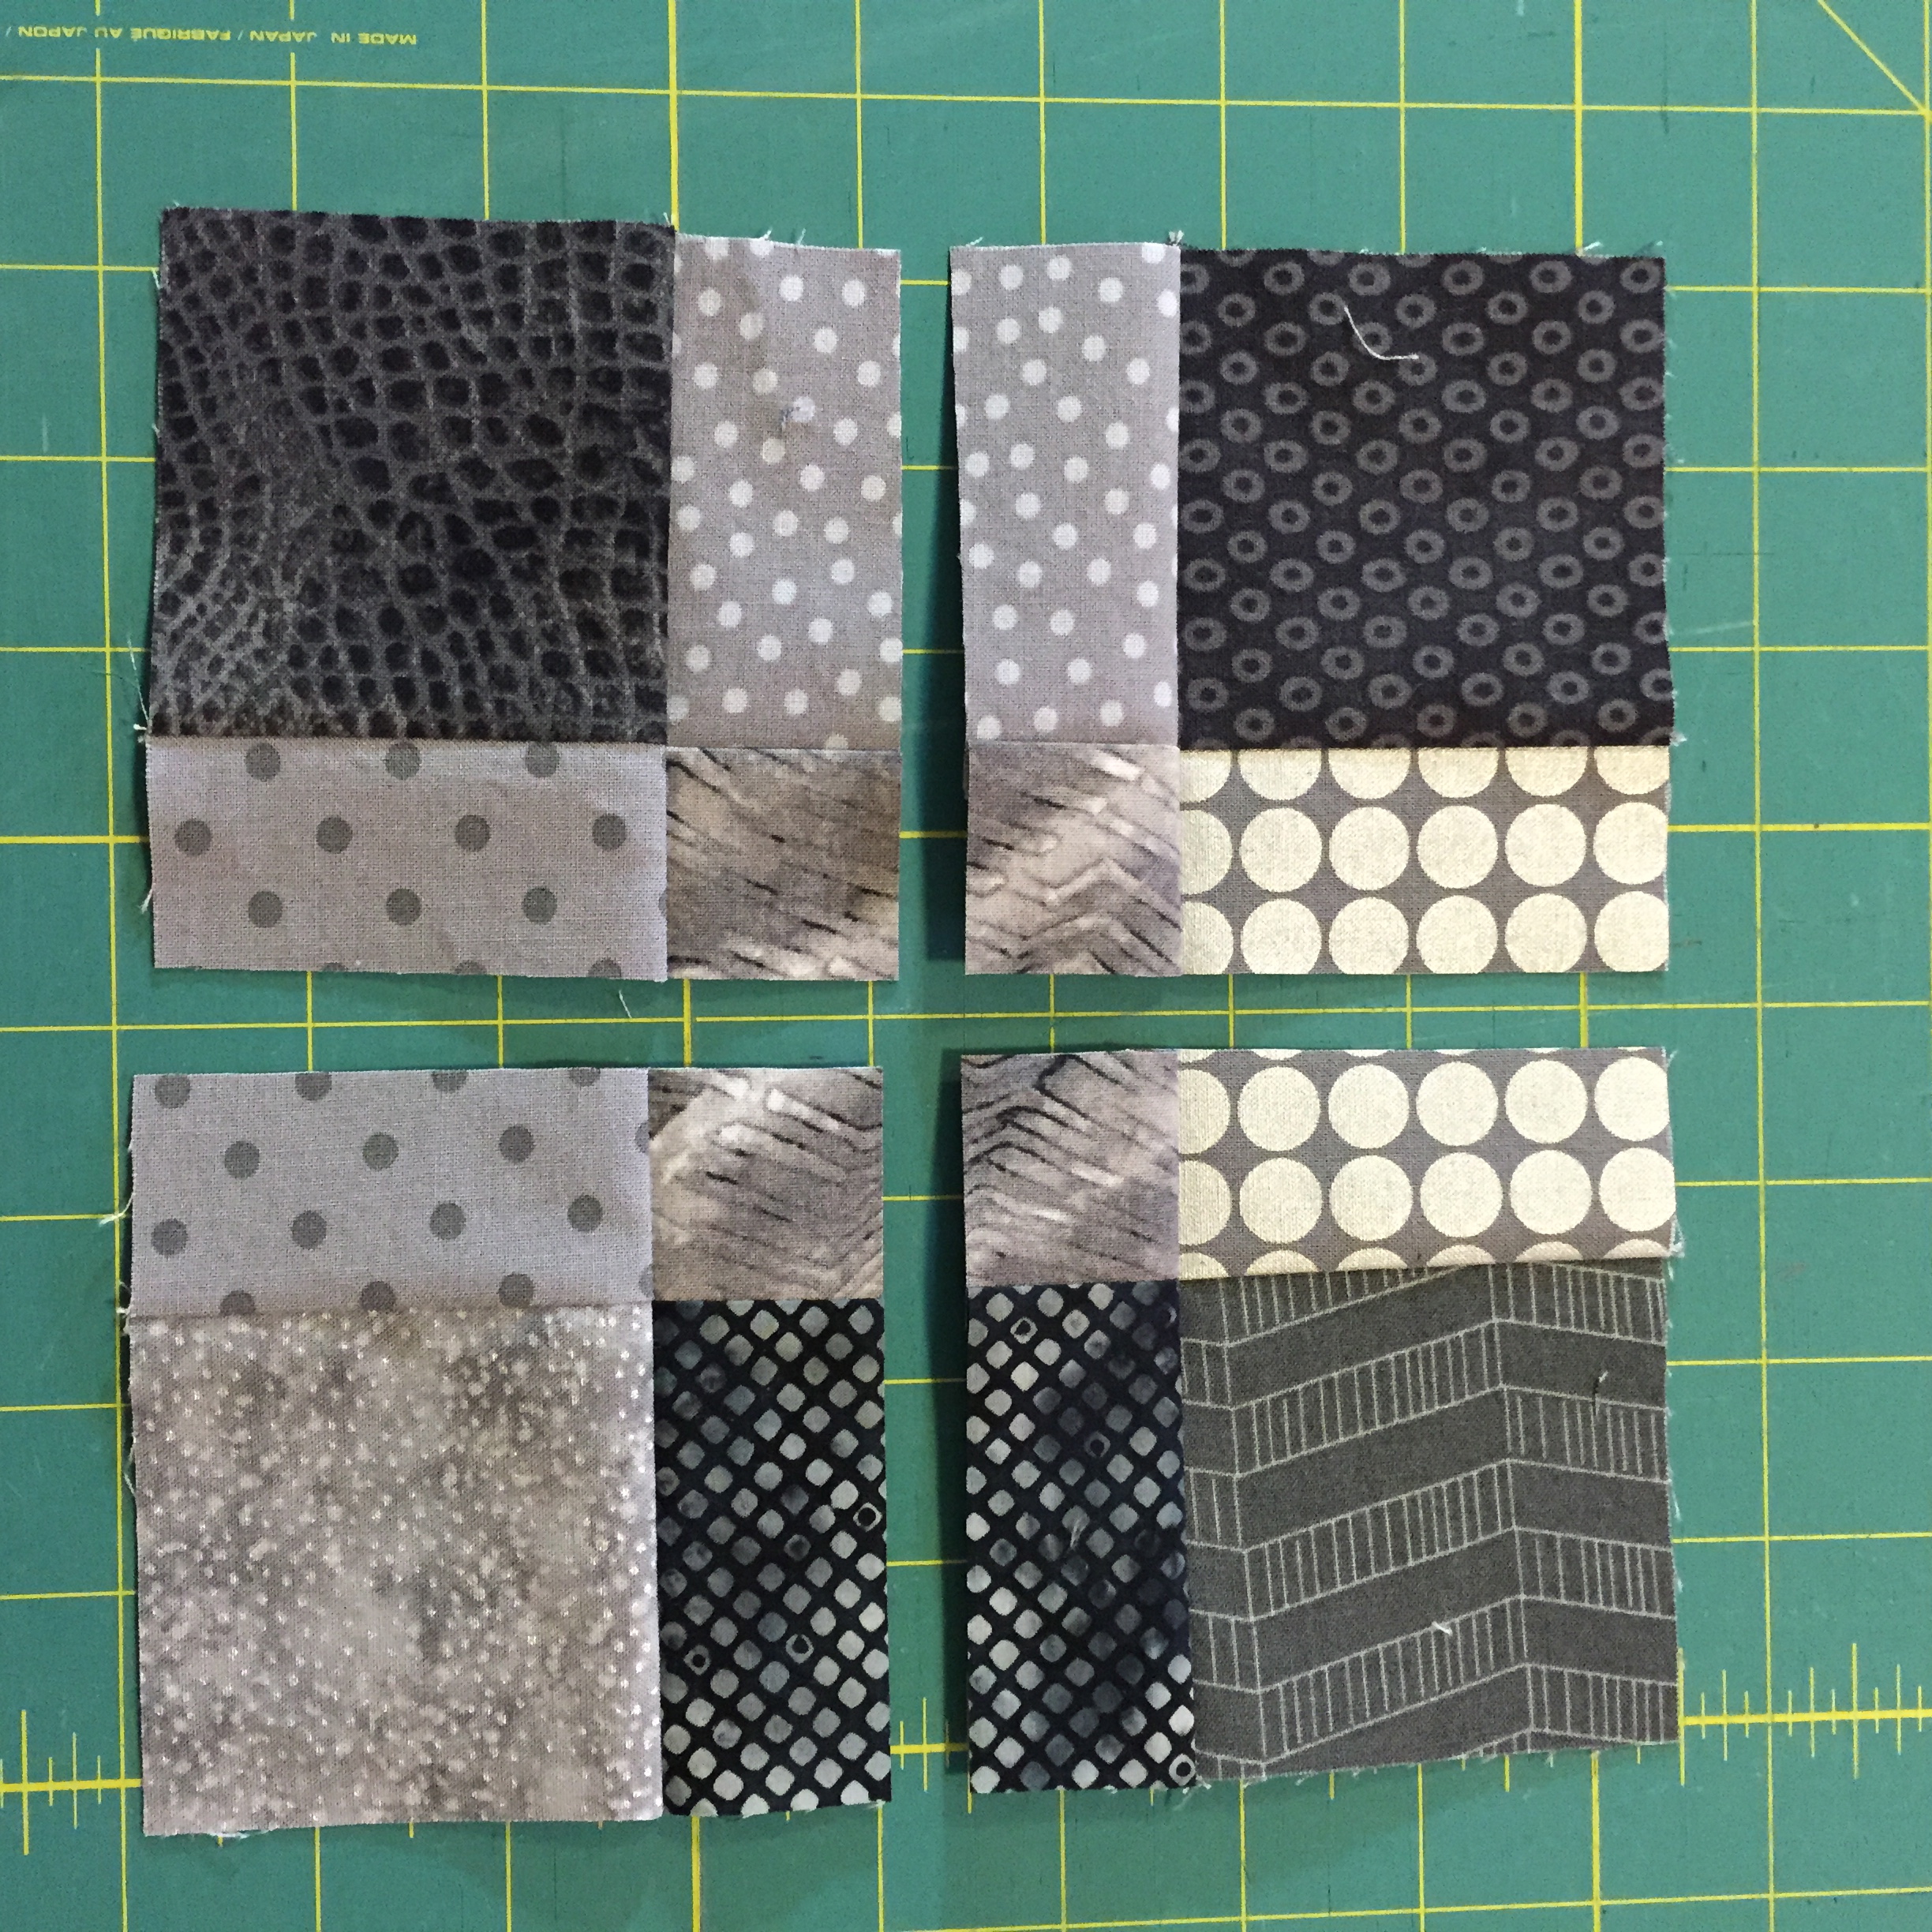
Cut the block down the middle both vertically and horizontally.
Once cut, I rotated the upper left and lower right pieces to put the small square at the outside corners.

I rotated two of the pieces.
You have other options at this point. You could orient these smaller blocks in any way you desire and you would get different looks.
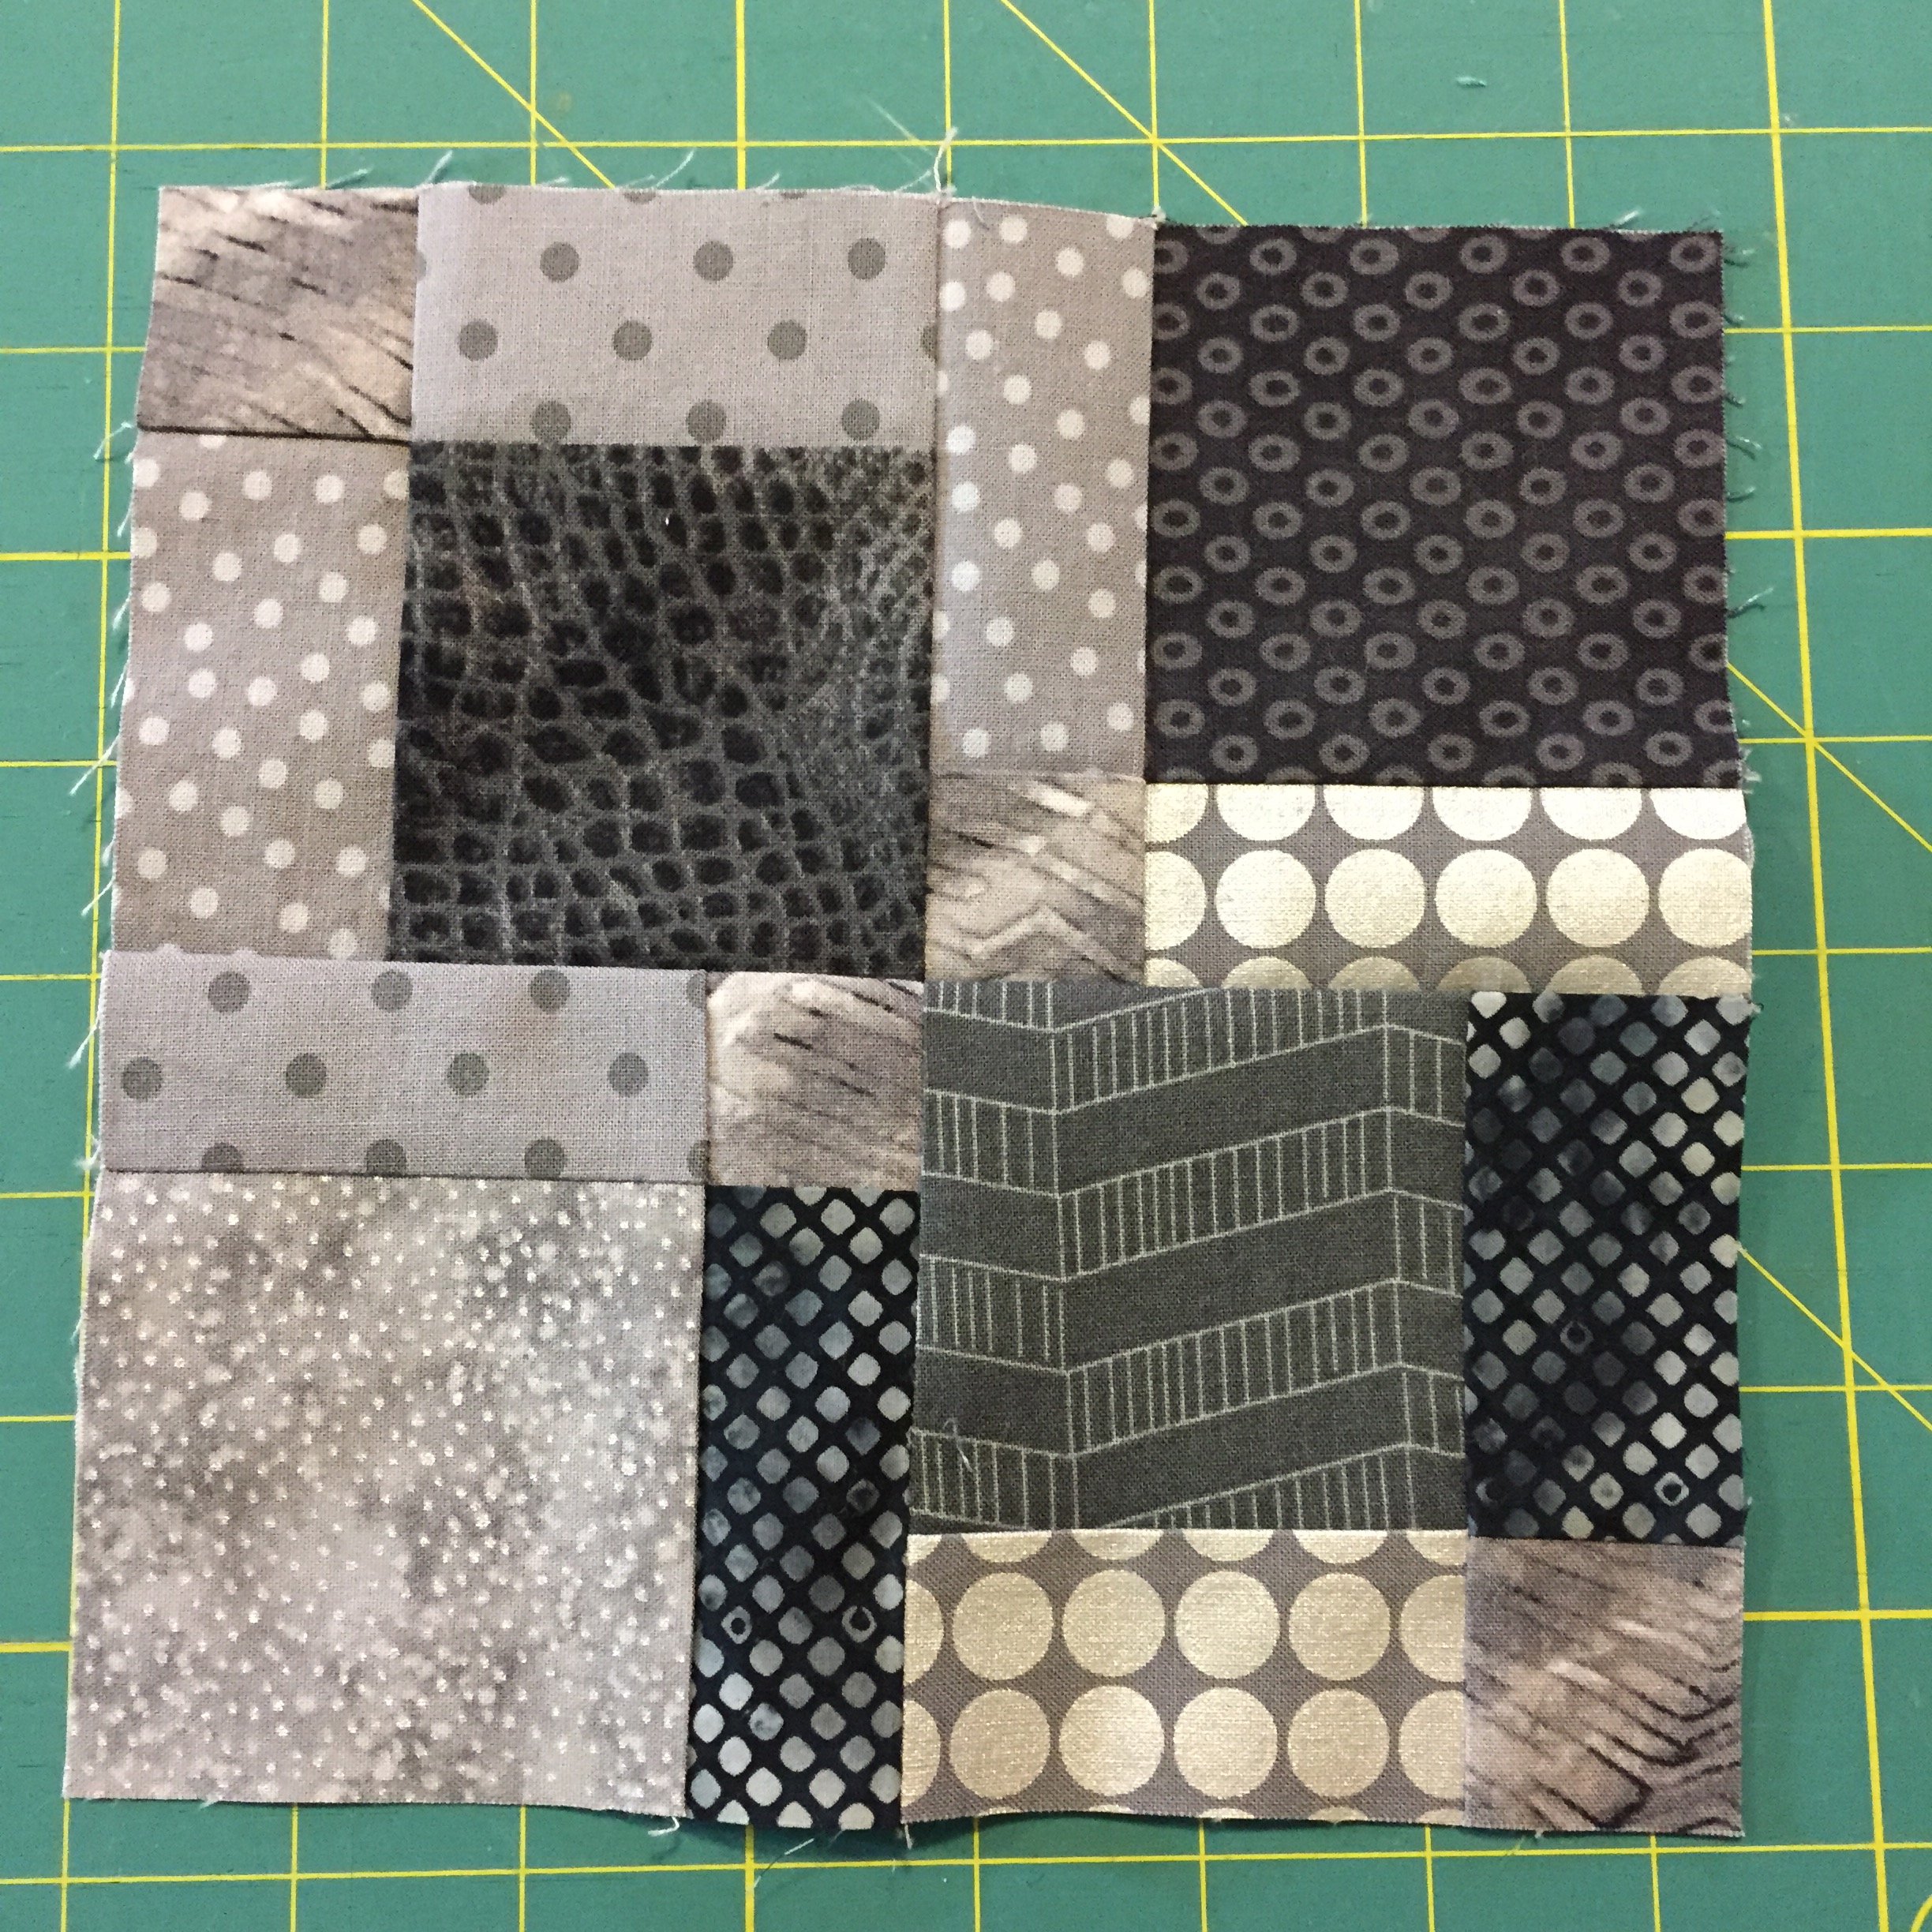
Sewn together.
The nice thing about the way I did these is that there is no fussing with lining up the seams to “nest” together except at the very center of the block. This may not seem like a big deal, but think about it. Every time two seams meet, it is desirable to have them ironed in different directions and this can get pretty complicated with this many seams.
Can you imagine sewing the block above by cutting out all of those pieces individually and piecing them together? It would take forever and be so inaccurate. At least if I did it, it would be.
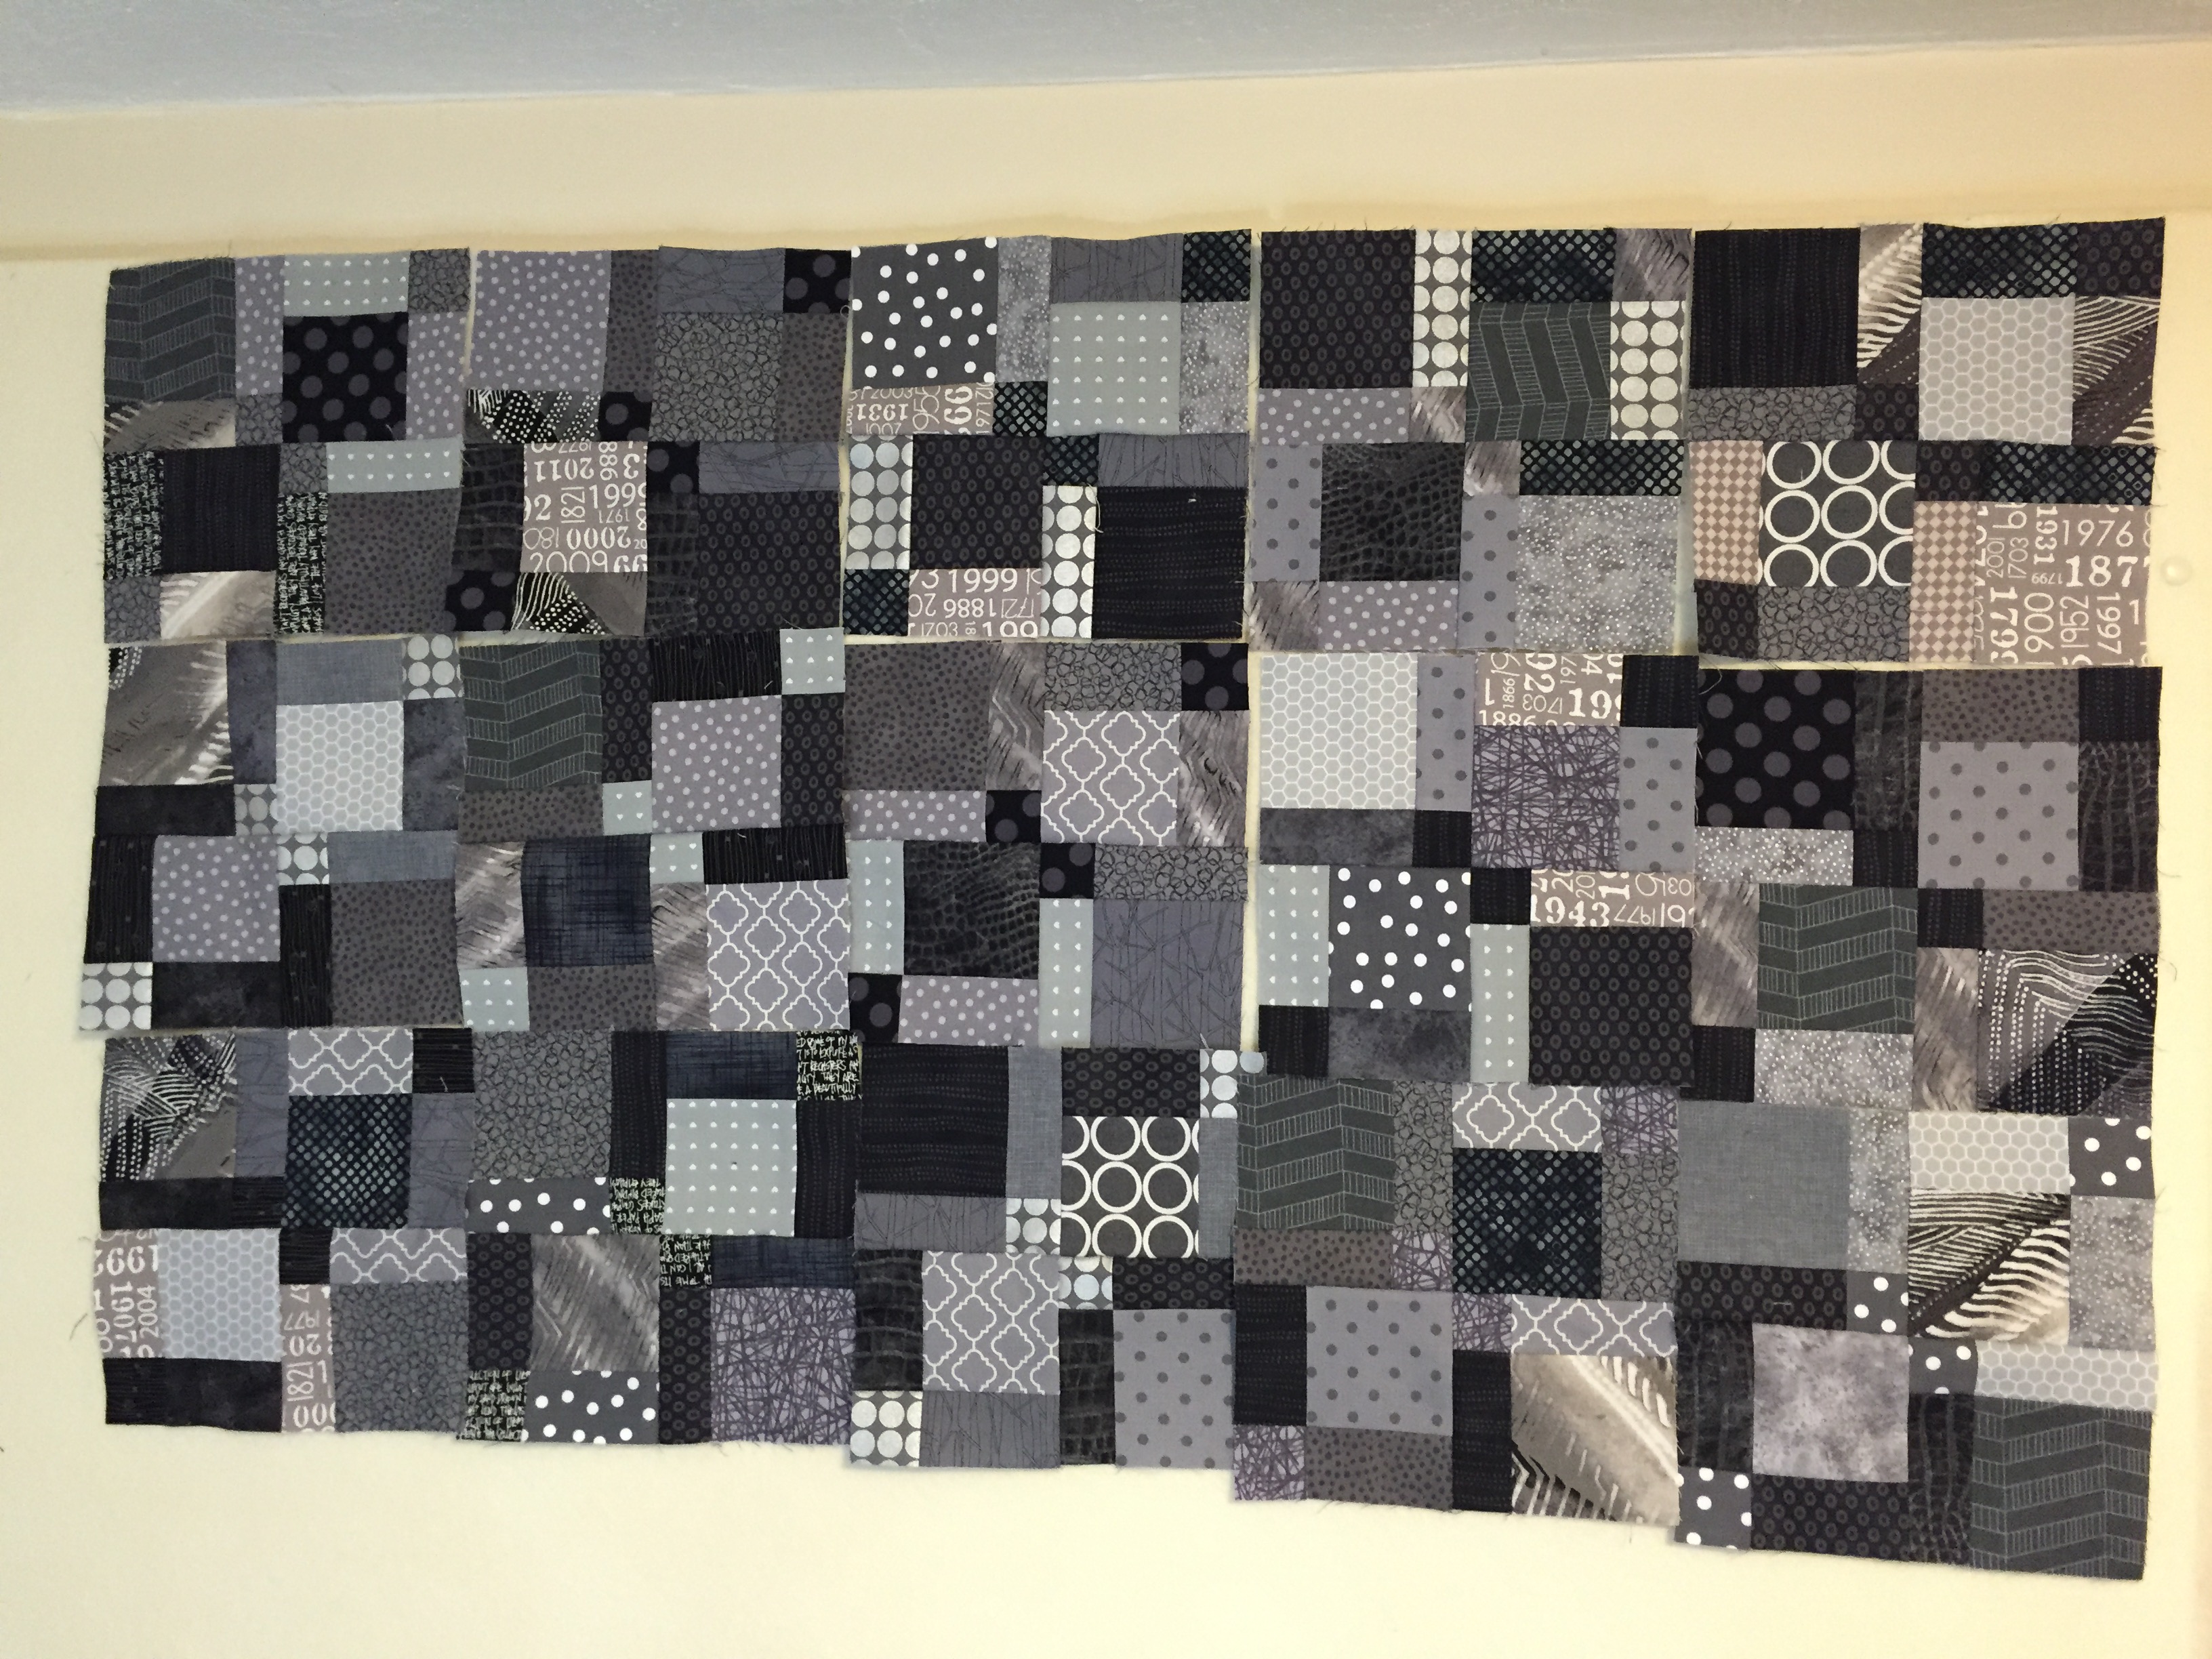
15 blocks on my design wall.
My finished blocks are 7 1/2″ square unfinished or will be 7″ square finished. I have 15 done and 33 left to go. If I lay them out with 6 blocks across and 8 blocks down, the finished quilt will be 42 X 56″ which I’m told is a good size for a baby. This is not what the finished quilt will look like however. There is going to be a big twist to make it special for the exceptionally special baby it is being made for. More to come!


Boy you had me fooled when I saw that on Instagram. I couldn’t figure out why you called it nine patch and then I thought you did cut all those different pieces and put them together! Ha ha ha Thanks for clearing that up for me and showing me the “trick” to make them easier. Can’t wait to see what the surprise is.
My daughter was totally confused by that photo too. She had seen the nine patches on my sewing table before they were cut up and couldn’t imagine what I had done with them to get the final block. This a a fairly commonly done block though. If you do a computer search for “disappearing nine patch” you’ll see all sorts of variations and of course fabric choices make all the difference!
Thanks for reminding me to try the disappearing nine patch! I like your fabrics and look forward to seeing the finished quilt : )
I like that a lot! Know that “special baby” will love having a treasure from his grandmother Linda!
Cool….had me fooled too. Looking forward to seeing the final edition.
Thanks for showing this. I could not figure out what a disappearing 9 patch was either. I like the texture of the grey and black. Will be great when you get the “surprise” on there.😊
I actually thought that most quilters knew what a “disappearing nine patch” is. Fran did a demo on it a few years ago during Needlechasers “Demo Day”. It is a fun block to make! You should try it.
Ooo, the suspense! Knowing you it’ll be an awesome surprise 🙂
That is so cool!! It is fun to see how you do this. Looking forward to the surprise.
Awesome!!!!! I will have to try that!!!
This looks so cool, Linda! I love the monochromatic colorscheme. It’s going to looks stunning finished 🙂
Thanks Liz. It is making up pretty quickly which is nice as I have a whole other component to add to it once this top is done. Thanks for stopping by and commenting!
Pingback: Dinosaur Baby Quilt | I Finally Have Time