I spent a few days last week with some good friends in Colorado. The husband, JB, has been working with wood since he retired and has become a real craftsman/artist. He and his wife, Chesta, are really great cooks (as became apparent by my snug fitting clothes after spending 5 days with them) and they love a utensil that he makes which they call a spatuloon.

Spatuloon
As you can see, it is part spatula and part spoon. You can use it for stirring things thick or thin, or for scooping or lifting food from a pan. I guess that JB has made quite a few of these for friends and was surprised to know that I did not have one from him. Off to the wood shop we went!
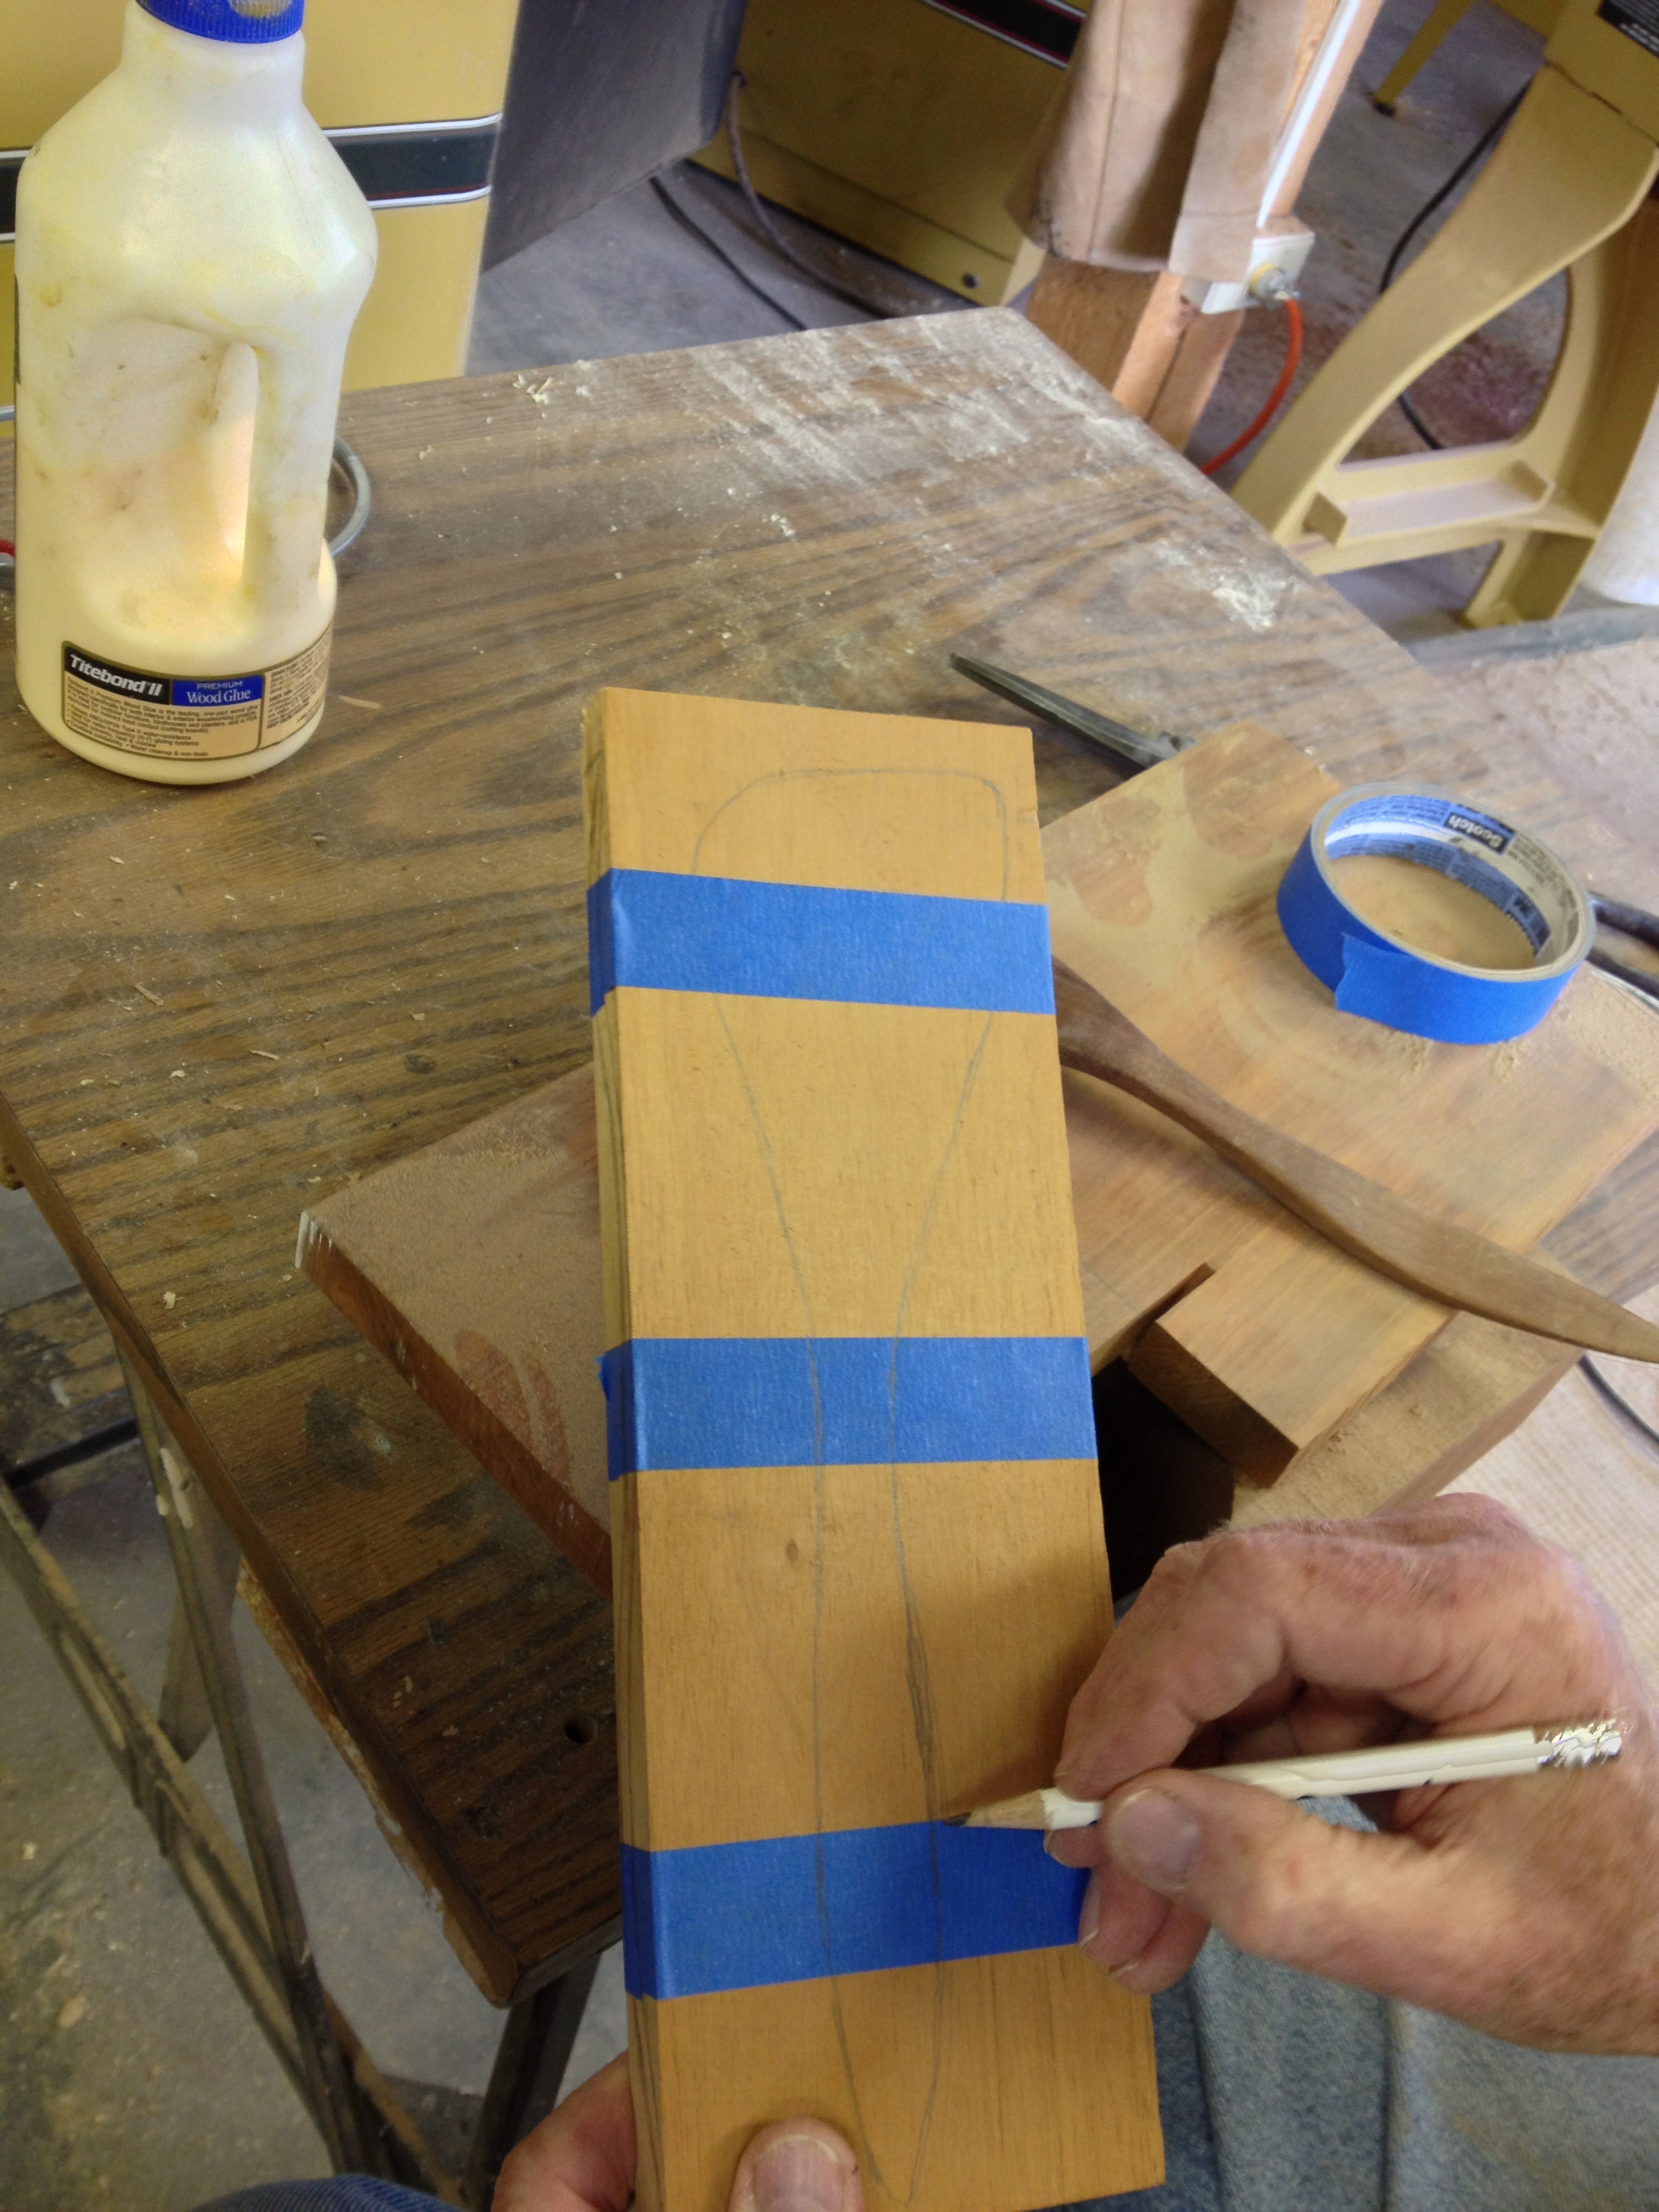
Drawing the pattern on the piece of cherry.
JB had a piece of cherry that he thought would work nicely. First he put tape around the board and then he freehand drew the pattern of the spatuloon – both on the front and side of the wood.

Next he took the piece to the bandsaw and cut out the shape in the first direction.

Shape cut out

Retaped together

Cut out the other way on one side, retaped, . . .

. . .and then the other side cut.
I wasn’t crazy about watching him do this. His fingers were pretty close to that blade! However, it didn’t take long before it was all cut and now the piece looked like this:

Rough cut spatuloon
At this point, it just needed to be sanded smooth.
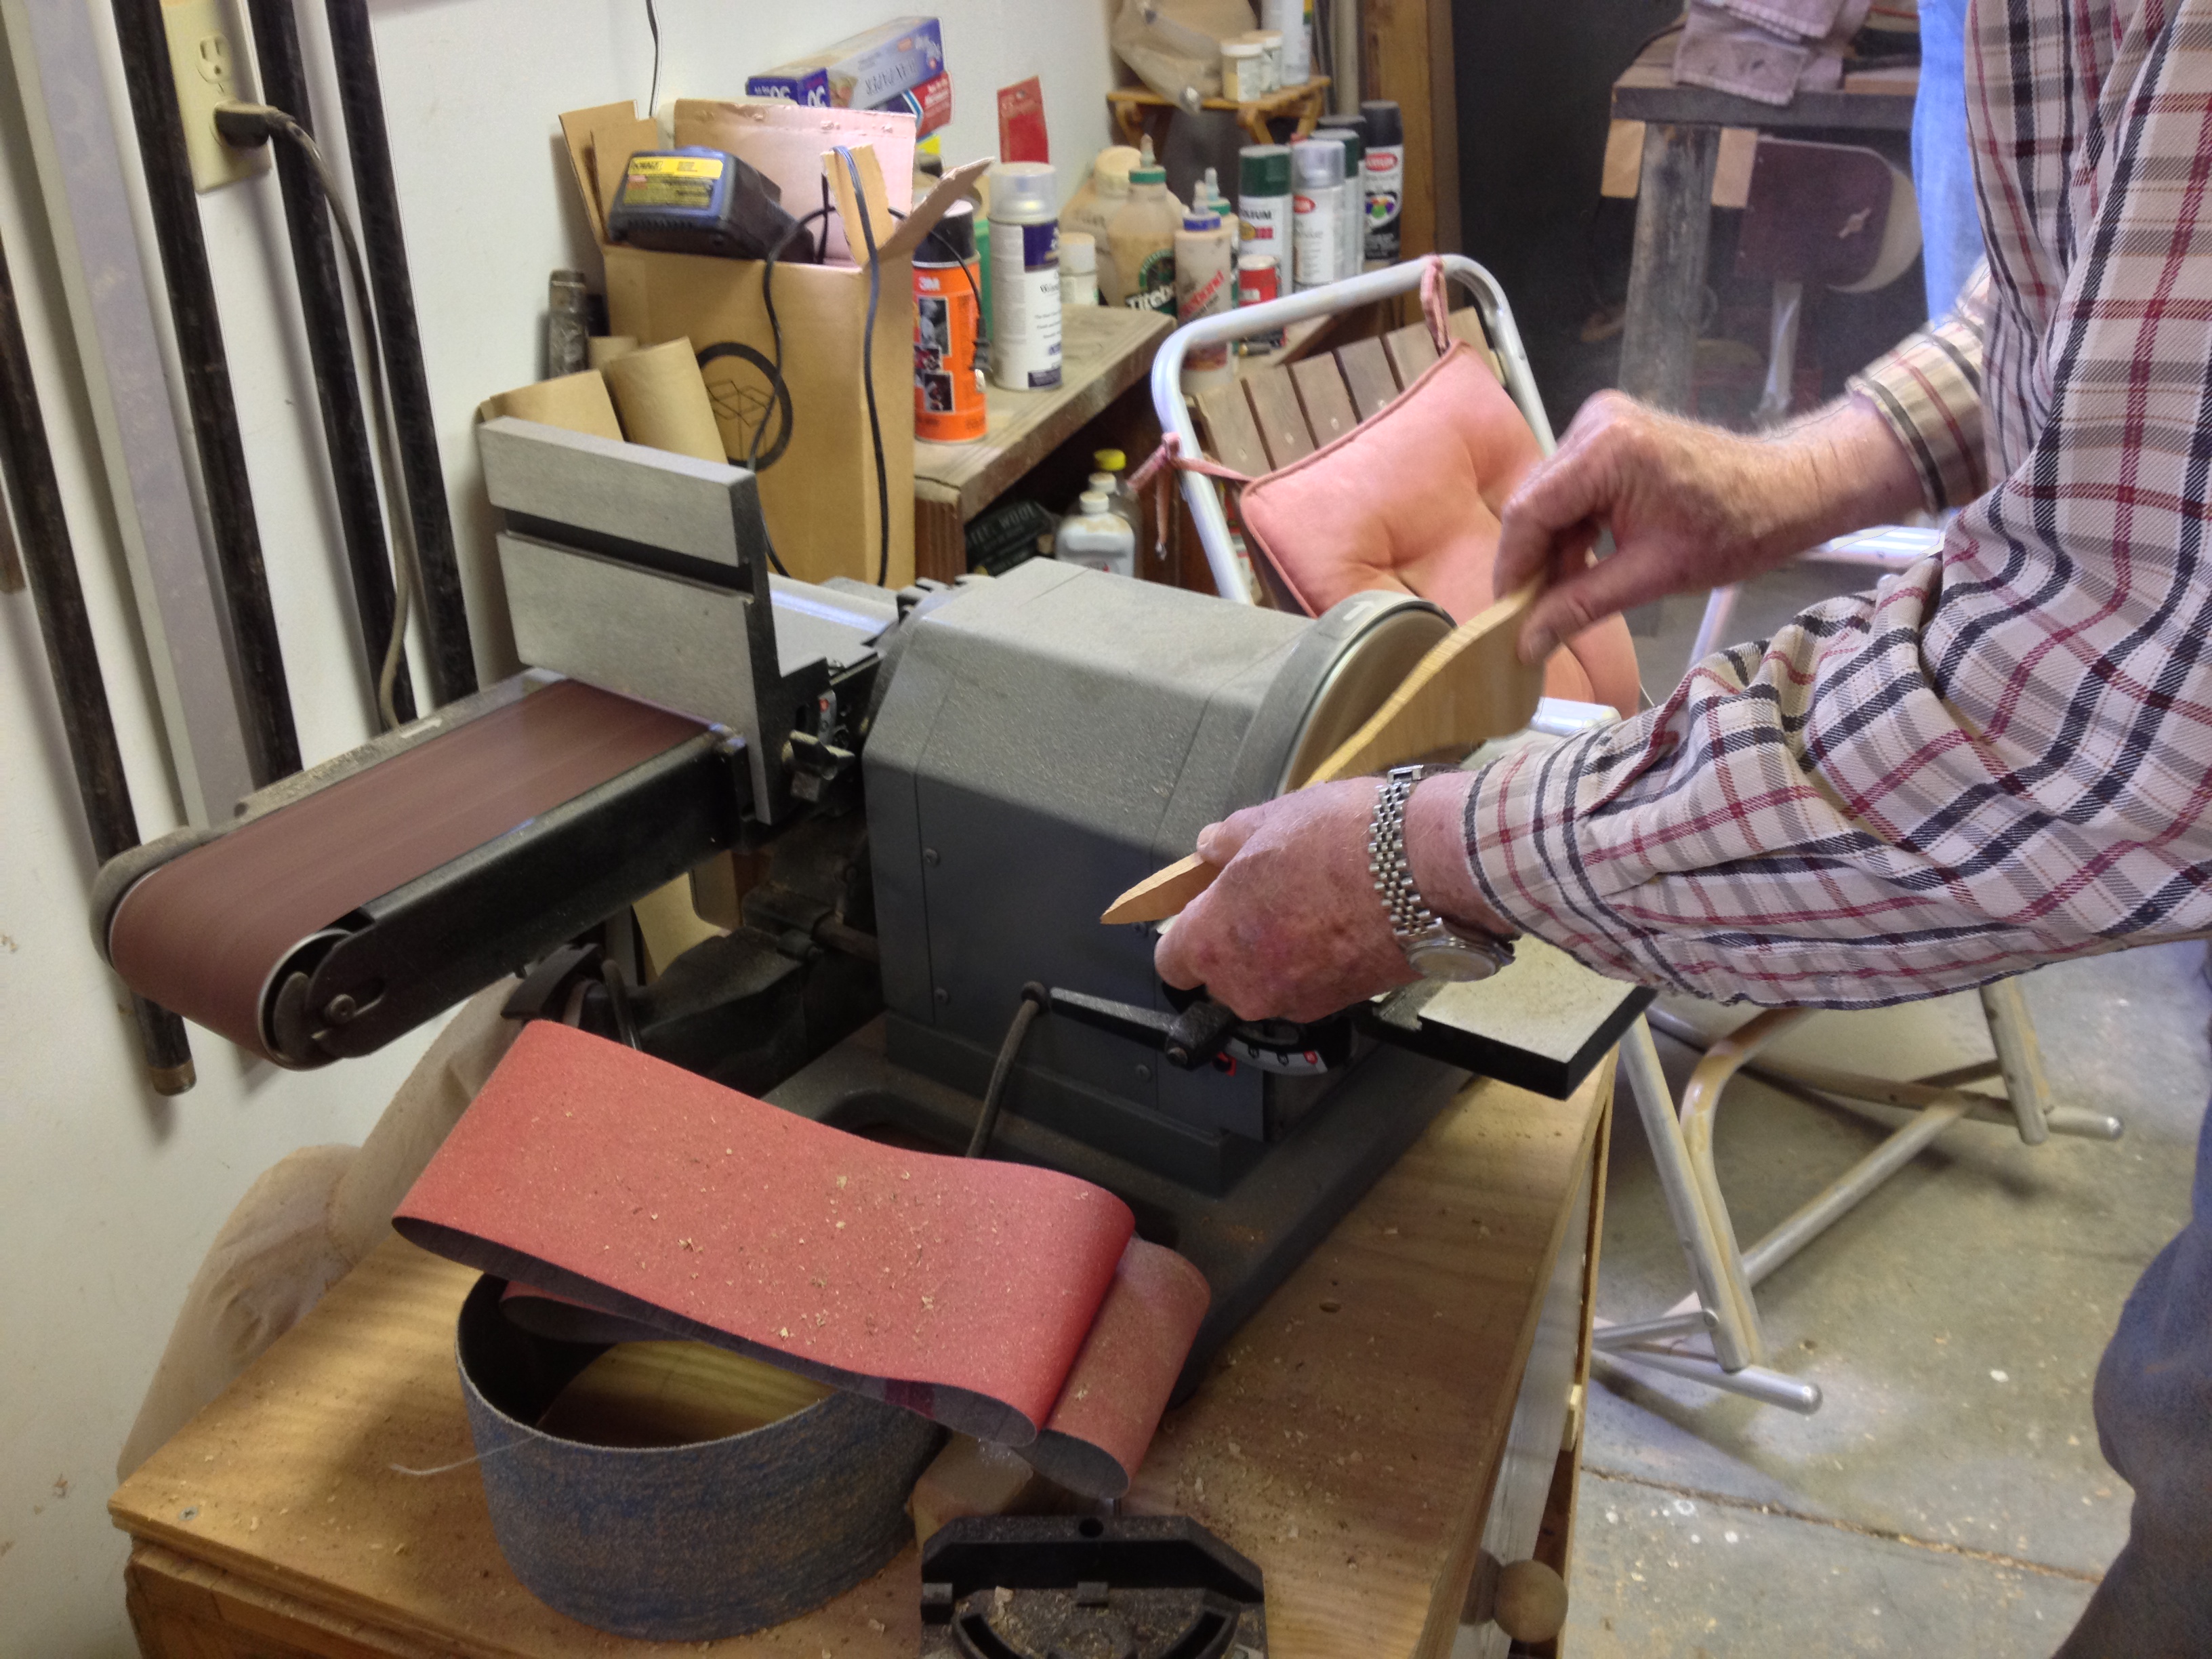
Sanded first on the electric sander.

Then with and electric hand sander.

And finally by hand.
My husband and I got into the act with the hand sanding. We used different grit sandpapers, getting finer and finer, until the spatuloon was quite smooth. The last step was to oil it and JB likes to use Walnut Oil for that because it puts a good protective finish on the wood but is also safe for using with food because it is used for cooking.

Walnut Oil can be bought at many grocery stores.
Here is my spatuloon next to his well used one:

Finished spatuloon.
I can’t wait to use it!
For your viewing pleasure, I just can’t resist showing you some of the other things that JB has made. First of all, his shop is in the garage of this cabin in the woods.

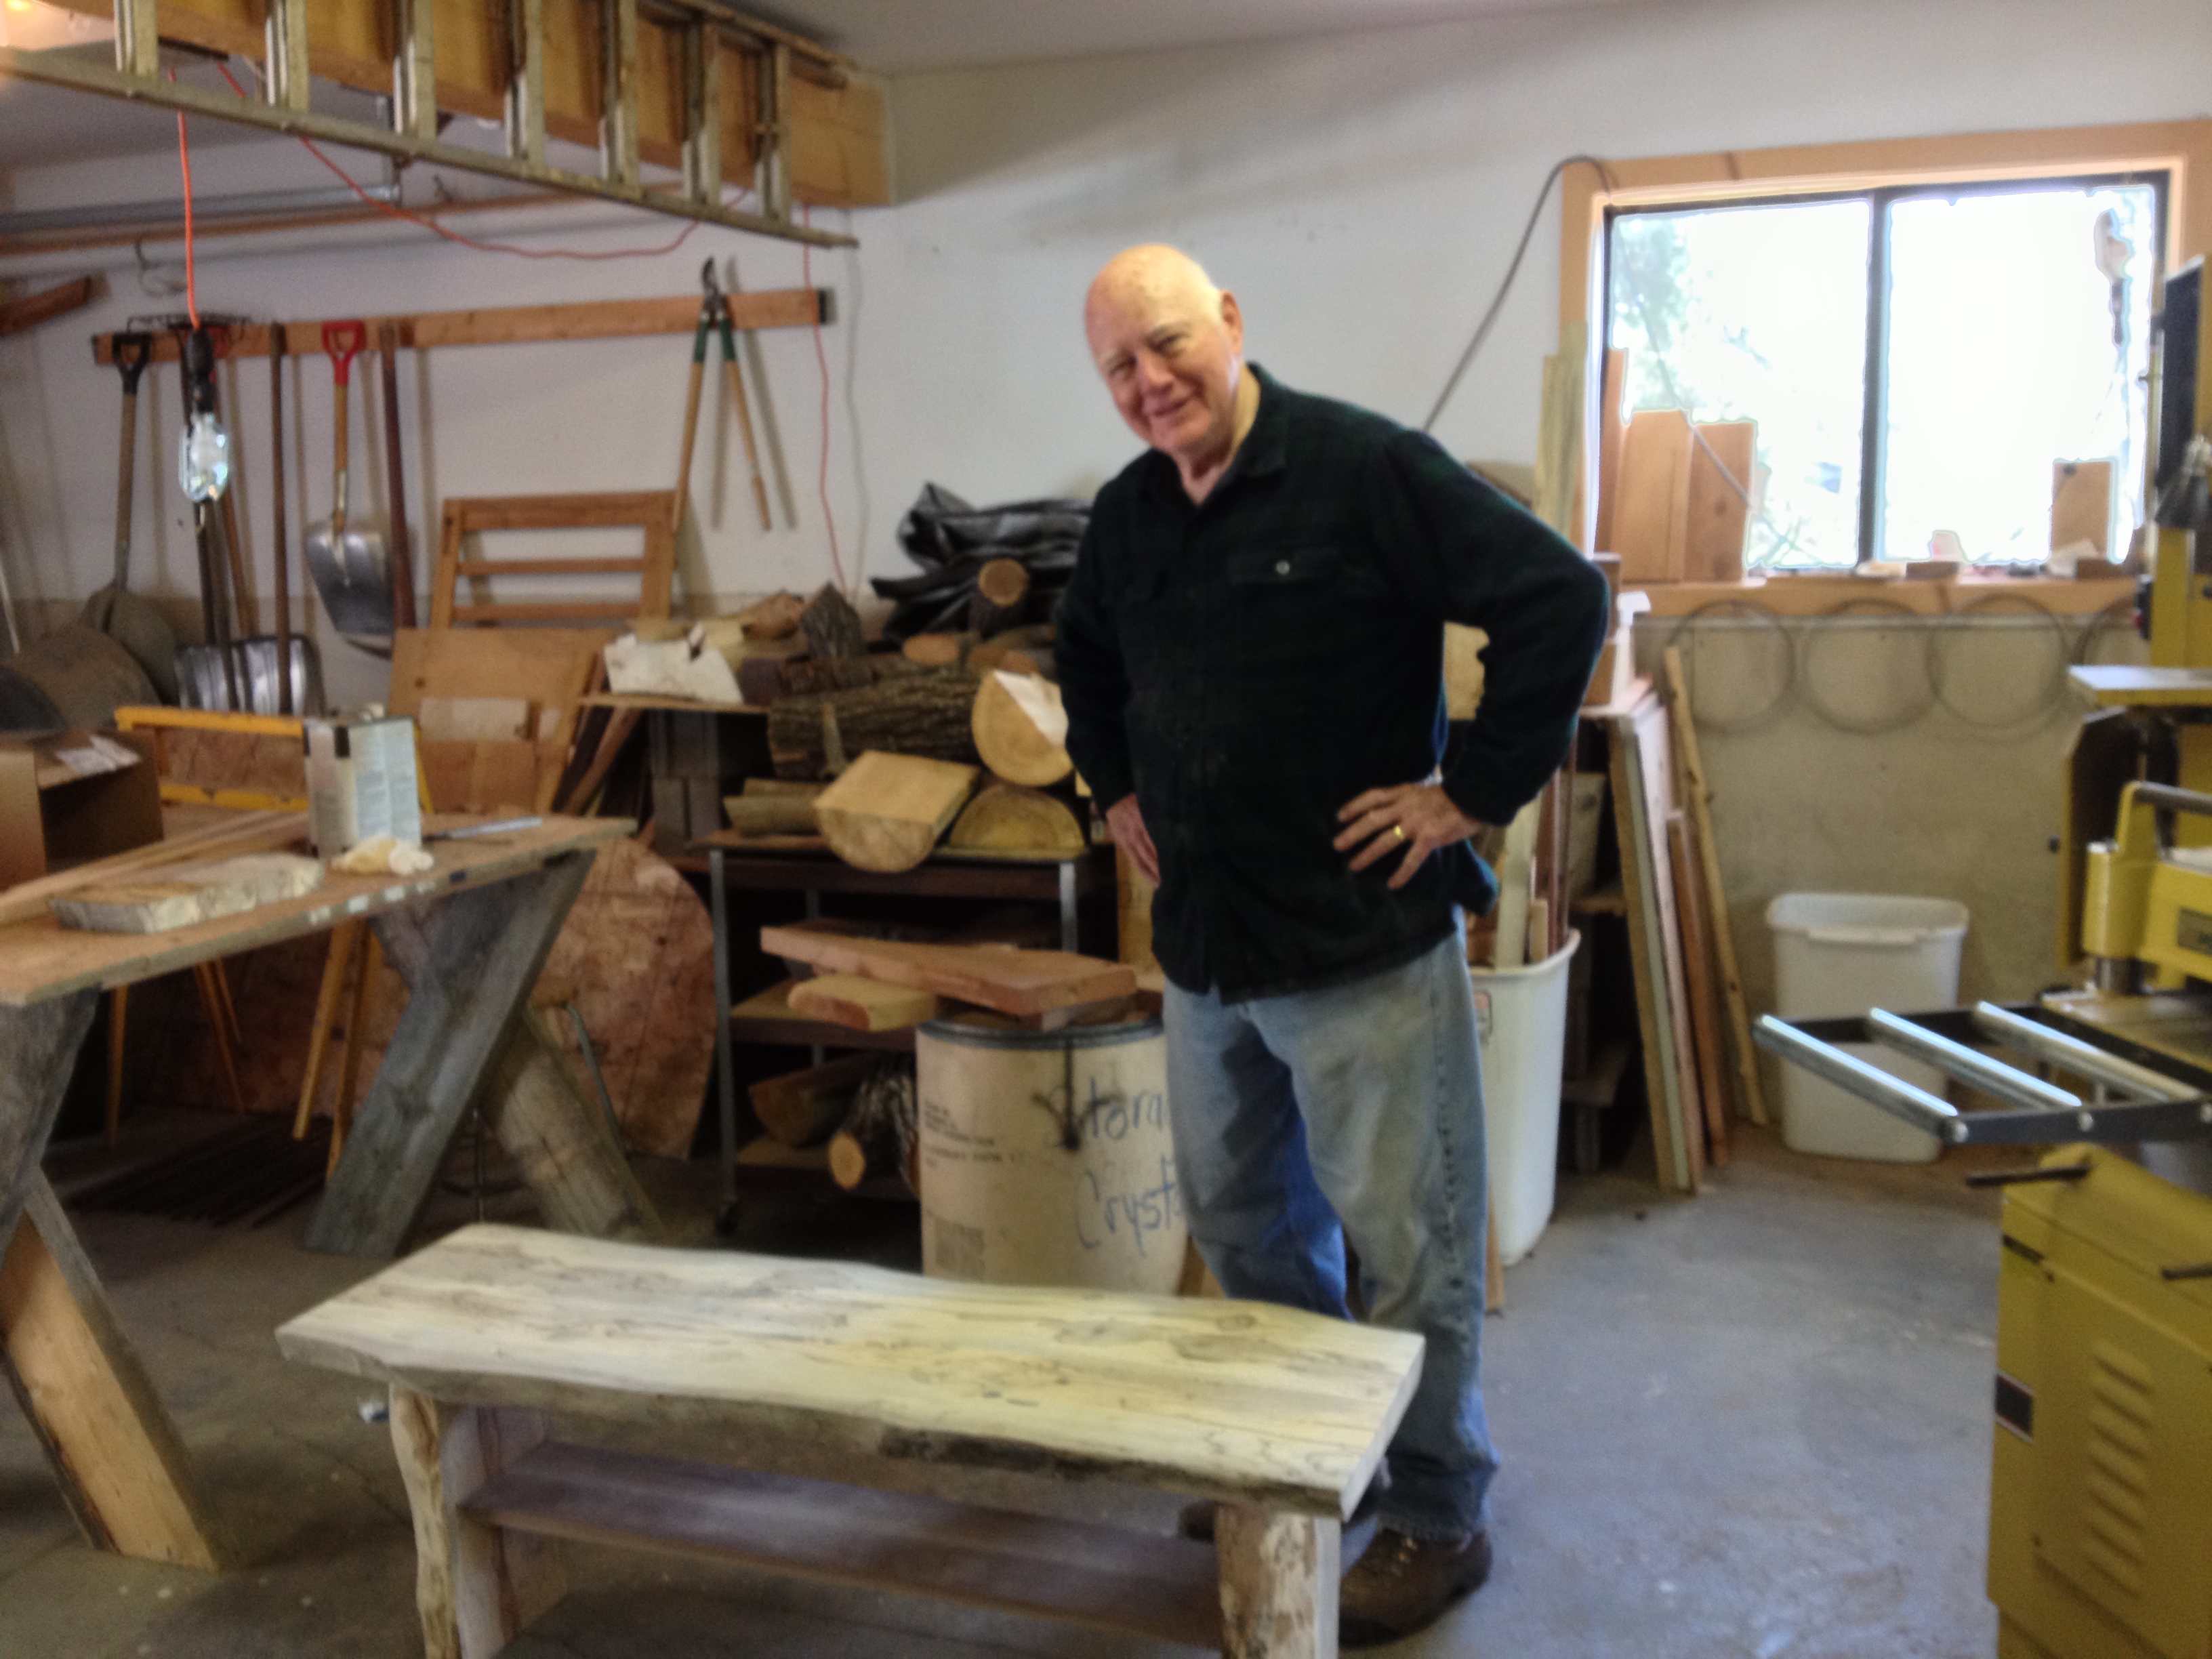
- This is JB with a bench that he made the week before. He intends to sell this one at a local gallery when he finishes it.
The gallery he sells some items in is The Studios at Bristol in Creede, Colorado. The owner, Teri Inman, is an amazing fiber artist who sells her hand woven and hand dyed items out of her studio and also in Estes Park and Taos each year. This is definitely a great place to visit if you travel to south-central Colorado.
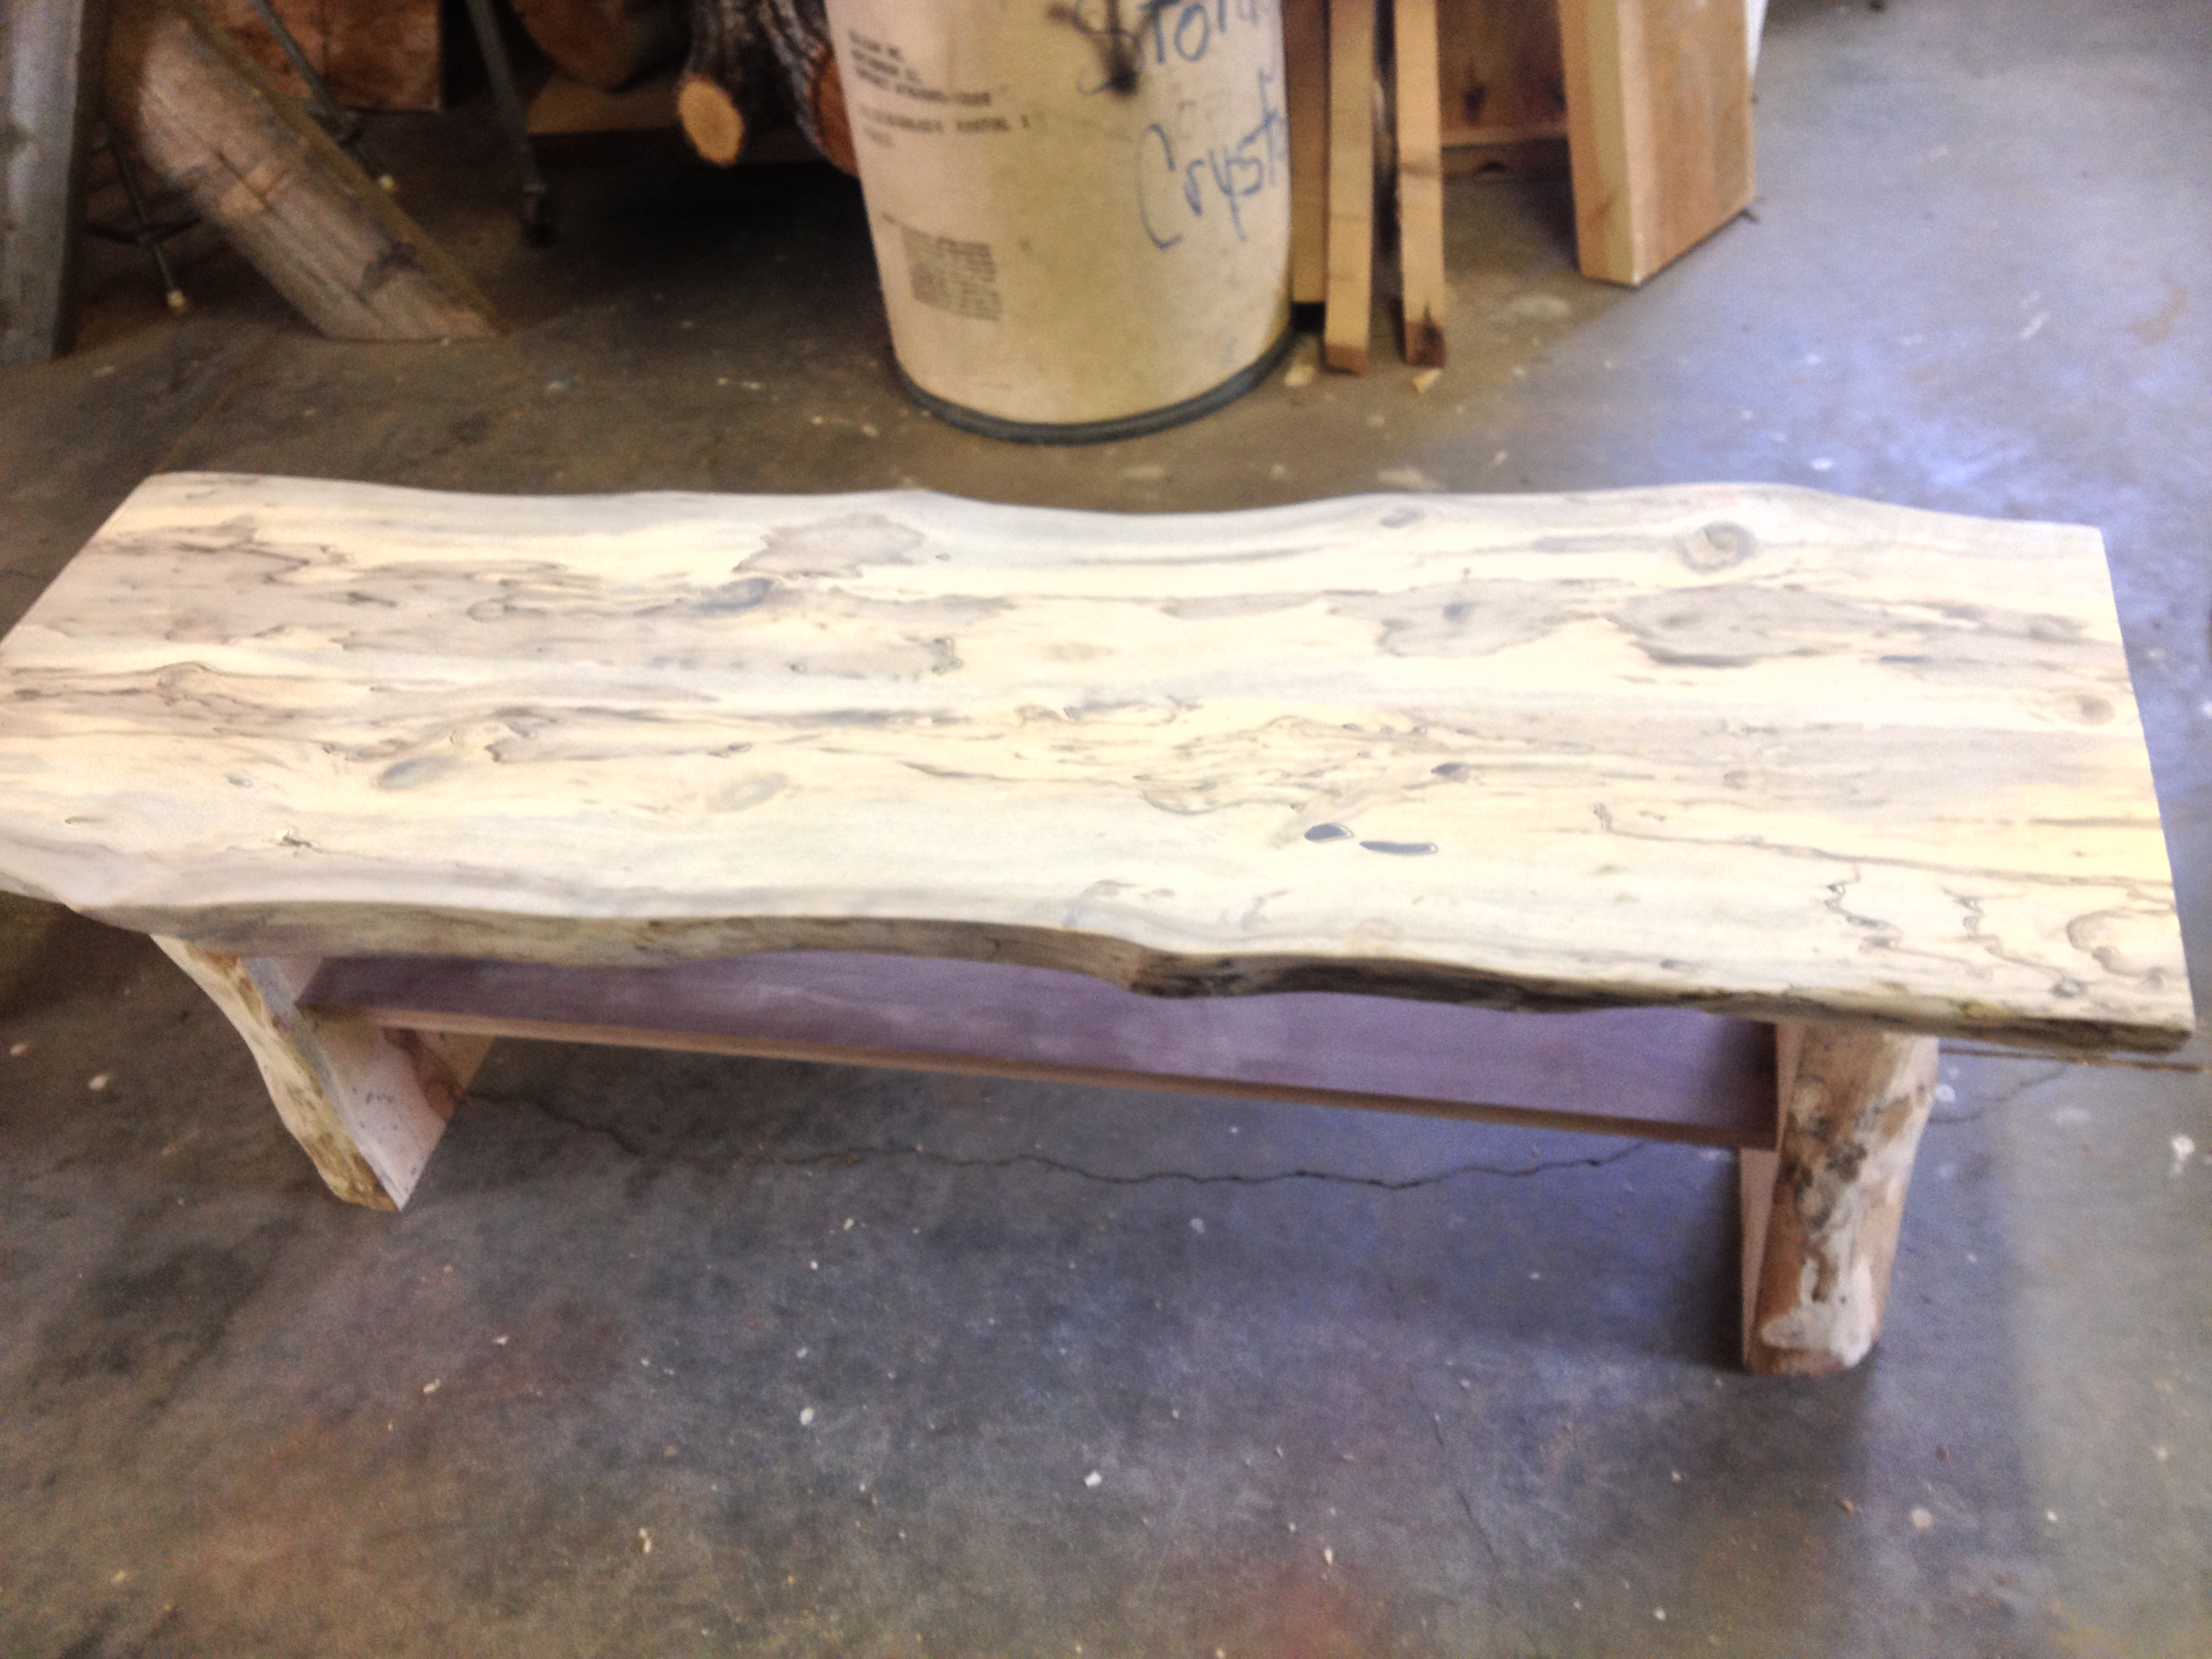
The top is splayed sycamore and the legs are pecan. The finish has not been put on yet which will accentuate all of that grain.
Here are some of the pieces that he has made that are in his cabin. Some of which, you will see, were made from hollowed out logs.

Shelf

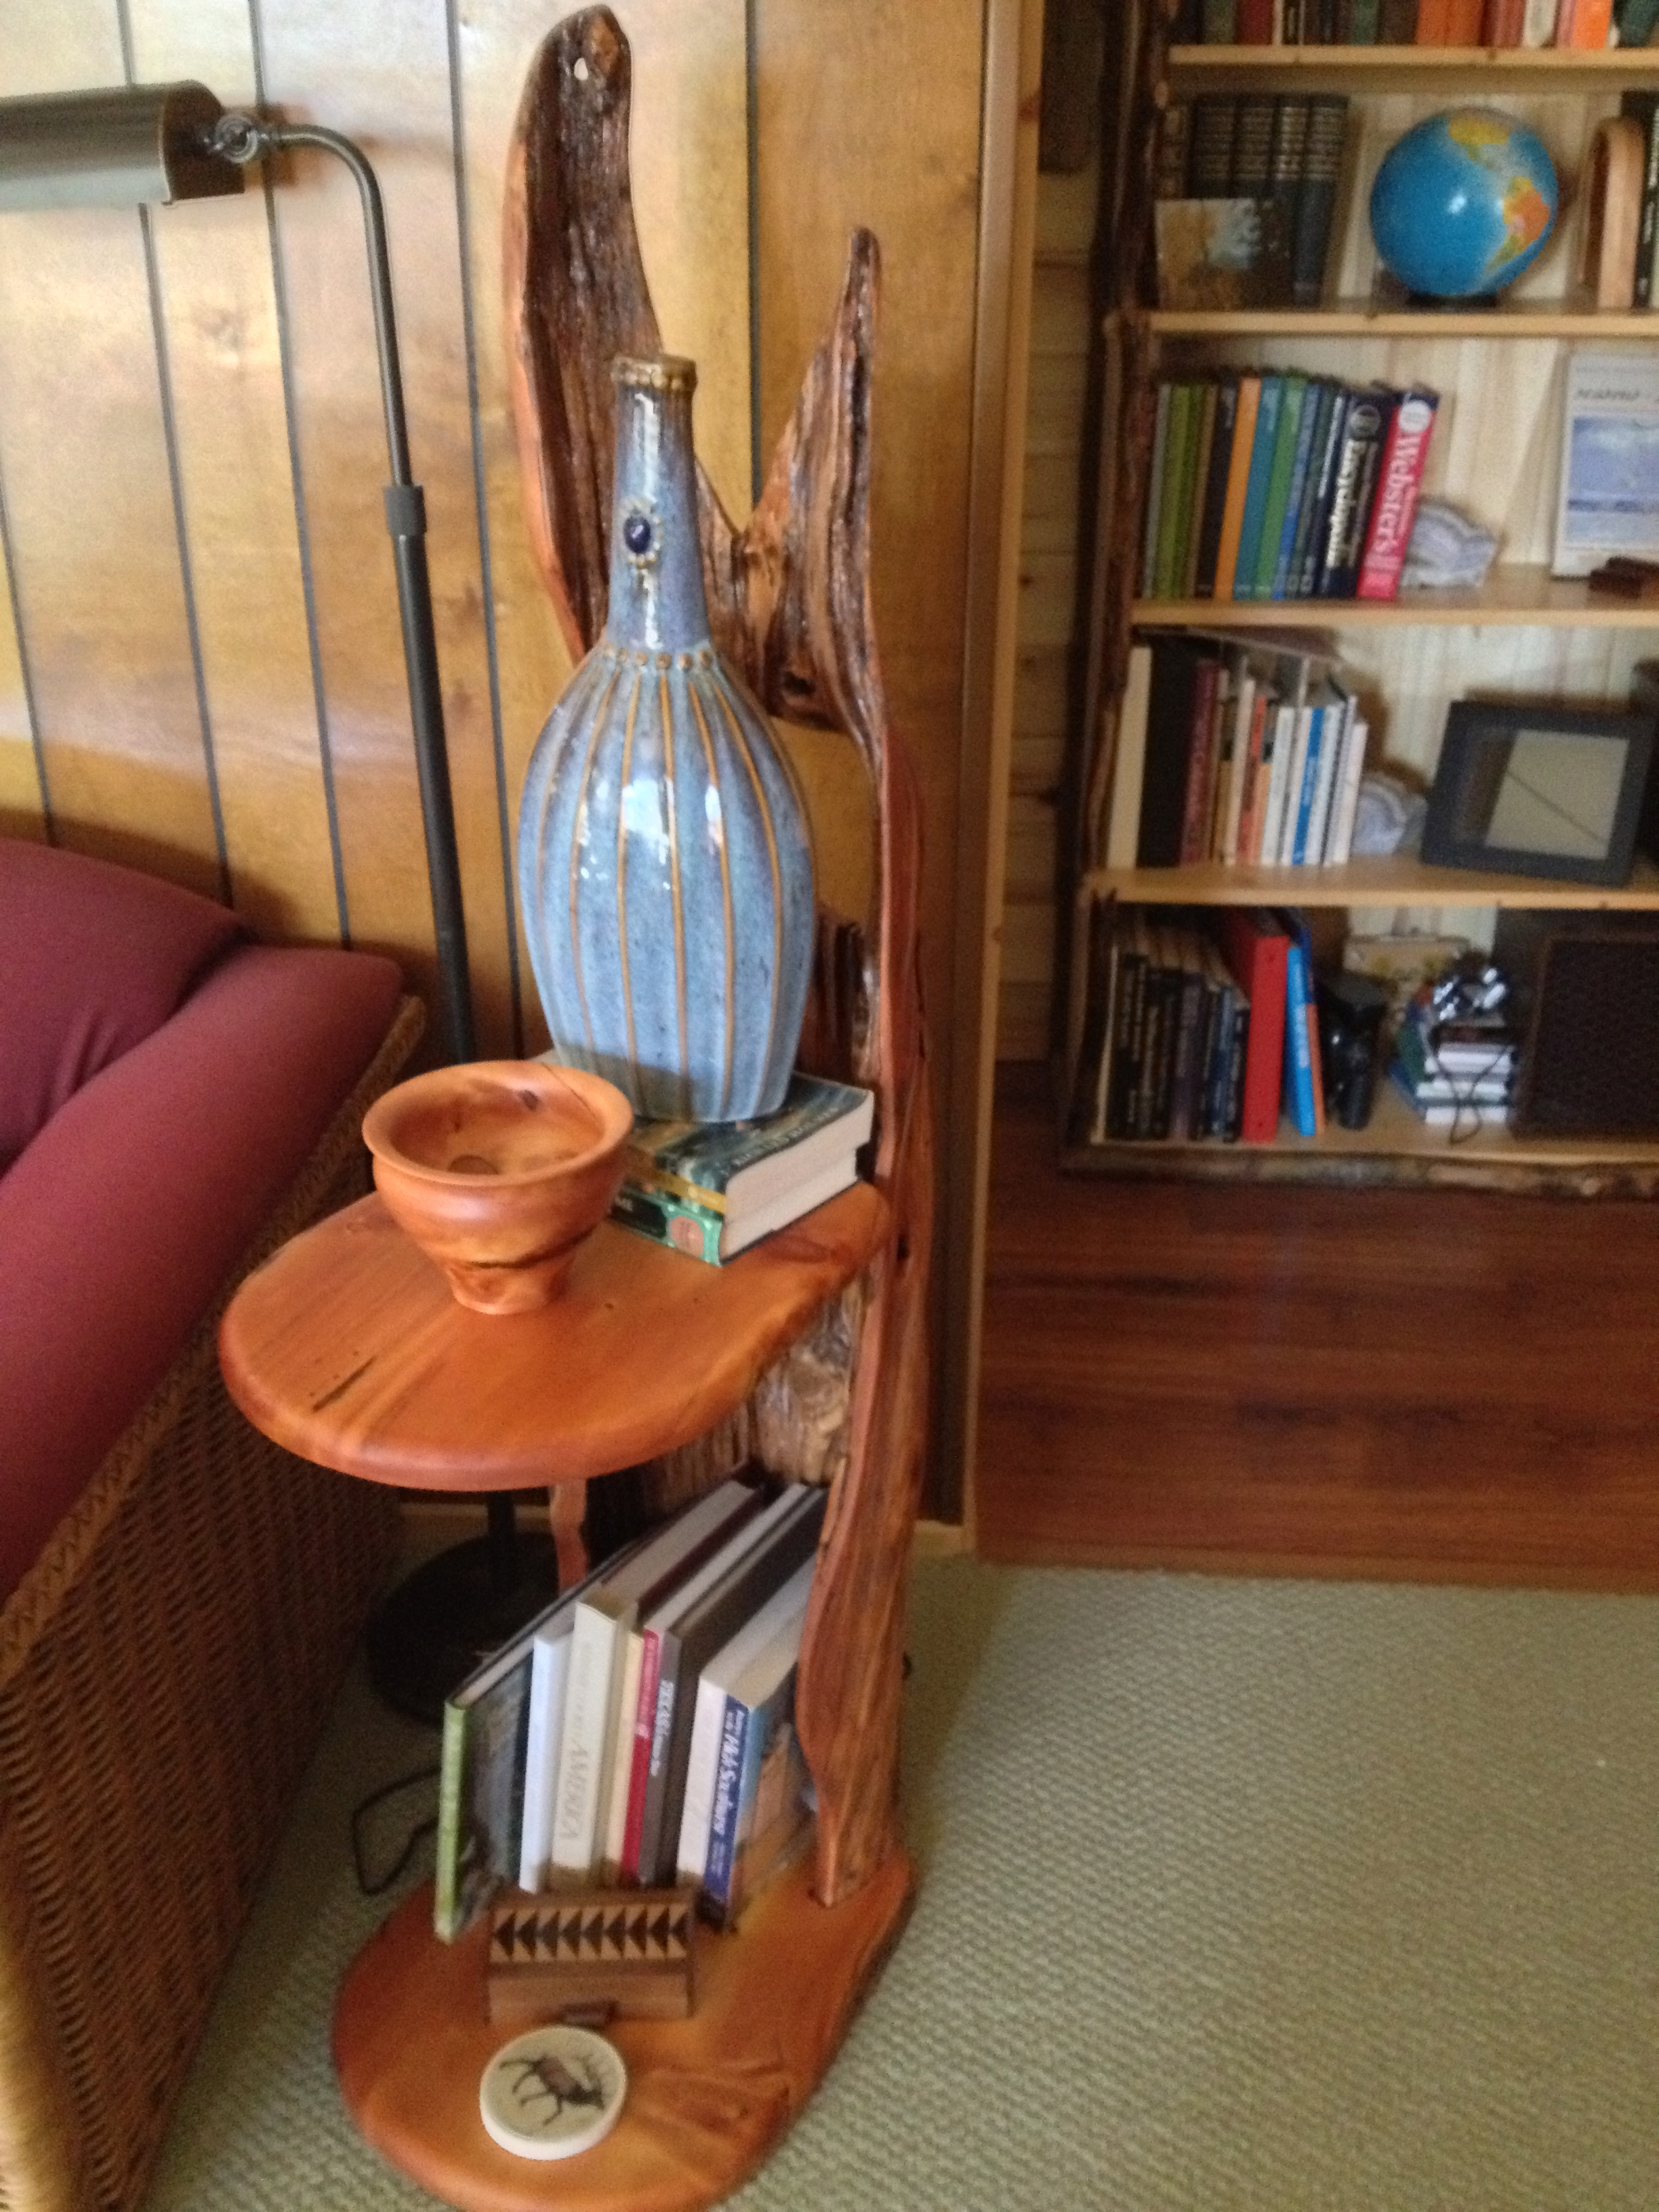
Another shelf (or maybe side table would be more accurate)

Lamp
There are so many other things JB has made, pretty much everything in the cabin. He has been so generous in his gift giving and I have items all over my house – bowls, rolling pins, vases, cutting boards and this very special spice rack:
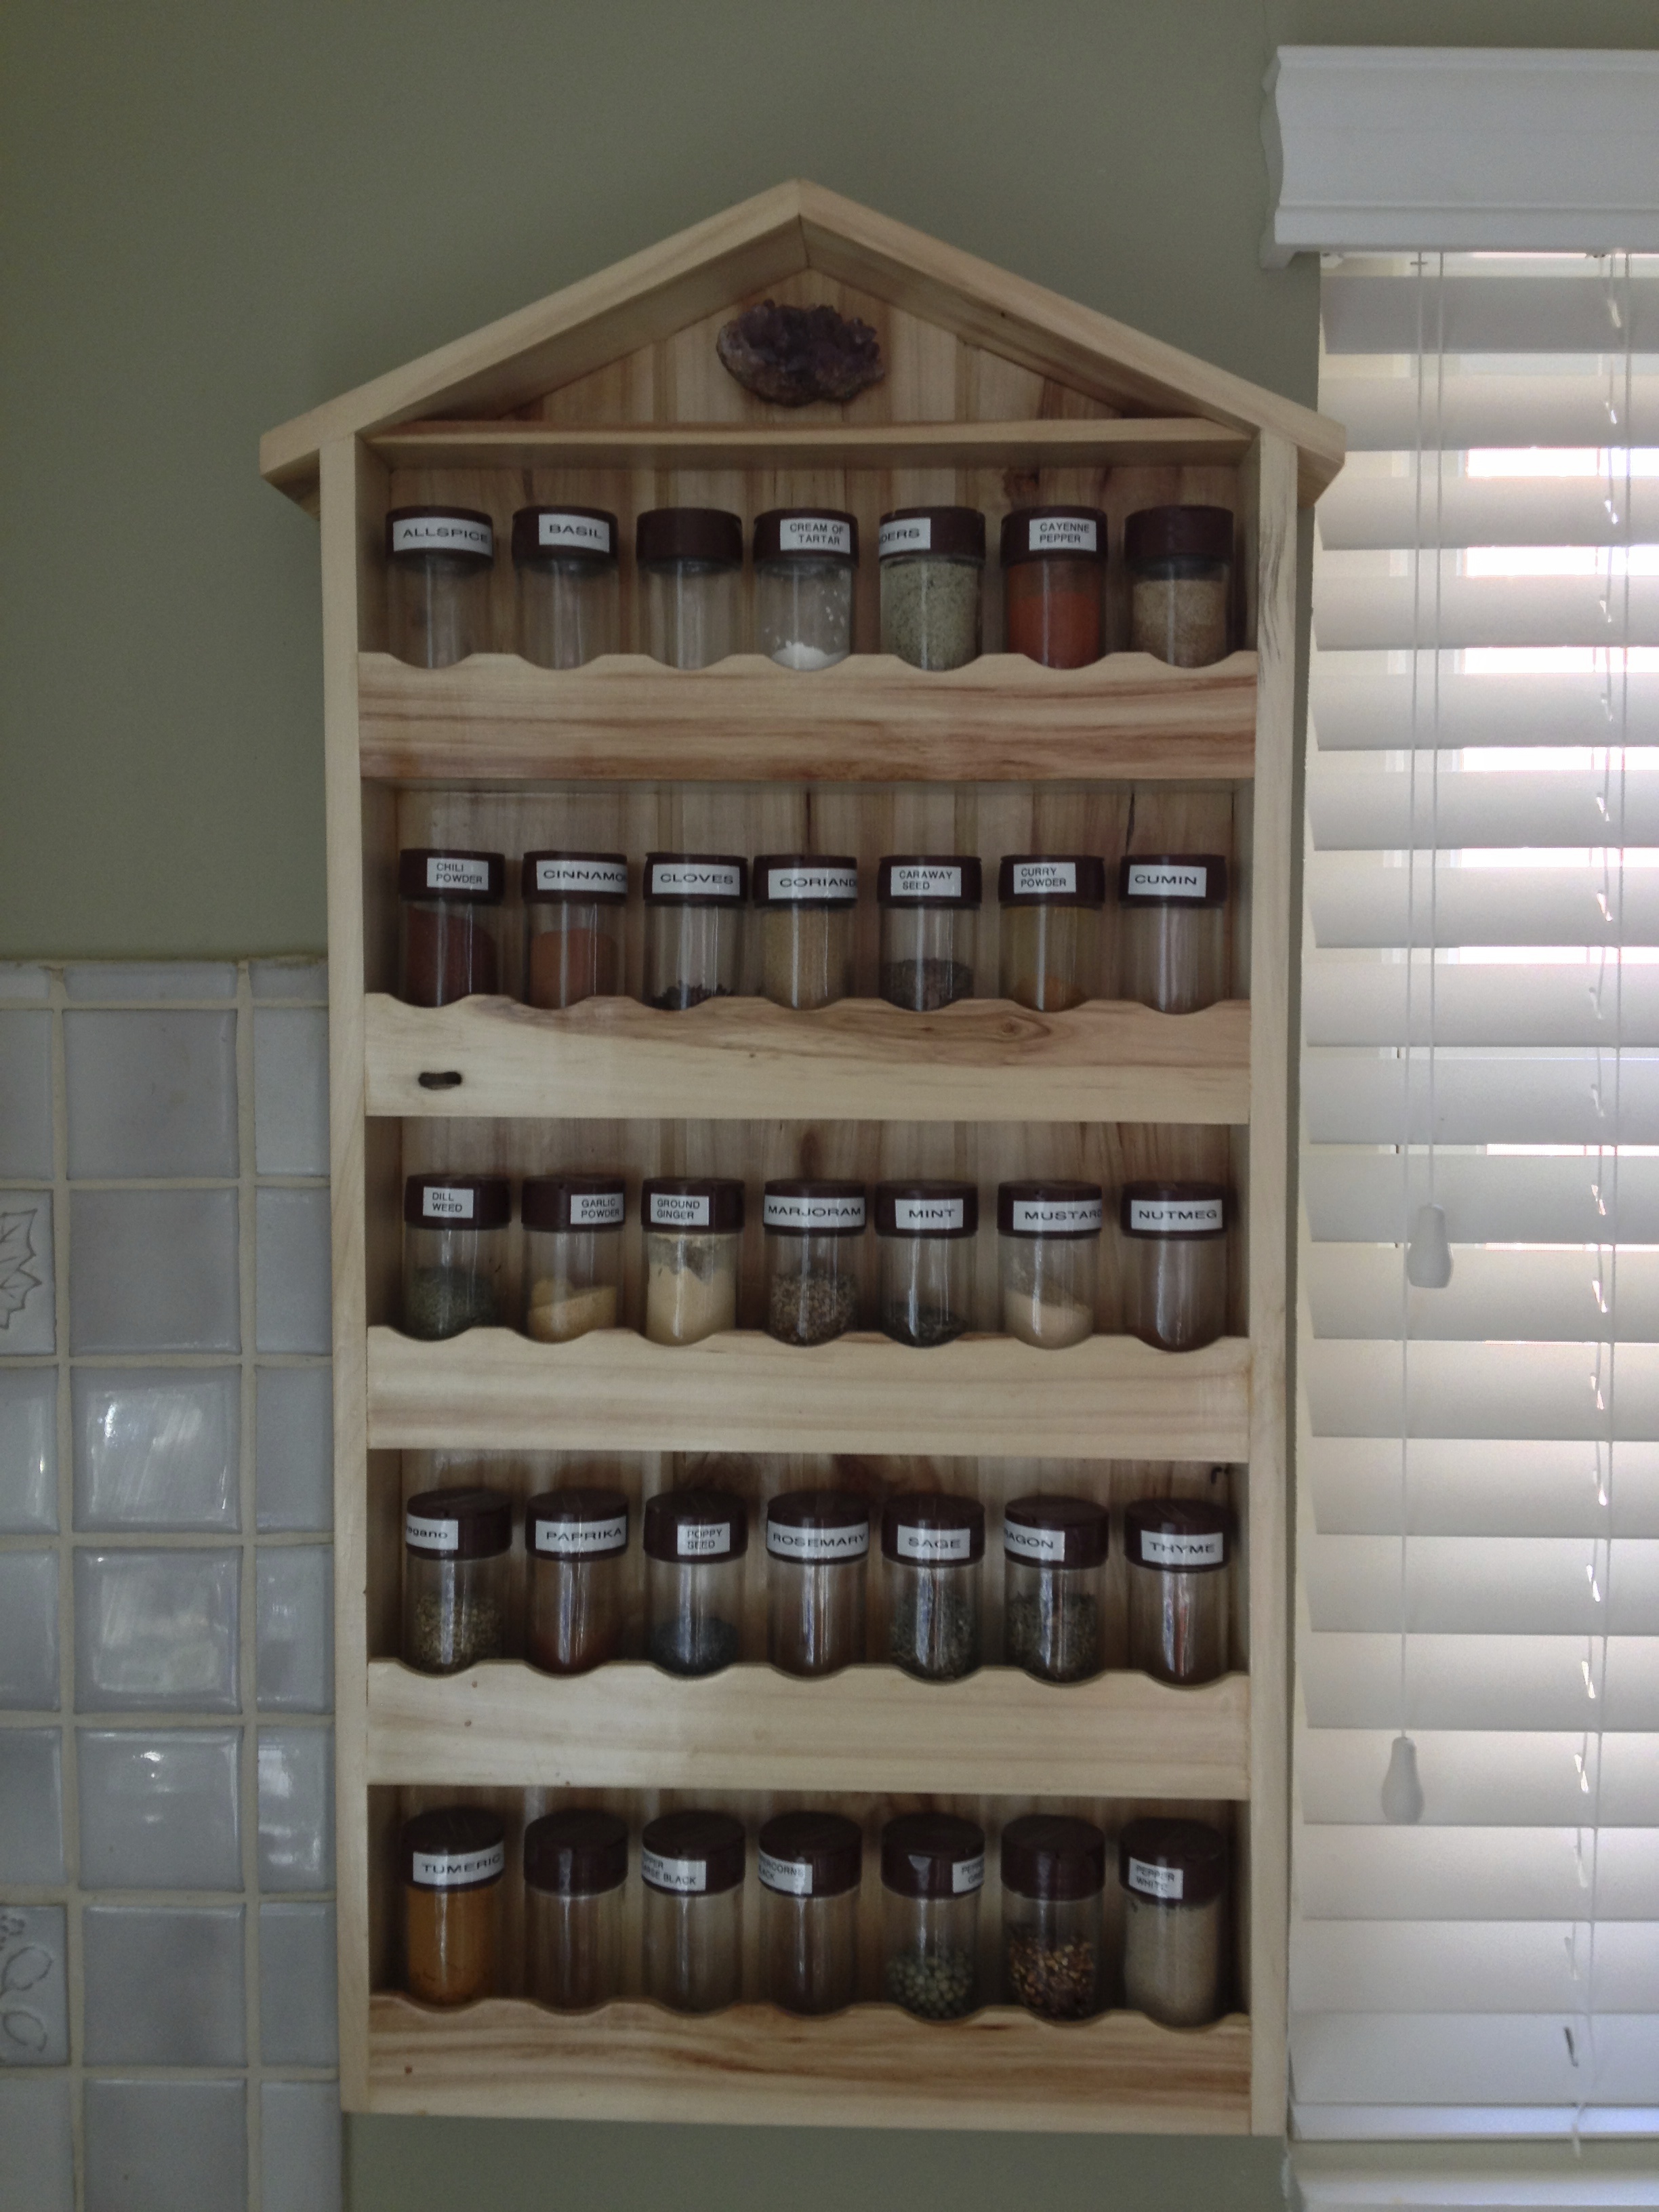
Best spice rack ever! Holds 35 bottles.
I have a very small kitchen, so I love having all these spices so handy but not taking up room on the counter or in a cabinet.
And lucky me . . . now I have a spatuloon!