Category Archives: Purses and Bags

Mesh Beach Bags

Ready for the beach!

Ready for the beach!

I made these 3 mesh beach bags recently for my nephew’s 3 little boys (ages 2 – 6). I thought they would be the perfect thing to carry their beach toys in. When they were done playing with them, they could throw the toys back in the bag and just give it a little shake to get rid of the sand.

I bought the colored mesh at a local quilt store.

Colored mesh comes in a roll that is 18" x 36" for about $5.25.

Colored mesh comes in a roll that is 18″ x 36″ for about $5.50.

Don’t you love the bug fabric? It was perfect to use with all 3 colors of the mesh.

This was a very simple project. I folded the mesh in half and sewed down the sides. Luckily my friend, Jan, had previously made a similar bag and suggested I sew the side seam with a french seam. This creates a smooth edge to the inside seam instead of something jagged that would possibly hurt little hands or catch on the toys or towel that you’re trying to get into or out of the bag.

Inside french seam

Inside french seam

Next was to box the bottom corners. This had to be done as a regular seam.

Boxed bottom corners.

Boxed bottom corners.

I sewed across the bottom corners and then cut the excess mesh. I did do a zig zag stitch over the seam edge to give it some extra strength.

The bug fabric was cut into 2 inch strips x WOF. I sewed 2 strips together lengthwise and then ironed the opposite raw edges under about 1/2 inch. I laid this right over the top of the mesh, marked exactly where the fabric should be joined to form a circle the width of the bag and then removed it and sewed this seam in the fabric. I’m afraid I don’t have pictures of this step. I think I got so excited about finishing up the bags so quickly, that I forgot to take more pictures!

Top of bag

Top of bag

The fabric was placed back on the top of the bag so that the mesh is right up against the top of it. I edge stitched around both the top and the bottom of the fabric strip.

Black webbing was used for the handles and secured onto the inside of the bag with both a square and an X in machine stitching.

Finished bags

Finished bags

That’s it!

The boys loved them!

The boys loved them!

Heading to the beach.

Heading to the beach.

6 Comments

Filed under Family, Gifts, Purses and Bags, Tutorials

Wool Embroidery and a Triple Zip

Baby chicks

Baby chick candle mat – Size is about 7″ across (small!)

Isn’t this a happy little piece? I bought it as a wool felt embroidery kit. It included all the pieces already cut out. All I had to do was pick some embroidery floss to make it up. I was inspired to stitch it while I was visiting my friends in CO. A couple years ago, my friends and I made this larger piece as a gift for a week in the friend’s cabin together:

xx

Felted wool and embroidery – size is about 15 inches across

Close up of wool and embroidery

Close up of wool and embroidery

Once I left Colorado, we drove to MT where I have a sewing machine. I finally made a triple zip pouch that I’ve been wanting to try making for some time. I used this tutorial by Debbie of A Quilter’s Table. It is an ingenious pattern and makes up fairly quickly.

Fabric and zipper selection

Fabric and zipper selection

All pieces cut out and ready

All pieces cut out and ready

Zipper tabs applied about 3/4 inch from each side of pouch piece.

Zipper tabs applied about 3/4 inch from each side of pouch piece.

Piece after all zippers and linings have been attached

Piece after all zippers and linings have been attached

Somehow, after all of that, it turns into this:

Finished triple zip

Finished triple zip – Size 7 1/2″ wide by 6″ tall

I’m trying to decide what sort of pouch would be the absolute best for carrying charging cords around when traveling – or maybe just for storing them when not in use. I currently use my House Pouch from the Zakka Style book:

Zakka Style House Pouch

Zakka Style House Pouch

I can fit my computer cord, kindle cord and telephone charging cord in this pouch but I have to take the whole bunch out and untangle them to get one. I thought the triple zip pouch might work but it is too small. (A larger version may be in the works soon – if I can figure it out).

Do you have a “pouch” that you like to carry charging cords in? Please let me know and I hope it is something that I can make.


8 Comments

Filed under Pattern review, Purses and Bags, Uncategorized, Zakka Style sew along

Sew South – Workshops

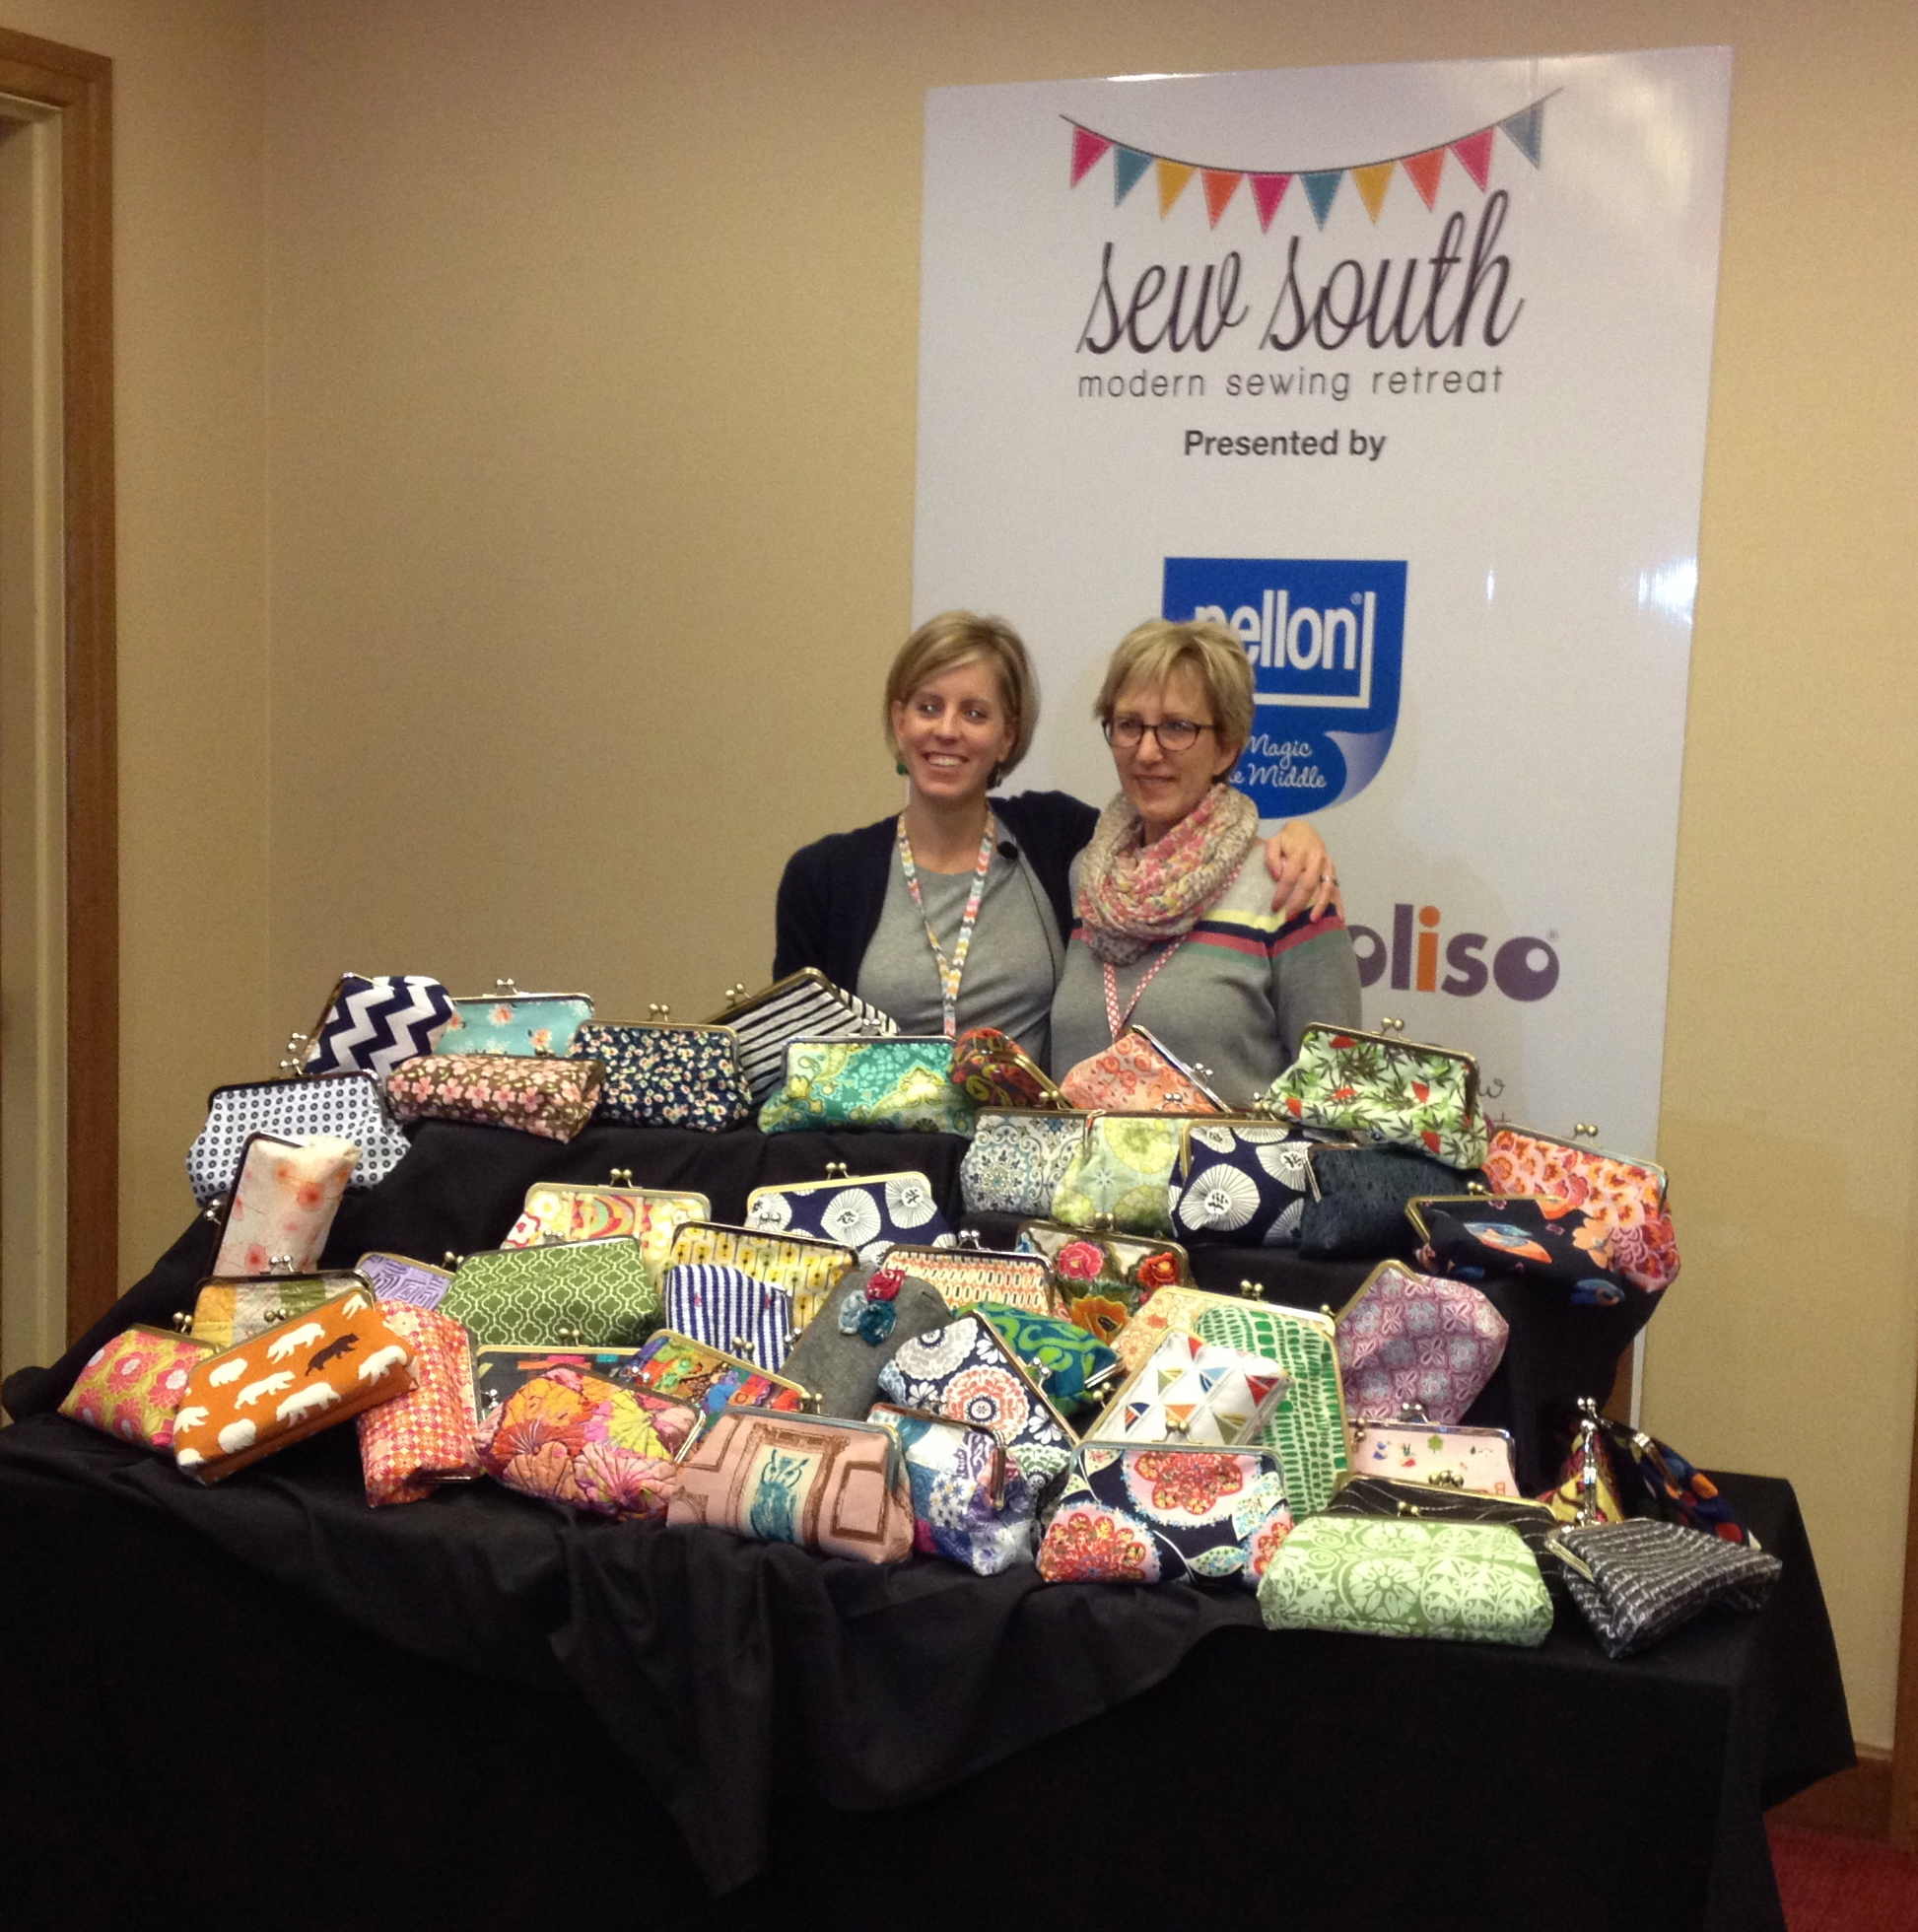
The Sew South Retreat was held in Charlotte, NC March 21 – 24, 2013. I was lucky enough to be one of the 50 attendees.

All of the "goodies"!

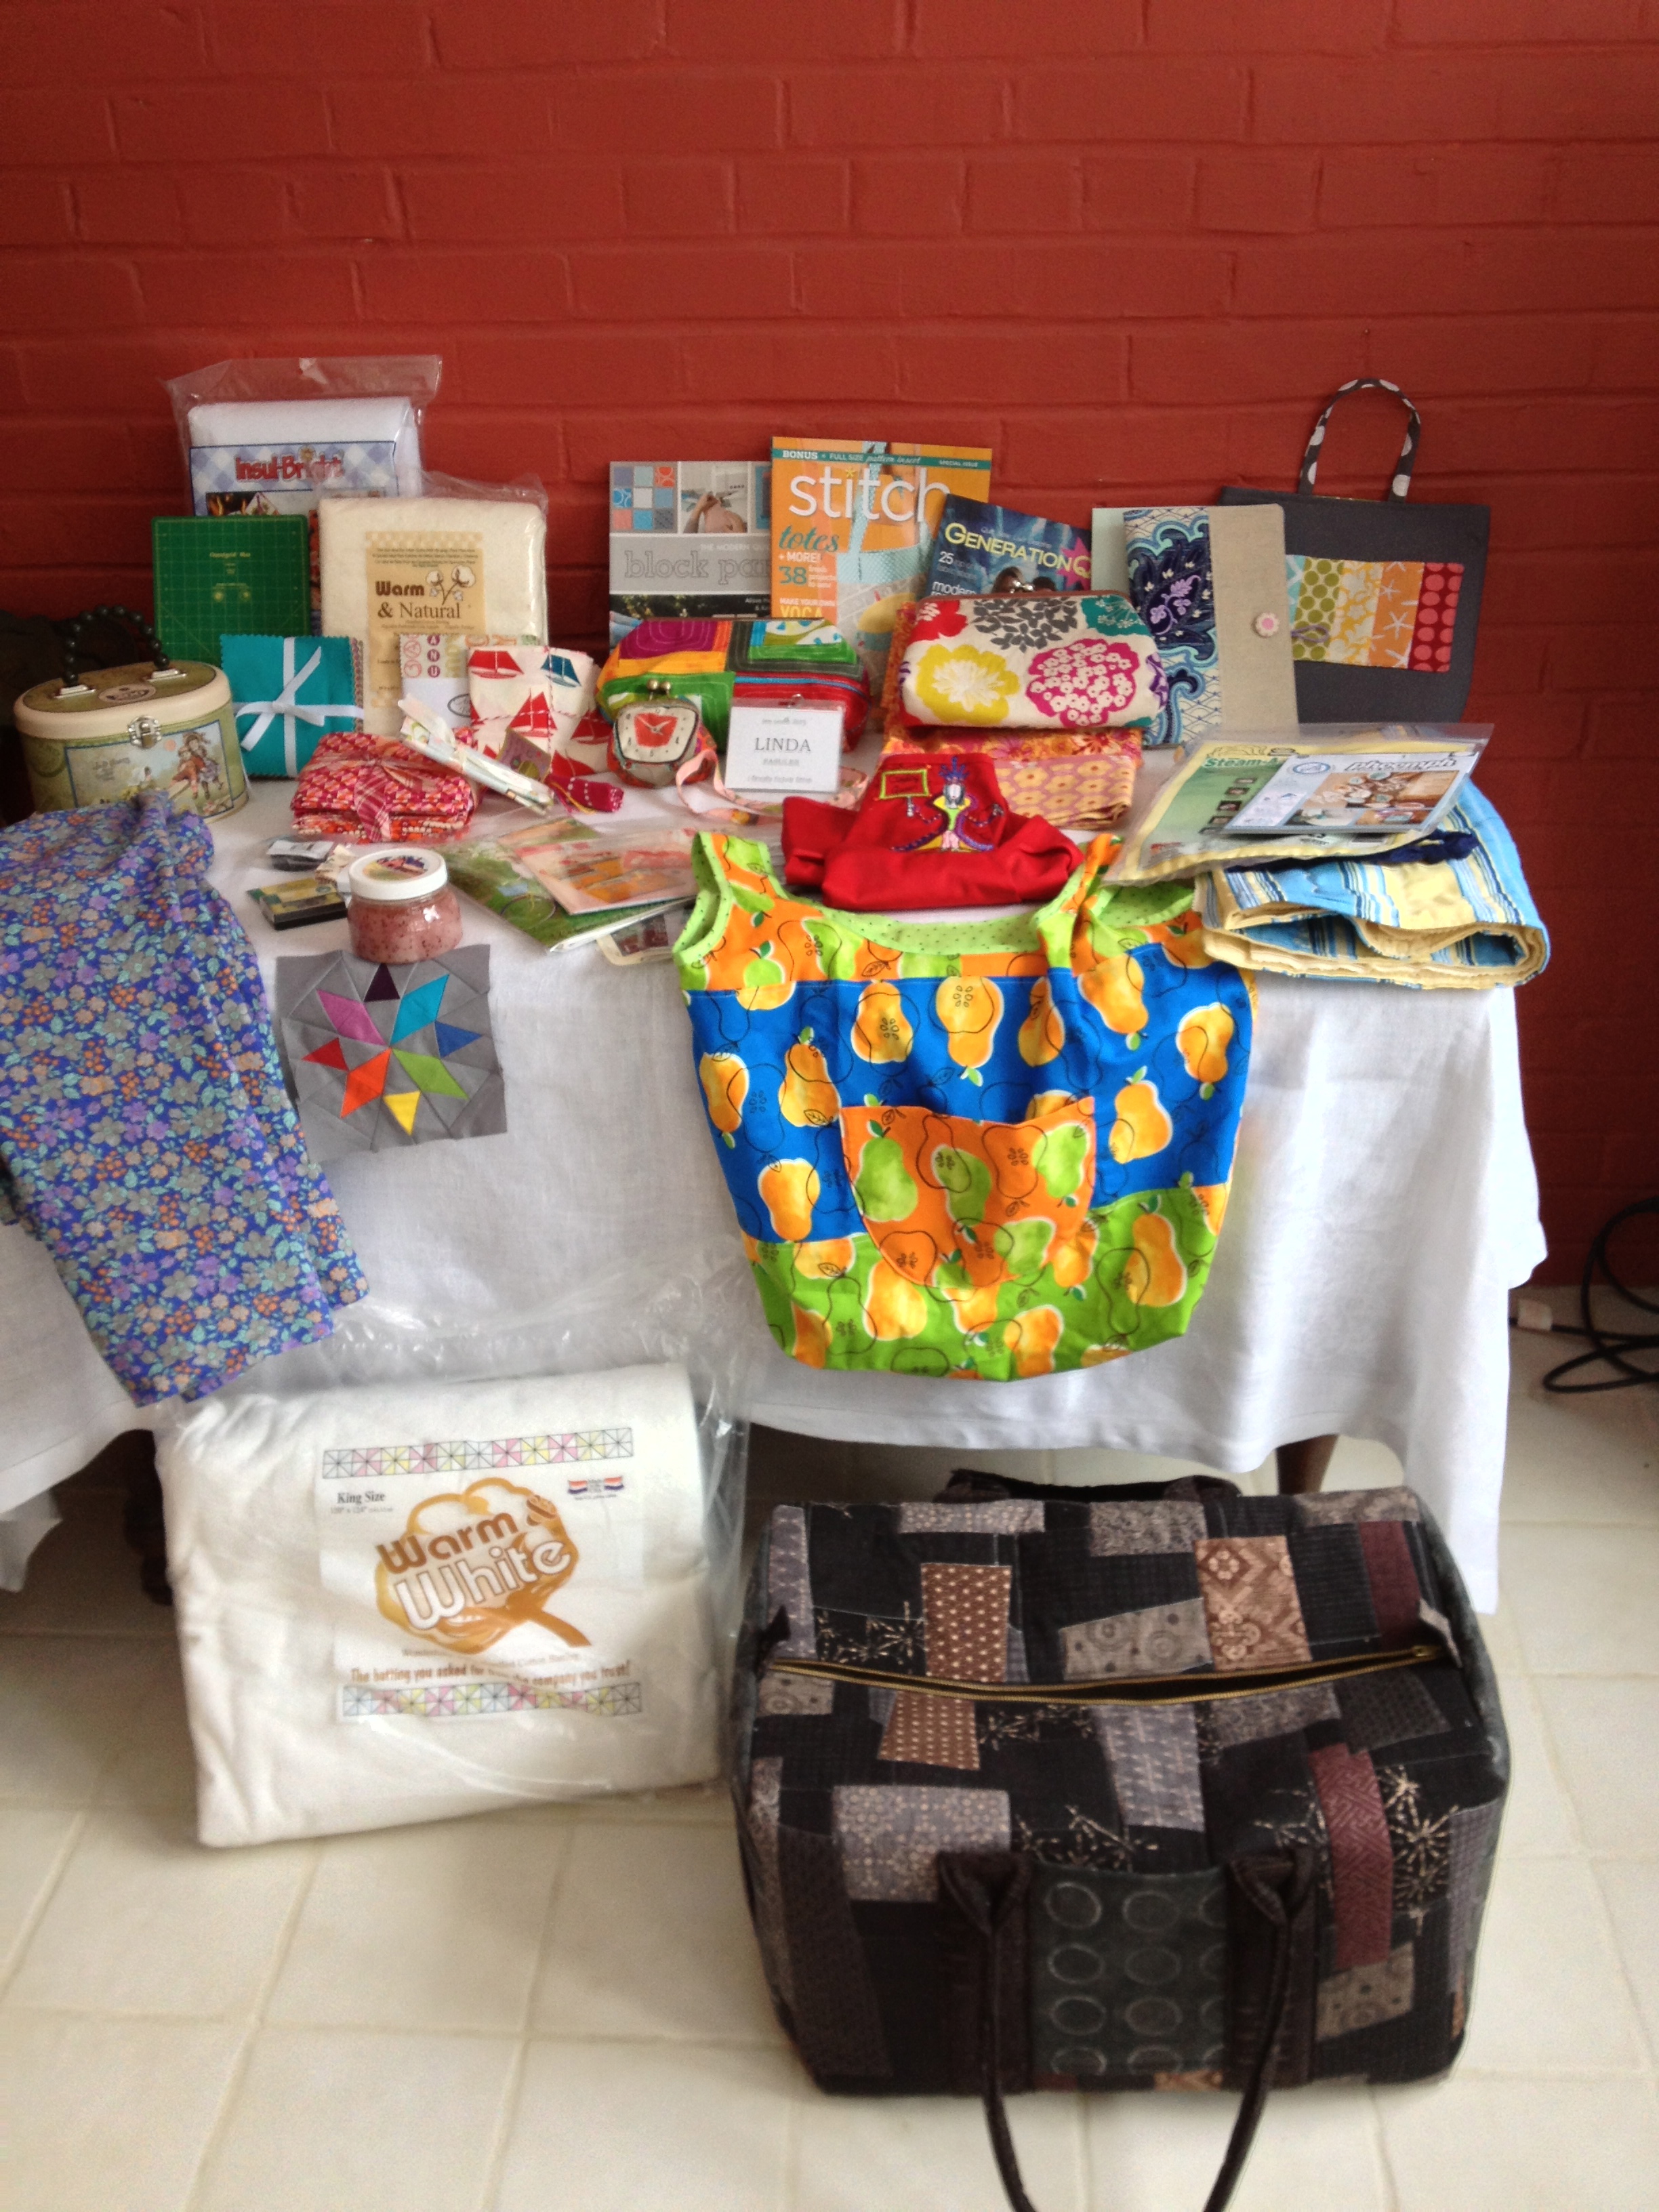
Look at all of these “goodies”! I either made them, swapped for them or was lucky enough to be given them by my secret sister or many of the retreat sponsors.

There is so much I would like to write about this retreat, but today I’m going to concentrate on the workshops. The retreat included 4 sewing workshops. We had to do some prep work beforehand for some of them, which made it feasible to leave the retreat with 4 FINISHED projects.

Paper pieced star

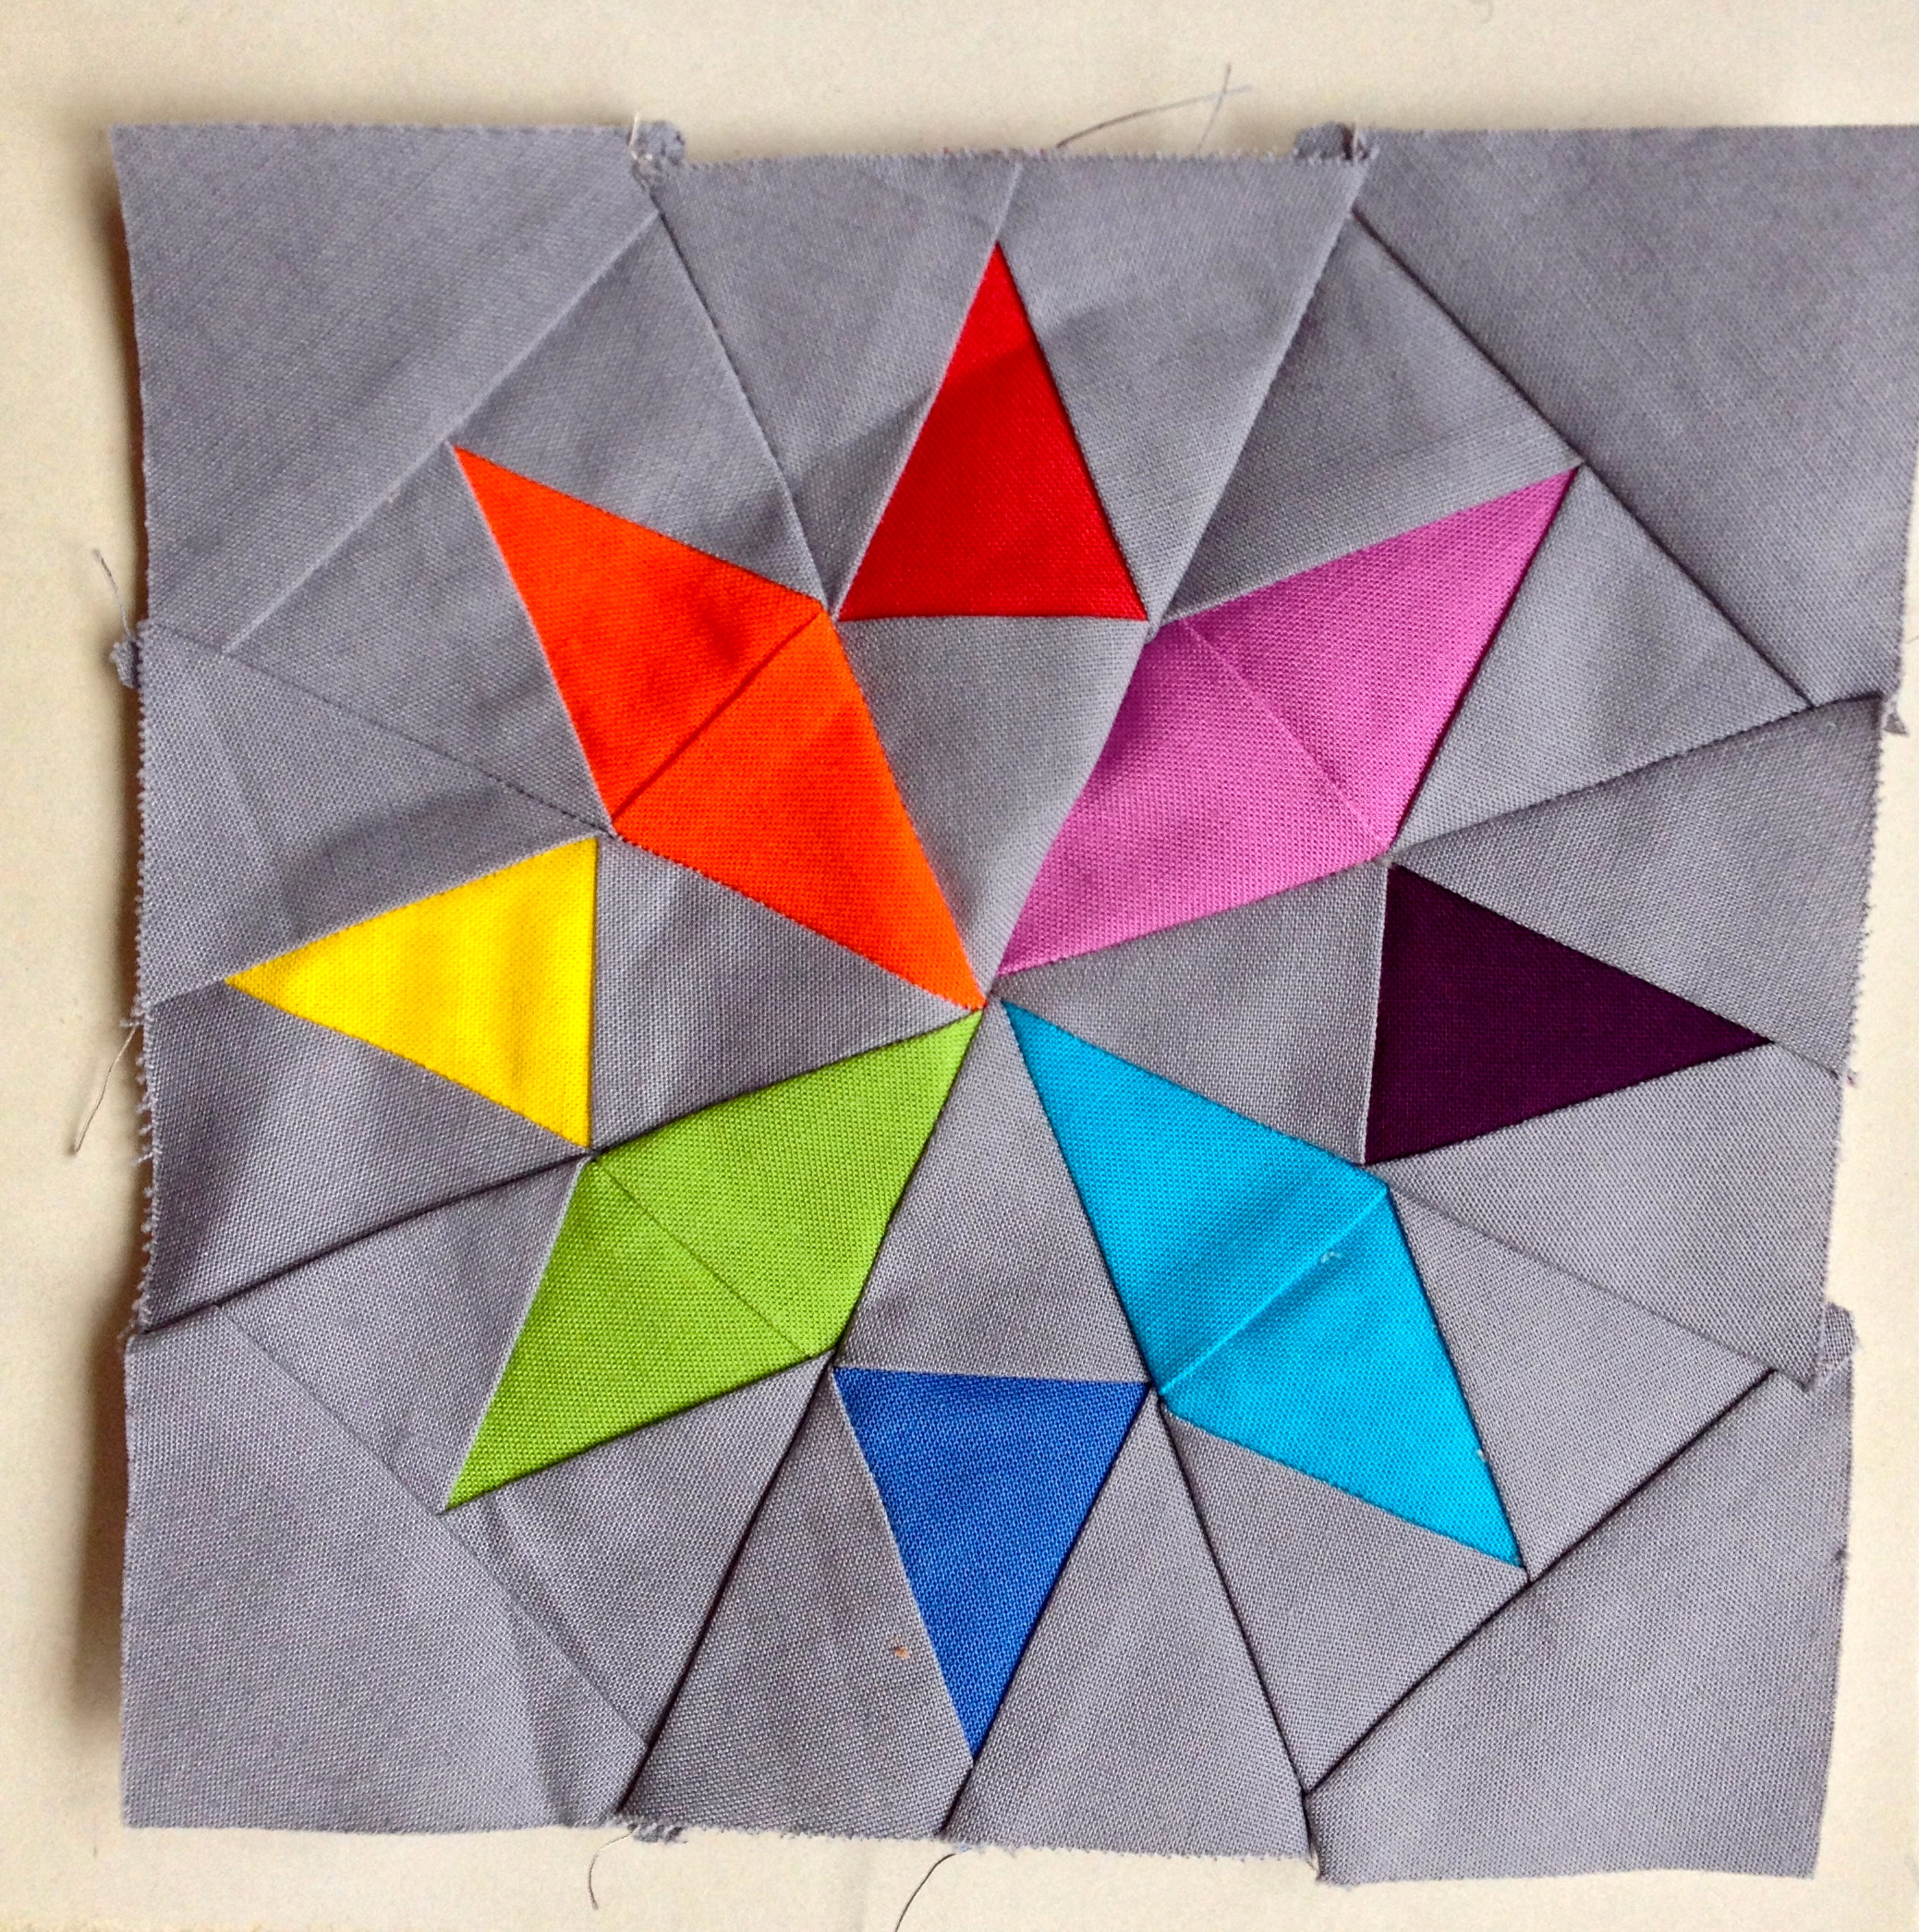
Paper pieced star – 6-1/2″ square

Workshop #1 was paper piecing. We were given the pattern for this star and for a bunny in a basket. This workshop was taught by Jennifer Mathis of Ellison Lane Quilts.

Jennifer Mathis

Jennifer Mathis

Jennifer was the organizer of Sew South and did an AMAZING job!

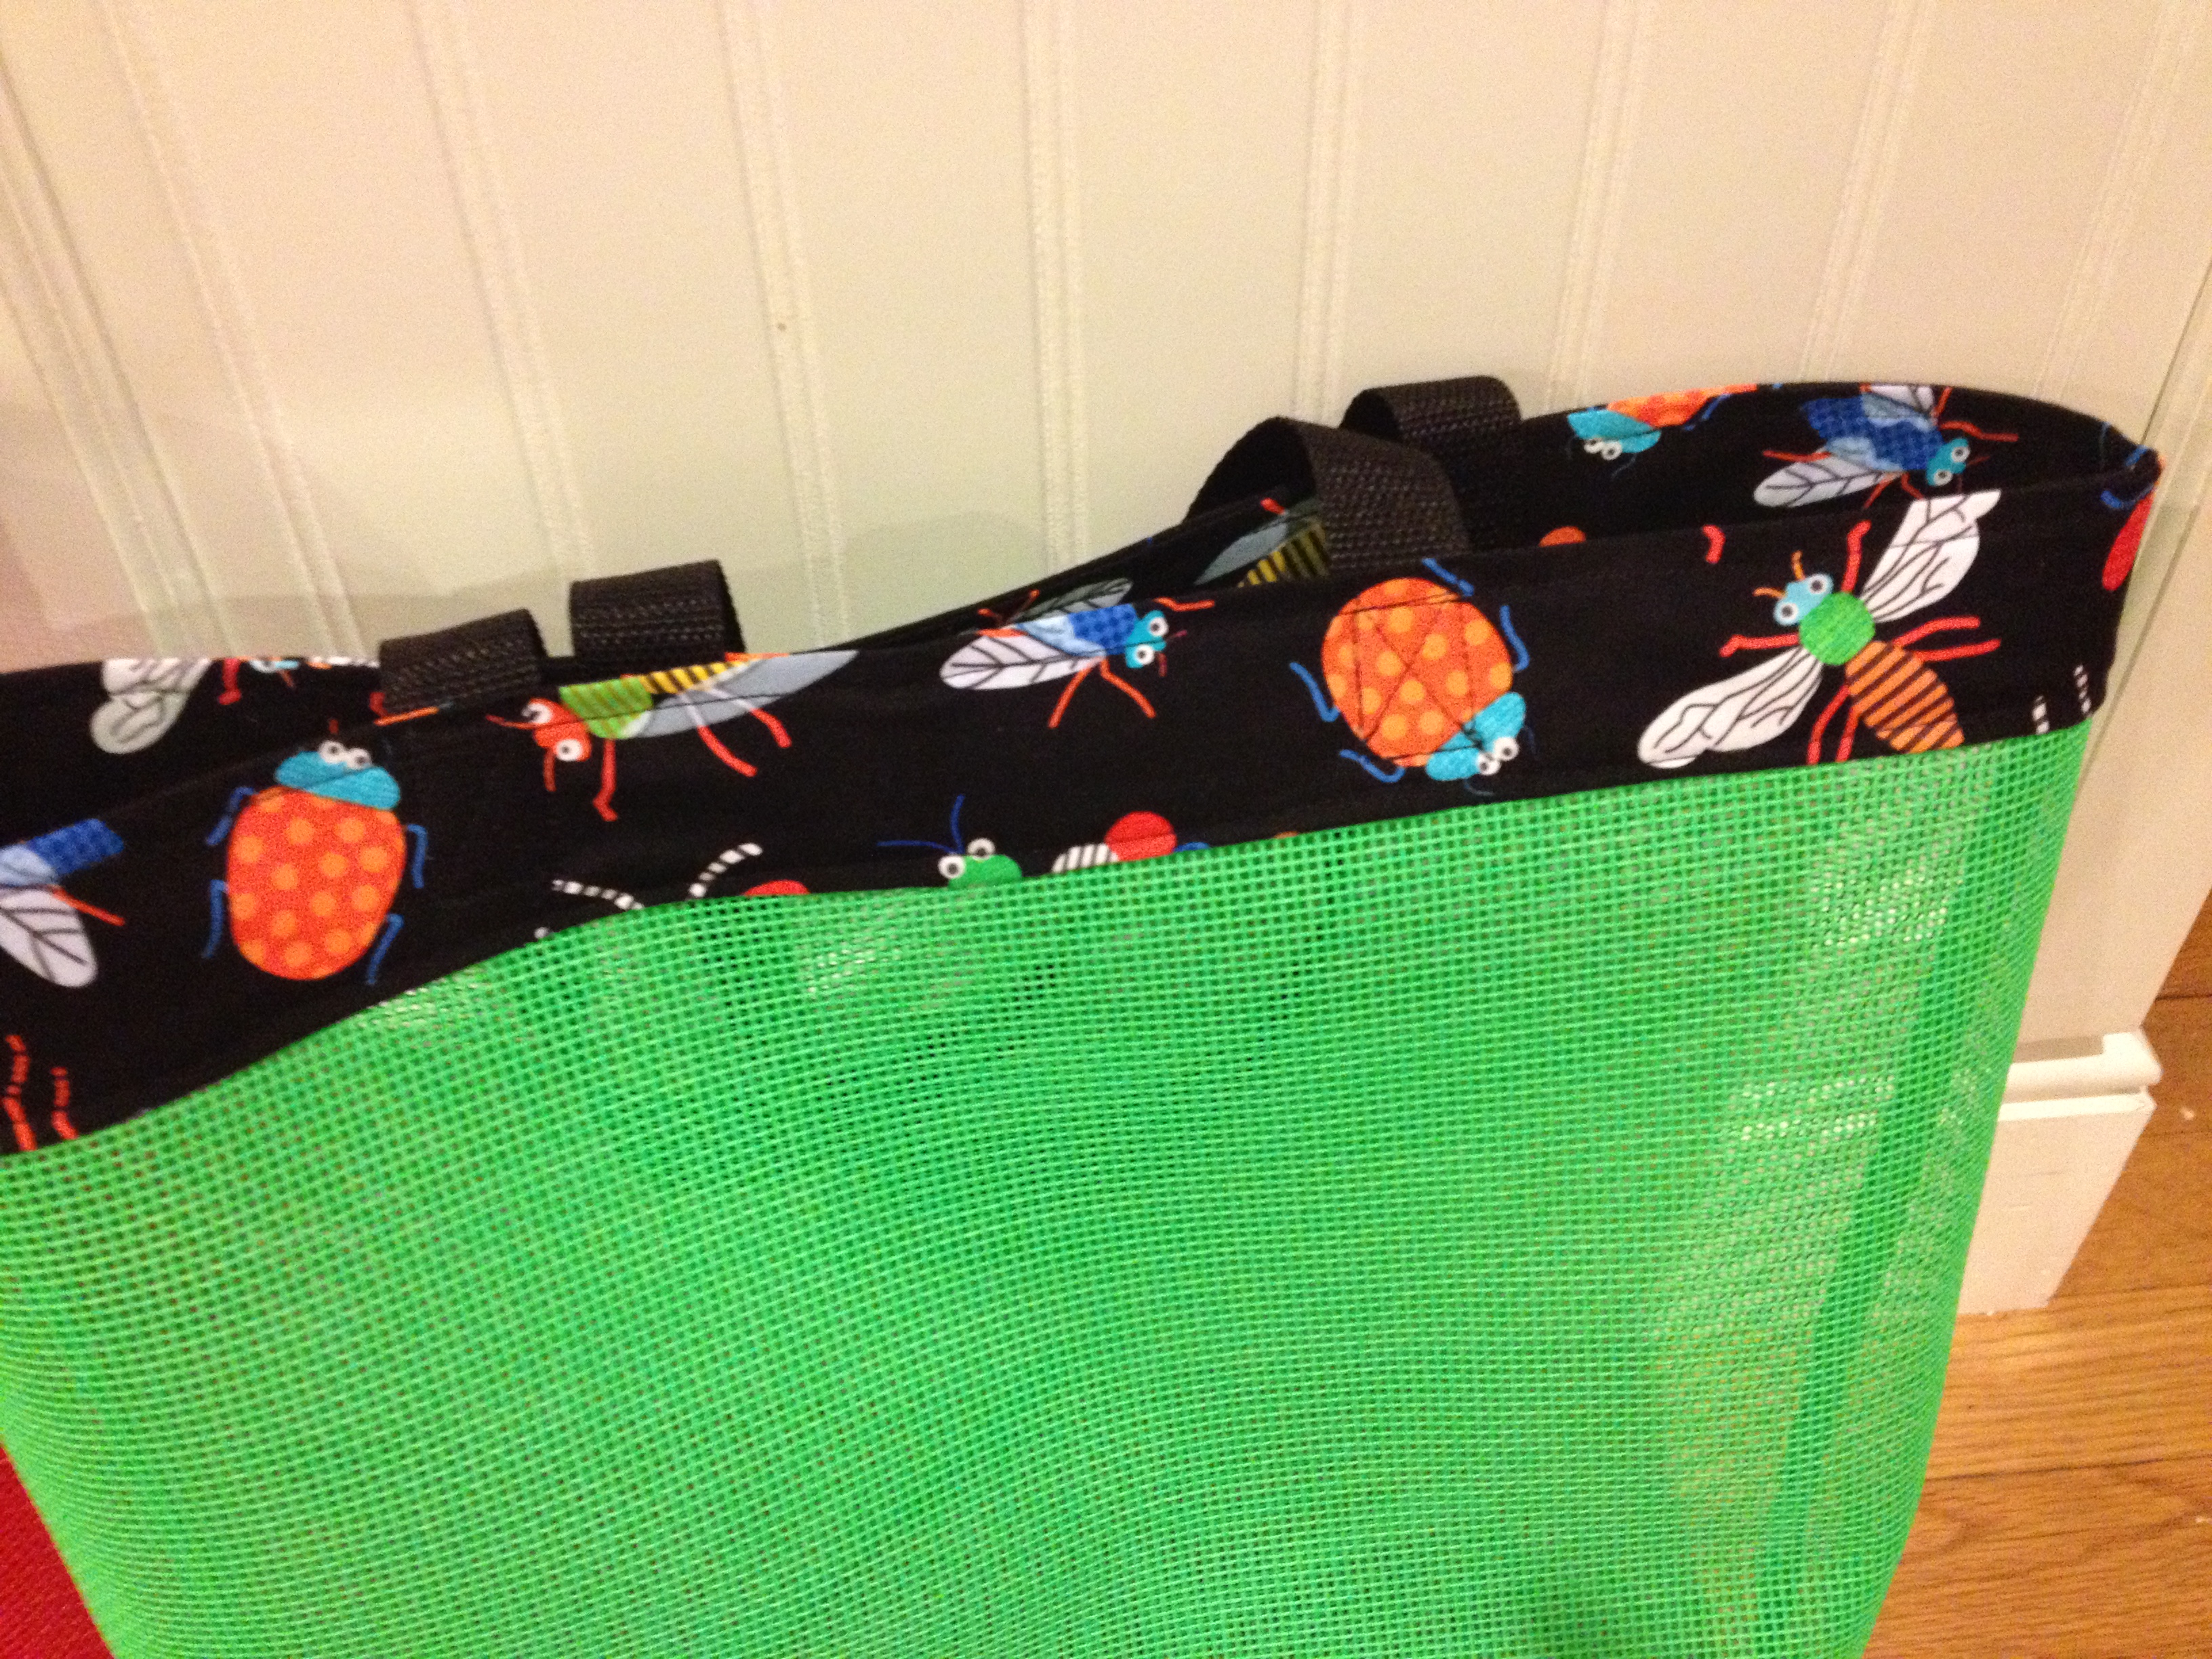
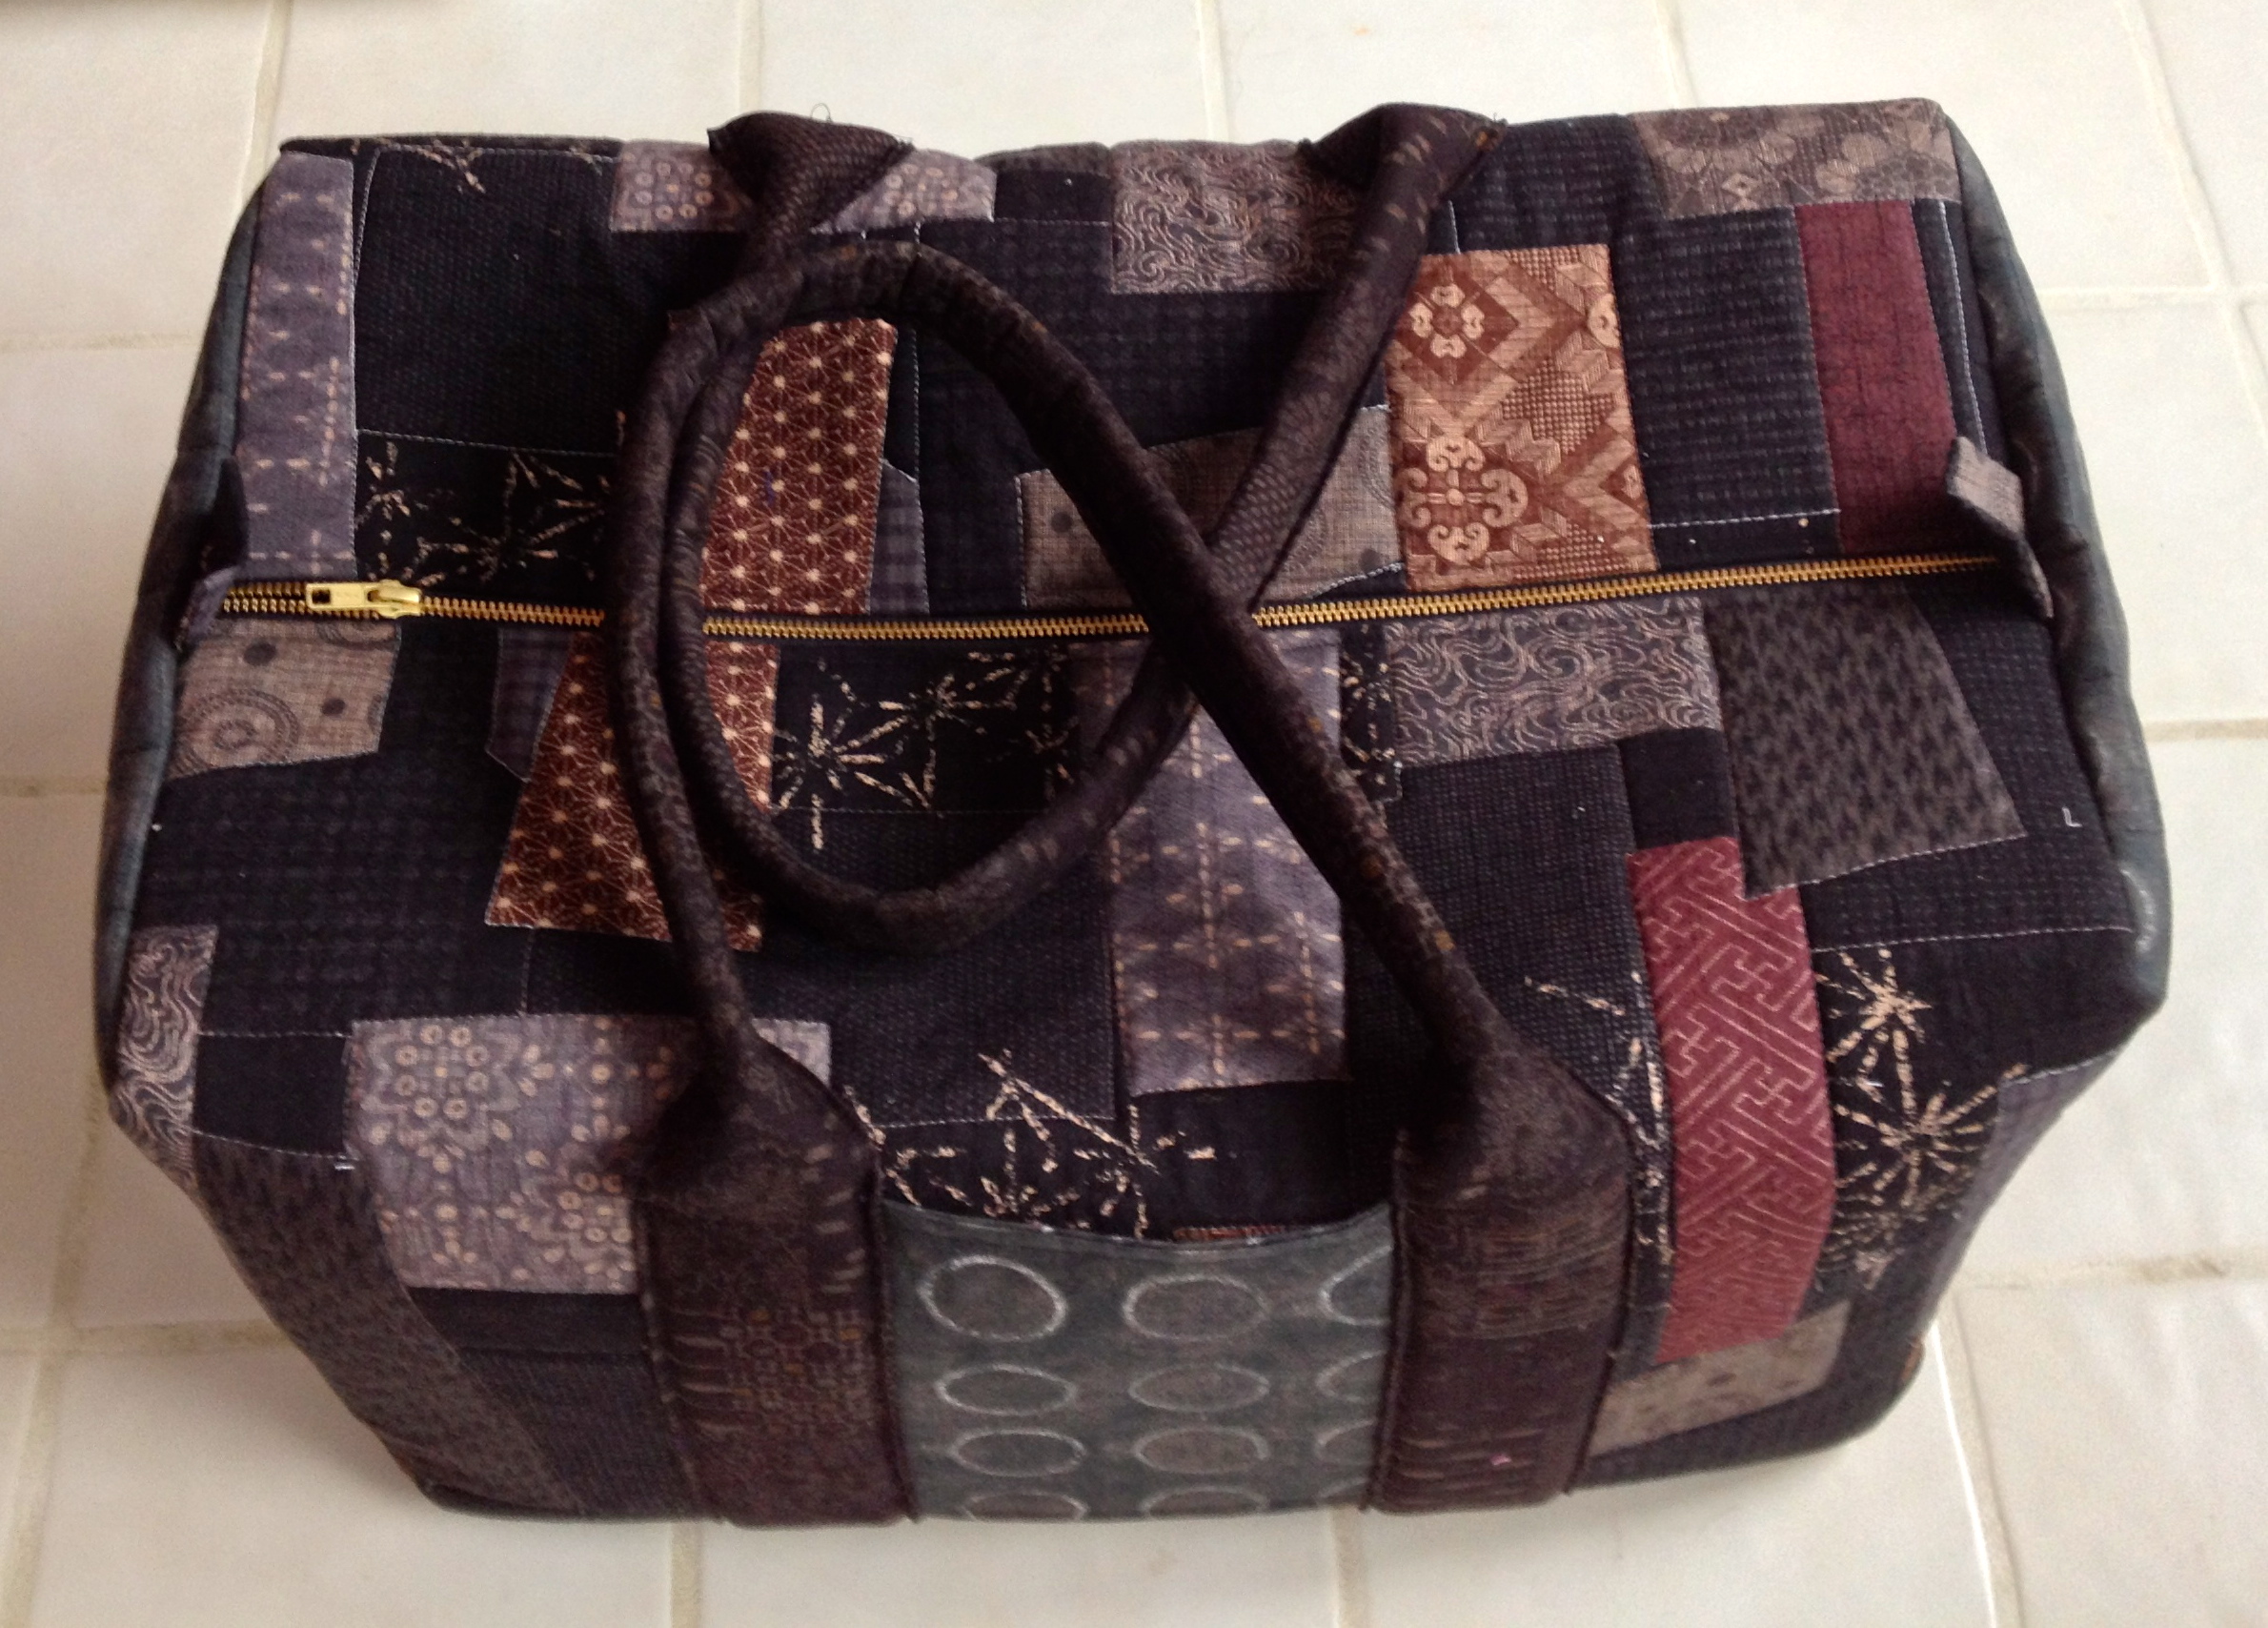
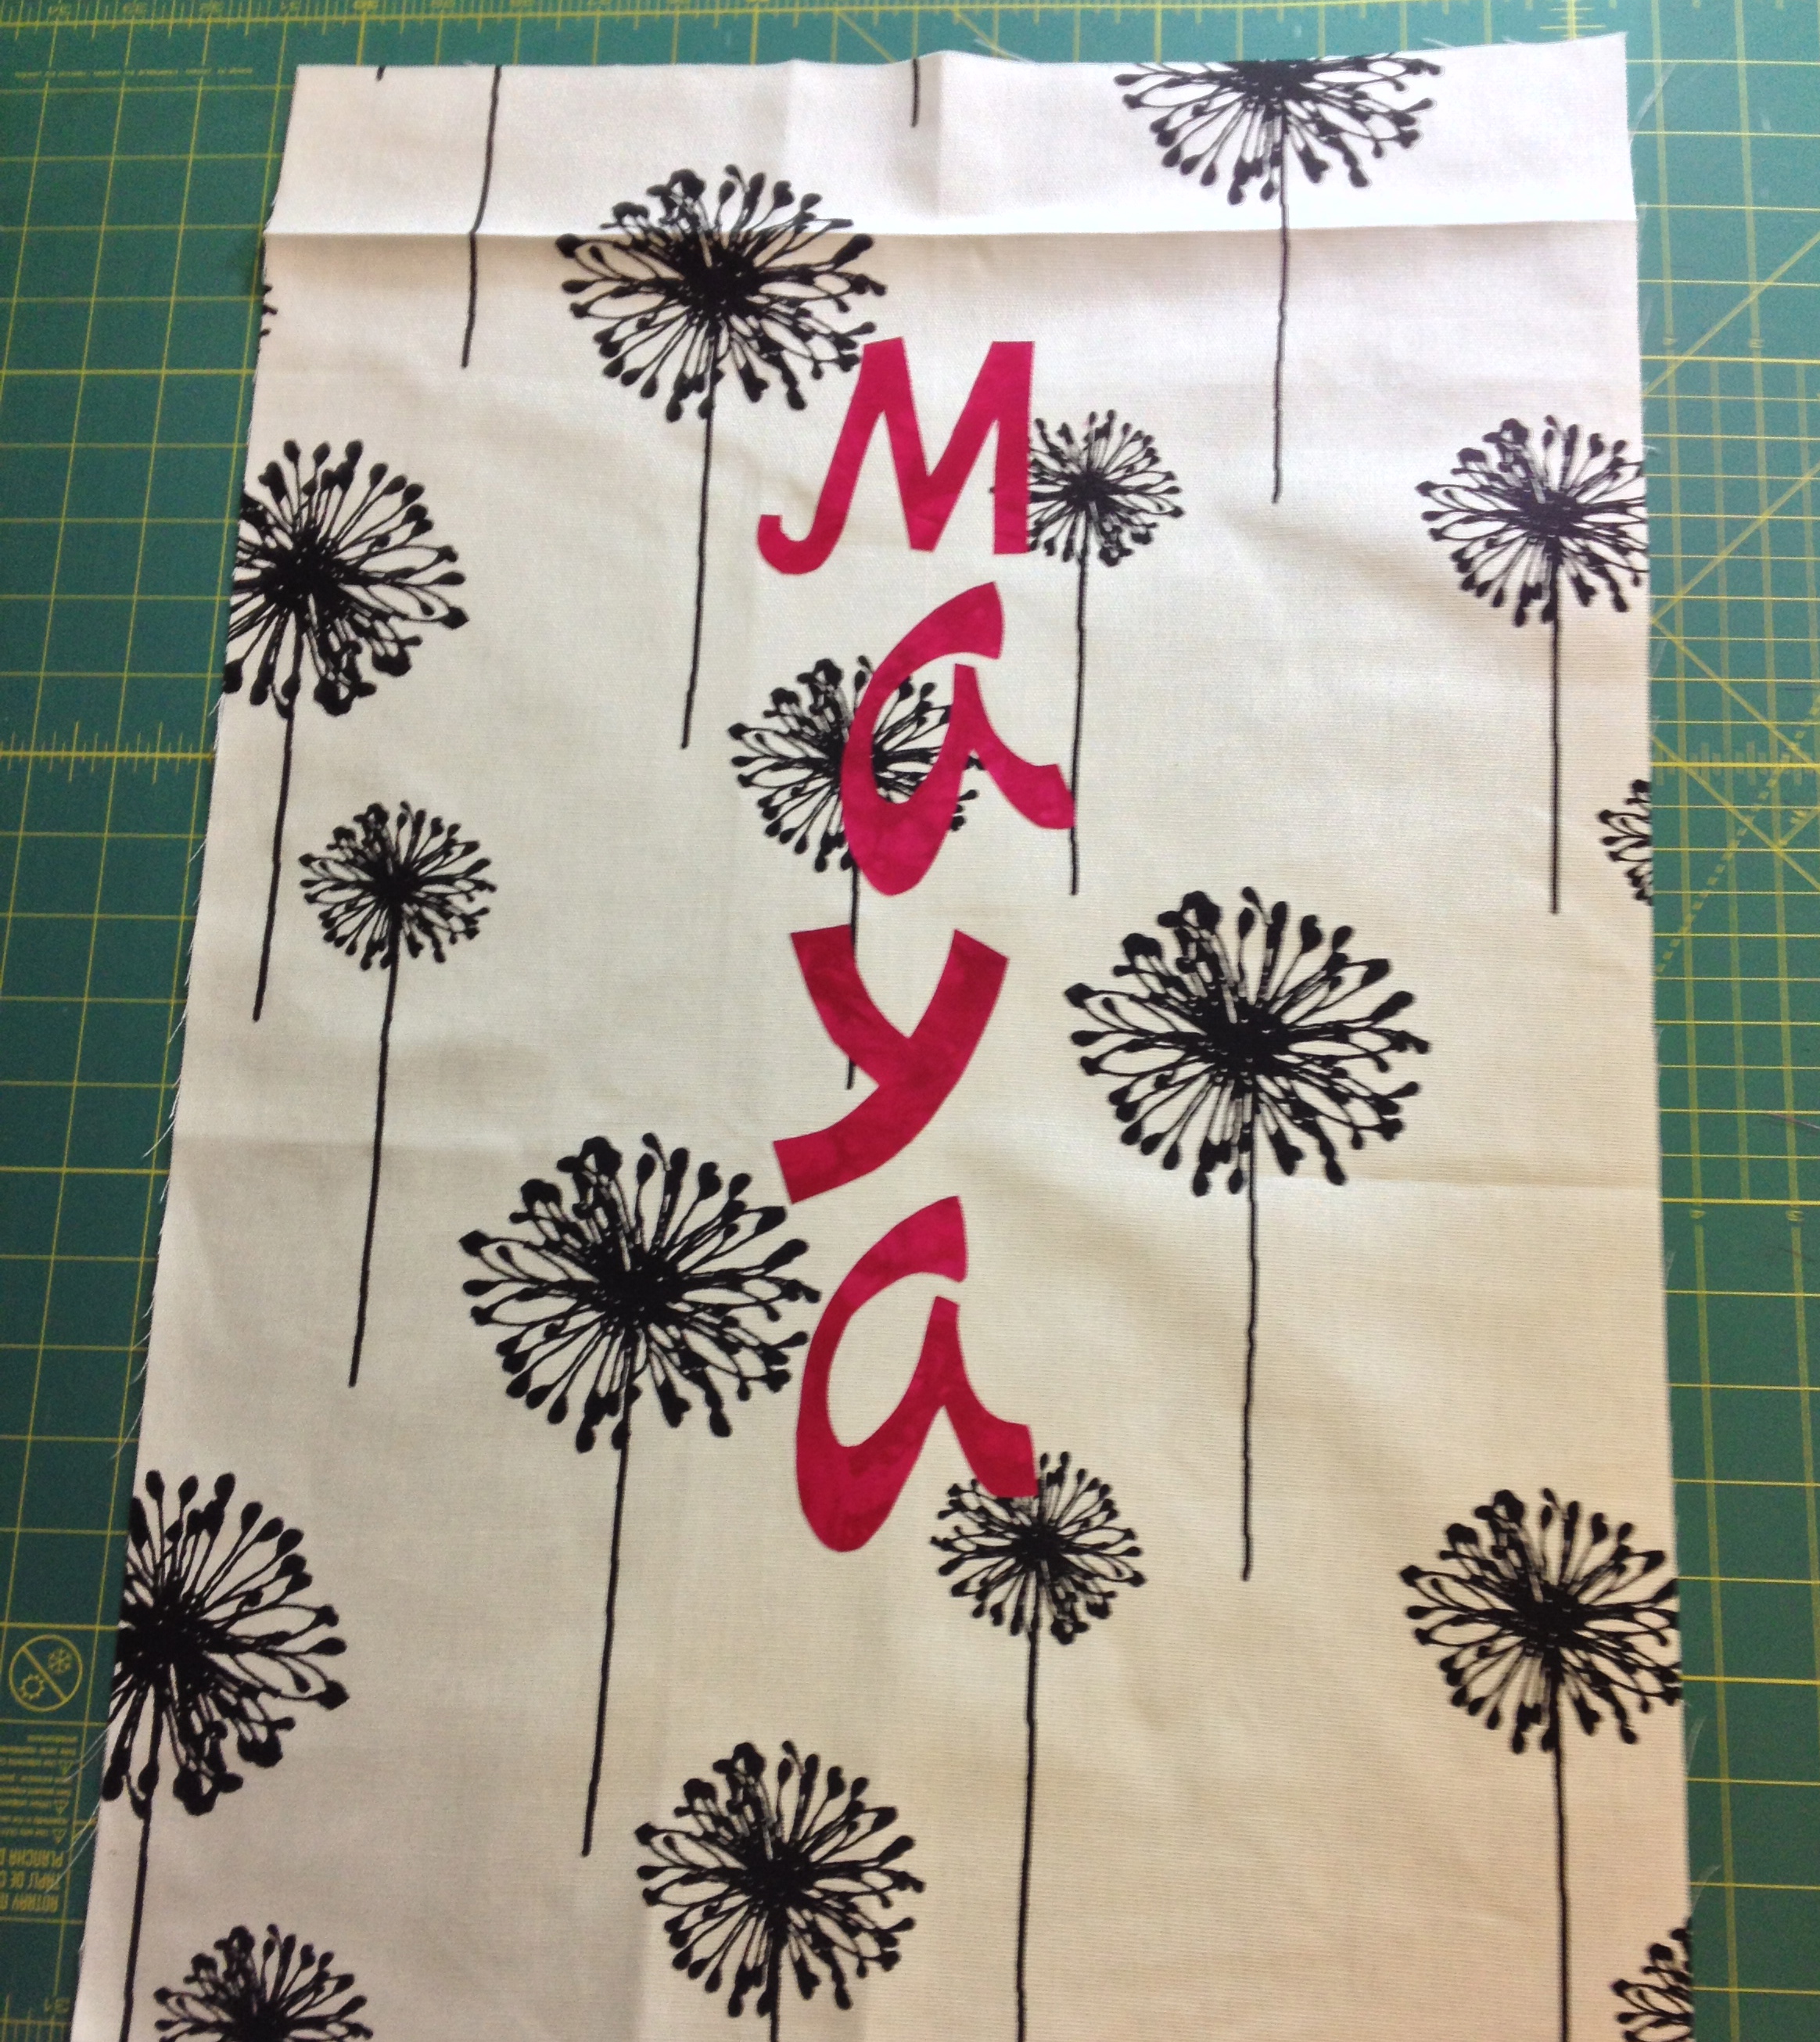
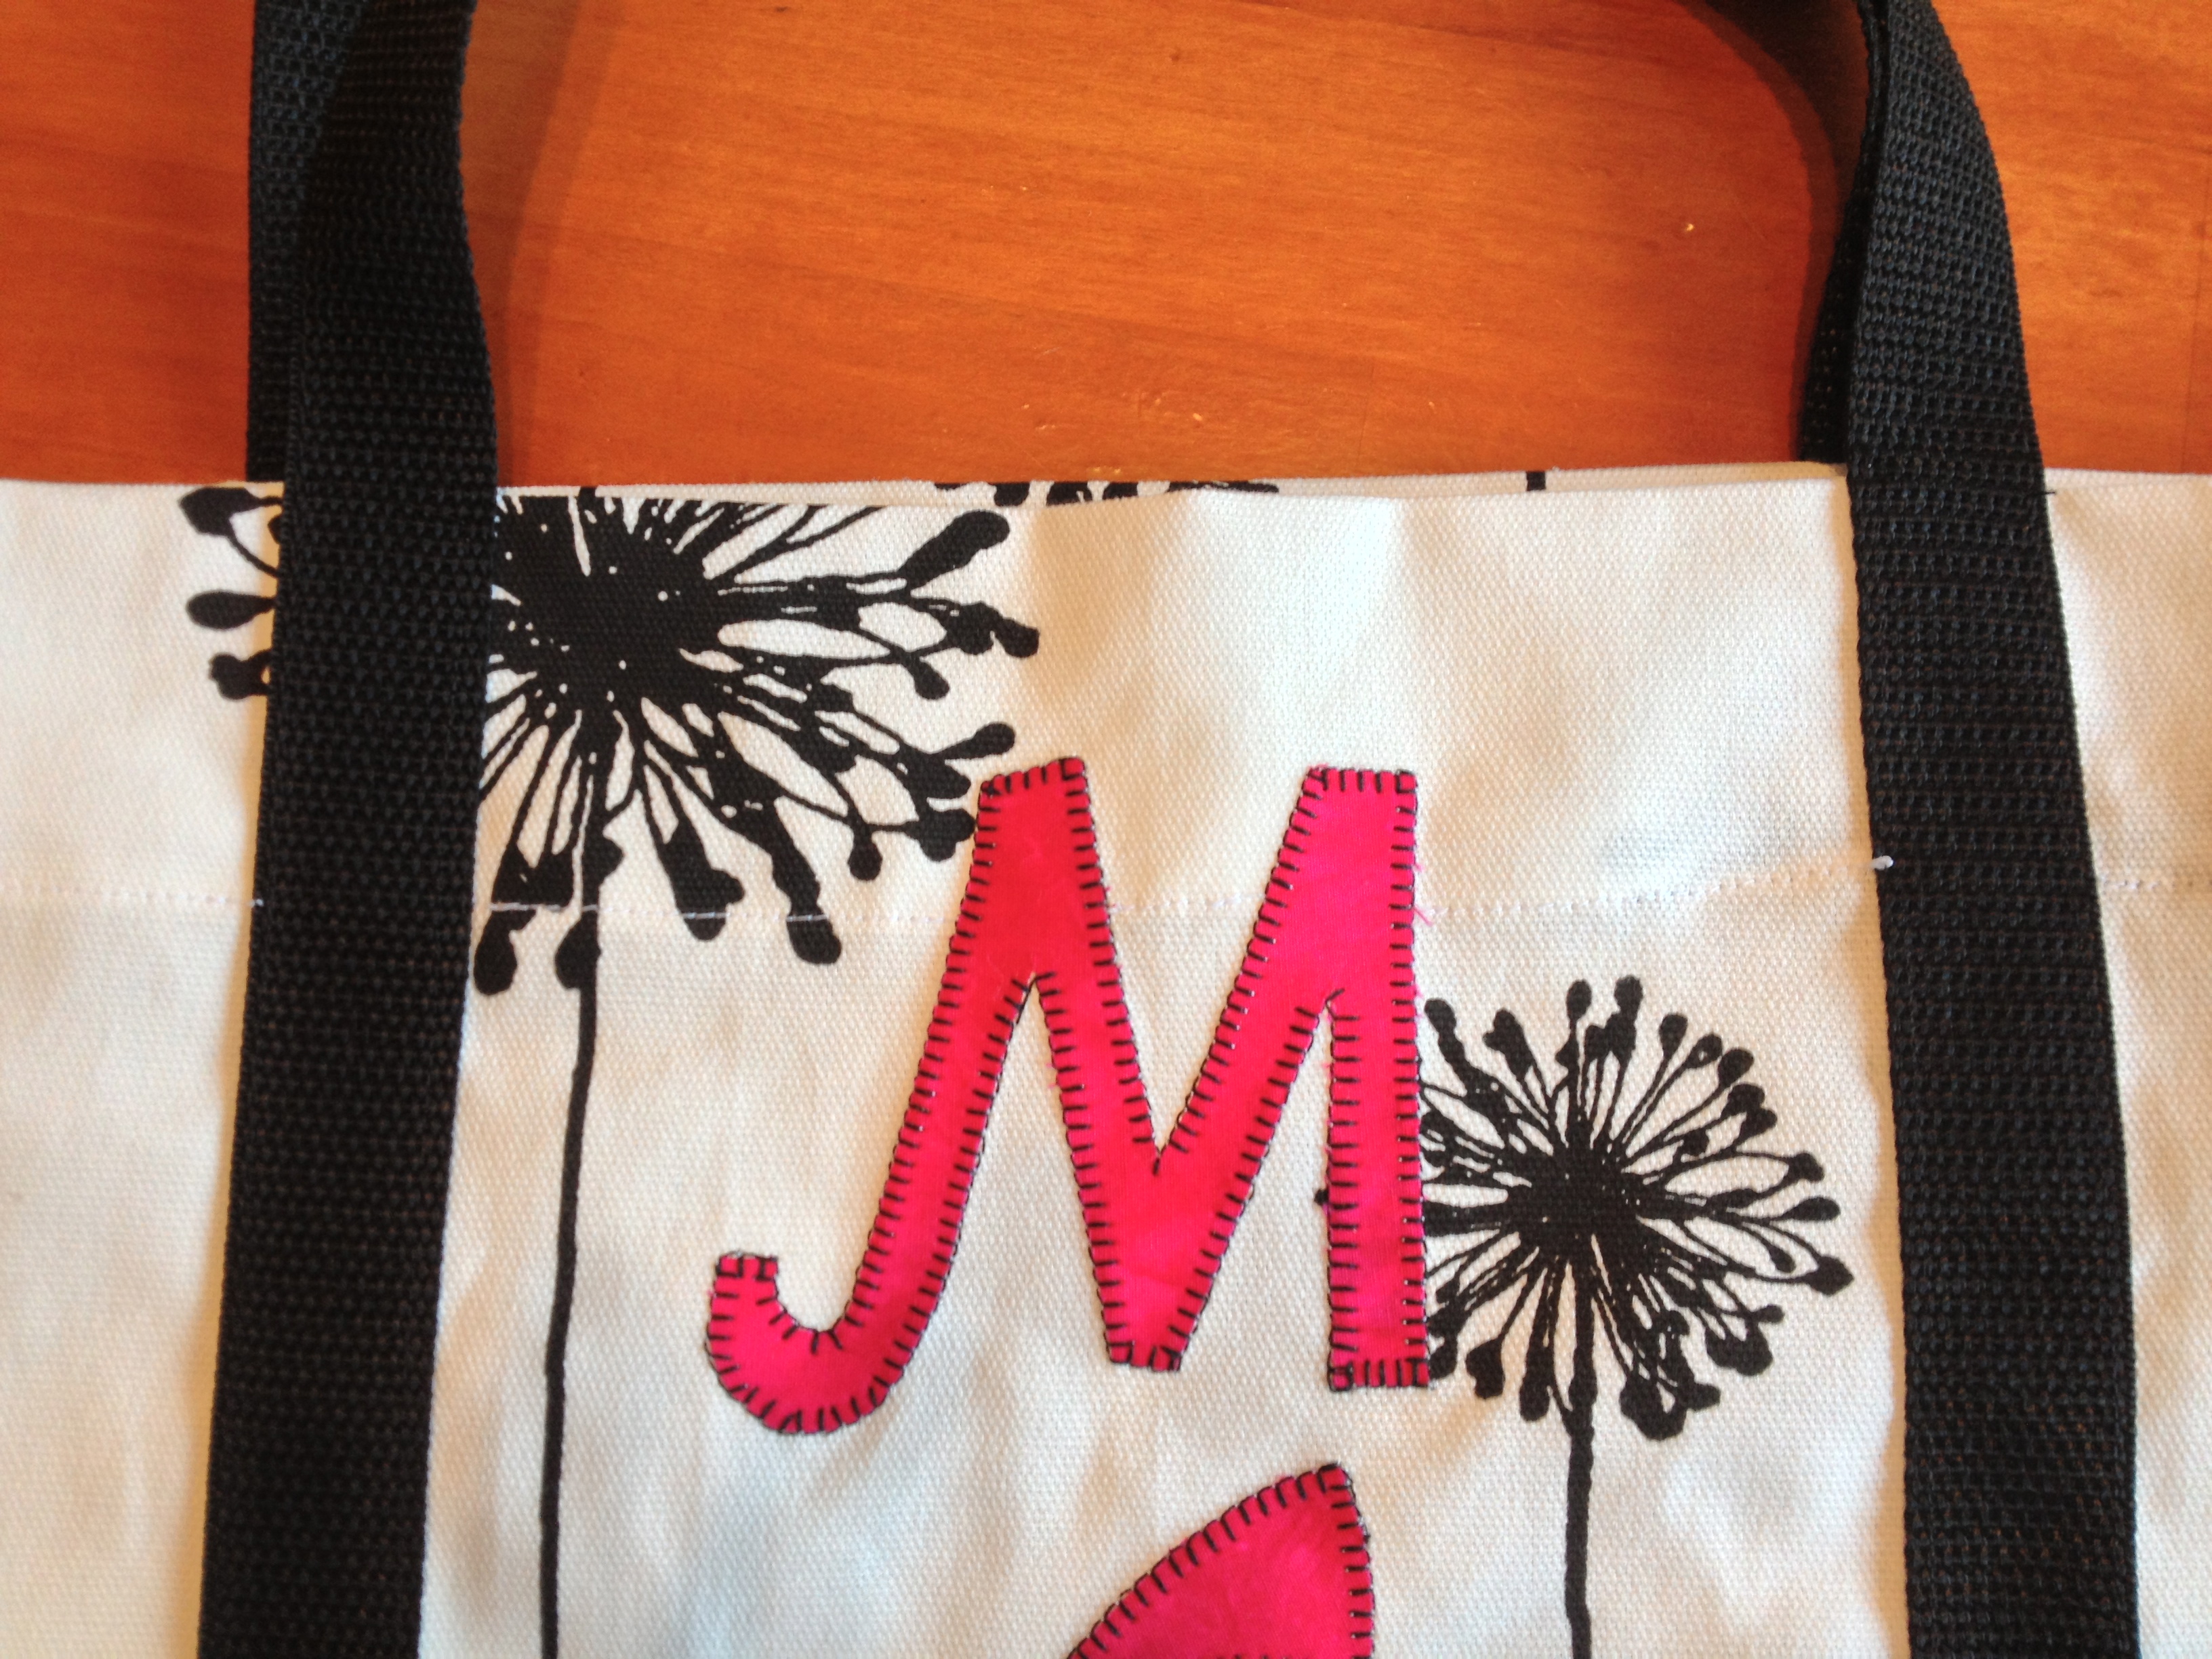
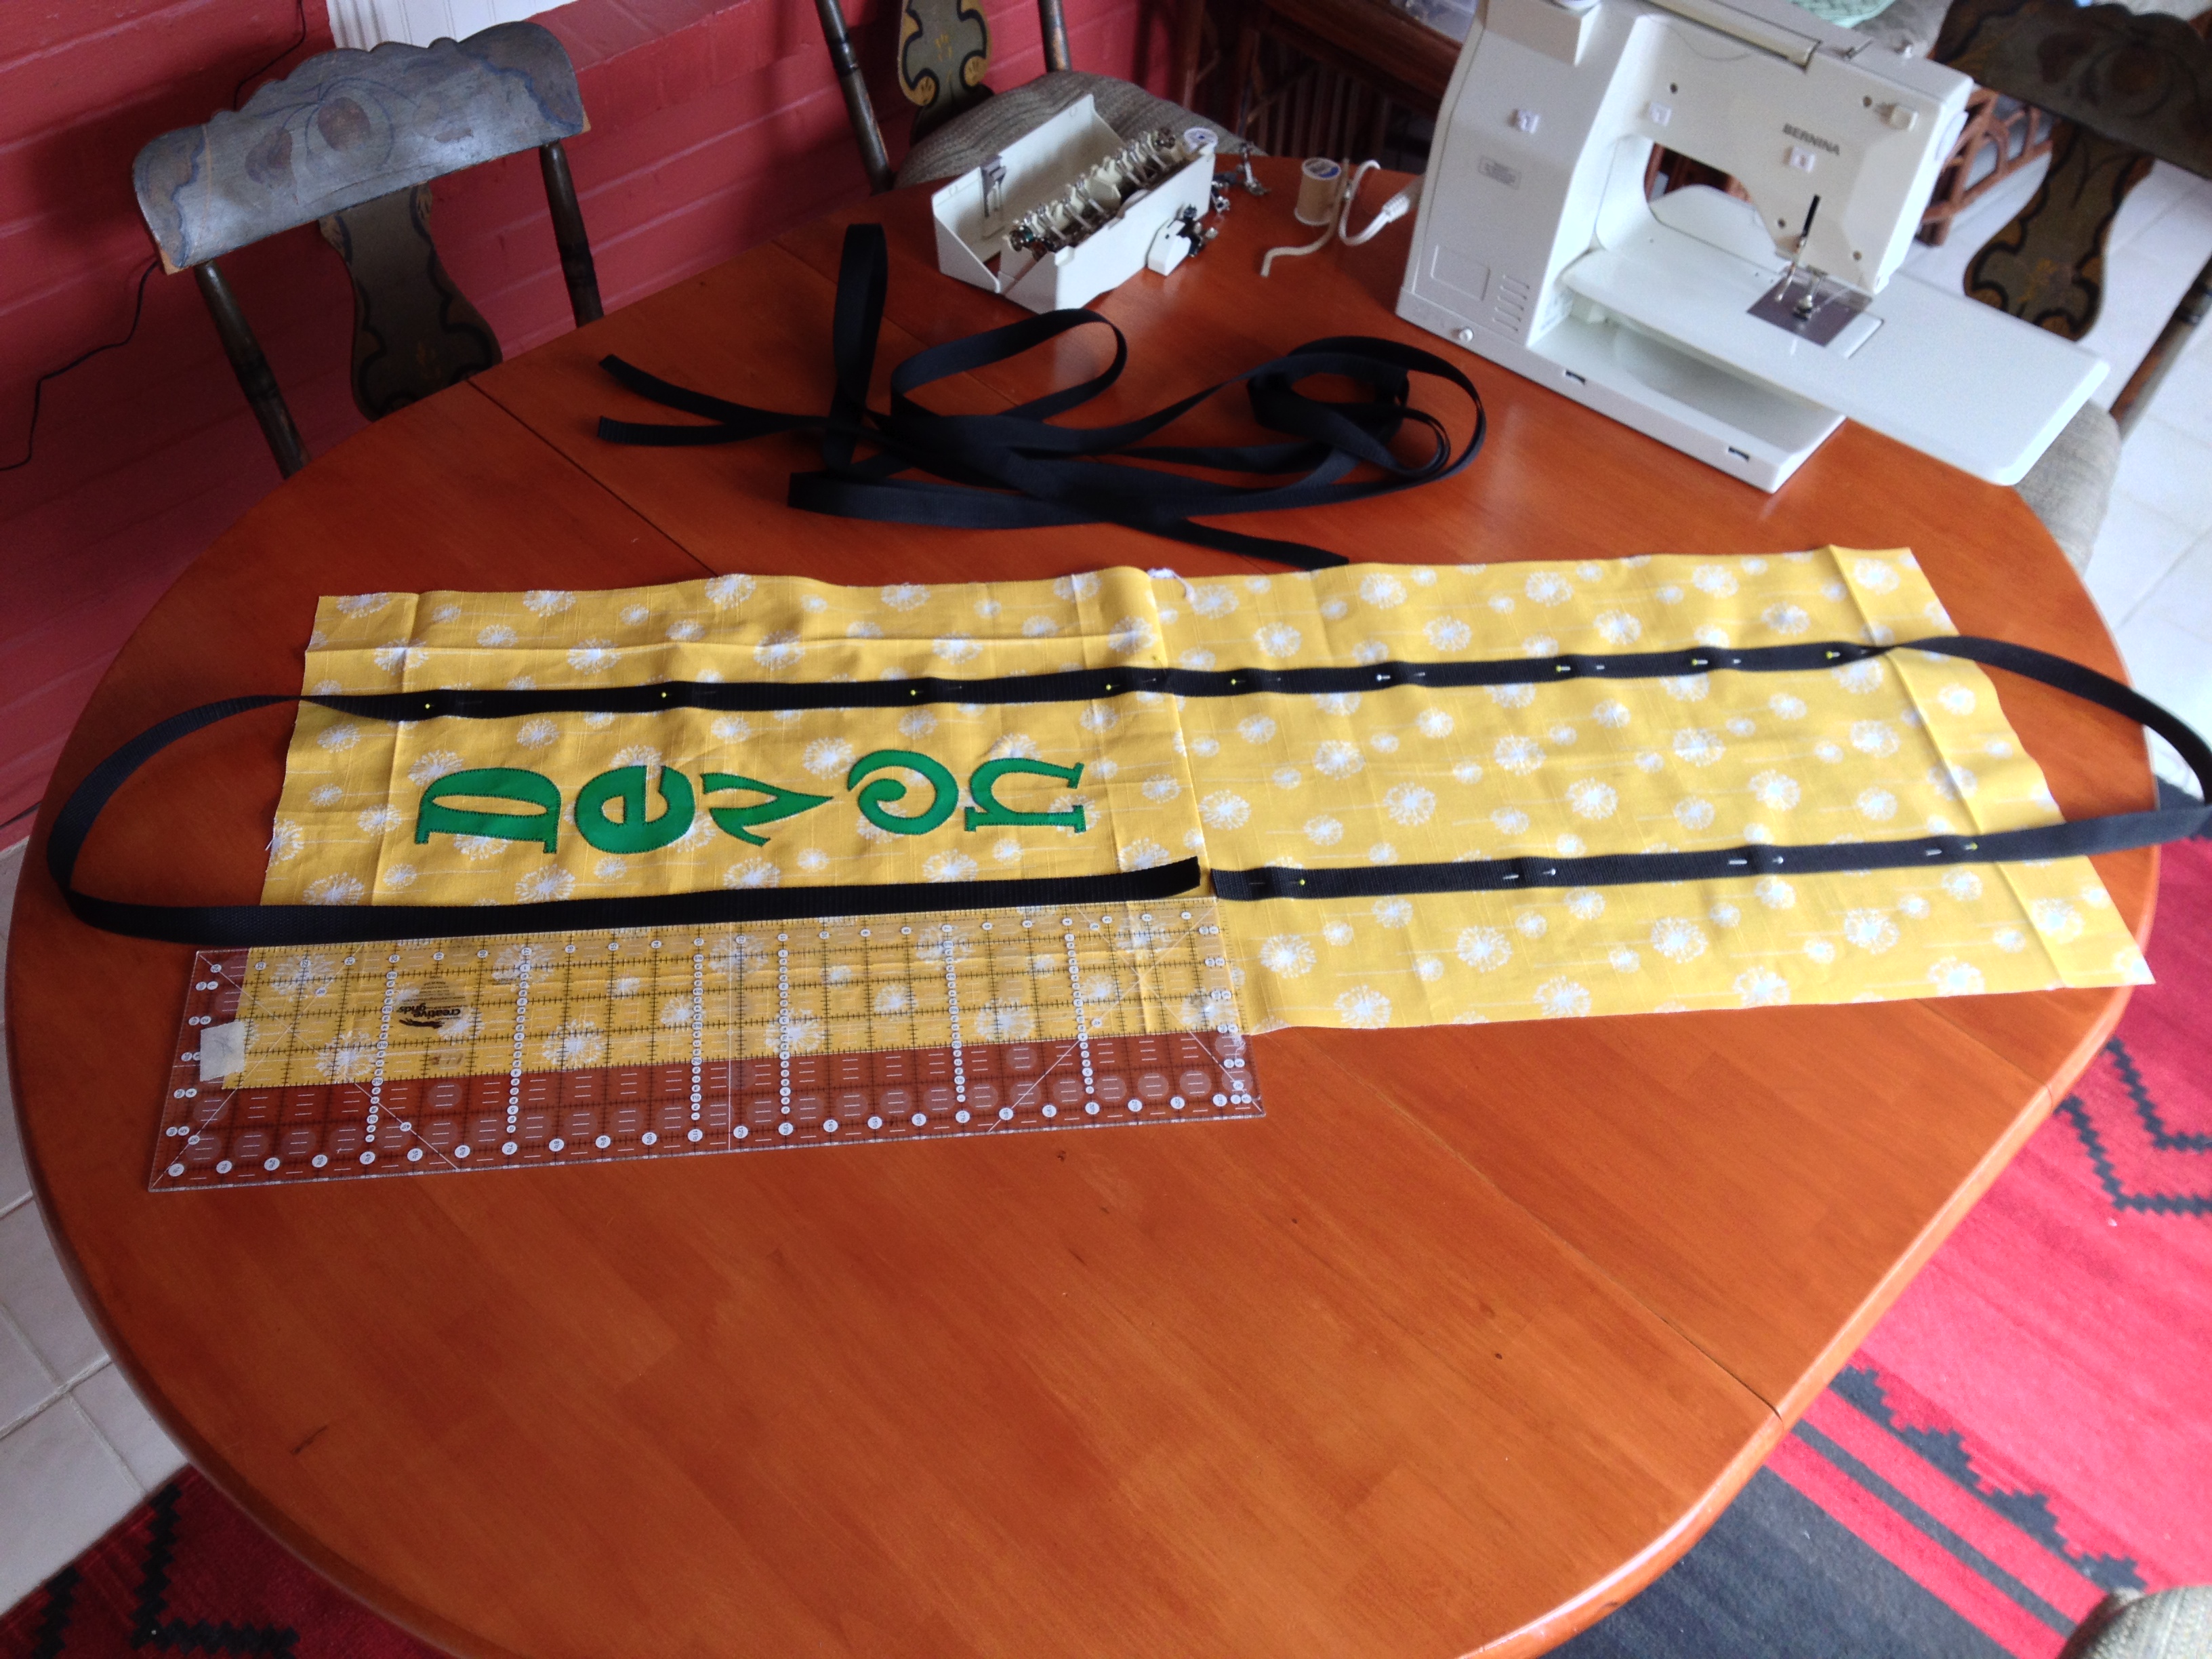
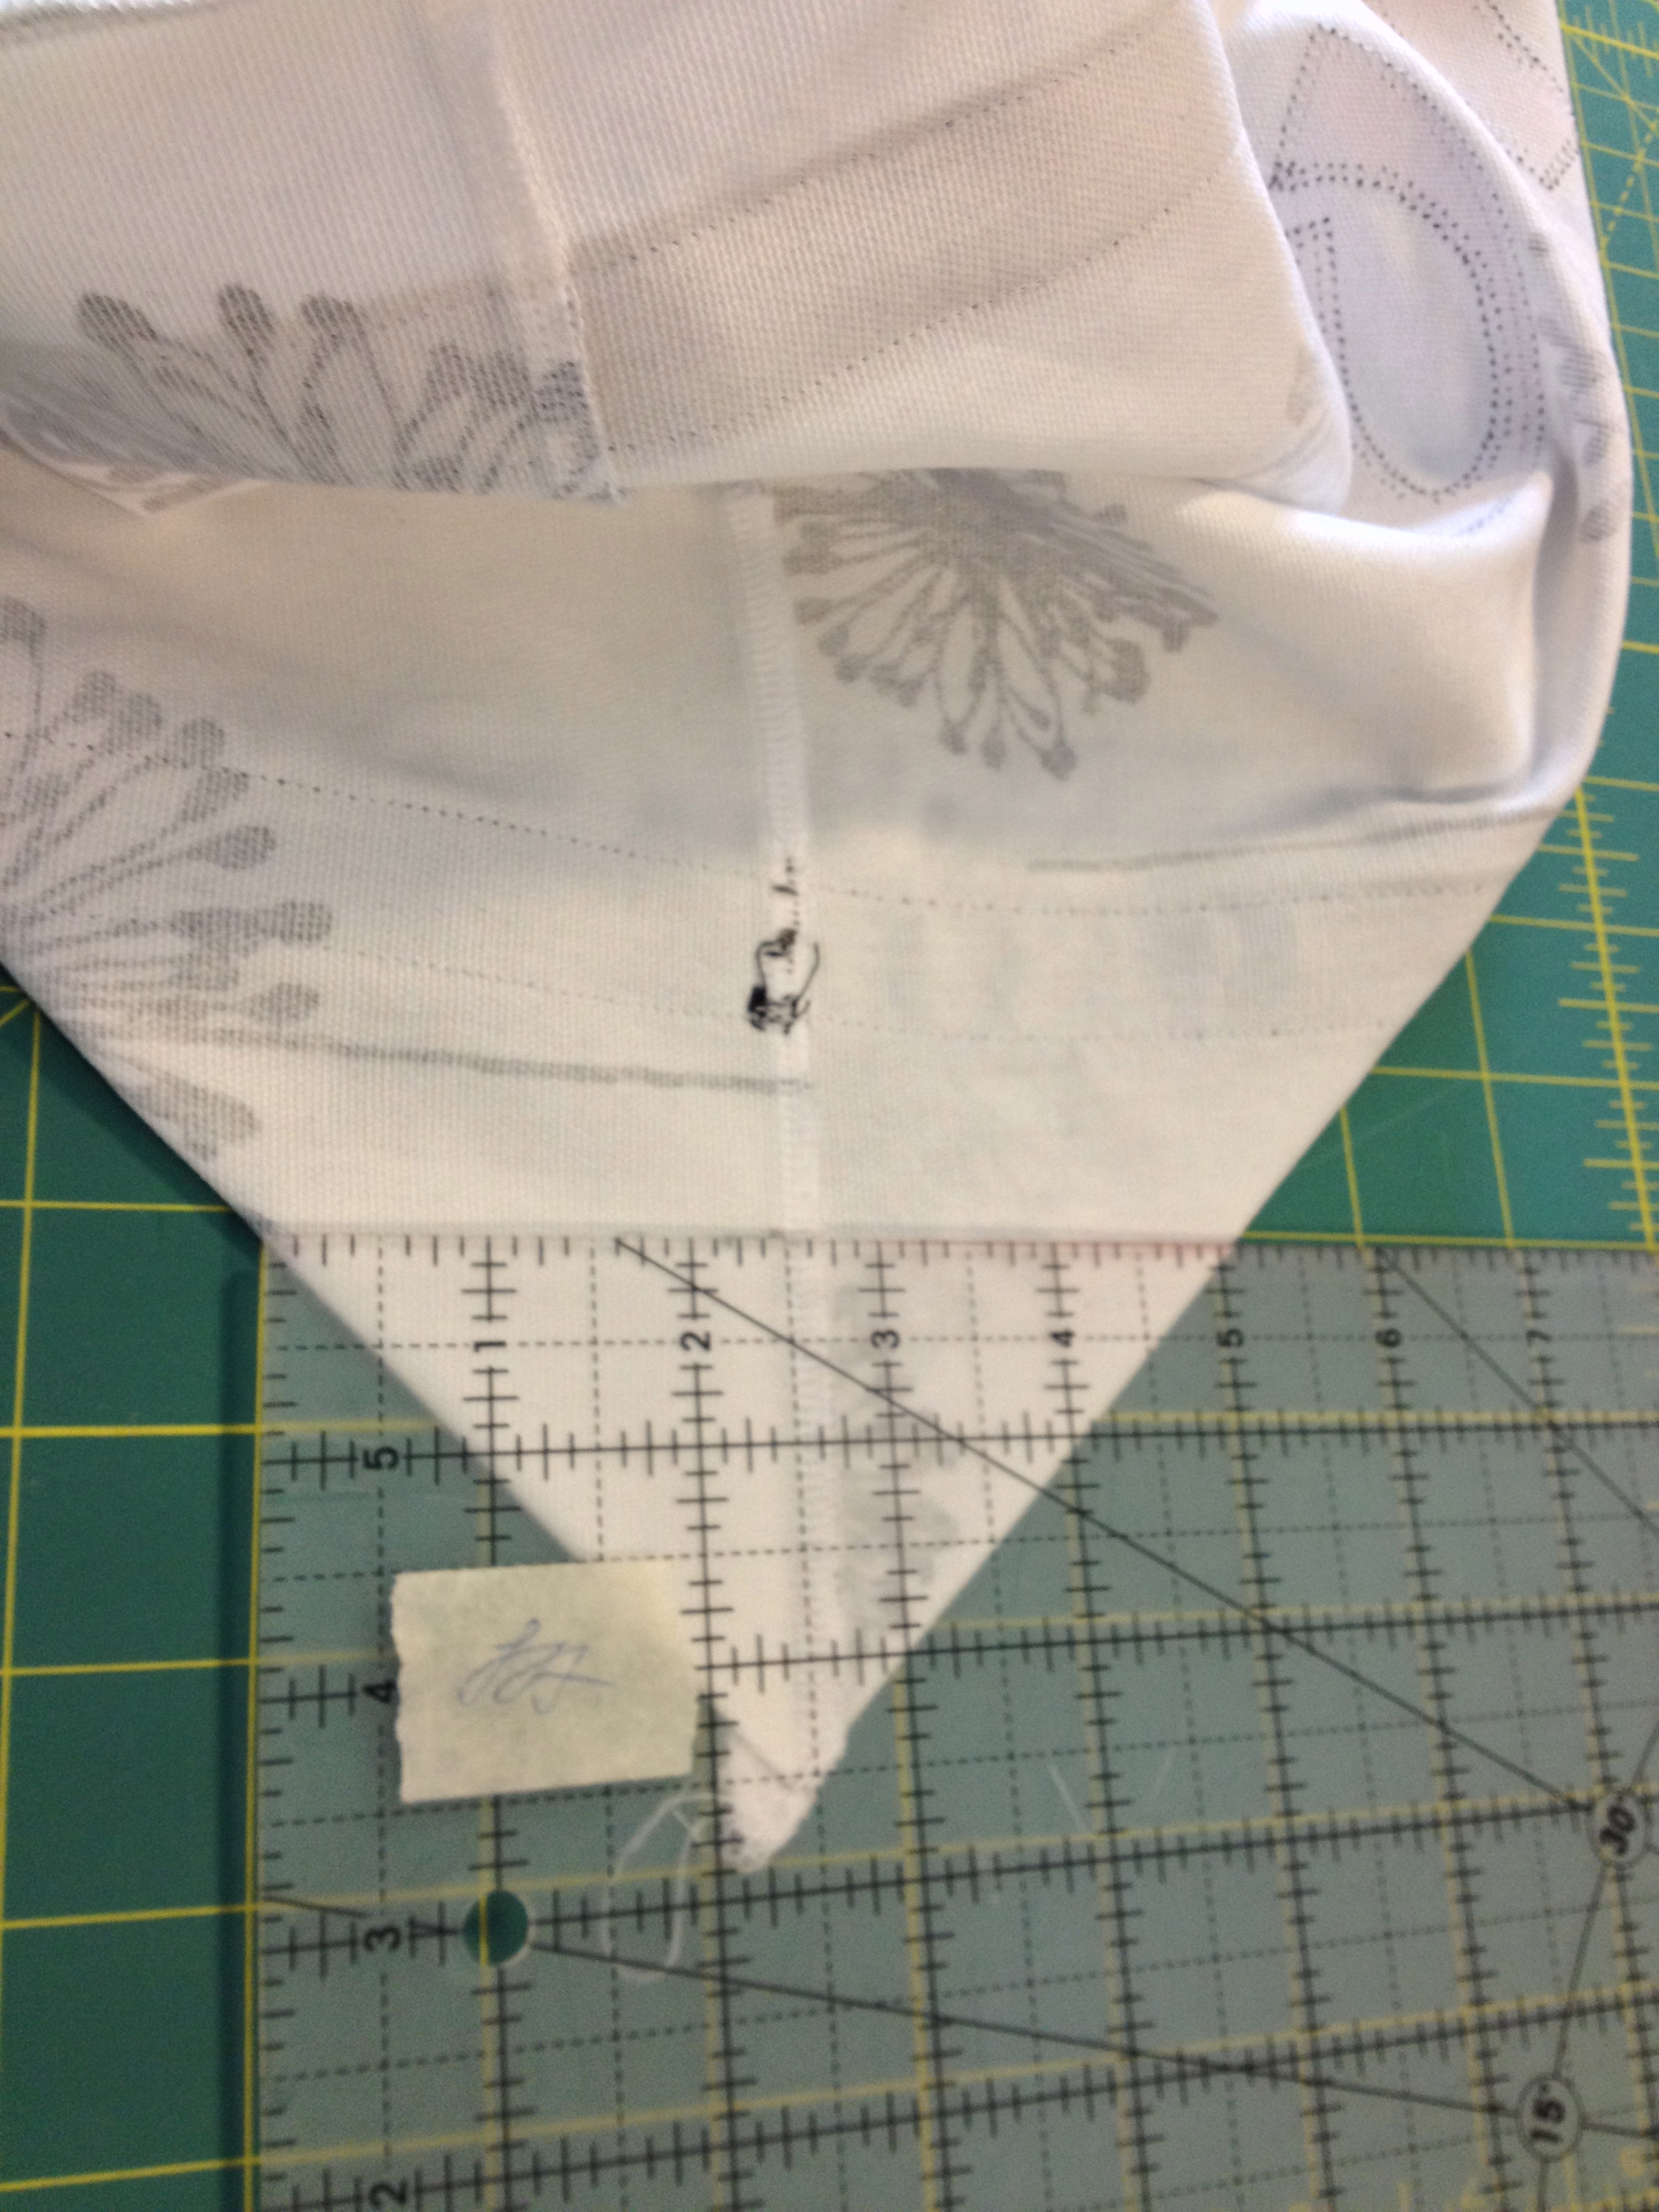
Workshop #2 was the Travel Duffle Bag by StudioCherie. The pattern is available here for $7 on Craftsy. Or sold here in the StudioCherie etsy shop for $189. This is the mother of all duffle bags!

My duffel bag.

My duffel bag – 20″ long, 12″ wide and 12″ deep

We came to the retreat with the fabric for the bag all put together with batting and backing and quilted. Lindsey Rhodes of LRStitched instructed us on making the handles and putting the bag together. We did not use jute for the handles which the pattern directions do use. There is a zippered pocket on one end, an open pocket between the handles on one side as you can see above (looks like the perfect size for a boarding pass to me!), and I put a pocket on one end of the inside as well (for charging cords!).
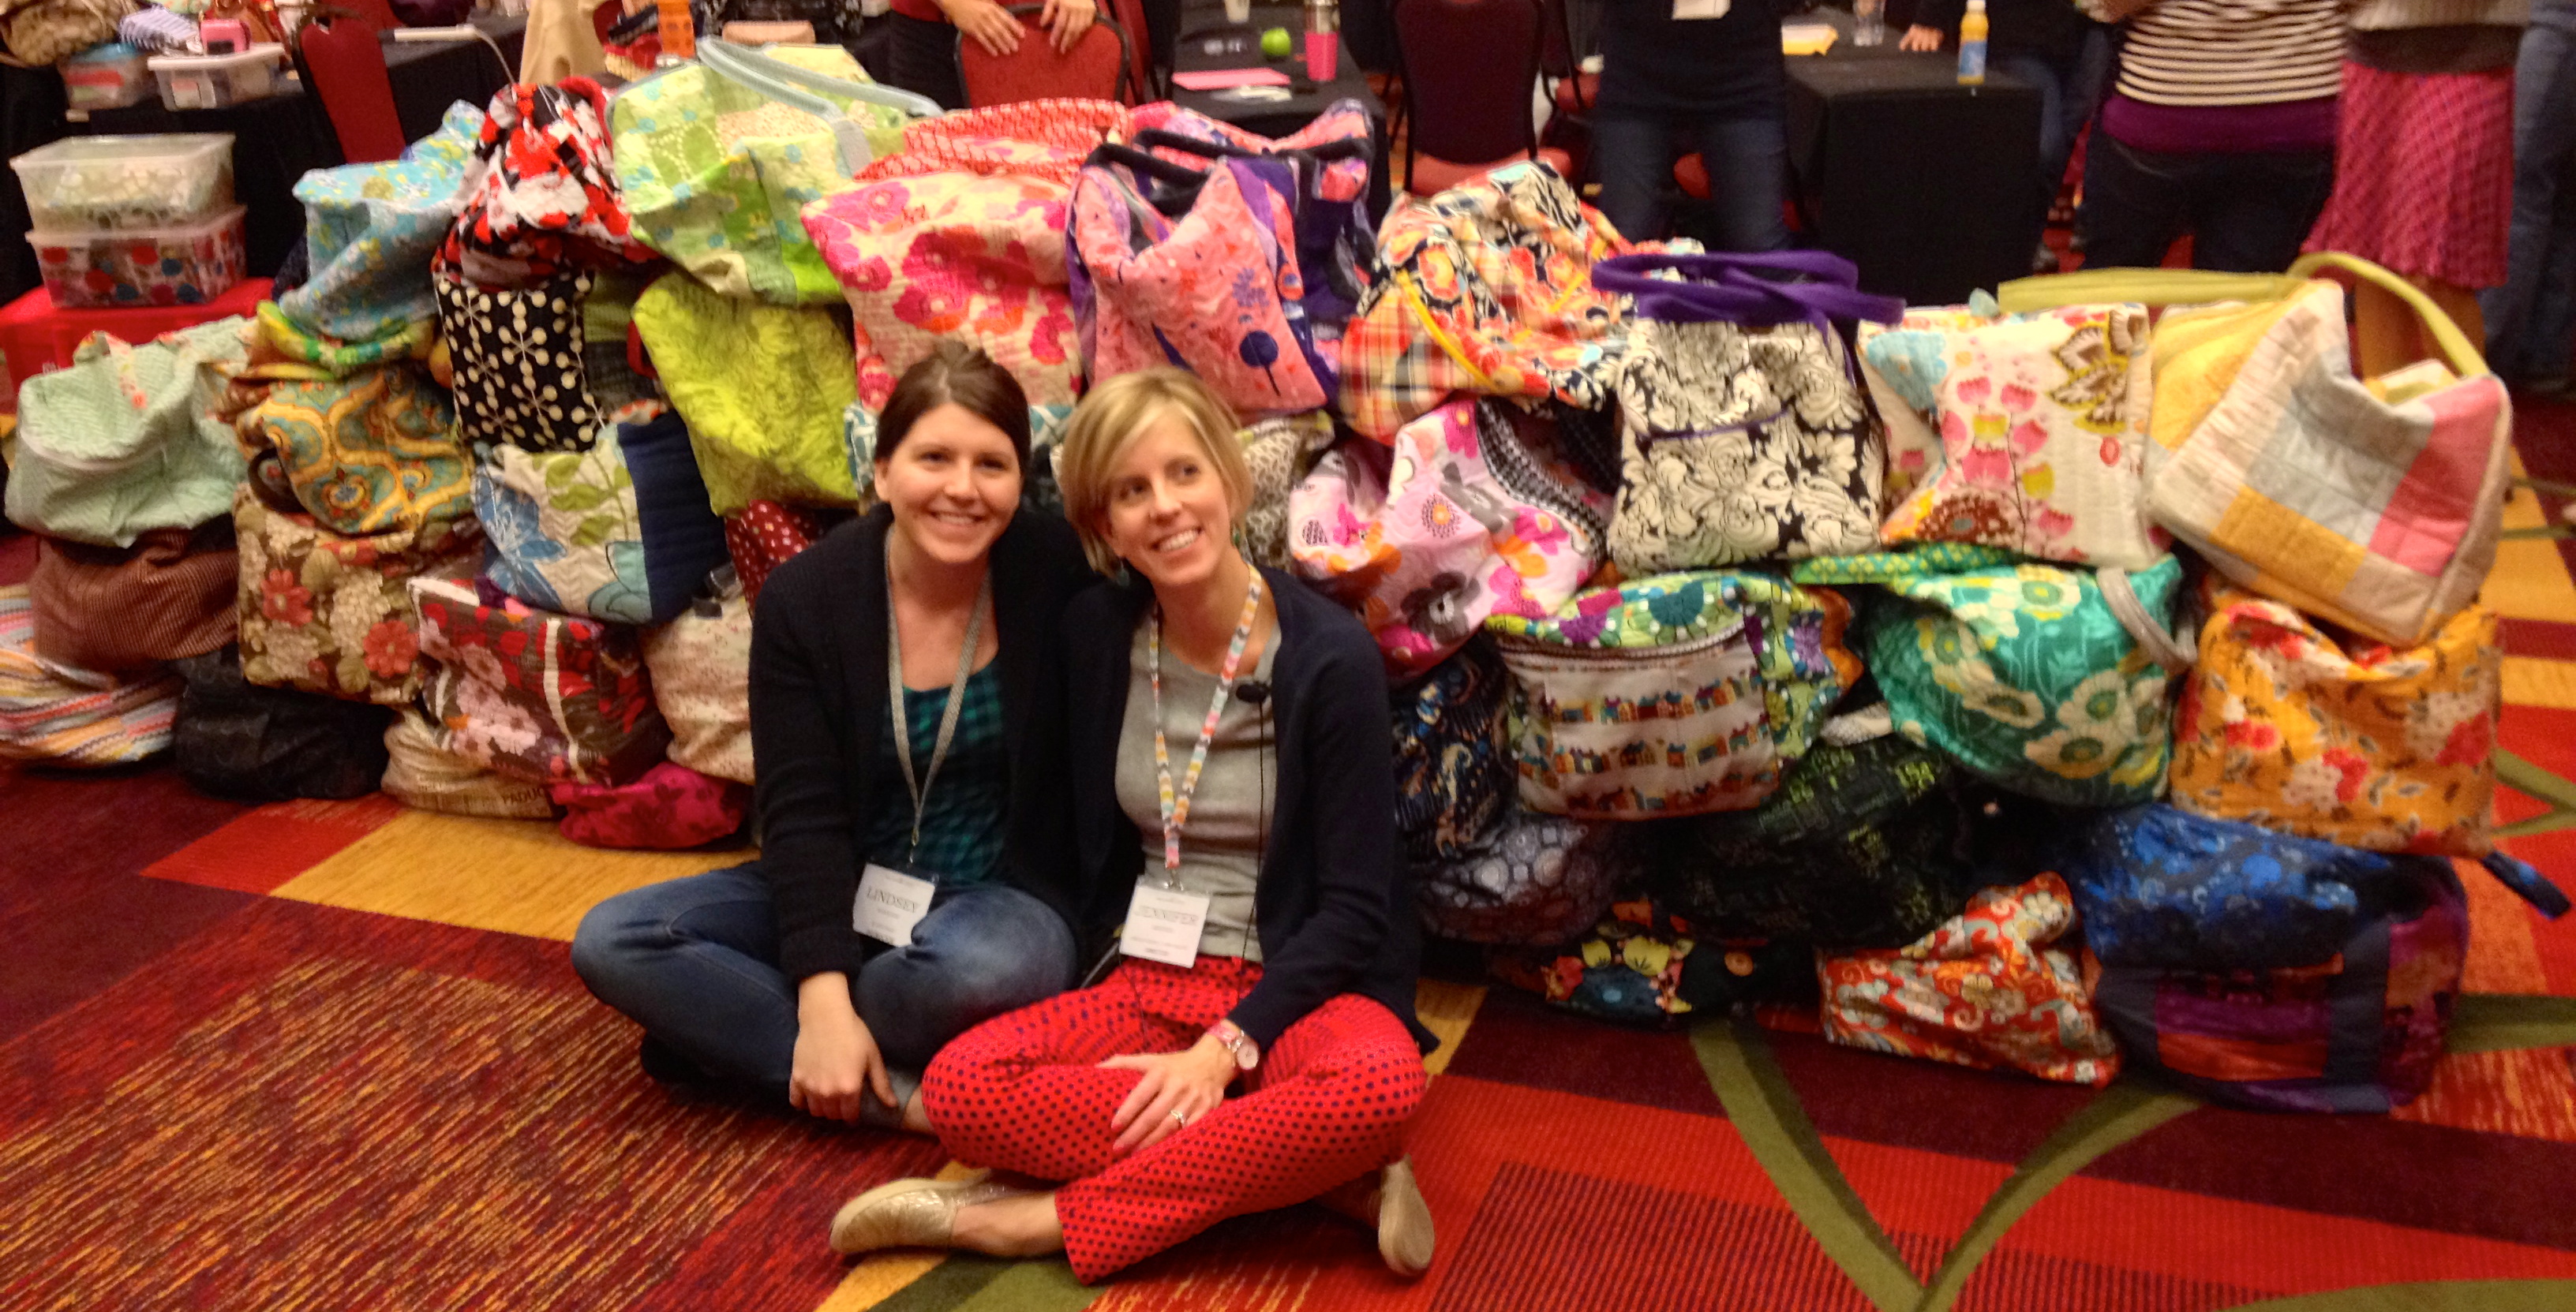
Lindsey Rhodes

Lindsey Rhodes

Lindsey Rhodes, Jennifer Mathis and everyone's duffel bags.

Lindsey Rhodes, Jennifer Mathis and all of the finished duffel bags.

I finished my duffel just after midnight on the first sewing day. We had a lot of free sewing time in the schedule which allowed us to finish up things (or work on something else of our own choosing).  It was just FUN to be in a room with 50 other sewers. This bag is so large and so thick, that there were MANY sewing machine needles broken during the sewing. As each person finished theirs and held it up, a roar of cheers and clapping would go up in the room. Whew! We really felt that we accomplished something big, when this duffel was done.

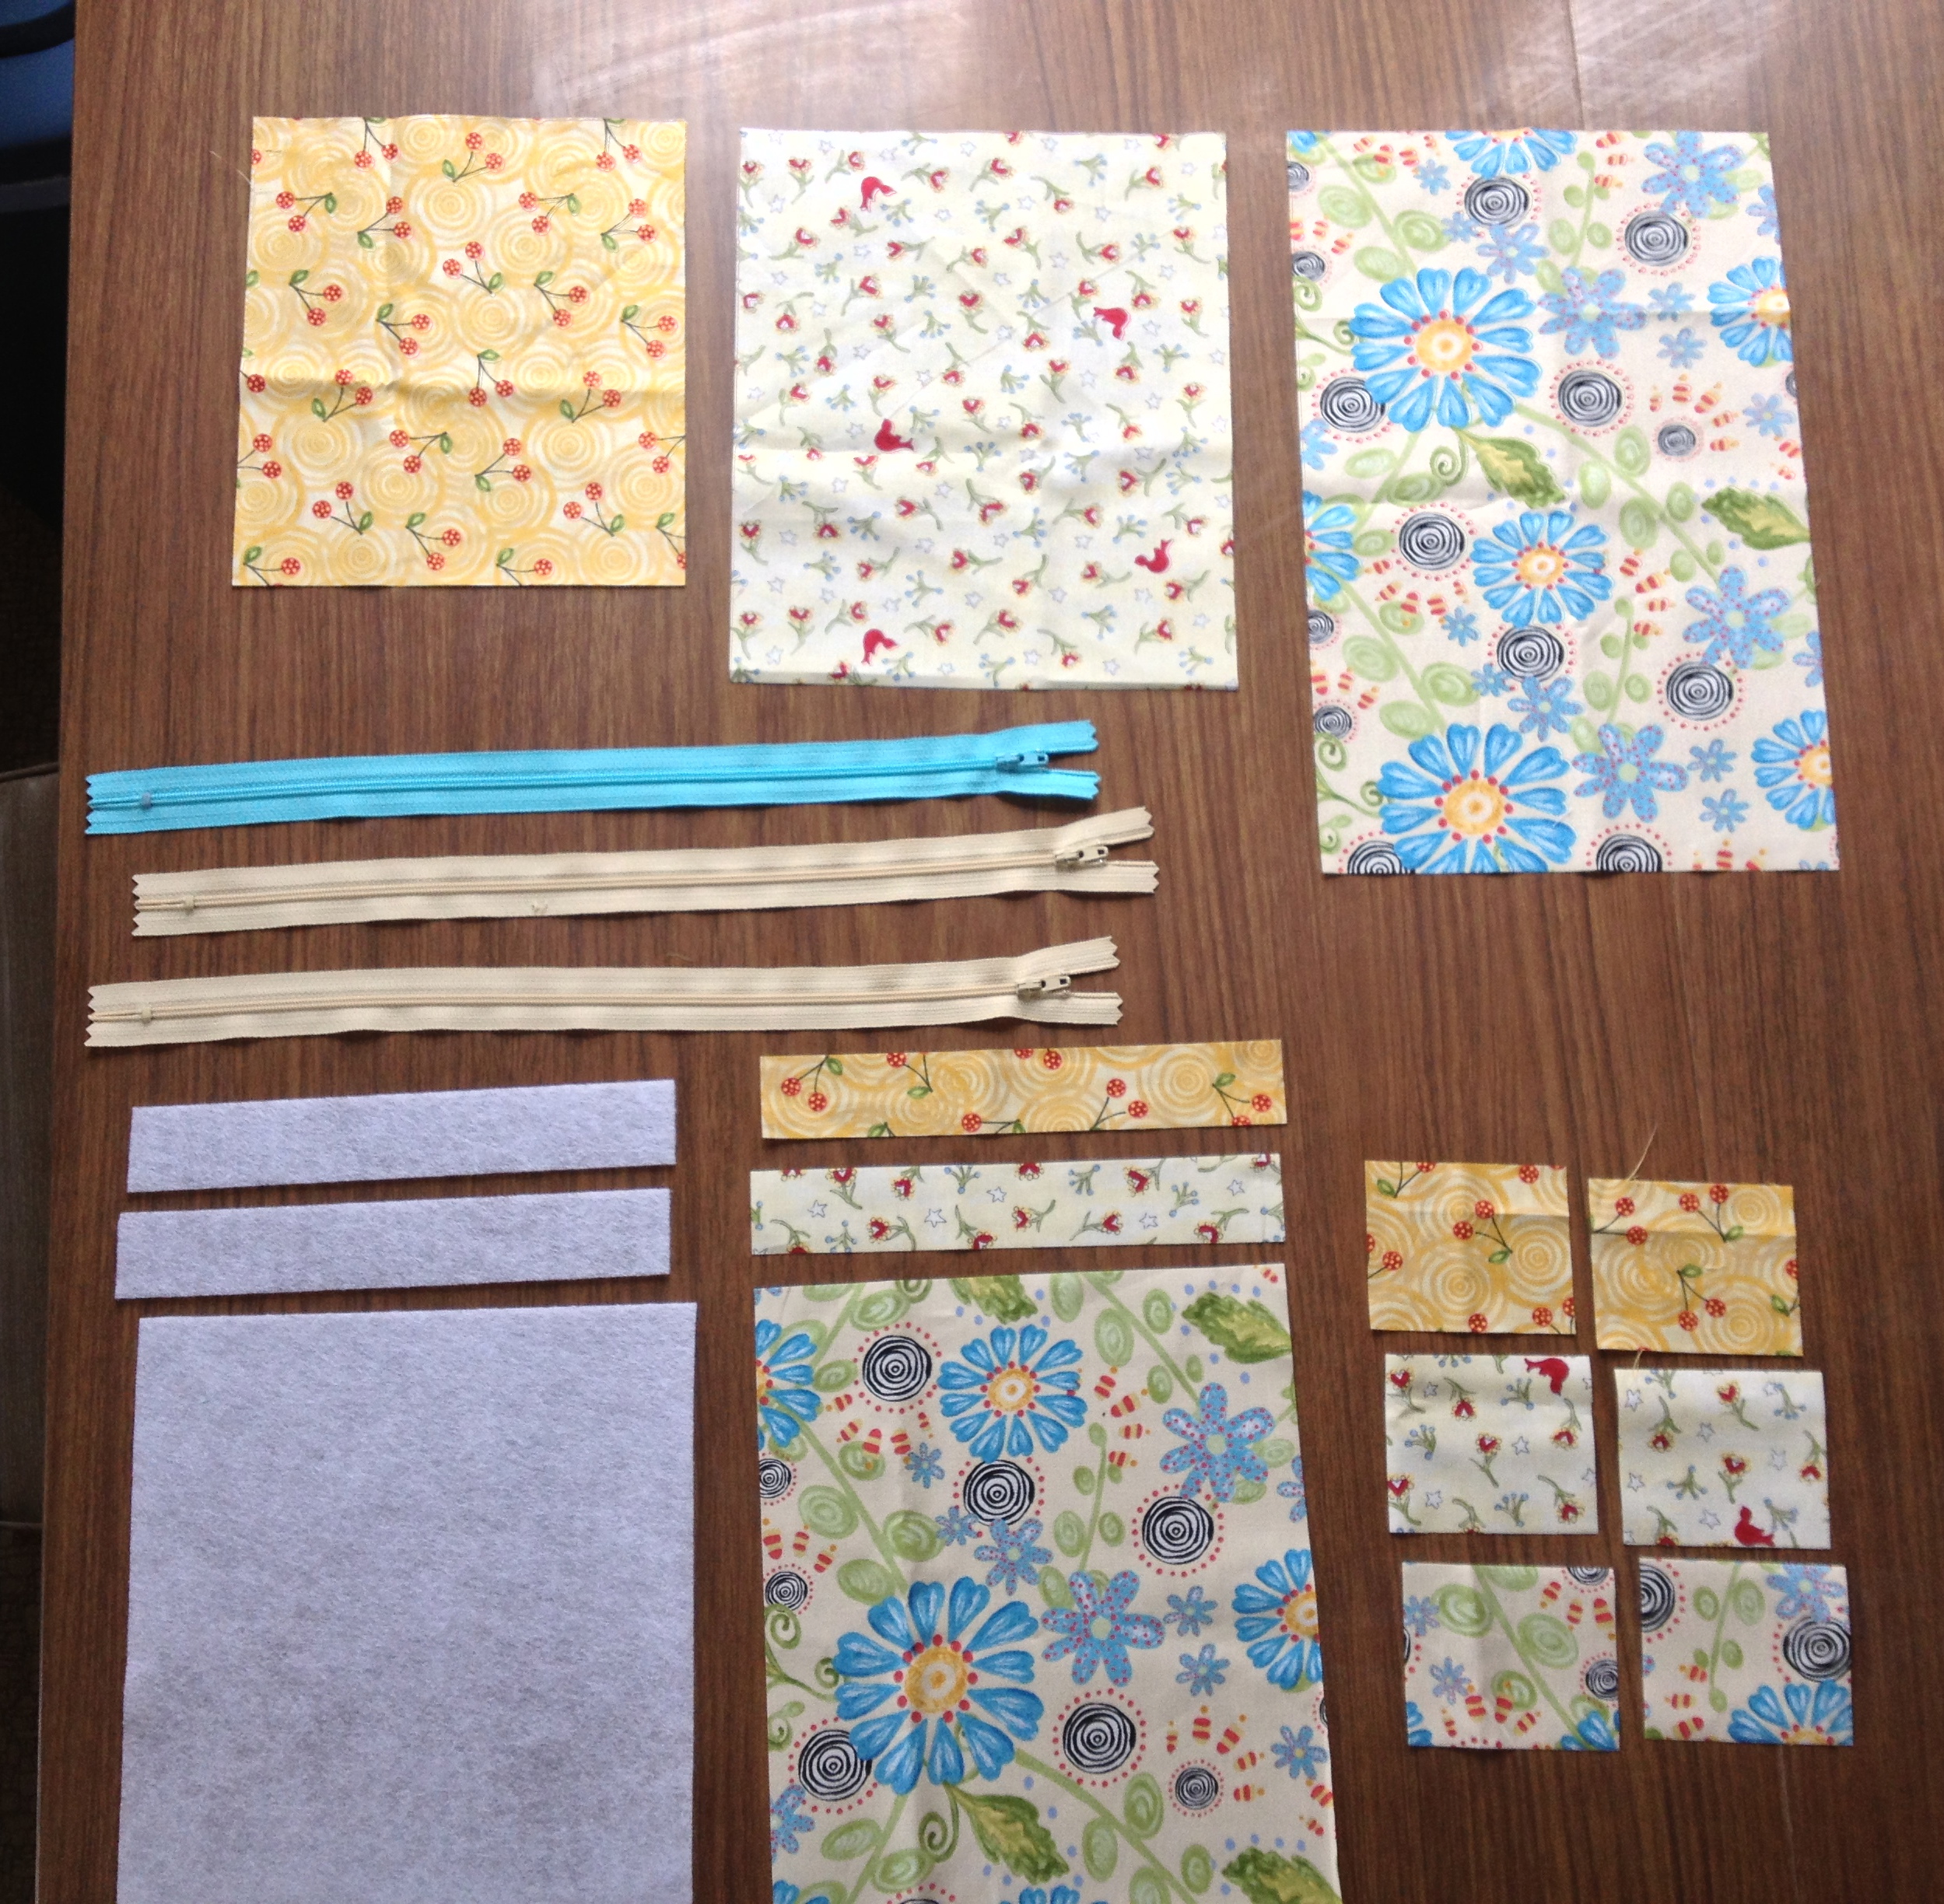
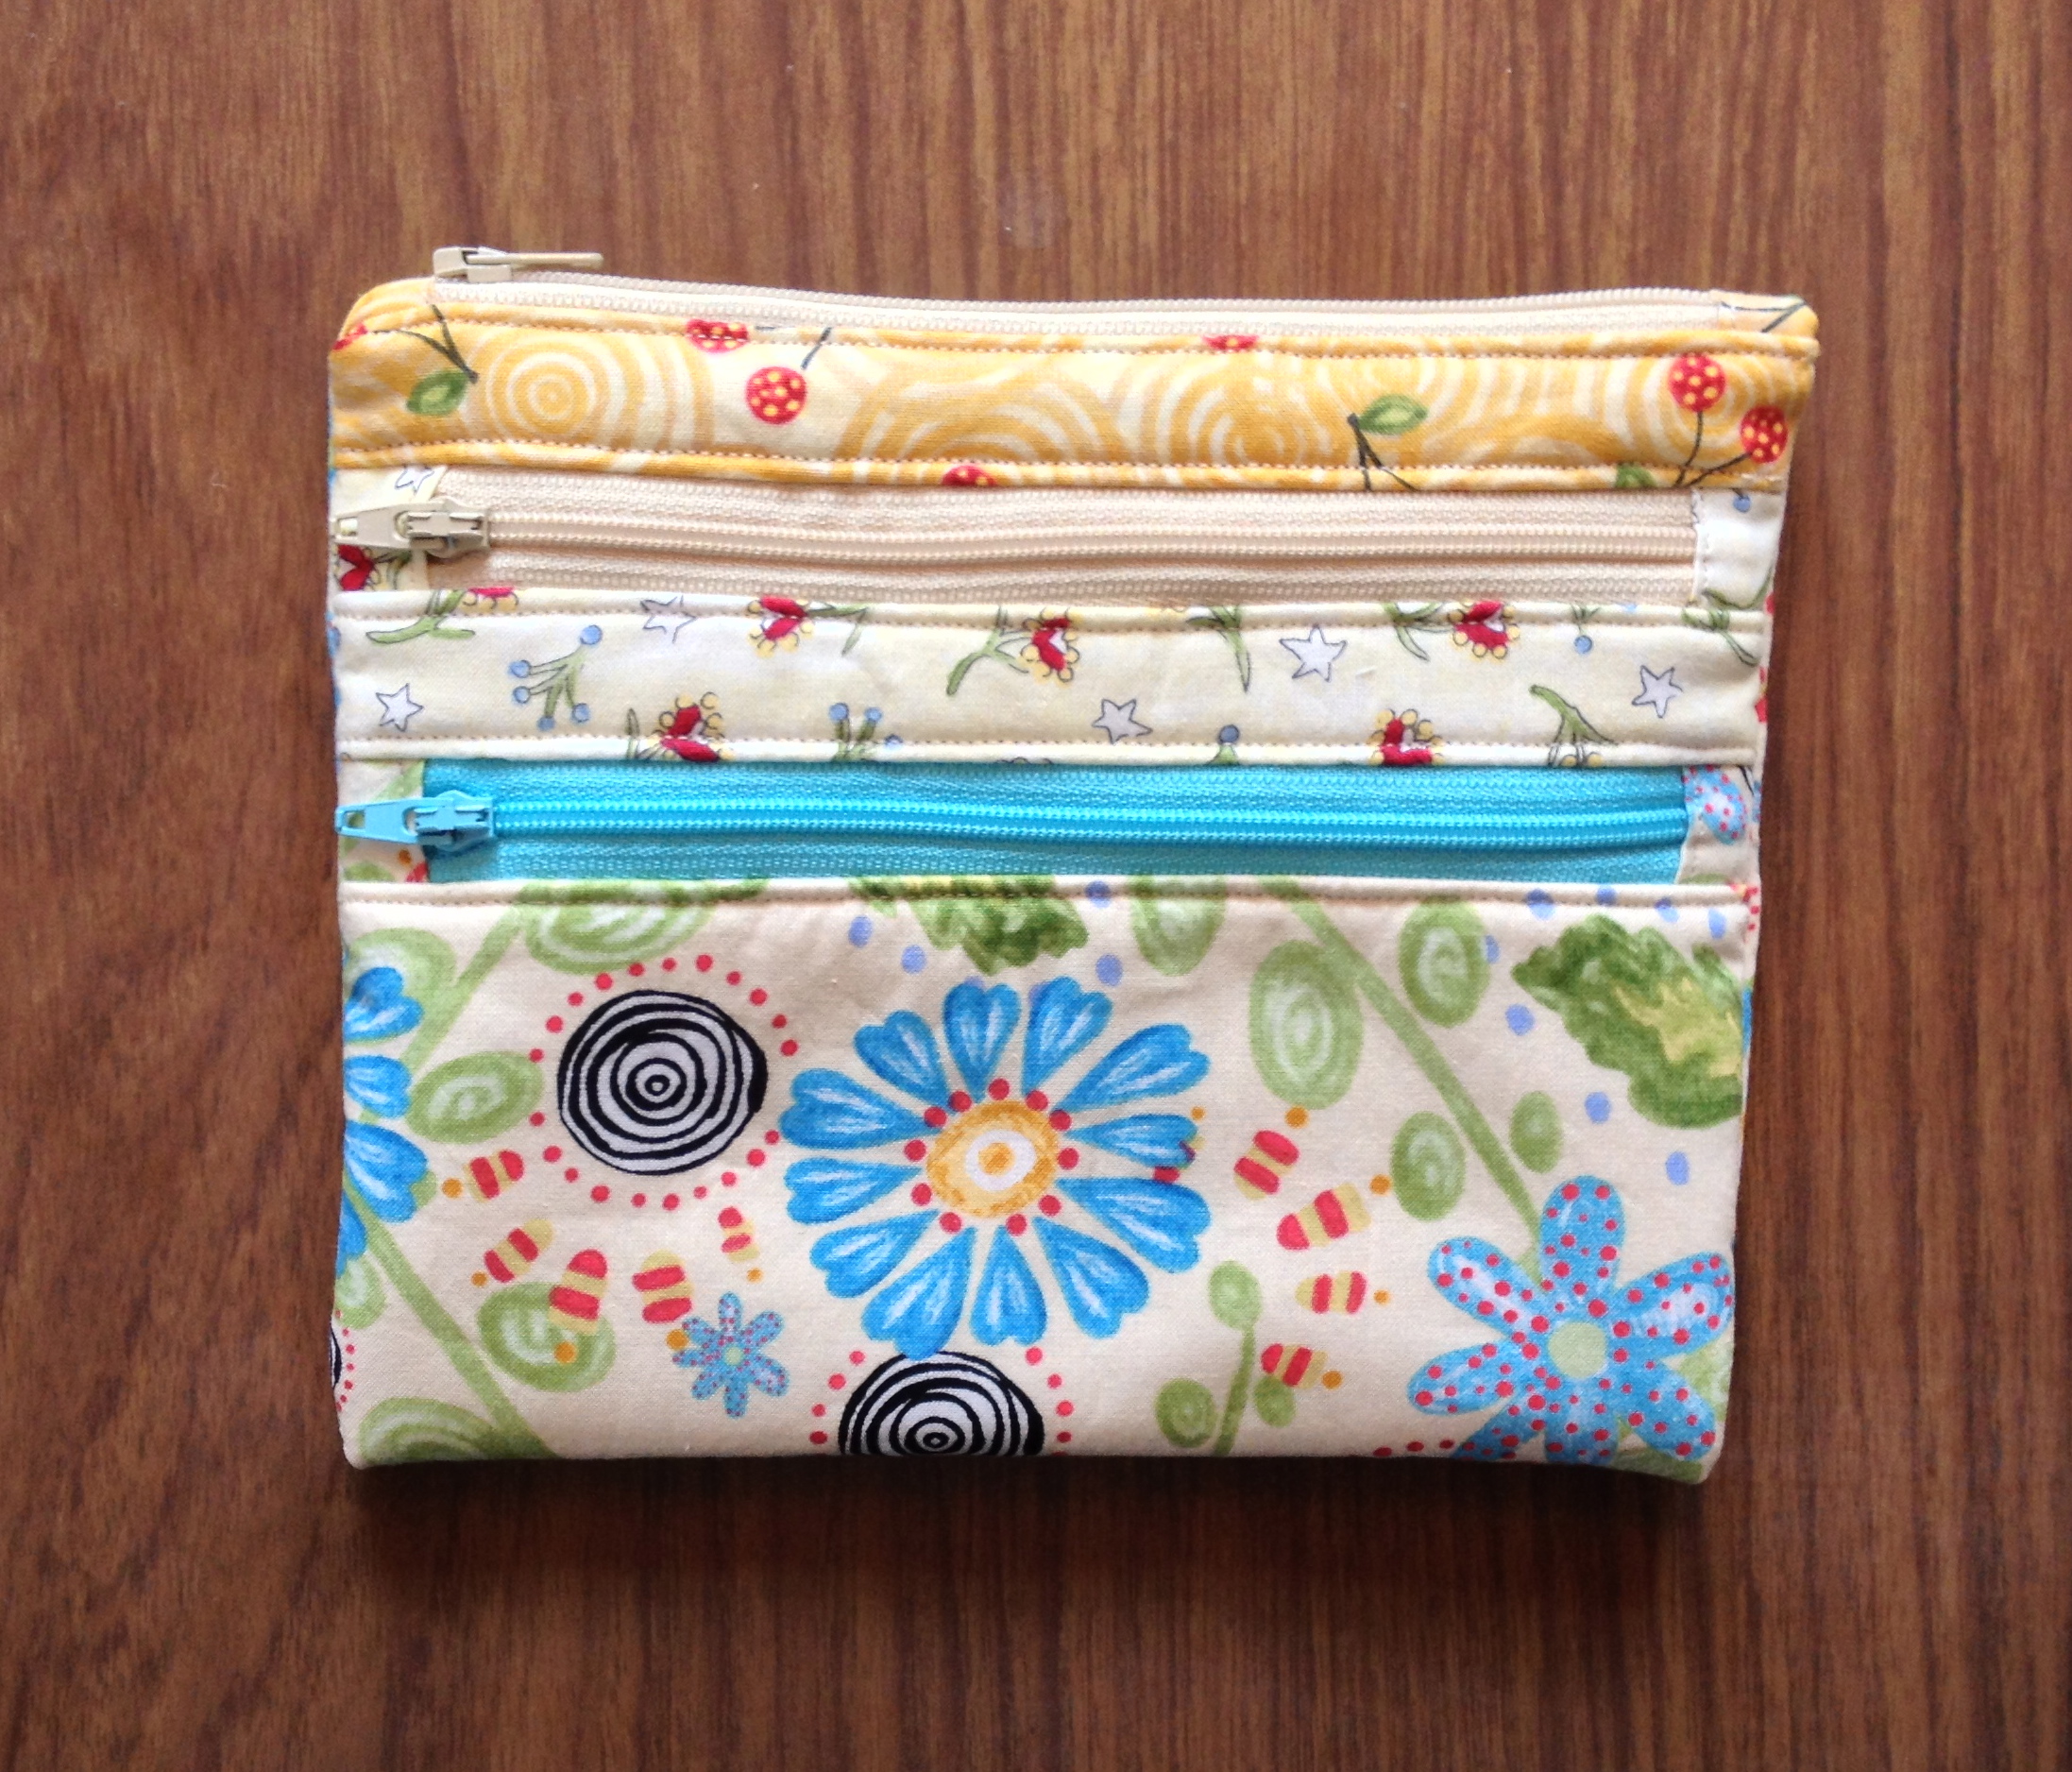
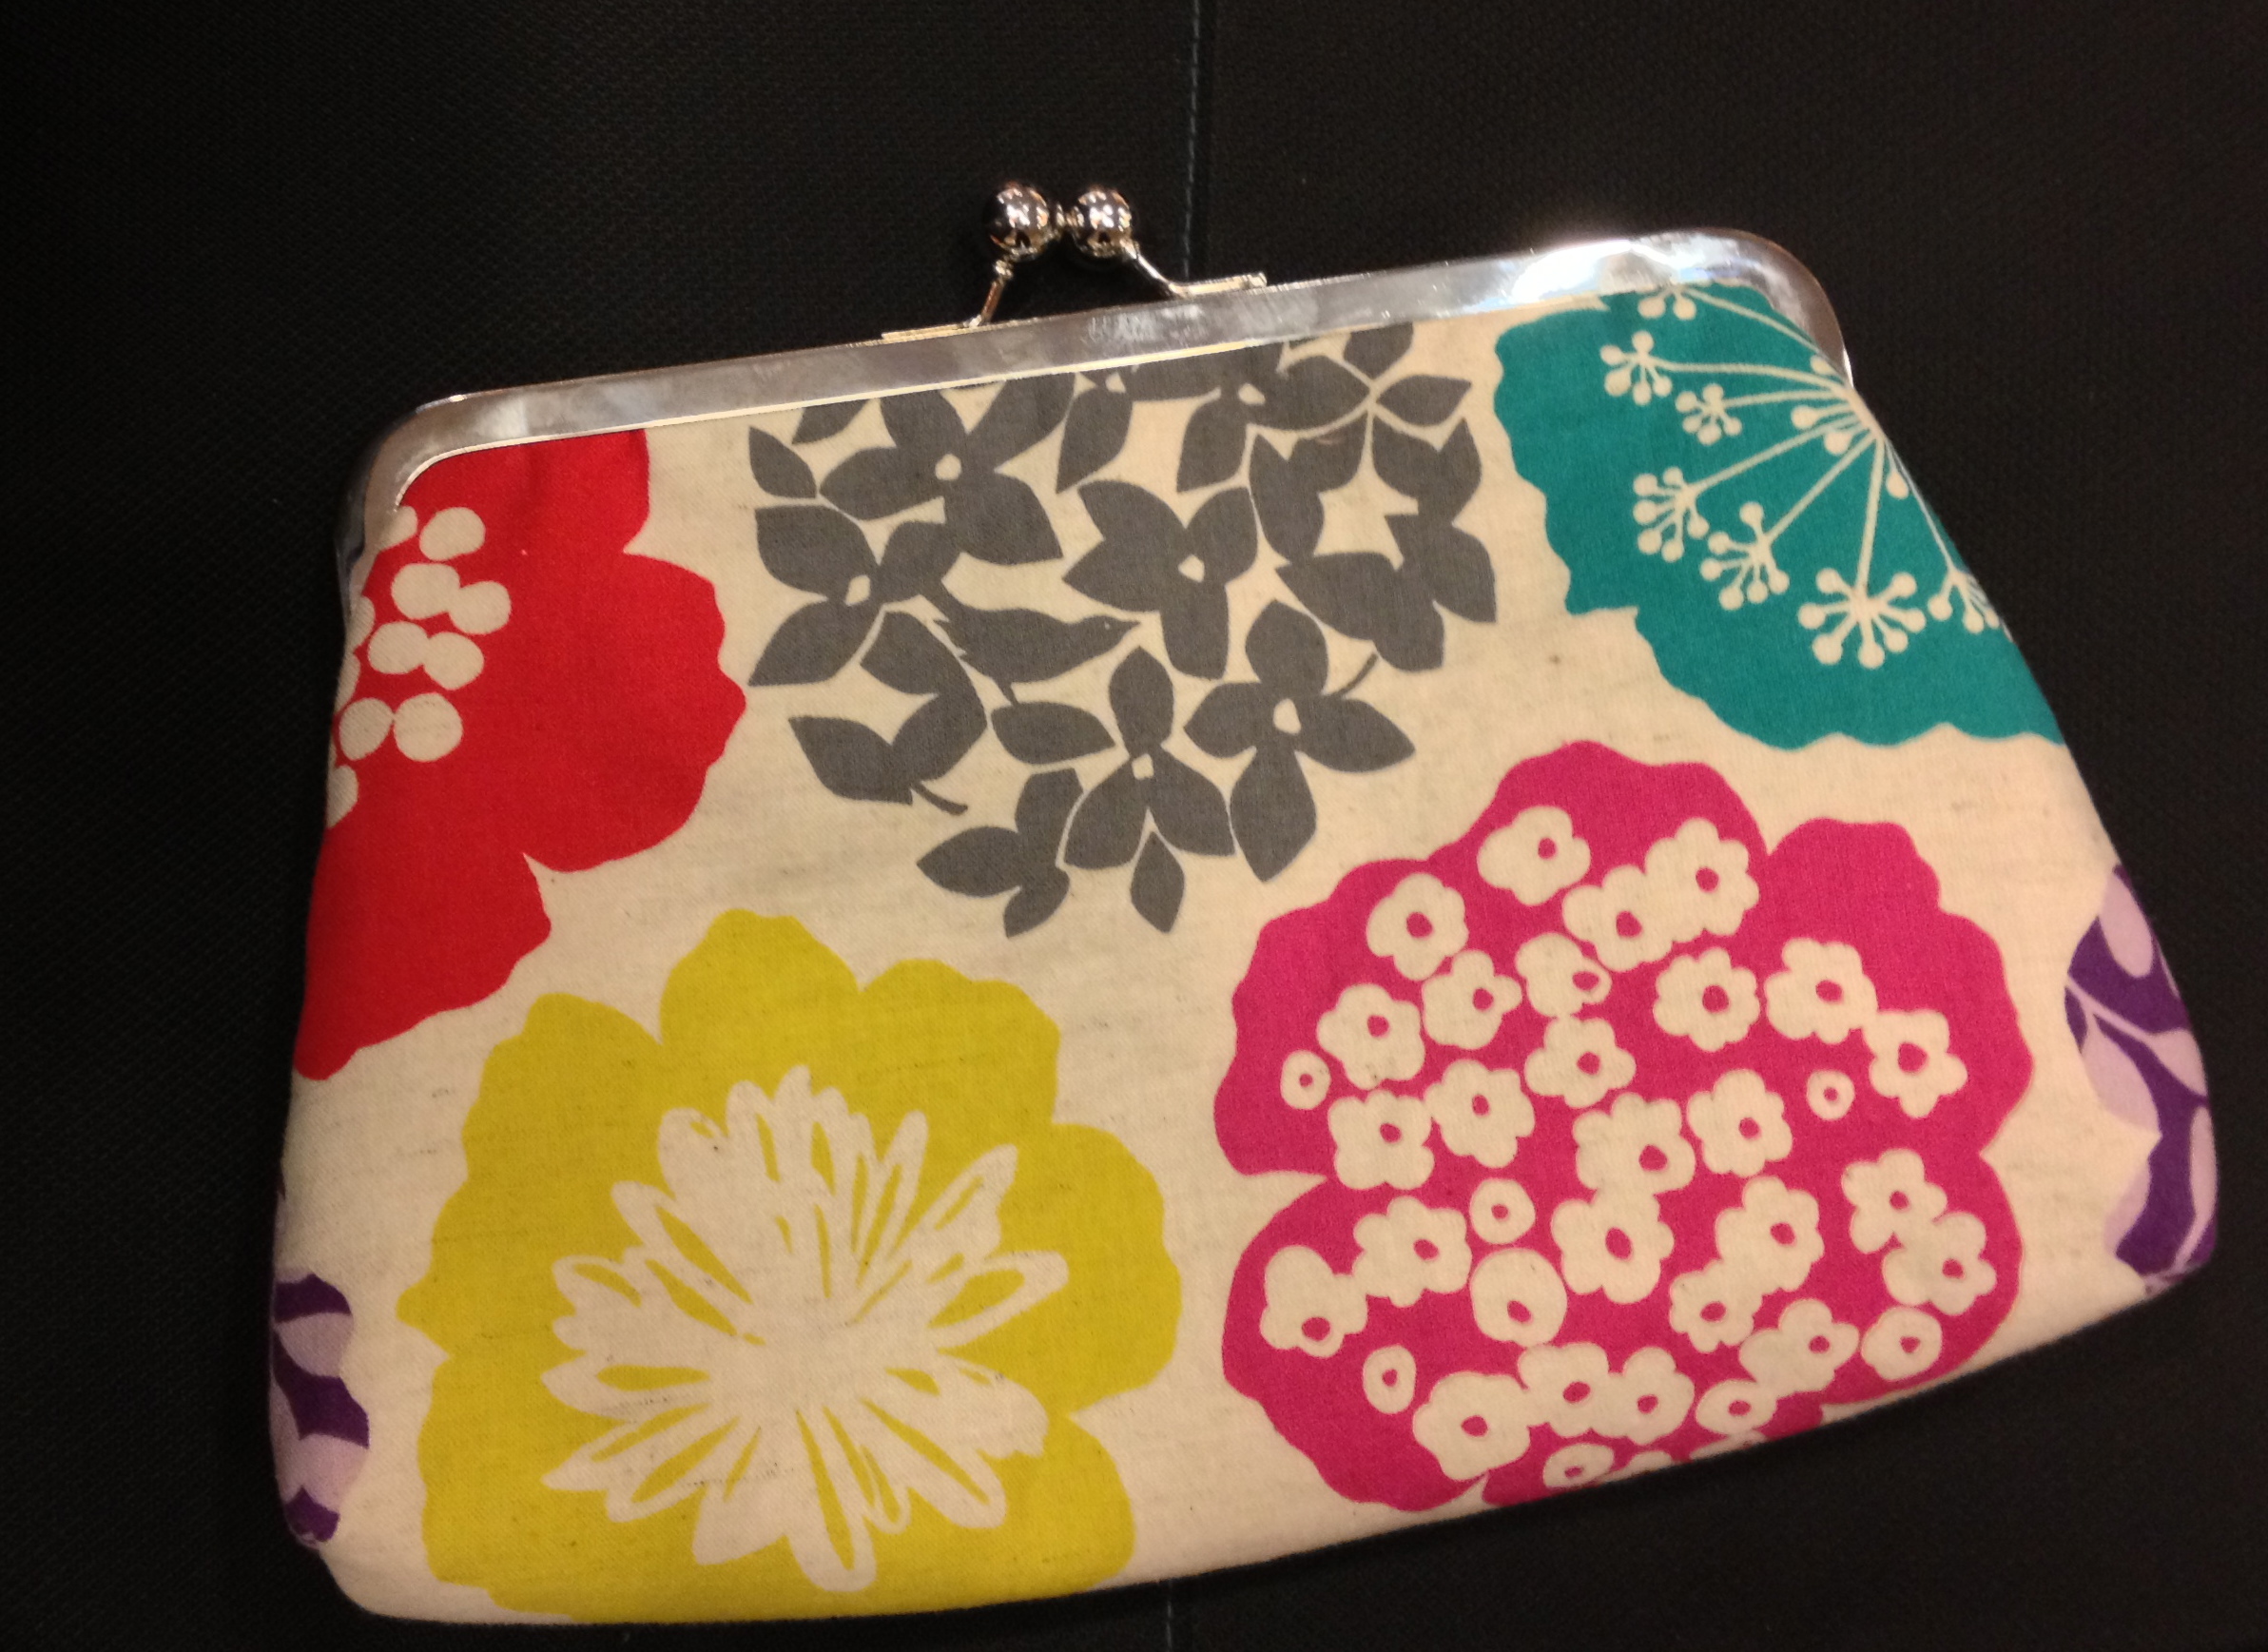
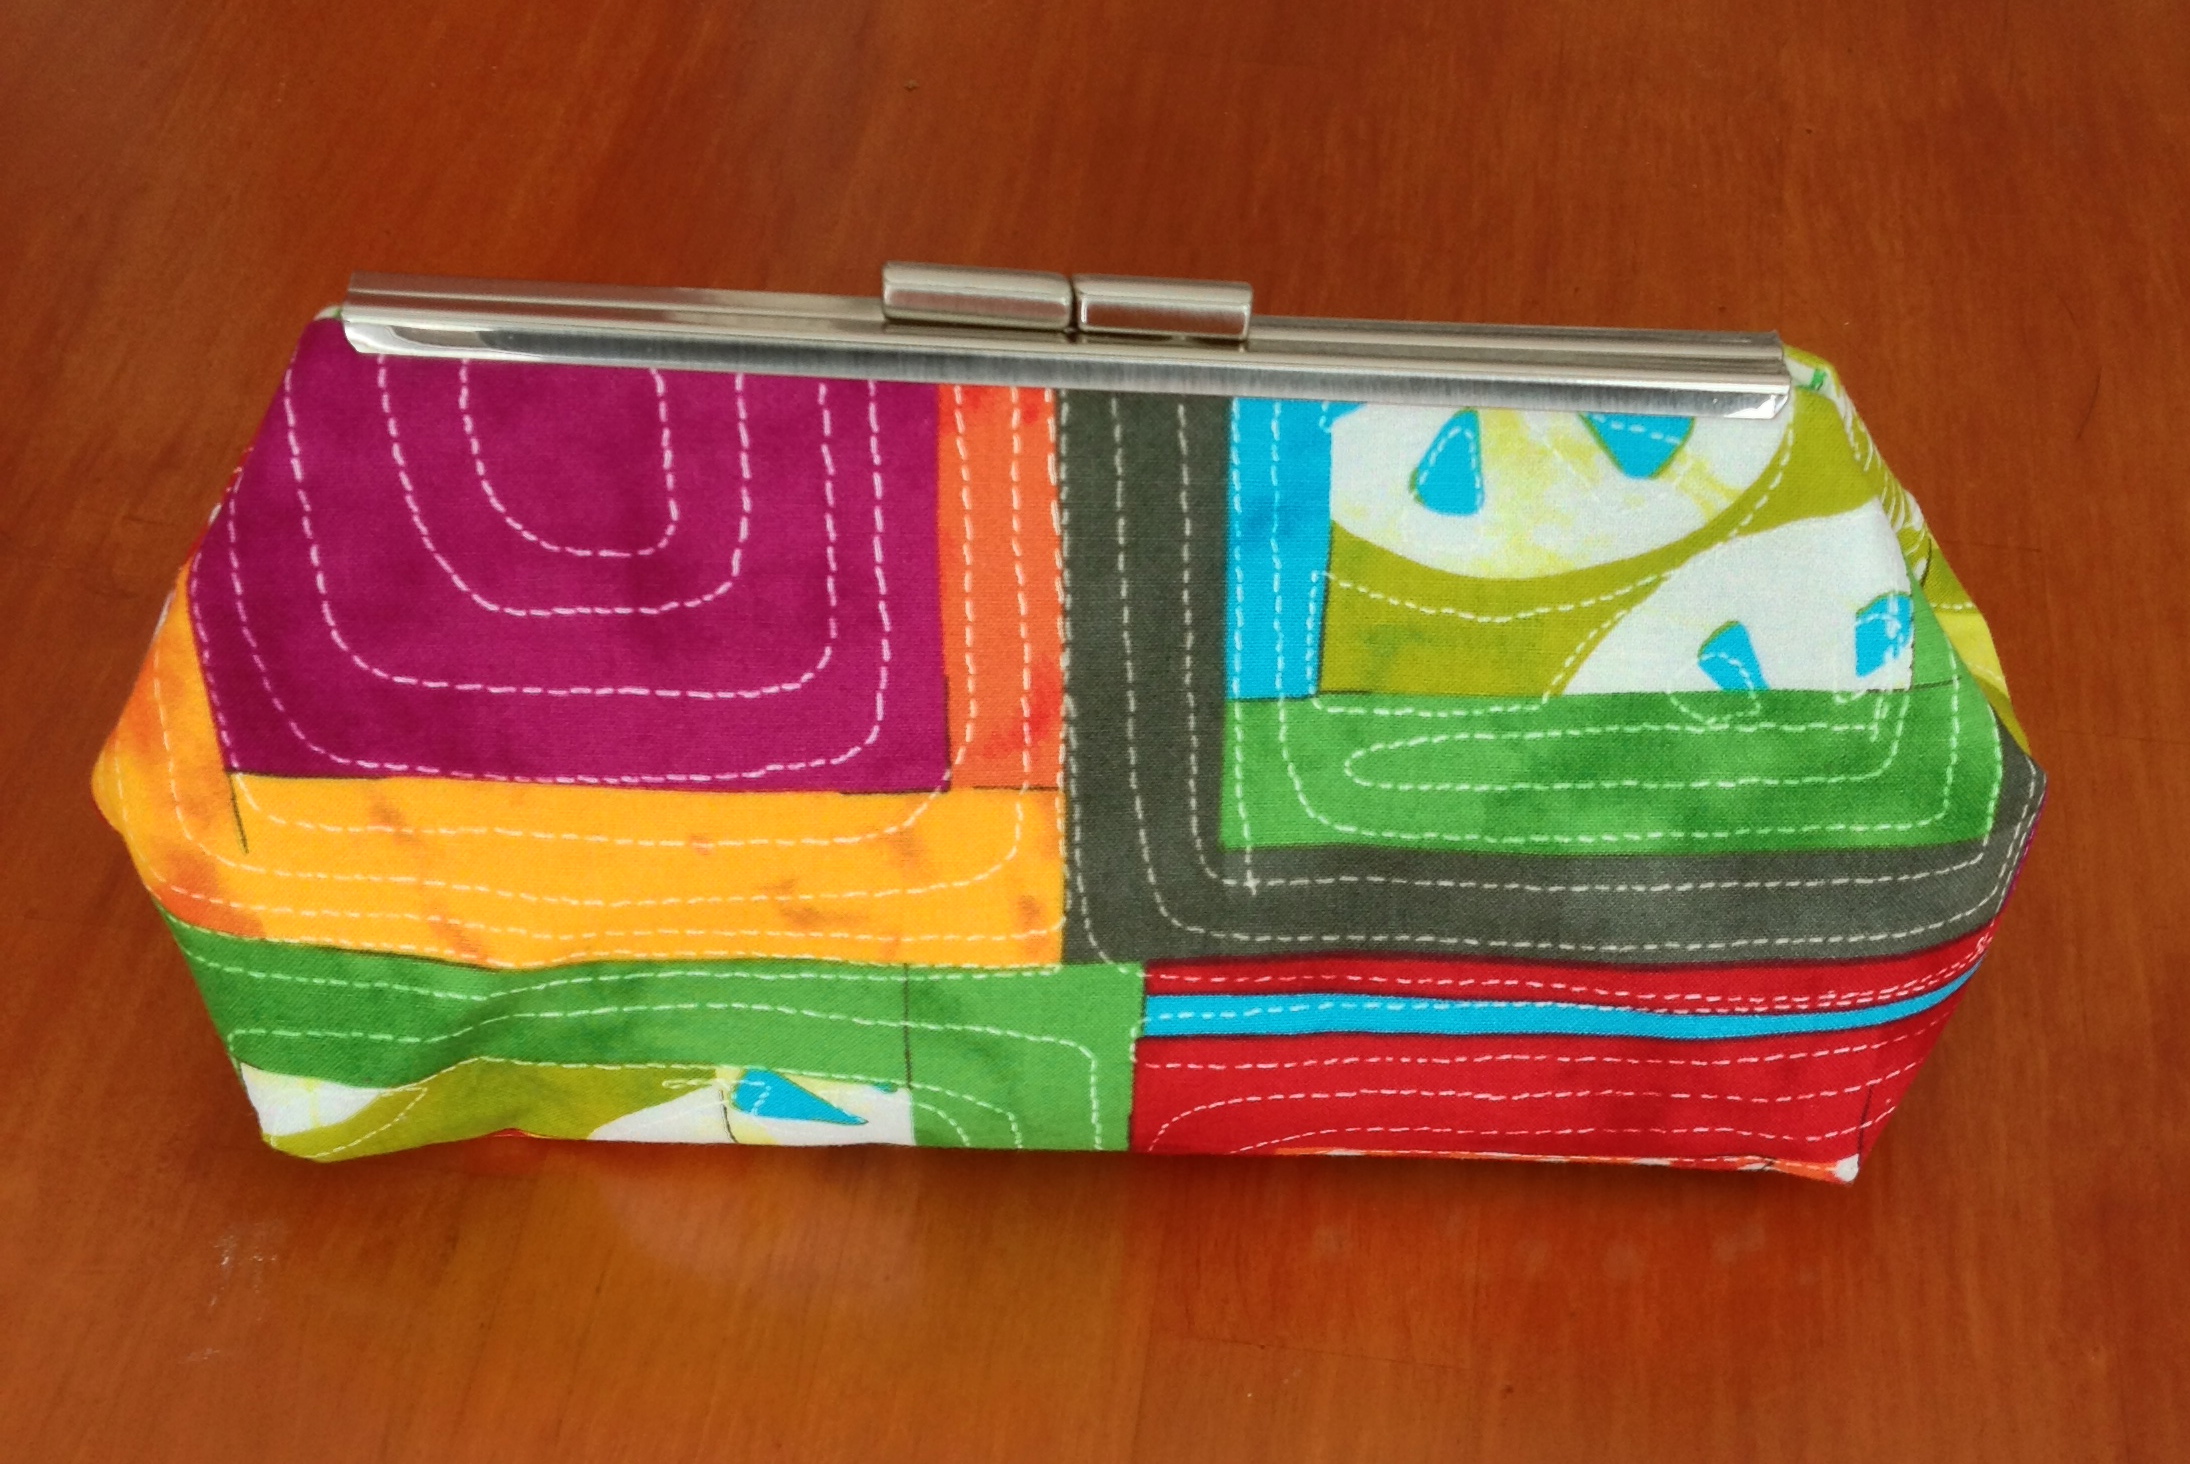
Workshop #3 – Framed Clutch. I’ve seen these frames a lot but had never bought one and tried to make it up. I was so glad this project was included in the retreat.

My framed clutch bag. Isn't it pretty?

My framed clutch bag. (The frame is 8″ X 3″)  Isn’t it pretty?

Diane Stanley of Random Thoughts Do or “Di” was the instructor. She came all the way from California to teach and attend Sew South. The frames were provided by While Baby Naps which is an etsy shop. The exterior and lining fabrics are sewn together and turned to create a finished edge and then glued into the frame. The success of this project seems to be all about the glue. We used Gutermann Creativ Glue and since my first attempt of using it was so successful, I don’t think I’d try anything else.  The glue is clear,  not very runny (which means it stays in place) and takes long enough to set that you have time to fool with getting the fabric inserted without panicking.

Diane Stanley

Diane Stanley

I lucked out in the framed purse category. I was Diane’s secret sister and she surprised me with this:

Clock coin purse by Diane Stanley

Clock coin purse by Diane Stanley

As if the coin purse wasn’t cute enough, she filled it with Clover binder clips. I have sewn some projects lately that included vinyl or laminated fabrics or had a lot of thick layers that a pin won’t go through and wished I had some of these.  Now I do!

I also, just by random chance, was in a swap group with Diane and swapped the chicken pincushion that I made for this pretty clutch:

Clutch by Diane Stanley

Clutch by Diane Stanley

I can’t wait to buy more frames and make some of these up for gifts. The possibilities are endless! They are pretty quick and simple. The sewer behind me at the retreat had some embroidered fabric that her (now deceased) mother-in-law had sewn and she made this:

Embroidered bag by Theresa

Embroidered bag by Teresa Van de Castle

Diane showed us this pretty clutch she has made as a wedding purse for a friend’s daughter:

The inside of it is gold fabric. So beautiful!

Jennifer Mathis, Diane Stanley, everyones' framed clutch purses.

Jennifer Mathis, Diane Stanley and all of the framed clutch purses.

Workshop #4 was garment sewing and we made pajama pants.

Pajama pants made from pima cotton.

Pajama pants made from pima cotton.

We used Kwik Sew K3602 as a pattern. Our instructor was Jennifer Roycroft from the Concord, NC store We’re Sew Creative. Jennifer and her shop hosted a field trip to the store before the retreat began for those who could get there early and a cocktail reception to kick off our time at the venue which was the Renaissance Charlotte SouthPark Hotel. She showed us how to make these pajamas with a cute coordinated cuff (which I did not do but wish I had) and overcast and flat felled seams.

Jennifer Roycroft

Jennifer Roycroft

Karen Linton who currently lives in Arkansas was sewing in front of me, and after much sewing, ripping and resewing (because she sewed one of her cuffs onto the pant’s waistband instead of the bottom) ended up with these adorable pajama bottoms with contrasting cuffs:

Pajamas with cuffs made by Karen Lintor

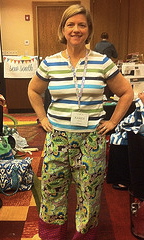
Pajamas with cuffs made by Karen Linton

She probably won’t be wearing them with that exact shirt but you get the idea. This picture was taken just as she finished and was trying them on.

The retreat was a blast and I can’t wait to share some more on another day!

12 Comments

Filed under Purses and Bags, Sew South Modern Sewing Retreat

Simple Personalized Tote Bag

xx

Simple Tote Bag

I was recently asked by my brother-in-law to make a few tote bags for my niece’s birthday party. She is having a sleep over with 3 friends and their American Girl dolls. He wanted tote bags that would fit a doll and a few other things. I think he thought that I could whip these things up in 5 minutes using fabric on hand and put them right in the mail. It didn’t seem like that quick of a project to me, but of course I wanted to do this for my niece who is turning 9 years old. It became a challenge to make something simple but nice. And I did manage to use materials I had “on hand”!

Other 3 totes in progress.

Other 3 totes in progress.

I decided to make the totes 18 inches tall which is the height of an American Girl doll. I didn’t want them to be too wide and randomly picked 11 inches for the width and 5 inches as the depth. Using these dimensions, I cut two pieces 23-1/2″ tall x 16-1/2″ wide.

Design on fabric should face this way.

This fabric is “directional”. It has a definite “up” and “down”.

I had these decor weight fabrics I had mail ordered some time ago, thinking they were quilting cottons. These are perfect for an unlined bag! I wanted to put the girls names on the front of the totes and had this booklet by Atkinson Designs. (now out of print)

Fat Quarter Fonts by Atkinson Designs

Fat Quarter Fonts by Atkinson Designs

The letters in the book are printed in reverse which make them perfect for tracing onto paper backed fusible (Wonder Under). I ironed the fusible to the colored fabrics and then cut them out and fused them to the front of the bags. Of some interest is that after I had done all this I noticed that the back of the book says “No fuss, No fusibles” so I THEN looked at the actual directions. They want you to print the letters on tear away (foundation) paper and then layer the fabric that you want for the letter on top of the background fabric but place the paper letter BEHIND this to sew along the lines. You then cut along the stitching line on the front – either closely to get a smooth look, or less close for a frayed look. Interesting! Doing it this way might have saved me time! But I really wanted the look of the next step.

Name fused on tote

Fold line pressed across top to help with letter placement.

I used a blanket stitch in black thread to stitch around the letters. I did this on all of the bags for it to coordinate with the black 1 inch webbing I’m using for the handles.

Blanket stitch letters. Could satin stitch or straight stitch instead.

Blanket stitch letters. Could satin stitch or straight stitch instead.

I  put the 2 pieces right sides together and serged across the bottom using a 1/4″ seam. Next I opened up this long piece and pinned the webbing in place. I did not stitch the webbing onto the bag above the fold line as that will be tucked into the bag as a hem on the top.

xx

Webbing was pinned on measuring 4″ in from each side with the ruler.

Sewing the webbing on is a breeze if you use an edge stitching foot and move your needle position!

Bernina #10 foot

Bernina #10 foot

Once the webbing was in place, the sides were sewn/serged together and then a gusset made across the corners. Since I wanted the bag depth to be 5″, I layed my ruler along the seamline on the 2.5 inch line and moved the ruler until I had 5″ across where I drew a line and then sewed.

xx

5″ Gusset

Once that was done, the very last step was to iron the top under 1/2 inch and then fold the hem in and stitch down. All of these fabrics were white on the wrong side. Since I used white thread on my serger and in my sewing machine bobbin, the inside is very finished looking, despite not being lined. I hope they like them!

Happy Birthday Maya!

Happy Birthday Maya!

A few days later:

Pajama party!

Pajama party!

(One of the girls was sick and couldn’t come).


8 Comments

Filed under Family, Purses and Bags

Paper Pieced Sunrise Clutch

Sunrise Clutch

Sunrise Clutch

This is a brand new pattern by Sara Larson of Sew Sweetness.  You can purchase the pattern for $8.00 here as a pdf download. I love buying patterns this way because it is so immediate – no waiting for the mail to bring the pattern. It comes to you over the computer and you print it out yourself. Since the front and back of this bag are paper pieced, I printed out the templates on special paper for paper piecing.

Jelly roll by Riley Blake

Jelly roll by Riley Blake

I made my clutch with a jelly roll of fabric. A “jelly roll”  is a collection of 42 coordinated 2-1/2″ precut strips. This is perfect for this pattern as none of the pieces are wider than 2-1/2″. It takes 40 different pieces to make up the sunrise on the front and back.

Paper piecing

Paper piecing

Piecing done

Piecing done

Trimmed

Trimmed

Sewn together.

Sewn together.

The finished bag has an optional wrist strap and an inverted zipper.

xx

Optional wrist strap.

Inverted zipper in the top.

Inverted zipper in the top (and a pretty zipper pull).

This was a fun clutch to make. Sara (the designer) has many pictures of it made up in different colors in her blog post here. The pattern is copyrighted but includes permission for the home sewist to sell the bags made from her patterns at craft fairs and on-line. I really appreciate it when designers give this permission right up front. My quilt guild, NeedleChasers of Chevy Chase, has a quilt show every other year and we sew items to sell at the show to benefit the guild and some designers won’t give us permission to sell an item made from their design. I just don’t understand this. So, thank you Sara!

Paper Pieced Sunrise Clutch

Paper Pieced Sunrise Clutch

5 Comments

Filed under Pattern review, Purses and Bags, Uncategorized