Category Archives: Family

Valentine hearts?

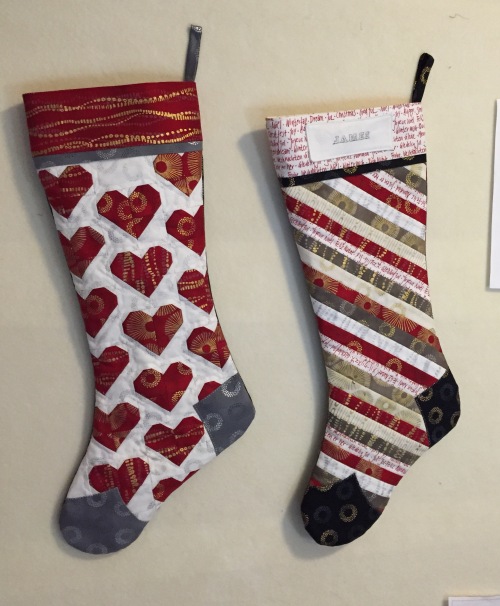
Christmas stocking for my cardiologist husband.  (Pattern specifics for both hearts and stocking are at the end of this post)

I did not get this stocking made in time to hang it on the mantel for Christmas. Does having it done by Valentine’s Day count for anything? This was the project I worked on during “Snowzilla” – 24 inches of snow in DC. (It kind of felt like Christmas!)

I marked the sewing lines on all of these squares.

I sewed across all 3 corners without removing from the machine - just pivoted.

I sewed across all 3 corners without removing from the machine – just pivoted.

Chain piecing made the project go faster.

The finished hearts are very boxy until you sew them together which produces the more rounded looking hearts.


Voila! I now have 2 stockings made. These happen to be for the oldest and youngest members of my family. 5 more to go. Maybe there will be another snow storm!?!

The heart directions are from a mini quilt tutorial by Jera of Quilting in the Rain.

The Christmas Stocking pattern by Fons and Porter can be found here. They are a great size – almost 2 feet long!

13 Comments

Filed under Christmas Stockings, Family, Uncategorized

Sewing with Daughters

I am a lucky woman – I have three daughters. I sewed a lot of things for them when they were little.  This included not only dresses or other clothing to wear, but also costumes – dress up clothes, Halloween costumes, dance costumes and school or church play costumes.

My three daughters wearing Easter dresses I made them.

My three daughters wearing Easter dresses I made them. Circa 1990.

They saw me sew a lot of things and now as adults they all have sewing machines and can sew themselves – when and if they have the time! Sometimes I feel silly that I named my blog “I Finally Have Time”, because I actually never feel as though I have that much time to spend on sewing. However, compared to my young professional daughters – I do have much more time. Nothing pleases me more than to actually sew with them.

My youngest daughter, Megan, asked for a sewing day with me for her birthday in May. She wanted to make the Moneta Dress by Colette. We made plans to spend the day at the Finch Sewing Studio in Leesburg, VA where we knew we could purchase the pattern, some great fabric and have lots of space to work without the interruptions that come up at home. We also knew that if we got into trouble with sewing the pattern, Nicole would be there to bail us out. We have already taken a variety of classes from Nicole, but this time we decided to just use her wonderful sewing studio space. Although she does have classes coming up for this dress pattern!

Knit Moneta dress by Colette

Knit Moneta dress by Colette

I didn’t take any process photos and Nicole took this one right before we left for the day. Don’t you LOVE this polka dot dress! And those pockets! Megan did a great job putting it together and there were some tricky parts. Actually, it is not a tricky pattern, but if you chose the sleeveless version, the bodice is lined and there is a magical way of sewing it in which requires extra attention to the directions. Colette also provides a video link to the process for people like me who would like to see it done instead of just reading the instructions. The waist has a narrow clear elastic sewn onto the seam allowance which will keep the knit from stretching out of shape there.

A week later I met my oldest daughter, Lindsey, in Montana and she had a knit maxi skirt that she had bought last summer and some fabric that she wanted to use to try to replicate it. Here is the original skirt on her.

Stripes horizontal on the front and back with Chevron on the sides.

Stripes horizontal on the front and back with Chevron on the sides.

We did not have enough fabric to do those chevrons and so decided to run the stripes vertically on the sides. This had an added benefit of not having to match the stripes. Here is the result:

New skirt

New skirt

The waistband of the purchased skirt looks like this on the inside:

xx

Inner waistband and elastic

There is a strip of clear elastic sewn into the seam allowance of the waist – just like with the dress above! Do you see the line of stitching about an inch below the top of the waistband? That is where a second strip of elastic is sewn inside the waistband. As nice as it is to have a knit waistband, my experience is that cotton knit fabric does stretch and it is nice to have the security of that extra elastic. We did not have access to clear elastic but where able to find 1/2″ white elastic to sew into the new skirt. It worked perfectly. The side seams of the waistband also had some elastic in them to cinch the sides which looked nice.

Cinched side seams.

Cinched side seams.

If only we had one more clothespin!

If only we had one more clothespin!

Lindsey happily left for home a few days later wearing this skirt.

I don’t know when I’ll have a chance to sew with my middle daughter, Sandy, but I hope it is soon. Most of the sewing she has done recently is to make pillows which she sells. She has a process to create a stencil using her computer and a Silhouette cutting machine. She can take words that are meaningful to someone and “paint” (actually ink) them onto fabric and then create a pillow. Below is one of three pillows she made for my brother and sister and me regarding our childhood summer home commonly referred to as “camp”.

Front

Front

Back (zipper hidden underneath)

Back (zipper hidden underneath)

My family will all be gathered at camp soon and can not wait to get there!


8 Comments

Filed under Family, Garment sewing, Pillows

Pojagi Curtain

Pojagi kitchen curtain

Pojagi kitchen curtain.

My oldest daughter and her husband bought a house a few months ago. So far, they only have temporary curtains or shades in their windows. Their kitchen window faces the street. It is nice to work at the sink and look out but it seems as though there should be some kind of curtain there for privacy. This is not a huge issue because of the size and position of the window, but it got me thinking about a decorative sheer panel curtain and a technique I’ve recently seen called pojagi. Have you heard of it?

My friend and quilt guild cohort, Dianne Miller Wolman, made this fun piece that hangs in her home. She made her piece with a hand sewing technique.

Pojagi by Dianne Miller Woman

Pojagi by Dianne Miller Woman

Below are some examples that I found on Flickr. Click on the title in the caption to go to the original photo and to learn more about these pieces. Victoria Gertenbach who blogs at The Silly BooDilly and who made the red “curtain” below (#1) has a great tutorial for pojagi using the sewing machine.

Pojagi or Bojagi is a Korean patchwork technique where the seams are finished on both sides. Historically these pieces were used as wrapping cloths. Essentially the seams are flat-felled. You sew each seam with the fabrics laid out in a staggered manner such that the top fabric’s seam allowance is 1/4″ and the bottom is 1/2″.

Each seam sewn first with a staggered seam allowance.

Each seam sewn first with a staggered seam allowance.

Next, the wider seam allowance is pressed over the smaller one and that whole seam is pressed flat with the raw edges all encased.

Encased seam is then edgestiched down.

Encased seam is then edgestiched down.

I read that traditional pojagi is done by hand and with a contrasting thread color. Most of the contemporary examples I’ve seen have used matching thread but I decided to go ahead and sew my piece with a bold black thread.

The curtain is completely reversible but on the regular seams one side shows one black thread line and the opposite side shows two.

Reversible!

Reversible!

Once I had read up on this technique, I wanted to plan my design. Most pictures that I found online were very log cabin-ish. My daughter is an engineer for a construction firm and her husband is both an engineer and an architect. My younger daughter made a comment that if I did a log cabin design for them I had better do it with straight lines – that they would not care for a “wonky” log cabin! For some reason, this got me thinking about their floor plan. I knew that my son-in-law had a digital version he had made up to play with the placement of their furniture. We had used it to calculate the square footage of their walls to help with knowing how much paint to buy to cover the walls. Could I use this?

Floor plan

Floor plan

I copied it on to graph paper and filled in some walls that were missing – like the whole garage!

xx

And so . . . take a look at my curtain again . . .

xx

Would you ever guess this was a floor plan?

I love how it looks from the outside at night too!

xx

18 Comments

Filed under Family, Gifts, Uncategorized

Mesh Beach Bags

Ready for the beach!

Ready for the beach!

I made these 3 mesh beach bags recently for my nephew’s 3 little boys (ages 2 – 6). I thought they would be the perfect thing to carry their beach toys in. When they were done playing with them, they could throw the toys back in the bag and just give it a little shake to get rid of the sand.

I bought the colored mesh at a local quilt store.

Colored mesh comes in a roll that is 18" x 36" for about $5.25.

Colored mesh comes in a roll that is 18″ x 36″ for about $5.50.

Don’t you love the bug fabric? It was perfect to use with all 3 colors of the mesh.

This was a very simple project. I folded the mesh in half and sewed down the sides. Luckily my friend, Jan, had previously made a similar bag and suggested I sew the side seam with a french seam. This creates a smooth edge to the inside seam instead of something jagged that would possibly hurt little hands or catch on the toys or towel that you’re trying to get into or out of the bag.

Inside french seam

Inside french seam

Next was to box the bottom corners. This had to be done as a regular seam.

Boxed bottom corners.

Boxed bottom corners.

I sewed across the bottom corners and then cut the excess mesh. I did do a zig zag stitch over the seam edge to give it some extra strength.

The bug fabric was cut into 2 inch strips x WOF. I sewed 2 strips together lengthwise and then ironed the opposite raw edges under about 1/2 inch. I laid this right over the top of the mesh, marked exactly where the fabric should be joined to form a circle the width of the bag and then removed it and sewed this seam in the fabric. I’m afraid I don’t have pictures of this step. I think I got so excited about finishing up the bags so quickly, that I forgot to take more pictures!

Top of bag

Top of bag

The fabric was placed back on the top of the bag so that the mesh is right up against the top of it. I edge stitched around both the top and the bottom of the fabric strip.

Black webbing was used for the handles and secured onto the inside of the bag with both a square and an X in machine stitching.

Finished bags

Finished bags

That’s it!

The boys loved them!

The boys loved them!

Heading to the beach.

Heading to the beach.

6 Comments

Filed under Family, Gifts, Purses and Bags, Tutorials

Happy Fourth of July!

Flag quilt top

My flag quilt top

The Fourth of July is a fun holiday for me. I spend it in NH on Lake Winnisquam with my brother and sister and as many of our kids as can come. My brother has 3 grandsons that live nearby and they definitely add to the fun and excitement. This year about 2 weeks prior to traveling I was on a road trip (by bus) with the Needlechasers of Chevy Chase to a quilt shop called Patches in Mt. Airy, MD.

Patches - quilt shop in Mt. Airy, MD

Patches – quilt shop in Mt. Airy, MD (Picture from their website)

There was a quilt laying near the cutting table that was essentially a flag. I really loved how it was pieced together in different shades of red and white and had a star fabric for the blue canton. I immediately wanted to make one and figured, as I often do, how easy it would be to make up fast! So despite the fact that the store staff was busy cutting fabric for our 40 or so members on the trip, I was able to ask if they had the star fabric, and luckily they did.

Needlechasers shopping at Patches

Needlechasers shopping at Patches

Patches flag quilt.

Patches flag quilt.

I took this picture of their quilt because I liked the easy wavy quilting that was done on it. (Are you catching on to what was important to me?) I chose fat quarters and took them home, washed them and cut them into 3″ squares.

On the following weekend, the DC Modern Quilt Guild had a sewing retreat for 3 days. I had a serger there for a different project and decided it might be quicker to use that to sew all these squares together. Since completing it, I’m really not sure that it made ANY difference at all in the time it took, but I did love how tidy the back was when I was done.

Serged back to the quilt

Serged back to the quilt

I got the quilt top done at the retreat but didn’t have any backing fabric so the final backing, quilting and binding was done at home.

xx

Working on the wavy quilting.

Quilting this way with a walking foot was very easy. I used matching thread and did a wavy line on each of the red and white stripes. I did a diagonal straight line through the star fabric.

Diagonal quilting

Diagonal quilting

Finished quilt is 60 x 32.5"

Finished quilt is 60 x 32.5″

I originally thought that this quilt would be a table topper but the size may be a little awkward for that. I think that we will display it off the deck as though it were a flag. Surely no one will get close enough to count the stars. Although the size of the stars look about right for the size of the flag, there are actually 70 stars!

Added later:

I gave the flag quilt to my brother and sister-in-law while cruising Lake Winnisquam in a pontoon (party!) boat from Winnisquam Marine which my brother owns and operates.  It turns out that it’s actually a pretty good quilt for keeping warm.

Sunset on Lake Winnisquam

Sunset on Lake Winnisquam

9 Comments

Filed under DC Modern Quilt Guild, Family, Gifts, NeedleChasers of Chevy Chase, Quilt Shops

Travel Log – May 2013

0000 – Trip odometer (re)set as we left home in Washington DC on a 2-1/2 week adventure.

0001 – Entered Maryland

0160 – Entered Pennsylvania

0254 – Entered West Virginia

0267 – Entered Ohio (obviously only crossed a very small part of WV!)

0500 – Entered Indiana

0650 – Entered Illinois

0805 – Entered Missouri

0927 – Stopped for the night in Columbia, MO.

1058 – Entered Kansas

1490 – Entered Colorado

1837 – Stopped at friend’s cabin in Creede, CO for 5 days.

xx

Hummingbird mania off the back deck! Make sure you have your sound on – they were noisy!

2080 – 5 days and many good meals and bottles of wine later – Entered Utah

2177 – Visited Natural Bridges National Monument in Utah.

One of the Natural Bridges

One of the Natural Bridges

Cliff dwellings visible near bottom left side.

Cliff dwellings visible near bottom left side.

2311 – Visited Capitol Reef National Park in Utah.

From the park service brochure: ” capitol for the white domes of Navajo Sandstone that resemble capitol building domes, and reef for the rocky cliffs which are a barrier to travel, like a coral reef.”

Notice the car on the road in front of us to get a size perspective of this area.

Notice the car on the road in front of us to get a size perspective of this area.

Petroglyphs on the cliff walls

Petroglyphs on the cliff walls

Panorama

Panorama

Fruit orchards which the Mormons planted and the National Park Service now tend.

Fruit orchards which the Mormons planted in the 1800s and the National Park Service now maintain. Pies available at the park store!

2683 – Entered Idaho

2835 – visited Craters of the Moon National Monument. This is a huge area of cinder cones and lava rock which flowed as recently at 2000 years ago.

Lava

Lava

"Splatter" cone

“Splatter” cone

And more lava!

And more lava! As far as you could see.

3055 – Entered Montana  – where we spent 5 days opening and repairing our family “retreat”.

3318 – Visited Yellowstone National Park in Wyoming.

Me among the geysers

Me – among the geysers

xx

Hot pot

This elk walked right by our car and didn’t pay any attention to my talking to it.

Bison were everywhere! Including the road.

Lots of bison babies too!

Lots of bison babies too!

3710 – Back in Montana

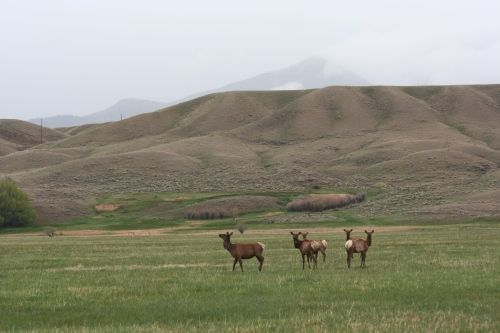
Group of Elk

Group of Elk

Beautiful Sunset

Beautiful Sunset

Bald Eagle

Bald Eagle

4170 – Entered N. Dakota

4625 – Entered Minnesota

4790 – Entered Wisconsin

5080 – Entered Illinois – where we visited with family.

Lindsey shows off her finished quilt - which she just finished binding.

Lindsey shows off her quilt – which she just finished binding.

5213 – Entered Indiana

5366 – Entered Ohio

5615 – Entered Pennsylvania

5803 – Entered Maryland

5893 – Home in DC. Whew! What a trip. Almost 6000 miles.

(And my husband and I are still talking to one another!)

8 Comments

Filed under Family, Uncategorized

30 years of Lindsey

xx

May 8, 1983

xx

1984 – 1st birthday

xx

xx

1985 – 2nd birthday

xx

1985 - 3rd birthday

1986 – 3rd birthday

xx

1987

xx

1988

xx

1989

xx

1990

Holly Ball - Cotillion

Cotillion Holly Ball   1995

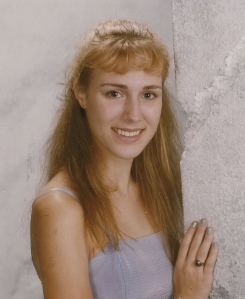
Senior picture

Senior picture 2001

High School graduation

High School graduation 2001

Grad school graduation

Grad school graduation 2007

Montana 2007

Montana 2007

Wedding - 2011

Wedding – 2011

2012

2012

Easter 2013

Easter 2013

Happy 30th Birthday Lindsey!  We love you!

3 Comments

Filed under Family

Quilt Top Finish

Quilt top is done!

Quilt top is done!

To find out more about the design of this quilt, please read my last post. I am making it for my married daughter and her husband and it is made from fabrics that were used as pretty fall napkins during their wedding reception.

xx

Each circle block is 20″ square

It seemed to take me forever to make those center two blocks. I strip pieced the fabrics and then laid them all out in order to make sure that I cut them right to get the alternating striped pattern that I wanted.

Not sewn together yet.

Not sewn together yet.

I was very careful to pick up each one and orient it the right way when I cut it so that it would form this pattern when I sewed it together. I did this meticulously for all 8 blocks and then I took them to the ironing board to press them, and guess what?

They all looked the same!

They all looked the same!

I felt so stupid! How did I not realize that I could have just simply laid them all out in the same direction and I would get the same pattern?

It was a breeze to sew the 12 large circle blocks together once these middle two were together. I’m really happy with the result. Here is how it looks laid out on my queen size bed – it’s only meant to be a lap quilt, but a big one!

xx

Next is making up the back. I’ve decided to simply sew the napkin squares together.  Circles on the front and squares on the back.

Napkins set out on my design wall.

Napkins set out on my design wall.

I will have to put a border around these as they are smaller than the blocks on the front. I’m in the process of trying to wash the cotton batting I am going to use to eliminate shrinkage when the finished quilt is washed. Most of the time I love that “crinkly” look when a quilt is washed for the first time. However, with this quilt having such a large design, I think it might be better if it lays more flat. If the batting survives the washing and drying process, I guess we’ll see.

xx

More wedding pictures!

xx

The groom made the photo booth. It was so much fun.

The groom made the photo booth. It was so much fun.

Both families

Both families together

It was a remarkable day and the two families have blended together perfectly. If we lived closer together (we’re in DC and they are in IL), I’m sure we would be good friends. As it is, we have great fun when we do get together.

6 Comments

Filed under Family, Quilts, Uncategorized

A Single Girl Quilt for my Married Girl?

My daughter got married to a most wonderful man on October 15, 2011.

"First look"

“First look”

As many modern couples do these days, they had pictures taken before the ceremony and so the first time he saw her in her wedding gown, they were outside instead of in the church. This wedding was on a beautiful fall day. The ceremony was in the afternoon.

throwing leaves

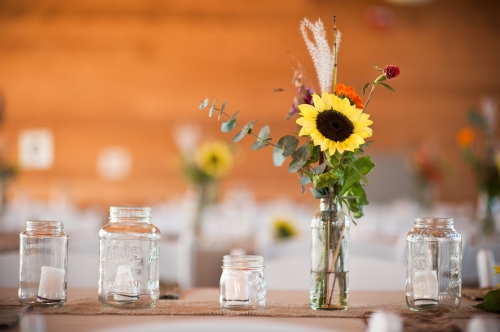
The reception hall was decorated (by friends and family) with fall flowers and candles.

xx

We made napkins by serging the edges of fabric to add some other fun fall color to the tables.

tableThe reception hall was a park building that had large glass windows and a stone fireplace. It felt magical, as though we were outside.

xx

When the party was over, we collected all the fabric napkins with the idea that I would make the happy couple a quilt out of them. (Yes, I washed them first!) Here they are:

All 150 of them!

All 150 of them!

I’ve had these for a year and a half now and have been trying to decide what the perfect quilt pattern would be for this couple using these colors. I’ve made several other items out of them – notebook covers and zippered pouches for family or friends who helped with the wedding.

Notebook for my mother-in-law.

Notebook for my mother-in-law.

My daughter has made her own beautiful fall colored quilt out of other fabrics since she got married.

xx

Isn’t it pretty?

xx

She had it quilted by a longarm quilter.

I’ve decided to make a “snuggle on the couch together” quilt. The pattern I have picked is the Single Girl Quilt by Denyse Schmidt.

xx

I would call it a modern version of the traditional wedding ring quilt.

Traditional Wedding Ring Quilt.

Traditional Wedding Ring Quilt.

I assume that it is called “Single Girl” because the rings do not interconnect. However, as I look at the Single Girl Quilts that others have made and posted on Flickr or Pinterest, I can see that plenty of people make them up as wedding quilts. The quilting can add that interlocking component.

My version is still a work in progress.

Blocks laid out on my rug. Middle two blocks not done yet.

Blocks laid out on my rug. Middle two blocks not done yet.

I’m going to make the center two blocks the opposite colors of the outside blocks. I will strip piece the background with the napkin fabrics and do the rings in the cream colored fabric. I love the thought of this. The middle blocks symbolize Lindsey’s and Brian’s wedding rings and they will be surrounded by circles that symbolize their families and their friends. Circles surrounded by circles. Okay, this is really dorky but “the circle of life” also comes to mind. (and with that term – The Lion King!)

So stay tuned for the big reveal once I get the other blocks made and have the whole top sewn together!

14 Comments

Filed under Family, Quilts, Uncategorized

Simple Personalized Tote Bag

xx

Simple Tote Bag

I was recently asked by my brother-in-law to make a few tote bags for my niece’s birthday party. She is having a sleep over with 3 friends and their American Girl dolls. He wanted tote bags that would fit a doll and a few other things. I think he thought that I could whip these things up in 5 minutes using fabric on hand and put them right in the mail. It didn’t seem like that quick of a project to me, but of course I wanted to do this for my niece who is turning 9 years old. It became a challenge to make something simple but nice. And I did manage to use materials I had “on hand”!

Other 3 totes in progress.

Other 3 totes in progress.

I decided to make the totes 18 inches tall which is the height of an American Girl doll. I didn’t want them to be too wide and randomly picked 11 inches for the width and 5 inches as the depth. Using these dimensions, I cut two pieces 23-1/2″ tall x 16-1/2″ wide.

Design on fabric should face this way.

This fabric is “directional”. It has a definite “up” and “down”.

I had these decor weight fabrics I had mail ordered some time ago, thinking they were quilting cottons. These are perfect for an unlined bag! I wanted to put the girls names on the front of the totes and had this booklet by Atkinson Designs. (now out of print)

Fat Quarter Fonts by Atkinson Designs

Fat Quarter Fonts by Atkinson Designs

The letters in the book are printed in reverse which make them perfect for tracing onto paper backed fusible (Wonder Under). I ironed the fusible to the colored fabrics and then cut them out and fused them to the front of the bags. Of some interest is that after I had done all this I noticed that the back of the book says “No fuss, No fusibles” so I THEN looked at the actual directions. They want you to print the letters on tear away (foundation) paper and then layer the fabric that you want for the letter on top of the background fabric but place the paper letter BEHIND this to sew along the lines. You then cut along the stitching line on the front – either closely to get a smooth look, or less close for a frayed look. Interesting! Doing it this way might have saved me time! But I really wanted the look of the next step.

Name fused on tote

Fold line pressed across top to help with letter placement.

I used a blanket stitch in black thread to stitch around the letters. I did this on all of the bags for it to coordinate with the black 1 inch webbing I’m using for the handles.

Blanket stitch letters. Could satin stitch or straight stitch instead.

Blanket stitch letters. Could satin stitch or straight stitch instead.

I  put the 2 pieces right sides together and serged across the bottom using a 1/4″ seam. Next I opened up this long piece and pinned the webbing in place. I did not stitch the webbing onto the bag above the fold line as that will be tucked into the bag as a hem on the top.

xx

Webbing was pinned on measuring 4″ in from each side with the ruler.

Sewing the webbing on is a breeze if you use an edge stitching foot and move your needle position!

Bernina #10 foot

Bernina #10 foot

Once the webbing was in place, the sides were sewn/serged together and then a gusset made across the corners. Since I wanted the bag depth to be 5″, I layed my ruler along the seamline on the 2.5 inch line and moved the ruler until I had 5″ across where I drew a line and then sewed.

xx

5″ Gusset

Once that was done, the very last step was to iron the top under 1/2 inch and then fold the hem in and stitch down. All of these fabrics were white on the wrong side. Since I used white thread on my serger and in my sewing machine bobbin, the inside is very finished looking, despite not being lined. I hope they like them!

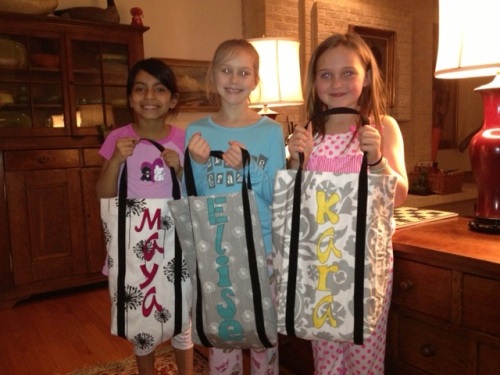
Happy Birthday Maya!

Happy Birthday Maya!

A few days later:

Pajama party!

Pajama party!

(One of the girls was sick and couldn’t come).


8 Comments

Filed under Family, Purses and Bags